目录
1. 数据库设计
2. 代码设计
登录认证过滤器
认证成功处理器AuthenticationSuccessHandler
认证失败处理器AuthenticationFailureHandler
AuthenticationEntryPoint配置
AccessDeniedHandler配置
UserDetailsService配置
Token校验过滤器
登录认证过滤器接口配置
Spring Security全局配置
util包
测试结果
在SpringSecurity实现前后端分离登录token认证详解_springsecurity前后端分离登录认证-CSDN博客基础上进行重构,实现前后端分离架构登录认证,基本思想相同,借鉴开源Gitee代码进行改造,具有更好的代码规范。
1. 数据库设计
DROP TABLE IF EXISTS `t_auth`;
CREATE TABLE `t_auth`  (
  `id` BIGINT(11) NOT NULL AUTO_INCREMENT,
  `name` VARCHAR(255) CHARACTER SET utf8mb4 COLLATE utf8mb4_general_ci NULL DEFAULT NULL COMMENT '名称',
  `url` VARCHAR(255) CHARACTER SET utf8mb4 COLLATE utf8mb4_general_ci NULL DEFAULT NULL COMMENT '路径',
  `status` INT(1) NULL DEFAULT NULL,
  `create_time` DATETIME(0) NULL DEFAULT NULL,
  `update_time` TIMESTAMP(0) NULL DEFAULT CURRENT_TIMESTAMP,
  PRIMARY KEY (`id`) USING BTREE
) ENGINE = INNODB AUTO_INCREMENT = 7 CHARACTER SET = utf8mb4 COLLATE = utf8mb4_general_ci ROW_FORMAT = COMPACT;

-- ----------------------------
-- Records of t_auth
-- ----------------------------
INSERT INTO `t_auth` VALUES (1, '删除用户', '/usr/del', 1, '2021-11-26 17:08:11', '2021-11-26 17:07:52');
INSERT INTO `t_auth` VALUES (2, '新增用户', '/usr/add', 1, '2021-11-26 17:08:13', '2021-11-26 17:08:09');
INSERT INTO `t_auth` VALUES (3, '添加产品', '/product/add', 1, '2021-11-26 17:08:42', '2021-11-26 17:08:29');
INSERT INTO `t_auth` VALUES (4, '下架产品', '/product/del', NULL, NULL, '2021-11-26 17:12:17');
INSERT INTO `t_auth` VALUES (5, '注册', '/user/register', NULL, NULL, '2021-11-26 17:13:32');
INSERT INTO `t_auth` VALUES (6, '注销', '/user/logOff', NULL, NULL, '2021-11-26 17:13:50');

-- ----------------------------
-- Table structure for t_role
-- ----------------------------
DROP TABLE IF EXISTS `t_role`;
CREATE TABLE `t_role`  (
  `id` BIGINT(11) NOT NULL,
  `name` VARCHAR(60) CHARACTER SET utf8mb4 COLLATE utf8mb4_general_ci NULL DEFAULT NULL COMMENT '角色名称',
  `status` INT(1) NULL DEFAULT NULL,
  `create_time` DATETIME(0) NULL DEFAULT NULL,
  `update_time` TIMESTAMP(0) NULL DEFAULT CURRENT_TIMESTAMP,
  PRIMARY KEY (`id`) USING BTREE
) ENGINE = INNODB CHARACTER SET = utf8mb4 COLLATE = utf8mb4_general_ci ROW_FORMAT = COMPACT;

-- ----------------------------
-- Records of t_role
-- ----------------------------
INSERT INTO `t_role` VALUES (1, 'ROLE_admin', 1, '2021-11-26 17:08:52', '2021-11-26 17:08:51');
INSERT INTO `t_role` VALUES (2, 'ROLE_dba', 1, '2021-11-26 17:09:10', '2021-11-26 17:09:05');
INSERT INTO `t_role` VALUES (3, 'ROLE_vip', 1, '2021-11-26 17:09:32', '2021-11-26 17:09:25');
INSERT INTO `t_role` VALUES (4, 'ROLE_user', 1, '2021-11-26 17:09:45', '2021-11-26 17:09:42');

-- ----------------------------
-- Table structure for t_role_auth
-- ----------------------------
DROP TABLE IF EXISTS `t_role_auth`;
CREATE TABLE `t_role_auth`  (
  `id` BIGINT(20) NOT NULL AUTO_INCREMENT,
  `role_id` BIGINT(20) NULL DEFAULT NULL,
  `auth_id` BIGINT(20) NULL DEFAULT NULL,
  `status` INT(1) NULL DEFAULT NULL,
  `create_time` DATETIME(0) NULL DEFAULT NULL,
  `update_time` TIMESTAMP(0) NULL DEFAULT CURRENT_TIMESTAMP,
  PRIMARY KEY (`id`) USING BTREE
) ENGINE = INNODB AUTO_INCREMENT = 5 CHARACTER SET = utf8mb4 COLLATE = utf8mb4_general_ci ROW_FORMAT = COMPACT;

-- ----------------------------
-- Records of t_role_auth
-- ----------------------------
INSERT INTO `t_role_auth` VALUES (1, 1, 3, 1, '2021-11-26 17:11:31', '2021-11-26 17:11:29');
INSERT INTO `t_role_auth` VALUES (2, 1, 4, 1, '2021-11-26 17:11:31', '2021-11-26 17:11:29');
INSERT INTO `t_role_auth` VALUES (3, 4, 5, 1, '2021-11-26 17:14:45', '2021-11-26 17:14:35');
INSERT INTO `t_role_auth` VALUES (4, 4, 6, 1, '2021-11-26 17:14:47', '2021-11-26 17:14:41');

-- ----------------------------
-- Table structure for t_user
-- ----------------------------
DROP TABLE IF EXISTS `t_user`;
CREATE TABLE `t_user`  (
  `id` BIGINT(11) NOT NULL,
  `user_id` VARCHAR(60) CHARACTER SET utf8mb4 COLLATE utf8mb4_general_ci NULL DEFAULT NULL COMMENT '唯一的userId',
  `username` VARCHAR(60) CHARACTER SET utf8mb4 COLLATE utf8mb4_general_ci NULL DEFAULT NULL COMMENT '用户名',
  `password` VARCHAR(60) CHARACTER SET utf8mb4 COLLATE utf8mb4_general_ci NULL DEFAULT NULL COMMENT '密码',
  `name` VARCHAR(60) CHARACTER SET utf8mb4 COLLATE utf8mb4_general_ci NULL DEFAULT NULL COMMENT '姓名',
  `status` INT(1) NULL DEFAULT NULL,
  `create_time` DATETIME(0) NULL DEFAULT NULL,
  `update_time` TIMESTAMP(0) NULL DEFAULT CURRENT_TIMESTAMP,
  PRIMARY KEY (`id`) USING BTREE
) ENGINE = INNODB CHARACTER SET = utf8mb4 COLLATE = utf8mb4_general_ci ROW_FORMAT = COMPACT;

-- ----------------------------
-- Records of t_user
-- ----------------------------
INSERT INTO `t_user` VALUES (1, '120', 'zhangsan', '123456', '张三', 1, '2021-11-26 17:07:03', '2021-11-26 17:06:53');
INSERT INTO `t_user` VALUES (2, '110', 'lisi', '123456', '李四', 1, '2021-11-26 17:07:36', '2021-11-26 17:07:12');

-- ----------------------------
-- Table structure for t_user_role
-- ----------------------------
DROP TABLE IF EXISTS `t_user_role`;
CREATE TABLE `t_user_role`  (
  `id` BIGINT(20) NOT NULL AUTO_INCREMENT,
  `user_id` VARCHAR(60) CHARACTER SET utf8mb4 COLLATE utf8mb4_general_ci NULL DEFAULT NULL COMMENT '用户唯一userId',
  `role_id` BIGINT(20) NULL DEFAULT NULL,
  `status` INT(1) NULL DEFAULT NULL,
  `create_time` DATETIME(0) NULL DEFAULT NULL,
  `update_time` TIMESTAMP(0) NULL DEFAULT CURRENT_TIMESTAMP,
  PRIMARY KEY (`id`) USING BTREE
) ENGINE = INNODB AUTO_INCREMENT = 3 CHARACTER SET = utf8mb4 COLLATE = utf8mb4_general_ci ROW_FORMAT = COMPACT;

-- ----------------------------
-- Records of t_user_role
-- ----------------------------
INSERT INTO `t_user_role` VALUES (1, '120', 1, 1, '2021-11-26 17:10:10', '2021-11-26 17:10:11');
INSERT INTO `t_user_role` VALUES (2, '110', 2, 1, '2021-11-26 17:11:16', '2021-11-26 17:11:13');
2. 代码设计
登录认证过滤器
Spring Security默认的表单登录认证的过滤器是UsernamePasswordAuthenticationFilter,这个过滤器并不适用于前后端分离的架构,因此我们需要自定义一个过滤器。参照UsernamePasswordAuthenticationFilter这个过滤器改造一下。
/**
 * 登录认证的filter,参照UsernamePasswordAuthenticationFilter,添加到这之前的过滤器
 */

public class JwtAuthenticationLoginFilter extends AbstractAuthenticationProcessingFilter {

    /**
     * 构造方法,调用父类的,设置登录地址/login,请求方式POST
     */
    public JwtAuthenticationLoginFilter() {
        super(new AntPathRequestMatcher("/login", "POST"));
    }

    @Override
    public Authentication attemptAuthentication(HttpServletRequest request, HttpServletResponse response) {
        //获取表单提交数据
        String username = request.getParameter("username");
        String password = request.getParameter("password");
        //封装到token中提交
        UsernamePasswordAuthenticationToken authRequest = new UsernamePasswordAuthenticationToken(
                username,password);
        return getAuthenticationManager().authenticate(authRequest);
    }
}
认证成功处理器AuthenticationSuccessHandler
上述的过滤器接口一旦认证成功,则会调用AuthenticationSuccessHandler进行处理,因此我们可以自定义一个认证成功处理器进行自己的业务处理,代码如下:
@Component
public class LoginAuthenticationSuccessHandler implements AuthenticationSuccessHandler {
@Autowired
private JwtUtil jwtUtil;
@Autowired
RedisTemplate redisTemplate;
@Override
public void onAuthenticationSuccess(HttpServletRequest httpServletRequest,
HttpServletResponse httpServletResponse,
Authentication authentication) throws IOException {
UserDetails userDetails = (UserDetails) authentication.getPrincipal();
SecurityContextHolder.getContext().setAuthentication(authentication);
Map<String,String> map=new HashMap<>();
map.put("username",userDetails.getUsername());
//jwt生成token
String token = jwtUtil.getToken(map);
RedisUser redisUser = RedisUser.builder().username(userDetails.getUsername())
.password(userDetails.getPassword())
.authorities(userDetails.getAuthorities().stream().map(i->i.getAuthority()).collect(Collectors.toList())).build();
//将用户信息保存到redis缓存中
redisTemplate.opsForValue().set(userDetails.getUsername(),redisUser,12, TimeUnit.HOURS);
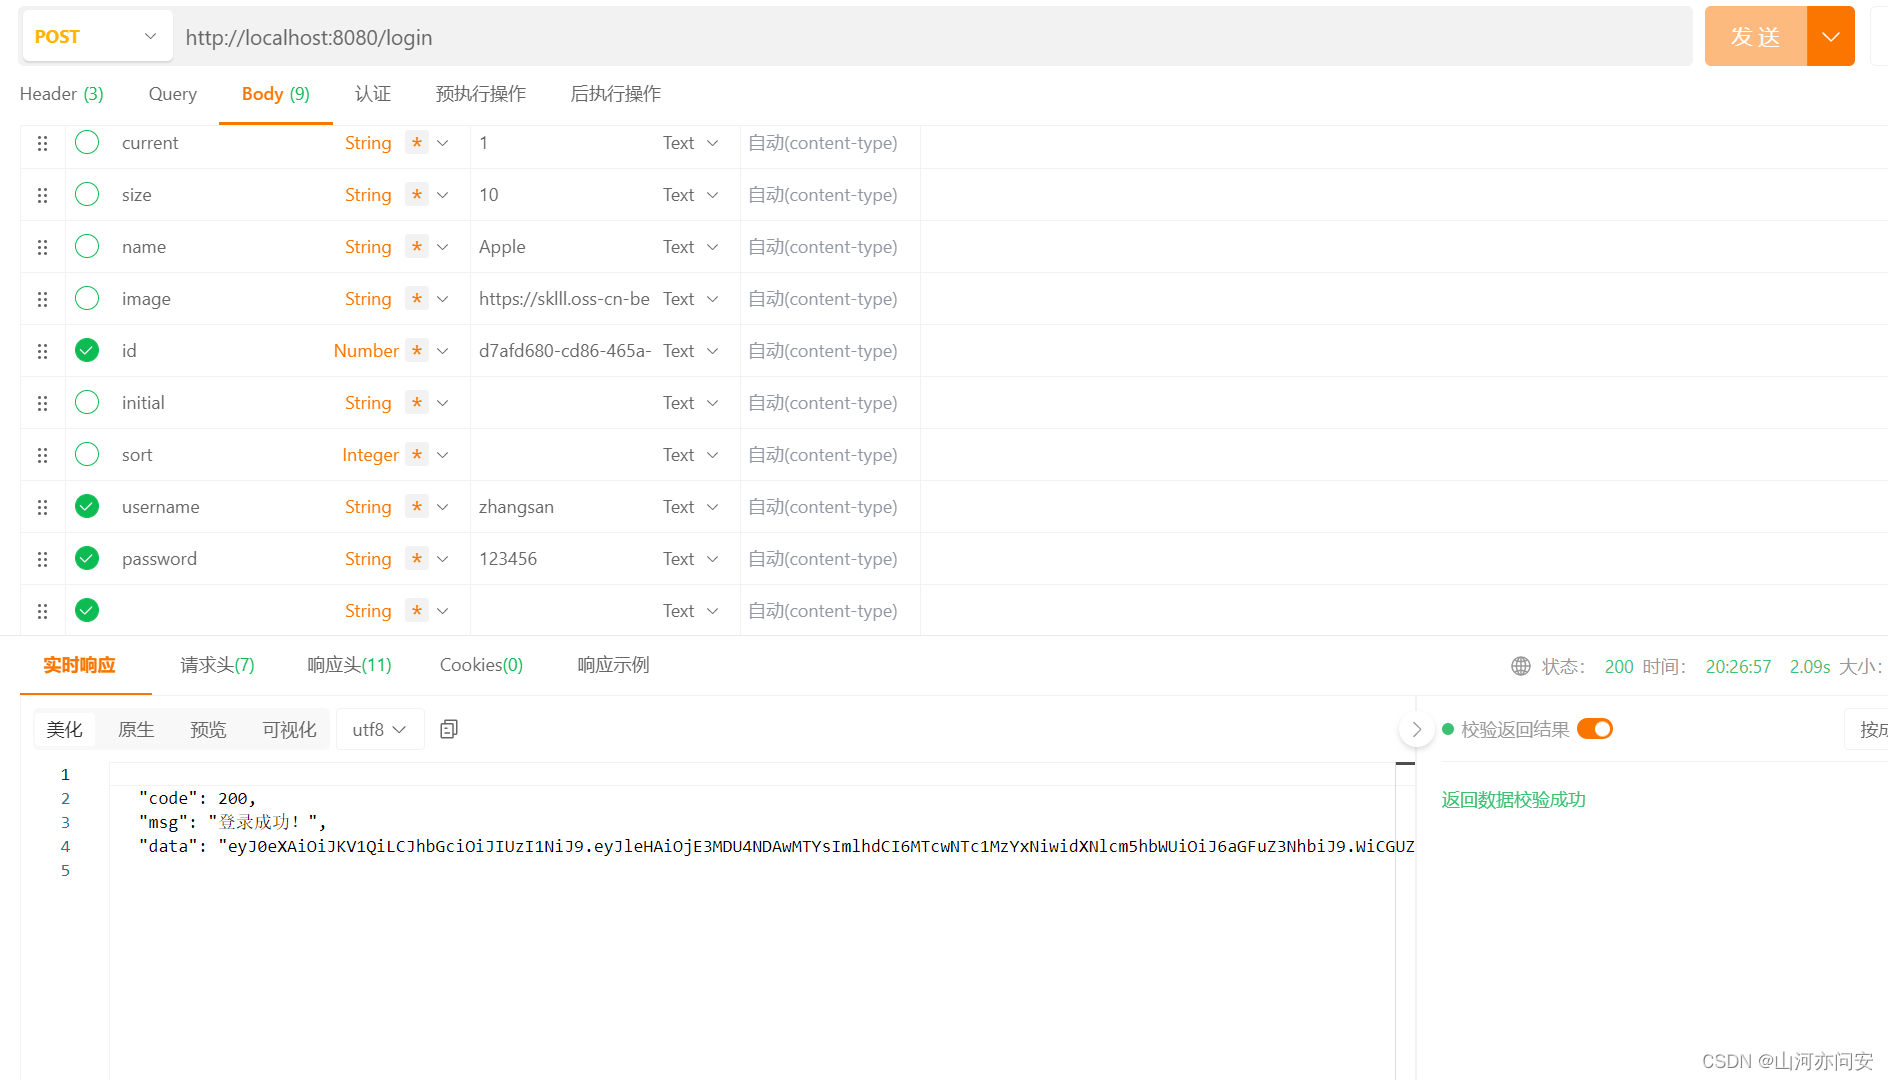
ResponseUtils.result(httpServletResponse,new ResultMsg(200,"登录成功!",token));
}
}认证失败处理器AuthenticationFailureHandler
同样的,一旦登录失败,比如用户名或者密码错误等等,则会调用AuthenticationFailureHandler进行处理,因此我们需要自定义一个认证失败的处理器,其中根据异常信息返回特定的JSON数据给客户端,代码如下:
@Component
public class LoginAuthenticationFailureHandler implements AuthenticationFailureHandler {
    /**
     * 一旦登录失败则会被调用
     */
    @Override
    public void onAuthenticationFailure(HttpServletRequest httpServletRequest,
                                        HttpServletResponse response,
                                        AuthenticationException exception) throws IOException {

        //TODO 根据项目需要返回指定异常提示,这里演示了一个用户名密码错误的异常
        //BadCredentialsException 这个异常一般是用户名或者密码错误
        if (exception instanceof BadCredentialsException){
            ResponseUtils.result(response,new ResultMsg(200,"用户名或密码不正确!",null));
        }
        ResponseUtils.result(response,new ResultMsg(200,"登录失败",null));
    }
}
AuthenticationEntryPoint配置
AuthenticationEntryPoint这个接口当用户未通过认证访问受保护的资源时,将会调用其中的commence()方法进行处理。
@Component
@Slf4j
public class EntryPointUnauthorizedHandler implements AuthenticationEntryPoint {

    @Override
    public void commence(HttpServletRequest request, HttpServletResponse response, AuthenticationException authException) throws IOException {
        ResponseUtils.result(response,new ResultMsg(403,"认证失败,请重新登录!",null));
    }
}
AccessDeniedHandler配置
AccessDeniedHandler这处理器当认证成功的用户访问受保护的资源,但是权限不够,则会进入这个处理器进行处理。
@Component
public class RequestAccessDeniedHandler implements AccessDeniedHandler {
    @Override
    public void handle(HttpServletRequest request,
                       HttpServletResponse response,
                       AccessDeniedException accessDeniedException) throws IOException {
        ResponseUtils.result(response,new ResultMsg(403,"权限不足!",null));
    }
}
UserDetailsService配置
UserDetailsService这个类是用来加载用户信息,包括用户名、密码、权限、角色集合,我们需要实现这个接口,从数据库加载用户信息,代码如下:
@Service
public class JwtTokenUserDetailsService implements UserDetailsService {

    /**
     * 查询用户详情的service
     */
    @Autowired
    private LoginService loginService;

    @Override
    public UserDetails loadUserByUsername(String username) throws UsernameNotFoundException {
        //从数据库中查询
        SecurityUser securityUser = loginService.loadByUsername(username);
        System.out.println(securityUser);
        //用户不存在直接抛出UsernameNotFoundException,security会捕获抛出BadCredentialsException
        if (Objects.isNull(securityUser))
            throw new UsernameNotFoundException("用户不存在!");
        return securityUser;
    }
}
其中的LoginService是根据用户名从数据库中查询出密码、角色、权限,代码如下:
@Service
public class LoginServiceImpl implements LoginService {


    @Autowired
    private PasswordEncoder passwordEncoder;

    @Autowired
    TUserService tUserService;

    @Autowired
    TRoleService tRoleService;

    @Nullable
    @Override
    public SecurityUser loadByUsername(String username) {
        //获取用户信息
        TUser user = tUserService.getByUsername(username);
        if (Objects.nonNull(user)){
            SecurityUser securityUser = new SecurityUser();
            securityUser.setUsername(username);
            //todo 此处为了方便,直接在数据库存储的明文,实际生产中应该存储密文,则这里不用再次加密
            securityUser.setPassword(passwordEncoder.encode(user.getPassword()));
            //查询该用户的角色
            List<String> userRoles = tRoleService.selectAllByUsername(username);
            String[] a={};
            List<GrantedAuthority> authorityList = AuthorityUtils.createAuthorityList(userRoles.toArray(a));
            securityUser.setAuthorities(authorityList);
            return securityUser;
        }
        return null;
    }


}
UserDetails这个也是个接口,其中定义了几种方法,都是围绕着用户名、密码、权限+角色集合这三个属性,因此我们可以实现这个类拓展这些字段,SecurityUser代码如下:
@Data
public class SecurityUser implements UserDetails {
    //用户名
    private String username;

    //密码
    private String password;

    //权限
    private Collection<? extends GrantedAuthority> authorities;

    public SecurityUser(String username, String password, Collection<? extends GrantedAuthority> authorities) {
        this.username = username;
        this.password = password;
        this.authorities = authorities;
    }

    public SecurityUser(){}

    @Override
    public Collection<? extends GrantedAuthority> getAuthorities() {
        return authorities;
    }

    @Override
    public String getPassword() {
        return password;
    }

    @Override
    public String getUsername() {
        return username;
    }

    // 账户是否未过期
    @Override
    public boolean isAccountNonExpired() {
        return true;
    }

    // 账户是否未被锁
    @Override
    public boolean isAccountNonLocked() {
        return true;
    }

    @Override
    public boolean isCredentialsNonExpired() {
        return true;
    }

    @Override
    public boolean isEnabled() {
        return true;
    }
}
Token校验过滤器
客户端请求头携带了token,服务端肯定是需要针对每次请求解析、校验token,因此必须定义一个Token过滤器,这个过滤器的主要逻辑如下:
-
从请求头中获取accessToken
-
对accessToken解析、验签、校验过期时间
-
校验成功,将authentication存入ThreadLocal中,这样方便后续直接获取用户详细信息。
@Component
public class TokenAuthenticationFilter extends OncePerRequestFilter {
    /**
     * JWT的工具类
     */
    @Autowired
    private JwtUtil jwtUtil;

    /**
     * UserDetailsService的实现类,从数据库中加载用户详细信息
     */
    @Qualifier("jwtTokenUserDetailsService")
    @Autowired
    private UserDetailsService userDetailsService;

    @Autowired
    RedisTemplate redisTemplate;

    @Override
    protected void doFilterInternal(HttpServletRequest request, HttpServletResponse response, FilterChain chain) throws ServletException, IOException {
        String token = request.getHeader("token");
        /**
         * token存在则校验token
         * 1. token是否存在
         * 2. token存在:
         *  2.1 校验token中的用户名是否失效
         */
        if (!StringUtils.isEmpty(token)){
            DecodedJWT decodedJWT = jwtUtil.getTokenInfo(token);
            String username;
            try {
               username = decodedJWT.getClaim("username").asString();
            }catch (Exception e){
                throw new RuntimeException("token无效");
            }
            //从redis缓存中获得对应用户数据
            RedisUser redisUser = (RedisUser) redisTemplate.opsForValue().get(username);
            String[] a={};
            List<GrantedAuthority> authorityList = AuthorityUtils.createAuthorityList(redisUser.getAuthorities().toArray(a));
            UsernamePasswordAuthenticationToken authentication = new UsernamePasswordAuthenticationToken(redisUser, null,
                    authorityList);
            authentication.setDetails(new WebAuthenticationDetailsSource().buildDetails(request));
            // 将 authentication 存入 ThreadLocal,方便后续获取用户信息
            SecurityContextHolder.getContext().setAuthentication(authentication);
        }
        //继续执行下一个过滤器
        chain.doFilter(request,response);
    }
}
登录认证过滤器接口配置
上述定义了一个认证过滤器JwtAuthenticationLoginFilter,这个是用来登录的过滤器,但是并没有注入加入Spring Security的过滤器链中,需要定义配置,代码如下:
@Configuration
public class JwtAuthenticationSecurityConfig extends SecurityConfigurerAdapter<DefaultSecurityFilterChain, HttpSecurity> {

    /**
     * userDetailService
     */
    @Qualifier("jwtTokenUserDetailsService")
    @Autowired
    private UserDetailsService userDetailsService;

    /**
     * 登录成功处理器
     */
    @Autowired
    private LoginAuthenticationSuccessHandler loginAuthenticationSuccessHandler;

    /**
     * 登录失败处理器
     */
    @Autowired
    private LoginAuthenticationFailureHandler loginAuthenticationFailureHandler;

    /**
     * 加密
     */
    @Autowired
    private PasswordEncoder passwordEncoder;

    /**
     * 将登录接口的过滤器配置到过滤器链中
     * 1. 配置登录成功、失败处理器
     * 2. 配置自定义的userDetailService(从数据库中获取用户数据)
     * 3. 将自定义的过滤器配置到spring security的过滤器链中,配置在UsernamePasswordAuthenticationFilter之前
     * @param
     */
    @Override
    public void configure(HttpSecurity http) {
        JwtAuthenticationLoginFilter filter = new JwtAuthenticationLoginFilter();
        filter.setAuthenticationManager(http.getSharedObject(AuthenticationManager.class));
        //认证成功处理器
        filter.setAuthenticationSuccessHandler(loginAuthenticationSuccessHandler);
        //认证失败处理器
        filter.setAuthenticationFailureHandler(loginAuthenticationFailureHandler);
        //直接使用DaoAuthenticationProvider
        DaoAuthenticationProvider provider = new DaoAuthenticationProvider();
        //设置userDetailService
        provider.setUserDetailsService(userDetailsService);
        //设置加密算法
        provider.setPasswordEncoder(passwordEncoder);
        http.authenticationProvider(provider);
        //将这个过滤器添加到UsernamePasswordAuthenticationFilter之前执行
        http.addFilterBefore(filter, UsernamePasswordAuthenticationFilter.class);
    }
}
Spring Security全局配置
上述仅仅配置了登录过滤器,还需要在全局配置类做一些配置,如下:
-
应用登录过滤器的配置
-
将登录接口、令牌刷新接口放行,不需要拦截
-
配置AuthenticationEntryPoint、AccessDeniedHandler
-
禁用session,前后端分离+JWT方式不需要session
-
将token校验过滤器TokenAuthenticationFilter添加到过滤器链中,放在UsernamePasswordAuthenticationFilter之前。
@Configuration
//@EnableWebSecurity
public class SecurityConfig extends WebSecurityConfigurerAdapter {
    @Autowired
    private JwtAuthenticationSecurityConfig jwtAuthenticationSecurityConfig;
    @Autowired
    private EntryPointUnauthorizedHandler entryPointUnauthorizedHandler;
    @Autowired
    private RequestAccessDeniedHandler requestAccessDeniedHandler;

    @Override
    protected void configure(HttpSecurity http) throws Exception {
        http.formLogin()
                //禁用表单登录,前后端分离用不上
                .disable()
                //应用登录过滤器的配置,配置分离
                .apply(jwtAuthenticationSecurityConfig)

                .and()
                // 设置URL的授权
                .authorizeRequests()

                .antMatchers("/login")
                .permitAll()
                // anyRequest() 所有请求   authenticated() 必须被认证
                .anyRequest()
                .authenticated()

                //处理异常情况:认证失败和权限不足
                .and()
                .exceptionHandling()
                //认证未通过,不允许访问异常处理器
                .authenticationEntryPoint(entryPointUnauthorizedHandler)
                //认证通过,但是没权限处理器
                .accessDeniedHandler(requestAccessDeniedHandler)

                .and()
                //禁用session,JWT校验不需要session
                .sessionManagement().sessionCreationPolicy(SessionCreationPolicy.STATELESS)

                .and()
                //将TOKEN校验过滤器配置到过滤器链中,否则不生效,放到UsernamePasswordAuthenticationFilter之前
                .addFilterBefore(authenticationTokenFilterBean(), UsernamePasswordAuthenticationFilter.class)
                // 关闭csrf
                .csrf().disable();
    }

    // 自定义的Jwt Token校验过滤器
    @Bean
    public TokenAuthenticationFilter authenticationTokenFilterBean() {
        return new TokenAuthenticationFilter();
    }

    /**
     * 加密算法
     *
     * @return
     */


    @Bean
    @Override
    protected AuthenticationManager authenticationManager() throws Exception {
        return super.authenticationManager();
    }
}
util包
JWT工具类
@Component
@ConfigurationProperties(prefix = "jwt")
//@Data
public class JwtUtil {
    private  String signature="cbac";
    private  Integer expiration=12;
    /***
     * 生成token header.payload.signature
     */
    public  String getToken(Map<String,String> payload){

        Calendar calendar = Calendar.getInstance();
        calendar.add(Calendar.HOUR, 24);  // 24小时

        JWTCreator.Builder builder = JWT.create();
        // 构建payload
        payload.forEach(builder::withClaim);
        // 指定签发时间、过期时间 和 签名算法,并返回token
        String token = builder.withIssuedAt(new Date()).withExpiresAt(calendar.getTime()).sign(Algorithm.HMAC256(signature));
        return token;
    }


    /***
     * 获取token信息
     */
    public  DecodedJWT getTokenInfo(String token){
        DecodedJWT verify=JWT.require(Algorithm.HMAC256(signature)).build().verify(token);
        return verify;
    }

}
结果封装类
public class ResponseUtils {

    public static void result(HttpServletResponse response, ResultMsg msg) throws IOException {
        response.setContentType("application/json;charset=UTF-8");
        ServletOutputStream out = response.getOutputStream();
        ObjectMapper objectMapper = new ObjectMapper();
        out.write(objectMapper.writeValueAsString(msg).getBytes("UTF-8"));
        out.flush();
        out.close();
    }
}
测试结果
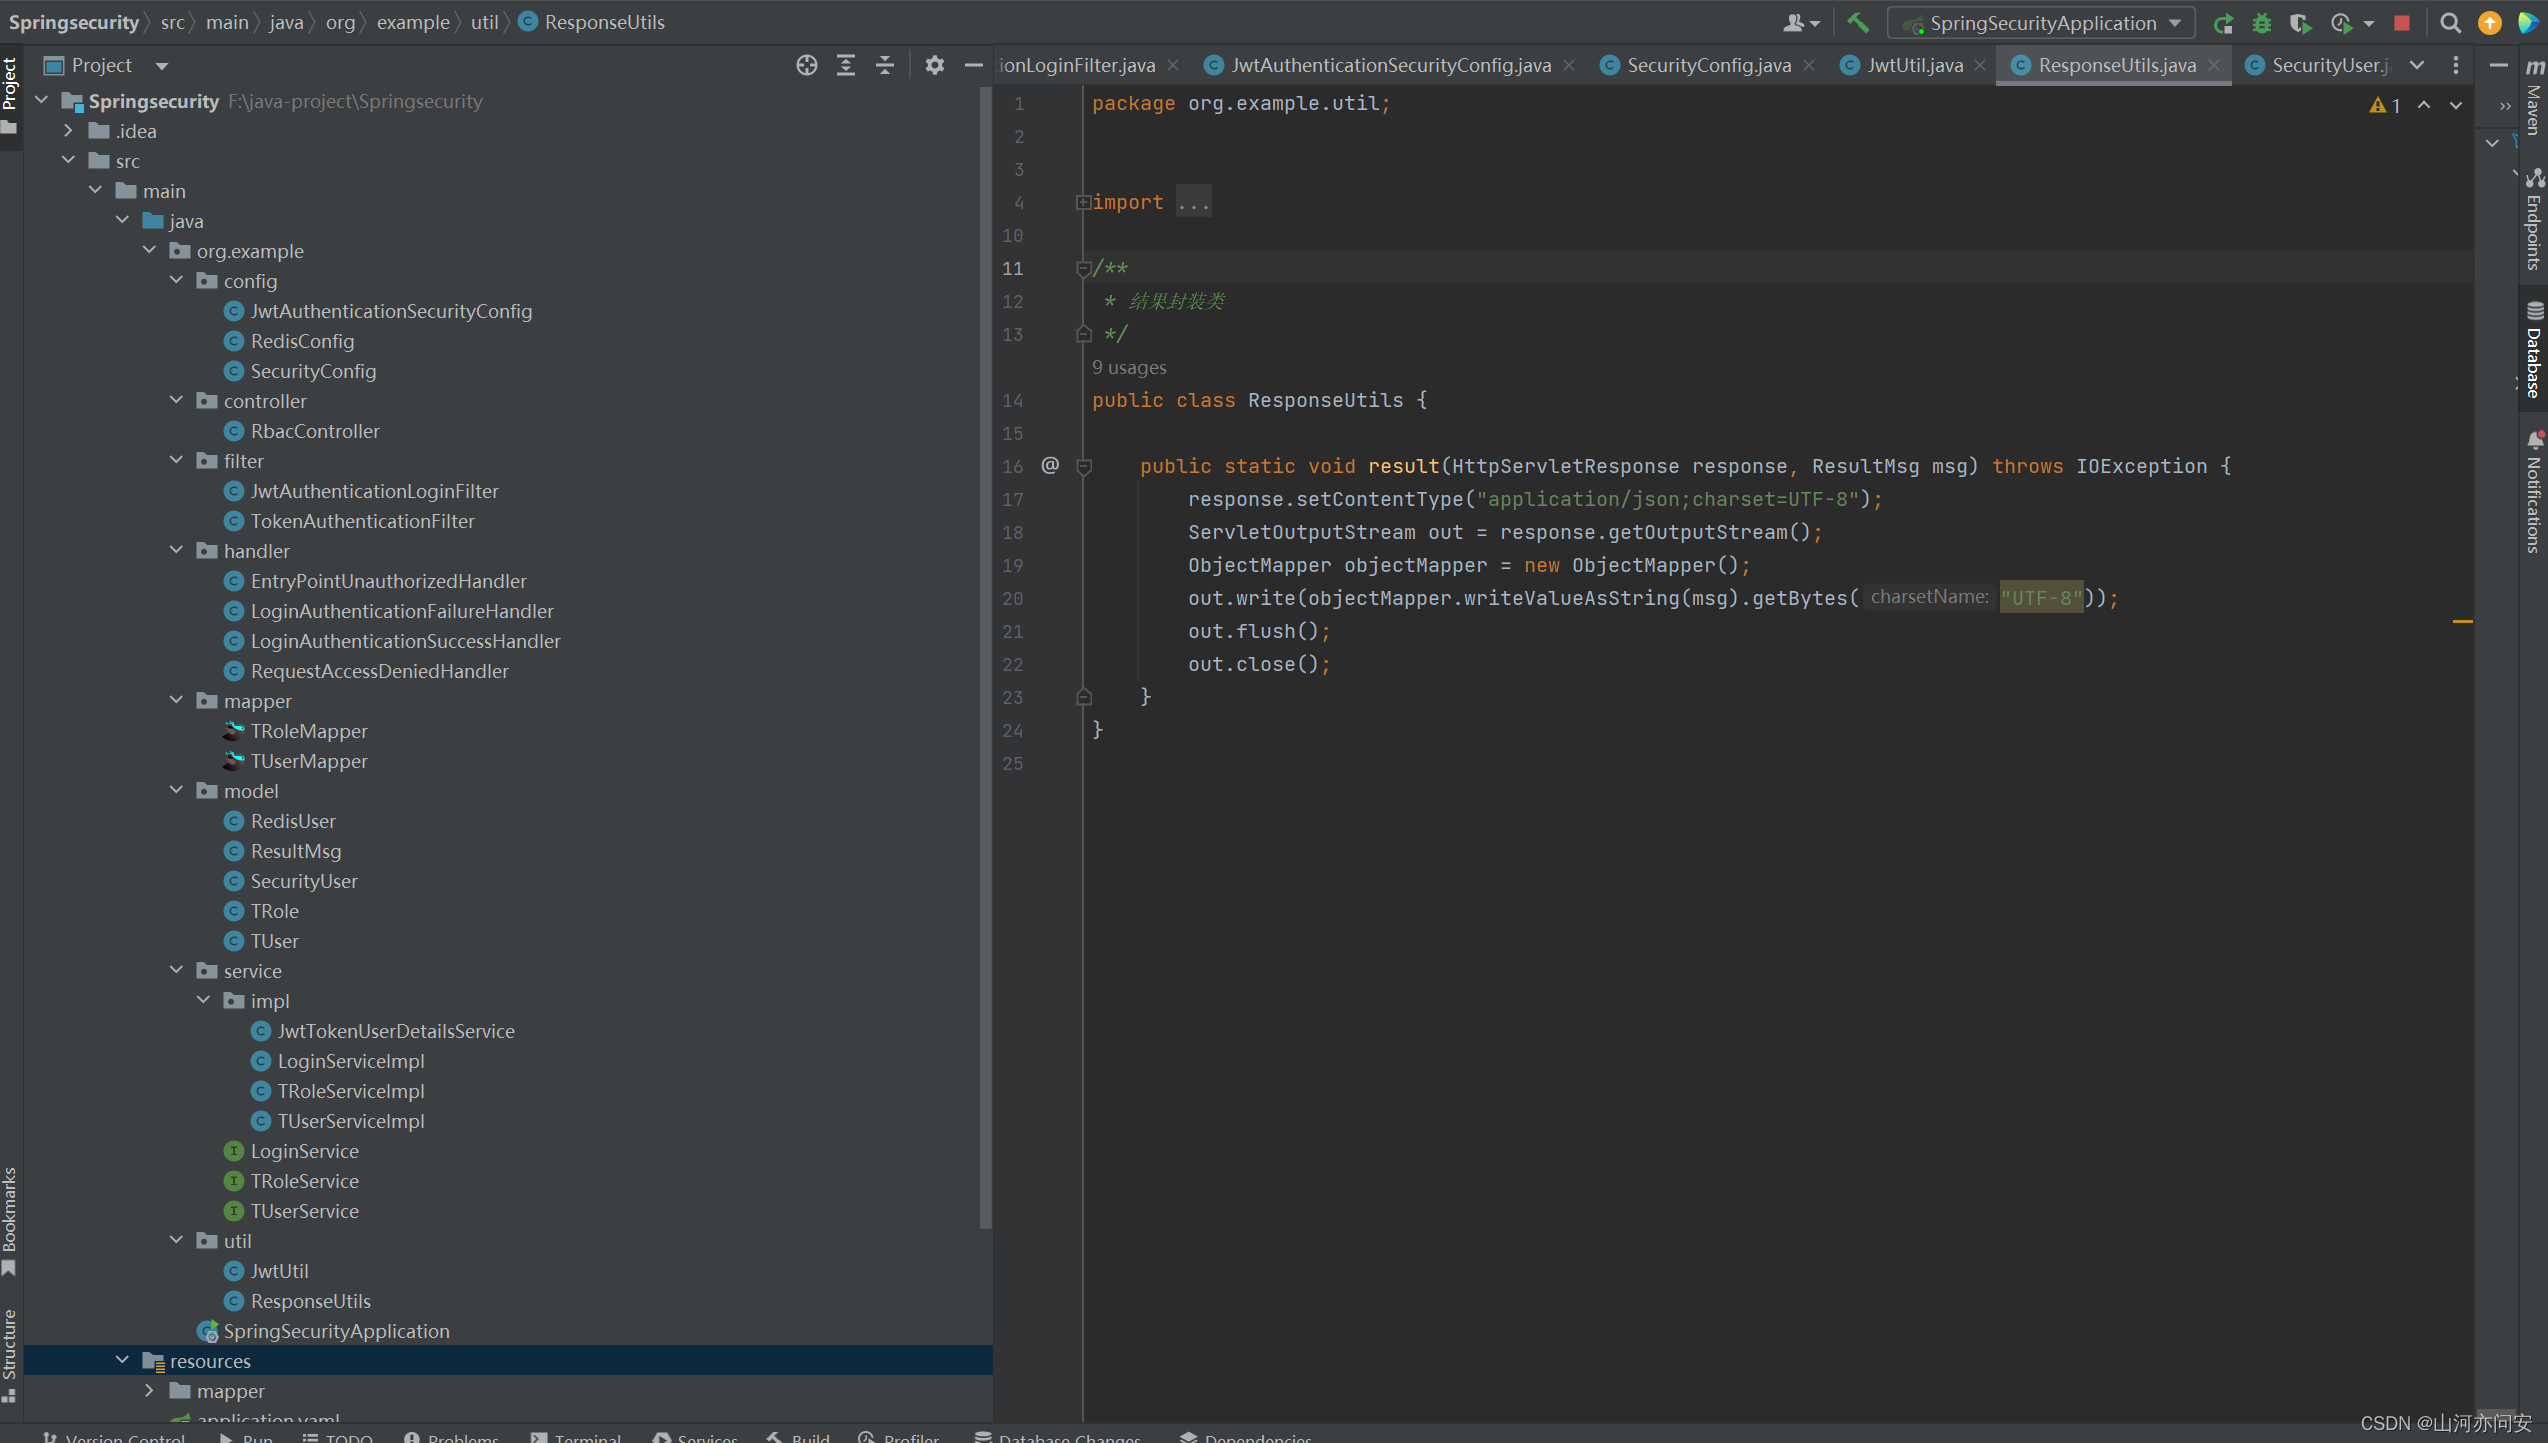
项目目录结构


![[小程序]样式与配置](https://img-blog.csdnimg.cn/direct/b8bdaca0e23b40f6bd94293e359ea003.png)