目录
- 一、微信登录流程简介
- 二、微信用户信息获取
- 1、index.js
- 2、index.wxml
- 三、微信登录流程代码详解
- 1、后台准备
- ①导入微信小程序SDK
- ②application.yml
- ③WxProperties
- ④WxConfig
- ⑤WxAuthController
- 1、登录-小程序
- ①login.js
- ②user.js
- ③util.js
- 四、emoji的存储
- 1、修改配置文件my.ini
- 2、重启mysql服务
- 3、多账号测试
- 4、总结
一、微信登录流程简介
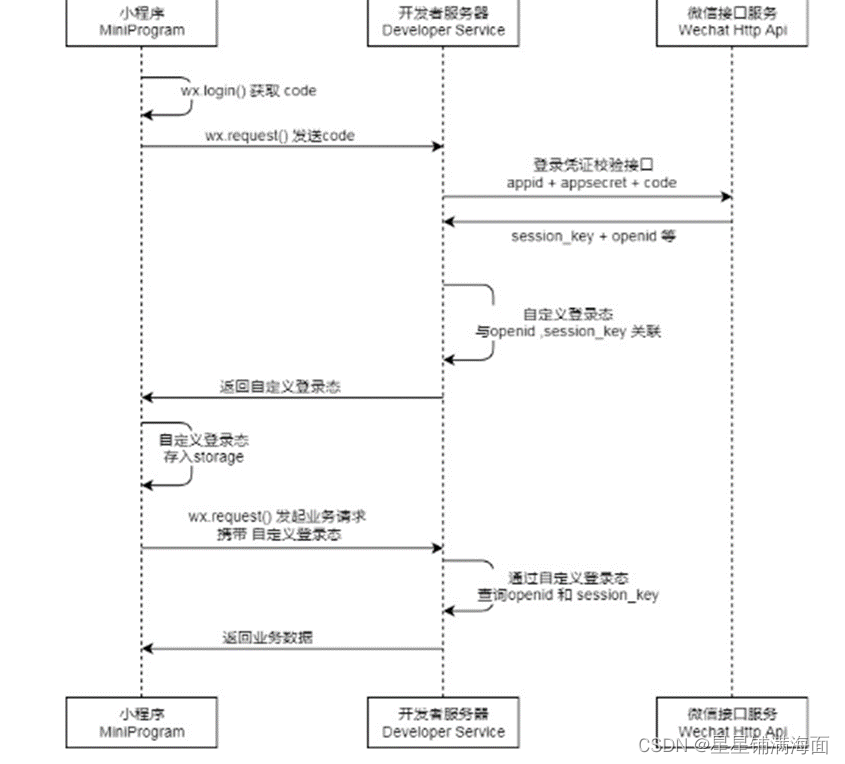
小程序登录
-
说明
- 调用 wx.login() 获取 临时登录凭证code ,并回传到开发者服务器。
- 调用 auth.code2Session 接口,换取 用户唯一标识 OpenID 、 用户在微信开放平台帐号下的唯一标识UnionID(若当前小程序已绑定到微信开放平台帐号) 和 会话密钥 session_key。
- 之后开发者服务器可以根据用户标识来生成自定义登录态,用于后续业务逻辑中前后端交互时识别用户身份。
-
注意事项
- 会话密钥
session_key是对用户数据进行 加密签名 的密钥。为了应用自身的数据安全,开发者服务器不应该把会话密钥下发到小程序,也不应该对外提供这个密钥。 - 临时登录凭证 code 只能使用一次
- 会话密钥
-
appId 作用说明
- appid 是微信账号的唯一标识,这个是固定不变的;
如果了解微信公众号开发的就需要注意一下,小程序的appid 和 公众号的appid 是不一致的
- appid 是微信账号的唯一标识,这个是固定不变的;
-
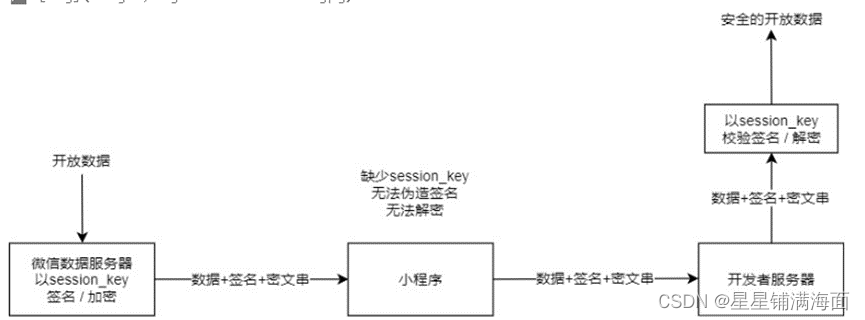
session_key 功能说明
微信客户端通过wx.getUserInfo()获取用户的信息
后台有时候也需要获取微信客户端的用户信息,因此,就需要利用session_key这个秘钥来从微信平台中获取
官方文档原文
签名校验以及数据加解密涉及用户的会话密钥 session_key。 开发者应该事先通过 wx.login 登录流程获取会话密钥 session_key 并保存在服务器。为了数据不被篡改,开发者不应该把 session_key 传到小程序客户端等服务器外的环境。
- 执行wx.login 登录获取小程序端的code
- 服务端根据code去微信端获取session_key并且缓存;同时生成access_token 保存在小程序端,维持登录状态;
- 小程序端请求服务端用户数据时,先wx.checkSession,有效就通过access_token 确定用户,找到session_key;无效就执行wx.login重新登录重新生成access_token,服务端重新获取session_key;
- 小程序端长时间不使用,服务端的session_key会失效,无法再用session_key去微信端获取数据,需要小程序端重新执行登录操作; 服务端要获取session_key 只能通过小程序端的登录来操作;
二、微信用户信息获取
1、index.js
// pages/index/index.js
Page({
  data: {
    userInfo: {},
    canIUseGetUserProfile: false,
  },
  onLoad() {
    // if (wx.getUserProfile) {
    //   this.setData({
    //     canIUseGetUserProfile: true
    //   })
    // }
  },
  getUserProfile(e) {
    console.log('getUserProfile')
    // 推荐使用 wx.getUserProfile 获取用户信息,开发者每次通过该接口获取用户个人信息均需用户确认
    // 开发者妥善保管用户快速填写的头像昵称,避免重复弹窗
    wx.getUserProfile({
      desc: '用于完善会员资料', // 声明获取用户个人信息后的用途,后续会展示在弹窗中,请谨慎填写
      success: (res) => {
        console.log(res);
        this.setData({
          userInfo: res.userInfo,
          hasUserInfo: true
        })
      }
    })
  },
  wxLogin: function(e) {
    debugger
    console.log('wxLogin')
    console.log(e.detail.userInfo);
    this.setData({
      userInfo: e.detail.userInfo
    })
    if (e.detail.userInfo == undefined) {
      app.globalData.hasLogin = false;
      util.showErrorToast('微信登录失败');
      return;
    }

  },
  /**
   * 生命周期函数--监听页面初次渲染完成
   */
  onReady() {

  },

  /**
   * 生命周期函数--监听页面显示
   */
  onShow() {

  },

  /**
   * 生命周期函数--监听页面隐藏
   */
  onHide() {

  },

  /**
   * 生命周期函数--监听页面卸载
   */
  onUnload() {

  },

  /**
   * 页面相关事件处理函数--监听用户下拉动作
   */
  onPullDownRefresh() {

  },

  /**
   * 页面上拉触底事件的处理函数
   */
  onReachBottom() {

  },

  /**
   * 用户点击右上角分享
   */
  onShareAppMessage() {

  }
})
2、index.wxml
<!--pages/index/index.wxml-->
<view>
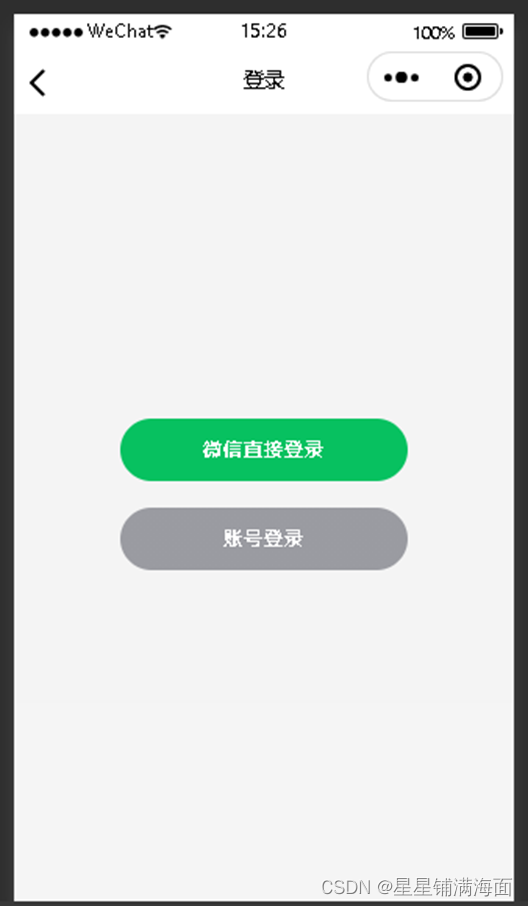
  <button wx:if="{{canIUseGetUserProfile}}" type="primary" class="wx-login-btn" bindtap="getUserProfile">微信直接登录1</button>
  <button wx:else open-type="getUserInfo" type="primary" class="wx-login-btn" bindgetuserinfo="wxLogin">微信直接登录2</button>
  <image mode="scaleToFill" src="{{userInfo.avatarUrl}}" />
  <text>昵称:{{userInfo.nickName}}</text>
</view>

三、微信登录流程代码详解
1、后台准备
①导入微信小程序SDK
<dependency>
    <groupId>com.github.binarywang</groupId>
    <artifactId>weixin-java-miniapp</artifactId>
    <version>3.3.0</version>
</dependency>
②application.yml
oa:
  wx:
    app-id: wx137a566651c72ea1
    app-secret: 3ef580544ab1ece997cac95db6a9d0b7
    msgDataFormat: JSON
③WxProperties
@Data
@Configuration
@ConfigurationProperties(prefix = "oa.wx")
public class WxProperties {
	/**
	 * 设置微信小程序的appId
	 */
	private String appId;
	/**
	 * 设置微信小程序的Secret
	 */
	private String appSecret;
	/**
	 * 消息数据格式
	 */
	private String msgDataFormat;

}
④WxConfig
@Configuration
public class WxConfig {
	@Autowired
	private WxProperties properties;

	@Bean
	public WxMaConfig wxMaConfig() {
		WxMaInMemoryConfig config = new WxMaInMemoryConfig();
		config.setAppid(properties.getAppId());
		config.setSecret(properties.getAppSecret());
		config.setMsgDataFormat(properties.getMsgDataFormat());
		return config;
	}

	@Bean
	public WxMaService wxMaService(WxMaConfig maConfig) {
		WxMaService service = new WxMaServiceImpl();
		service.setWxMaConfig(maConfig);
		return service;
	}

}
⑤WxAuthController
@RequestMapping("/wx/auth")
public class WxAuthController {
    @Autowired
    private WxMaService wxService;
     @PostMapping("login_by_weixin")
    public Object loginByWeixin(@RequestBody WxLoginInfo wxLoginInfo, HttpServletRequest request) {

        //客户端需携带code与userInfo信息
        String code = wxLoginInfo.getCode();
        UserInfo userInfo = wxLoginInfo.getUserInfo();
        if (code == null || userInfo == null) {
            return ResponseUtil.badArgument();
        }
        //调用微信sdk获取openId及sessionKey
        String sessionKey = null;
        String openId = null;
        try {
            WxMaJscode2SessionResult result = this.wxService.getUserService().getSessionInfo(code);
            sessionKey = result.getSessionKey();//session id
            openId = result.getOpenid();//用户唯一标识 OpenID
        } catch (Exception e) {
            e.printStackTrace();
        }

        if (sessionKey == null || openId == null) {
            log.error("微信登录,调用官方接口失败:{}", code);
            return ResponseUtil.fail();
        }else{
            log.info("openId={},sessionKey={}",openId,sessionKey);
        }
        //根据openId查询wx_user表
        //如果不存在,初始化wx_user,并保存到数据库中
        //如果存在,更新最后登录时间
        //....
        // token
        UserToken userToken = null;
        try {
            userToken = UserTokenManager.generateToken(user.getId());
        } catch (Exception e) {
            log.error("微信登录失败,生成token失败:{}", user.getId());
            e.printStackTrace();
            return ResponseUtil.fail();
        }
        userToken.setSessionKey(sessionKey);
        log.info("SessionKey={}",UserTokenManager.getSessionKey(user.getId()));
        Map<Object, Object> result = new HashMap<Object, Object>();
        result.put("token", userToken.getToken());
        result.put("tokenExpire", userToken.getExpireTime().toString());
        result.put("userInfo", userInfo);
        //....


        log.info("【请求结束】微信登录,响应结果:{}", JSONObject.toJSONString(result));

        return ResponseUtil.ok(result);
    }
1、登录-小程序
①login.js
user.loginByWeixin(res.userInfo).then(res => {
    app.globalData.hasLogin = true;
    wx.navigateBack({
    delta: 1
    })
})
②user.js
function loginByWeixin(userInfo) {
  return new Promise(function(resolve, reject) {
    return login().then((res) => {
      //登录远程服务器
      util.request(api.AuthLoginByWeixin, {
        code: res.code,
        userInfo: userInfo
      }, 'POST').then(res => {
        if (res.errno === 0) {
          //存储用户信息
          wx.setStorageSync('userInfo', res.data.userInfo);
          wx.setStorageSync('token', res.data.token);
          resolve(res);
        } else {
          reject(res);
        }
      })
③util.js
function request(url, data = {}, method = "GET") {
  return new Promise(function (resolve, reject) {
    wx.request({
      url: url,
      data: data,
      method: method,
      timeout:6000,
      header: {
        'Content-Type': 'application/json',
        'X-OA-Token': wx.getStorageSync('token')
      },
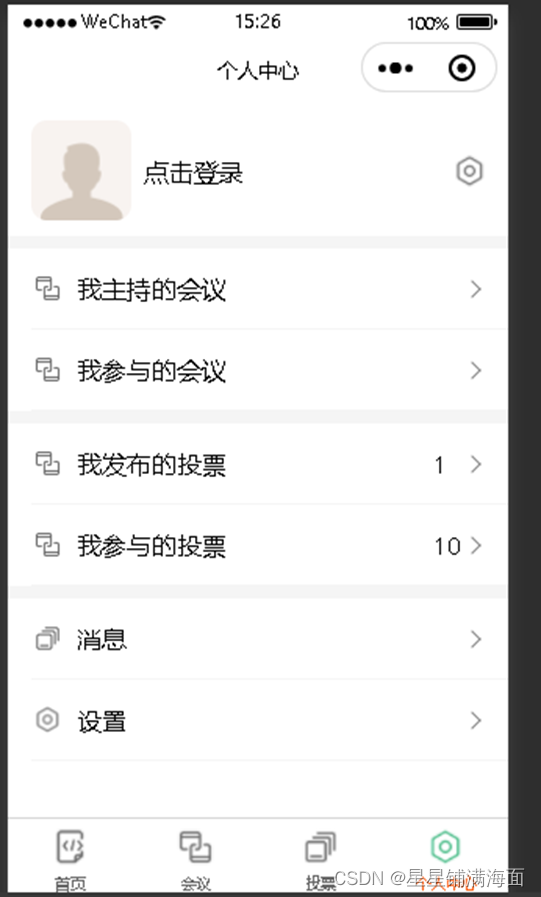
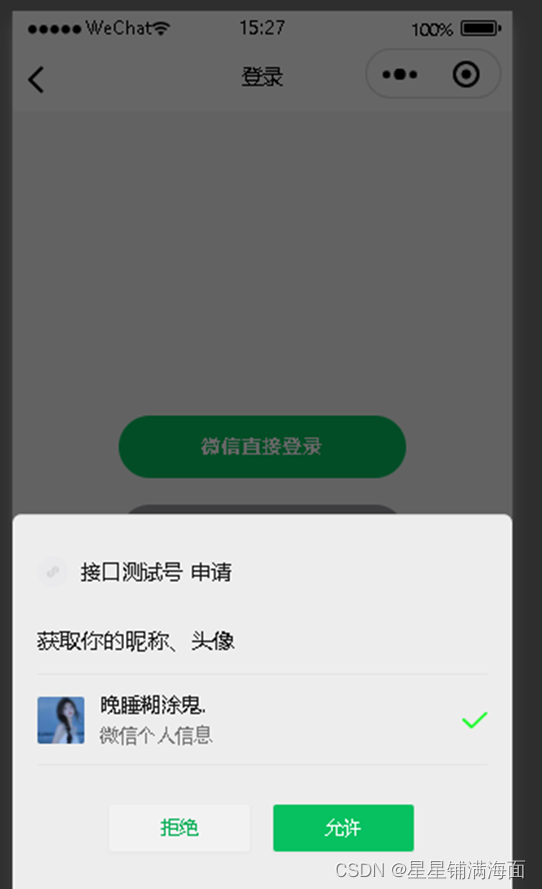
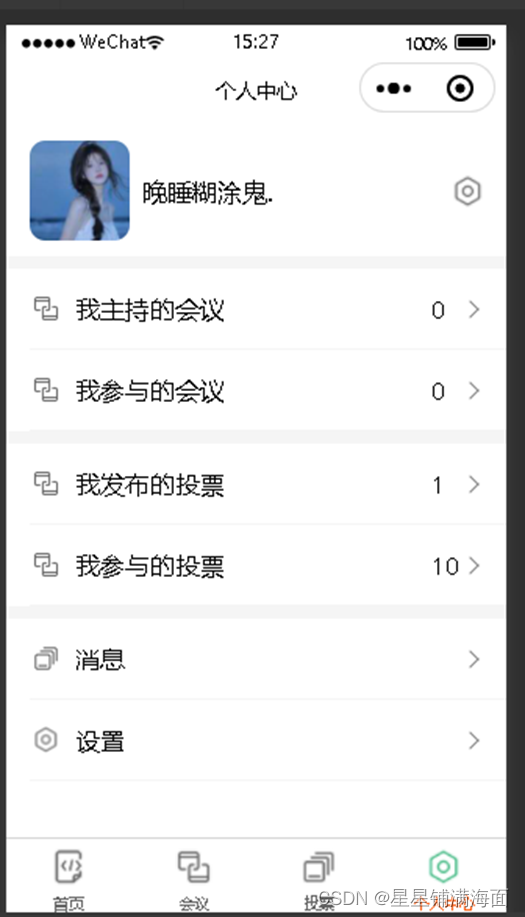
四、emoji的存储
mysql的utf8编码的一个字符最多3个字节,但是一个emoji表情为4个字节,所以utf8不支持存储emoji表情。但是utf8的超集utf8mb4一个字符最多能有4字节,所以能支持emoji表情的存储。
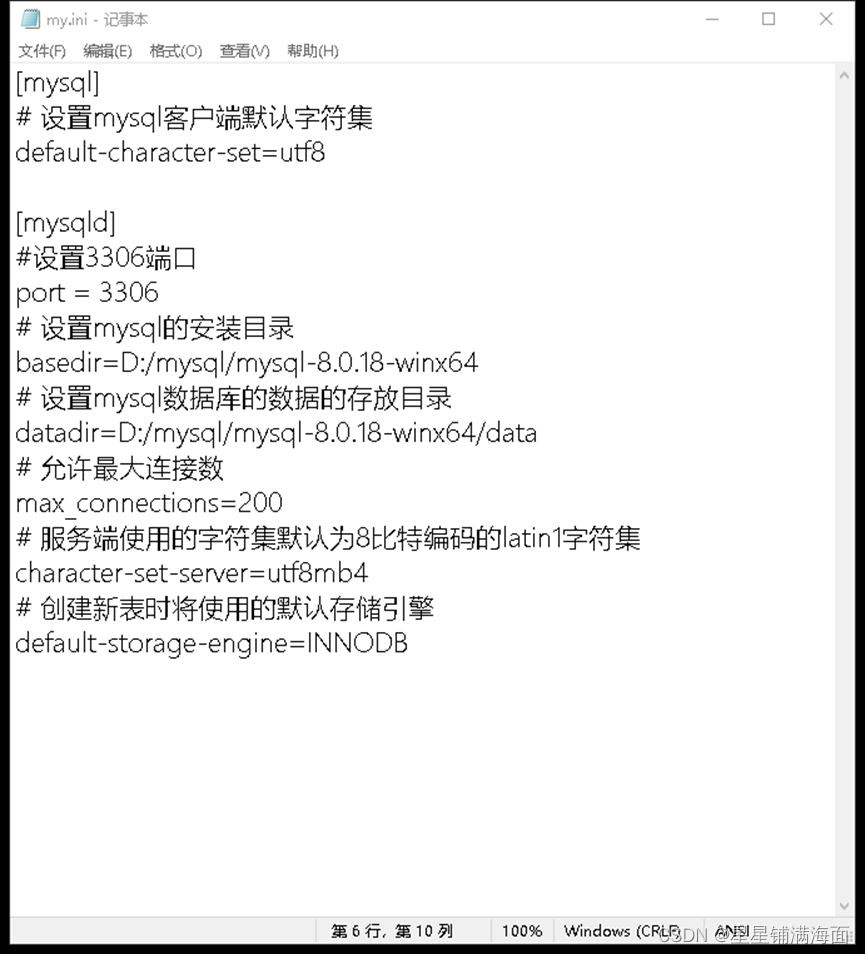
Linux系统中MySQL的配置文件为my.cnf。
Winows中的配置文件为my.ini。
1、修改配置文件my.ini
[mysql]
# 设置mysql客户端默认字符集
default-character-set=utf8mb4

[mysqld]
#设置3306端口
port = 3306
# 设置mysql的安装目录
basedir=D:\\tools\\mysql-5.7.23-winx64
# 设置mysql数据库的数据的存放目录
datadir=D:\\tools\\mysql-5.7.23-winx64\\data
# 允许最大连接数
max_connections=200
# 服务端使用的字符集默认为8比特编码的latin1字符集
character-set-server=utf8mb4
# 创建新表时将使用的默认存储引擎
default-storage-engine=INNODB
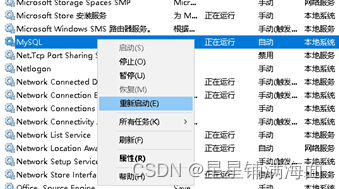
2、重启mysql服务
3、多账号测试
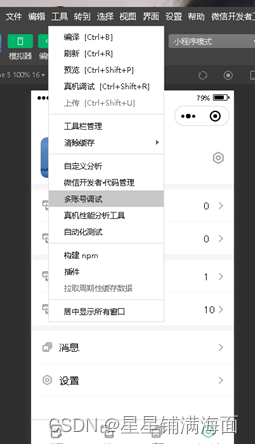
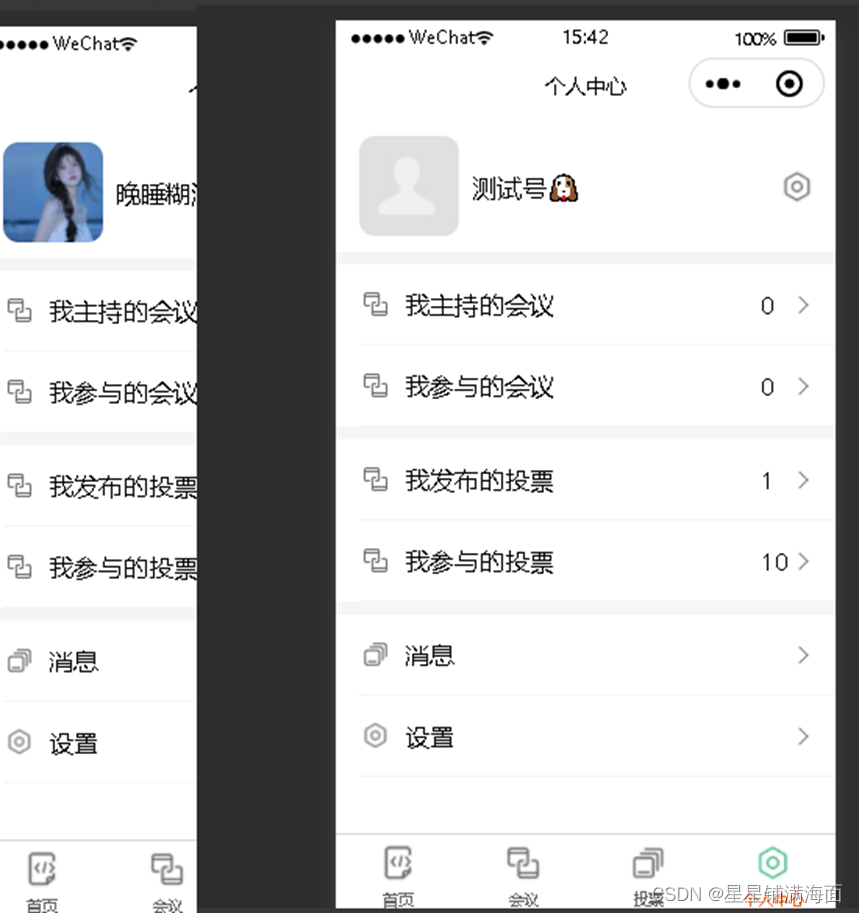
4、总结
注意:记得一定要修改配置文件字符集编码,否则在多账号测试时一定会登录失败且后台的控制台一定会报错
