一、ppt研读:
1.关于这个 input Embedding 的内容:

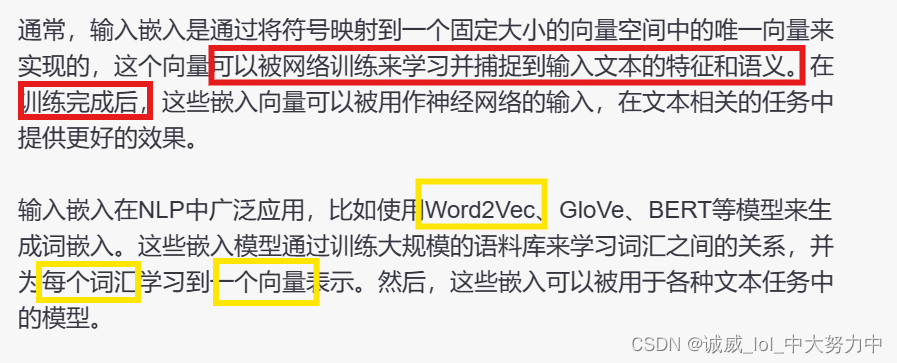
2.关于Positional Encoding:


二、慢慢积累,一点点阅读代码:
虽然这次的模块挺多的,但是,这样也就意味着,把这个内化为自己的,就可以获得更大的进步了
1.关于使用git命令获取到源代码:

2.Fix Random Seed部分都是相同的,就是为了结果可以复现:
seed = 73
random.seed(seed)
torch.manual_seed(seed)
if torch.cuda.is_available():
    torch.cuda.manual_seed(seed)
    torch.cuda.manual_seed_all(seed)
np.random.seed(seed)
torch.backends.cudnn.benchmark = False
torch.backends.cudnn.deterministic = True
3.定义一个字符类型转换函数:
def strQ2B(ustring):
    """Full width -> half width"""
    # reference:https://ithelp.ithome.com.tw/articles/10233122
    ss = []
    for s in ustring:
        rstring = ""
        for uchar in s:
            inside_code = ord(uchar)
            if inside_code == 12288:  # Full width space: direct conversion
                inside_code = 32
            elif (inside_code >= 65281 and inside_code <= 65374):  # Full width chars (except space) conversion
                inside_code -= 65248
            rstring += chr(inside_code)
        ss.append(rstring)
    return ''.join(ss)
4.字符处理函数:
def clean_s(s, lang):
    if lang == 'en':
        s = re.sub(r"\([^()]*\)", "", s) # remove ([text])
        s = s.replace('-', '') # remove '-'
        s = re.sub('([.,;!?()\"])', r' \1 ', s) # keep punctuation
    elif lang == 'zh':
        s = strQ2B(s) # Q2B
        s = re.sub(r"\([^()]*\)", "", s) # remove ([text])
        s = s.replace(' ', '')
        s = s.replace('—', '')
        s = s.replace('“', '"')
        s = s.replace('”', '"')
        s = s.replace('_', '')
        s = re.sub('([。,;!?()\"~「」])', r' \1 ', s) # keep punctuation
    s = ' '.join(s.strip().split())
    return s
5.python中的string.split()分割函数:

6.定义整个文字串的处理函数:
```python
def clean_corpus(prefix, l1, l2, ratio=9, max_len=1000, min_len=1):
    # 检查已经存在的清洗后文件,如果存在则跳过清洗步骤
    if Path(f'{prefix}.clean.{l1}').exists() and Path(f'{prefix}.clean.{l2}').exists():
        print(f'{prefix}.clean.{l1} & {l2} exists. skipping clean.')
        return

    # 打开原始语料文件和清洗后的输出文件
    with open(f'{prefix}.{l1}', 'r') as l1_in_f:
        with open(f'{prefix}.{l2}', 'r') as l2_in_f:
            with open(f'{prefix}.clean.{l1}', 'w') as l1_out_f:
                with open(f'{prefix}.clean.{l2}', 'w') as l2_out_f:
                    # 逐行读取原始语料文件
                    for s1 in l1_in_f:
                        s1 = s1.strip()  # 去除首尾空格
                        s2 = l2_in_f.readline().strip()
                        s1 = clean_s(s1, l1)  # 清洗句子 s1
                        s2 = clean_s(s2, l2)  # 清洗句子 s2
                        s1_len = len_s(s1, l1)  # 计算句子 s1 的长度
                        s2_len = len_s(s2, l2)  # 计算句子 s2 的长度

                        if min_len > 0:  # 判断句子长度是否满足最小长度要求,如果不满足则跳过
                            if s1_len < min_len or s2_len < min_len:
                                continue

                        if max_len > 0:  # 判断句子长度是否超过最大长度,如果超过则跳过
                            if s1_len > max_len or s2_len > max_len:
                                continue

                        if ratio > 0:  # 判断句子长度比例是否满足要求,如果不满足则跳过
                            if s1_len/s2_len > ratio or s2_len/s1_len > ratio:
                                continue

                        # 将清洗后的句子写入输出文件
                        print(s1, file=l1_out_f)
                        print(s2, file=l2_out_f)
```

以上是一个用于清洗语料的函数,函数将两个语料文件 `prefix.l1` 和 `prefix.l2` 清洗后保存到 `prefix.clean.l1` 和 `prefix.clean.l2` 文件中。

注释已经逐行添加在代码中。
总的来说呢,就是将 太长 或者 太短的 句子进行处理,并且进行一些符号的处理,使得最终得到的句子是比较合理的那种
7.转换为subword units进行处理:
import sentencepiece as spm
vocab_size = 8000
if (prefix/f'spm{vocab_size}.model').exists():
    print(f'{prefix}/spm{vocab_size}.model exists. skipping spm_train.') #如果这段文字已经被subword过了,pass
else:
    spm.SentencePieceTrainer.train( #否则,就要设置这个SentencePieceTrainer模块的参数的具体数值了
        input=','.join([f'{prefix}/train.clean.{src_lang}',
                        f'{prefix}/valid.clean.{src_lang}',
                        f'{prefix}/train.clean.{tgt_lang}',
                        f'{prefix}/valid.clean.{tgt_lang}']),
        model_prefix=prefix/f'spm{vocab_size}',
        vocab_size=vocab_size,
        character_coverage=1,
        model_type='unigram', # 'bpe' works as well
        input_sentence_size=1e6,
        shuffle_input_sentence=True,
        normalization_rule_name='nmt_nfkc_cf',
    )
spm_model = spm.SentencePieceProcessor(model_file=str(prefix/f'spm{vocab_size}.model')) #初始化上述模块
in_tag = {
'train': 'train.clean',
'valid': 'valid.clean',
'test': 'test.raw.clean',
}
#反正下面这里就是利用subword进行文字串的处理
for split in ['train', 'valid', 'test']:
for lang in [src_lang, tgt_lang]:
out_path = prefix/f'{split}.{lang}'
if out_path.exists():
print(f"{out_path} exists. skipping spm_encode.")
else:
with open(prefix/f'{split}.{lang}', 'w') as out_f:
with open(prefix/f'{in_tag[split]}.{lang}', 'r') as in_f:
for line in in_f:
line = line.strip()
tok = spm_model.encode(line, out_type=str)
print(' '.join(tok), file=out_f)8.将上述的字符串利用fairseq处理:
binpath = Path('./DATA/data-bin', dataset_name)
if binpath.exists():
    print(binpath, "exists, will not overwrite!")
else:
    !python -m fairseq_cli.preprocess \
        --source-lang {src_lang}\
        --target-lang {tgt_lang}\
        --trainpref {prefix/'train'}\
        --validpref {prefix/'valid'}\
        --testpref {prefix/'test'}\
        --destdir {binpath}\
        --joined-dictionary\
        --workers 2
9.原来真的需要些log实验日志:
logging.basicConfig(
    format="%(asctime)s | %(levelname)s | %(name)s | %(message)s",
    datefmt="%Y-%m-%d %H:%M:%S",
    level="INFO", # "DEBUG" "WARNING" "ERROR"
    stream=sys.stdout,
)
proj = "hw5.seq2seq"
logger = logging.getLogger(proj)
if config.use_wandb:
    import wandb
    wandb.init(project=proj, name=Path(config.savedir).stem, config=config)
10.关于fairseq(facebook AI Research Sequence to Sequence Toolkit)这个库的初探
(1)概念:它基于PyTorch开发,提供了多种自然语言处理任务的模型,包括神经机器翻译、语音识别、文本生成等
(2)功能分块
(3)使用方式:(我感觉就是一种别具一格形式的函数调用)


http://t.csdn.cn/d8dpn
也可以参考这一篇文章
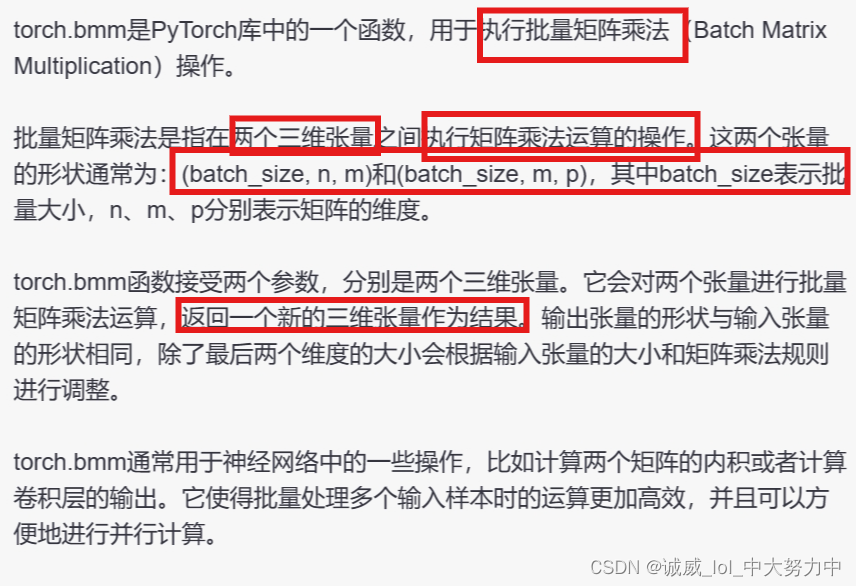
11.torch.bmm(tensor1,tensor2)这种批量的矩阵乘法运算:
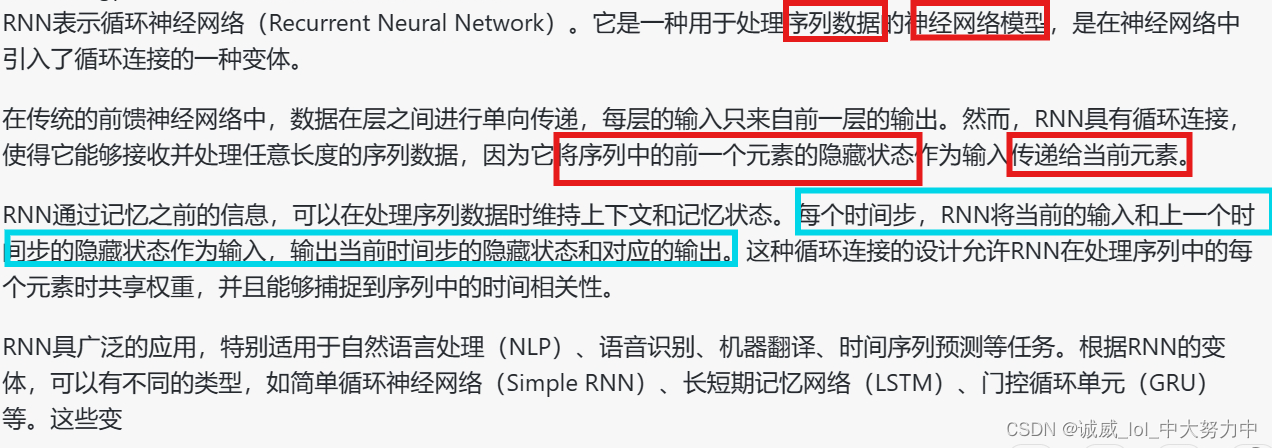
12.了解一下,什么叫做RNN(Recurrent Neural Network):
二、下面重点研读 encoder 、 attention 和 decoder部分的代码(目前来说其他部分有些吃力,等我够强大了,再回来报仇!!!虽迟未晚)
1.Encoder部分的代码:
class RNNEncoder(FairseqEncoder): #通过继承来自FairseqEncoder的这个类模型
    def __init__(self, args, dictionary, embed_tokens): #_init_初始化函数:参数:arg参数数组中包含着embed_dim、hidden_dim、num_layers等参数,dictionary字符集,embed_tokens这个算是字符还是embedding之后的向量呢?
        super().__init__(dictionary) #用字符初始化父类的_init_函数
        self.embed_tokens = embed_tokens #把embed_tokens参数传进去

        self.embed_dim = args.encoder_embed_dim #原来arg中就有dim等参数
        self.hidden_dim = args.encoder_ffn_embed_dim #中间层的dim
        self.num_layers = args.encoder_layers  #layer的层数

        self.dropout_in_module = nn.Dropout(args.dropout) #args中的dropout概率参数也要传递进去
        self.rnn = nn.GRU(        #定义这个模型的rnn结构,
            self.embed_dim,      #传参:embed_dim就是embed时的dim维度
            self.hidden_dim,      #hidden_dim就是中间层的dim维度
            self.num_layers,      #num_layers层数
            dropout=args.dropout,   #dropout概率参数
            batch_first=False,
            bidirectional=True
        )
        self.dropout_out_module = nn.Dropout(args.dropout)

        self.padding_idx = dictionary.pad()  #pad()又是这个用来对不够长的文段进行pad,然后返回索引

    def combine_bidir(self, outs, bsz: int):
        out = outs.view(self.num_layers, 2, bsz, -1).transpose(1, 2).contiguous()
        return out.view(self.num_layers, bsz, -1) #就是对outs结构的重新排布

    def forward(self, src_tokens, **unused): #定义encoder的运行函数了
        bsz, seqlen = src_tokens.size() #获取tokens的数量

        # get embeddings
        x = self.embed_tokens(src_tokens) #对tokens字符进行embedding得到向量序列
        x = self.dropout_in_module(x)   #经过一次dropout,防止overfit

        # B x T x C -> T x B x C
        x = x.transpose(0, 1)

        # pass thru bidirectional RNN
        h0 = x.new_zeros(2 * self.num_layers, bsz, self.hidden_dim) #创建一个多维向量
        x, final_hiddens = self.rnn(x, h0) #将x数据 和 h0传进到rnn模型中,得到输出x和final_hiddens
        outputs = self.dropout_out_module(x) #再将x通过一个dropout得到outputs
        # outputs = [sequence len, batch size, hid dim * directions]
        # hidden =  [num_layers * directions, batch size  , hid dim]

        # Since Encoder is bidirectional, we need to concatenate the hidden states of two directions
        final_hiddens = self.combine_bidir(final_hiddens, bsz)
        # hidden =  [num_layers x batch x num_directions*hidden]

        encoder_padding_mask = src_tokens.eq(self.padding_idx).t()
        return tuple(
            (
                outputs,  # seq_len x batch x hidden
                final_hiddens,  # num_layers x batch x num_directions*hidden
                encoder_padding_mask,  # seq_len x batch
            )
        )

    def reorder_encoder_out(self, encoder_out, new_order): #用于beam_search,反正不重要
        # This is used by fairseq's beam search. How and why is not particularly important here.
        return tuple(
            (
                encoder_out[0].index_select(1, new_order),
                encoder_out[1].index_select(1, new_order),
                encoder_out[2].index_select(1, new_order),
            )
        )
2.attention函数的设计:
class AttentionLayer(nn.Module): #用nn.Module设计一个self-attention的网络结构
    def __init__(self, input_embed_dim, source_embed_dim, output_embed_dim, bias=False): #定义初始化函数
        super().__init__()

        self.input_proj = nn.Linear(input_embed_dim, source_embed_dim, bias=bias) #第一个Linear层-input
        self.output_proj = nn.Linear(
            input_embed_dim + source_embed_dim, output_embed_dim, bias=bias  #第二个Linear层-output
        )

    def forward(self, inputs, encoder_outputs, encoder_padding_mask): #定义运行函数
        # inputs: T, B, dim
        # encoder_outputs: S x B x dim
        # padding mask:  S x B

        # convert all to batch first
        #通过transpose将这些数据都转化为第零维的是batch
        inputs = inputs.transpose(1,0) # B, T, dim
        encoder_outputs = encoder_outputs.transpose(1,0) # B, S, dim
        encoder_padding_mask = encoder_padding_mask.transpose(1,0) # B, S

        # project to the dimensionality of encoder_outputs
        x = self.input_proj(inputs) #调用input_linear函数

        # compute attention
        # (B, T, dim) x (B, dim, S) = (B, T, S) #这里说的就是批量的矩阵乘法运算
        attn_scores = torch.bmm(x, encoder_outputs.transpose(1,2))

        # cancel the attention at positions corresponding to padding
        if encoder_padding_mask is not None:
            # leveraging broadcast  B, S -> (B, 1, S)
            encoder_padding_mask = encoder_padding_mask.unsqueeze(1)
            attn_scores = (
                attn_scores.float()
                .masked_fill_(encoder_padding_mask, float("-inf"))
                .type_as(attn_scores)
            )  # FP16 support: cast to float and back

        # softmax on the dimension corresponding to source sequence
        attn_scores = F.softmax(attn_scores, dim=-1)  #将attn_scores通过一个softmax

        # shape (B, T, S) x (B, S, dim) = (B, T, dim) weighted sum
        x = torch.bmm(attn_scores, encoder_outputs) #再次进行矩阵乘法

        # (B, T, dim)
        x = torch.cat((x, inputs), dim=-1) #沿着最后一维进行向量的拼接
        x = torch.tanh(self.output_proj(x)) # concat + linear + tanh(双曲正切值)

        # restore shape (B, T, dim) -> (T, B, dim)
        return x.transpose(1,0), attn_scores  #返回x,和对应的attn_scores分数
3.Decoder的结构设计:
class RNNDecoder(FairseqIncrementalDecoder): #继承来自FairseqIncrementalDecoder,有点d
    def __init__(self, args, dictionary, embed_tokens): #初始化参数:和encoder那边一样的基本
        super().__init__(dictionary)
        self.embed_tokens = embed_tokens

        #2个断言,不用管
        assert args.decoder_layers == args.encoder_layers, f"""seq2seq rnn requires that encoder
        and decoder have same layers of rnn. got: {args.encoder_layers, args.decoder_layers}"""
        assert args.decoder_ffn_embed_dim == args.encoder_ffn_embed_dim*2, f"""seq2seq-rnn requires
        that decoder hidden to be 2*encoder hidden dim. got: {args.decoder_ffn_embed_dim, args.encoder_ffn_embed_dim*2}"""

        #把参数传进去
        self.embed_dim = args.decoder_embed_dim
        self.hidden_dim = args.decoder_ffn_embed_dim
        self.num_layers = args.decoder_layers


        self.dropout_in_module = nn.Dropout(args.dropout)
        self.rnn = nn.GRU( #取nn.GRU模板作为rnn结构
            self.embed_dim,
            self.hidden_dim,
            self.num_layers,
            dropout=args.dropout,
            batch_first=False,
            bidirectional=False
        )
        self.attention = AttentionLayer(  #把上面定义的那个attentionLayer涌过来
            self.embed_dim, self.hidden_dim, self.embed_dim, bias=False
        )
        # self.attention = None
        self.dropout_out_module = nn.Dropout(args.dropout)

        if self.hidden_dim != self.embed_dim: #是否需要Linear层的问题
            self.project_out_dim = nn.Linear(self.hidden_dim, self.embed_dim)
        else:
            self.project_out_dim = None

        if args.share_decoder_input_output_embed:
            self.output_projection = nn.Linear(
                self.embed_tokens.weight.shape[1],
                self.embed_tokens.weight.shape[0],
                bias=False,
            )
            self.output_projection.weight = self.embed_tokens.weight
        else:
            self.output_projection = nn.Linear(
                self.output_embed_dim, len(dictionary), bias=False
            )
            nn.init.normal_(
                self.output_projection.weight, mean=0, std=self.output_embed_dim ** -0.5
            )

    def forward(self, prev_output_tokens, encoder_out, incremental_state=None, **unused): #定义整个Decoder的运行过程
        # extract the outputs from encoder
        encoder_outputs, encoder_hiddens, encoder_padding_mask = encoder_out #从encoder那里取到数据
        # outputs:          seq_len x batch x num_directions*hidden
        # encoder_hiddens:  num_layers x batch x num_directions*encoder_hidden
        # padding_mask:     seq_len x batch

        if incremental_state is not None and len(incremental_state) > 0:
            # if the information from last timestep is retained, we can continue from there instead of starting from bos
            prev_output_tokens = prev_output_tokens[:, -1:]
            cache_state = self.get_incremental_state(incremental_state, "cached_state")
            prev_hiddens = cache_state["prev_hiddens"]
        else:
            # incremental state does not exist, either this is training time, or the first timestep of test time
            # prepare for seq2seq: pass the encoder_hidden to the decoder hidden states
            prev_hiddens = encoder_hiddens

        bsz, seqlen = prev_output_tokens.size()

        #主要的操作都在下面了哇!
        # embed tokens
        x = self.embed_tokens(prev_output_tokens) #对tokens进行embedding得到向量序列
        x = self.dropout_in_module(x)       #通过一次dropout

        # B x T x C -> T x B x C
        x = x.transpose(0, 1)

        # decoder-to-encoder attention
        if self.attention is not None:
            x, attn = self.attention(x, encoder_outputs, encoder_padding_mask) #有attention就进行attention

        # pass thru unidirectional RNN
        x, final_hiddens = self.rnn(x, prev_hiddens)  #通过rnn结构
        # outputs = [sequence len, batch size, hid dim]
        # hidden =  [num_layers * directions, batch size  , hid dim]
        x = self.dropout_out_module(x)

        # project to embedding size (if hidden differs from embed size, and share_embedding is True,
        # we need to do an extra projection)
        if self.project_out_dim != None:
            x = self.project_out_dim(x)

        # project to vocab size
        x = self.output_projection(x)

        # T x B x C -> B x T x C
        x = x.transpose(1, 0)

        # if incremental, record the hidden states of current timestep, which will be restored in the next timestep
        cache_state = {
            "prev_hiddens": final_hiddens,
        }
        self.set_incremental_state(incremental_state, "cached_state", cache_state)

        return x, None

    def reorder_incremental_state( #下面就是用来进行beam_search的内容,暂时不管了
        self,
        incremental_state,
        new_order,
    ):
        # This is used by fairseq's beam search. How and why is not particularly important here.
        cache_state = self.get_incremental_state(incremental_state, "cached_state")
        prev_hiddens = cache_state["prev_hiddens"]
        prev_hiddens = [p.index_select(0, new_order) for p in prev_hiddens]
        cache_state = {
            "prev_hiddens": torch.stack(prev_hiddens),
        }
        self.set_incremental_state(incremental_state, "cached_state", cache_state)
        return
目前实力还不足以让我完成hw5,君子报仇,十年不晚
