1. 快速生成logger
-
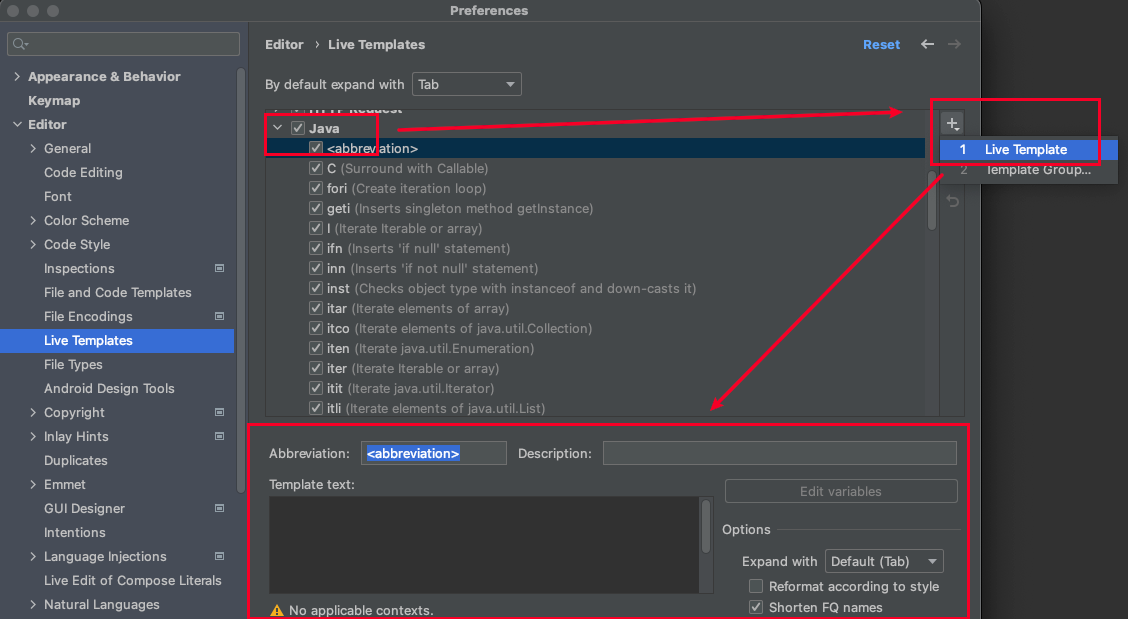
打开 Settings,找到 Editor 目录下的 Live Templates

-
选中 Java,点击右侧的加号,创建一个新的模板
-
在创建模板的相关位置,填上对应的值
-
Abbreviation:触发的关键字(此处我使用的是 logg)
-
Description:模板的描述
-
Template text:具体的代码
private static final org.slf4j.Logger logger = org.slf4j.LoggerFactory.getLogger($className$.class);
-
-
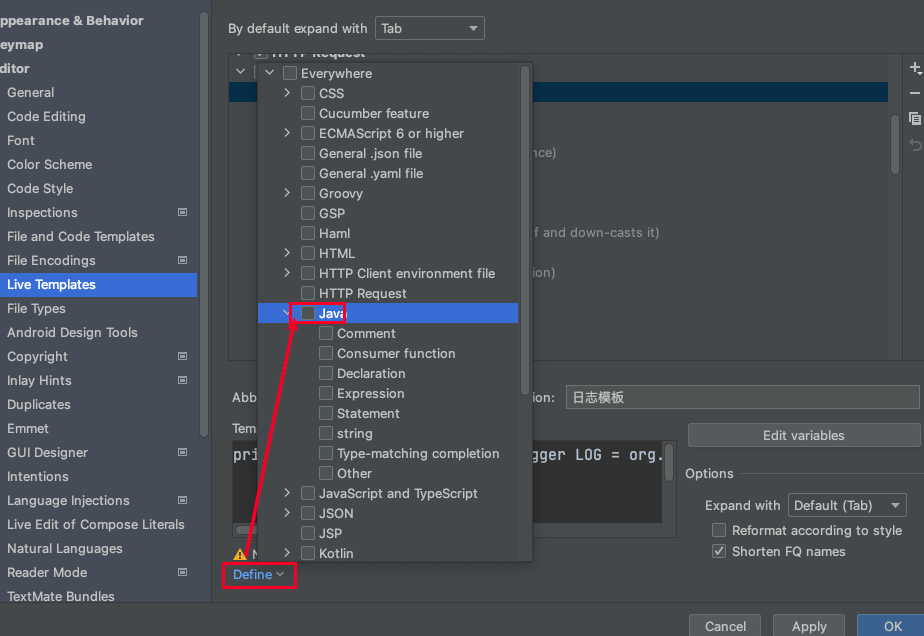
点击下方 Define 选择生效的场景
-
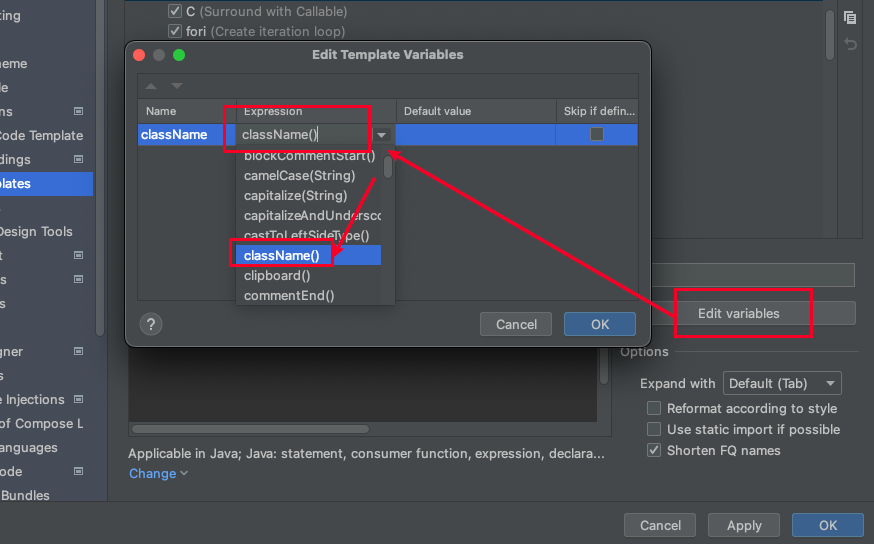
点击右侧 Edit variables,在 Expression 中选择 className()
-
在需要使用的地方输入自定义的关键字即可

2. 通过Maven的profile配置实现动态切换环境
背景:实现无需在代码中通过修改 spring.profiles.active=dev 配置信息才能切换环境的需求
maven 中提供了一个 profile 配置项,可以在打包时动态的指定环境配置
-
在 配置文件 中,更改 spring.profiles.active
spring.profiles.active = @env@注意:修改为这种形式,在项目启动时可能会报错( found character ‘@’ that cannot start any token. (Do not use @ for indentation) ),如果报错,可以在 pom.xml 文件中增加
<resources> <resource> <directory>src/main/resources</directory> <filtering>true</filtering> </resource> </resources> -
修改 pom.xml文件
<project> <!-- 其它代码省略...... --> <profiles> <!-- 开发环境 --> <profile> <id>dev</id> <properties> <env>dev</env> <!-- 之前写的@env@就是通过这里的配置切换环境 --> </properties> <activation> <activeByDefault>true</activeByDefault> <!-- 指定缺省环境 --> </activation> </profile> <!-- 测试环境 --> <profile> <id>test</id> <properties> <env>test</env> </properties> </profile> <!-- 生产环境 --> <profile> <id>prod</id> <properties> <env>prod</env> </properties> </profile> </profiles> </project> -
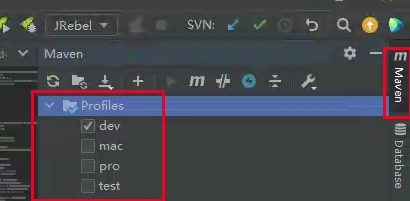
此时,我们就默认以 dev 为工作环境了,如果需要切换,只需点开 maven 面板(如果找不到,可通过菜单 View -> Tool Windows -> Maven Projects 展示出来),选择对应的环境即可
3. IDEA常用基础设置
参考自idea使用
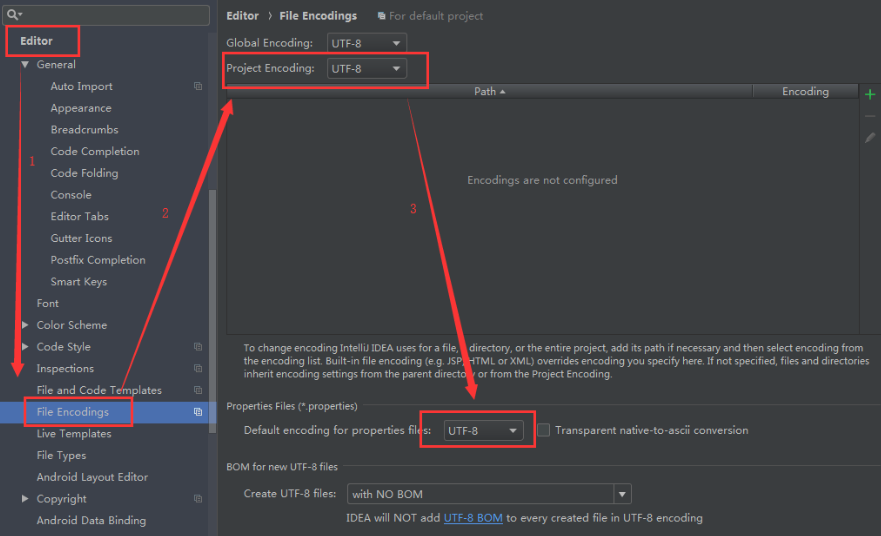
3.1 编码设置
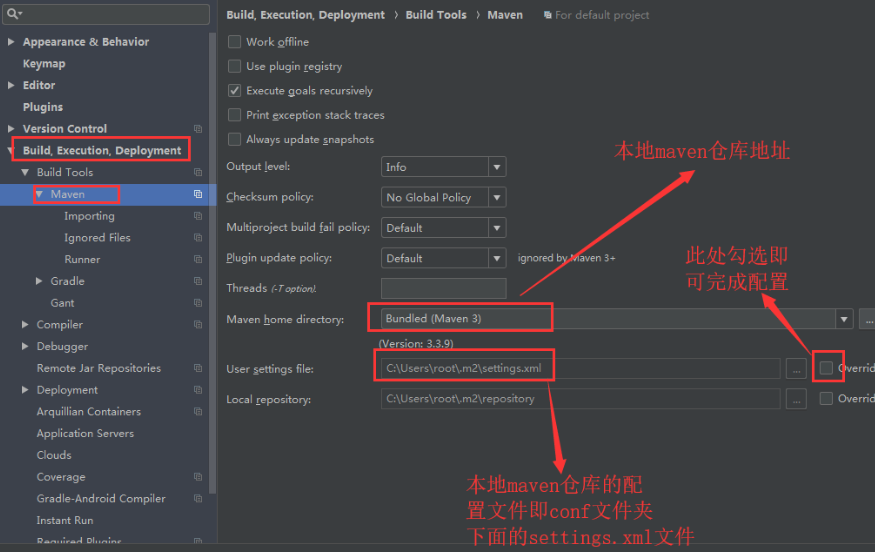
3.2 maven 配置
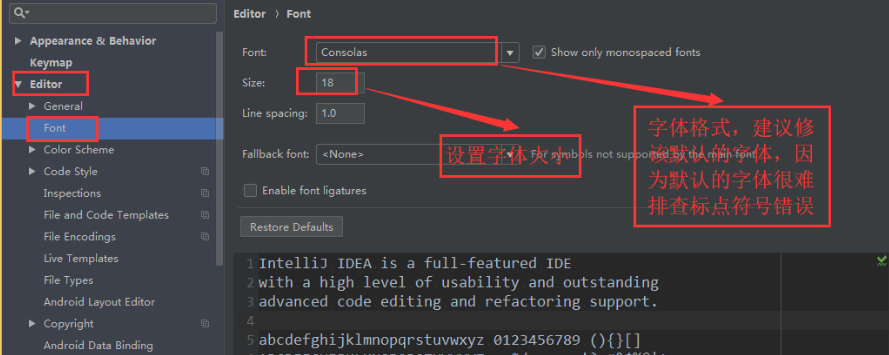
3.3 设置字体格式
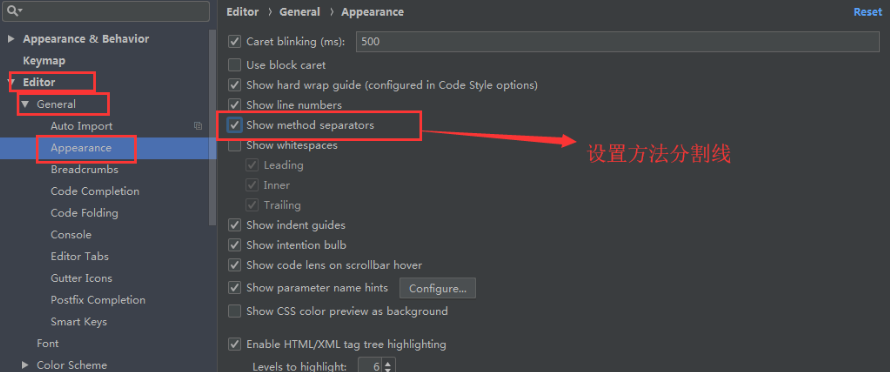
3.4 设置方法分割线
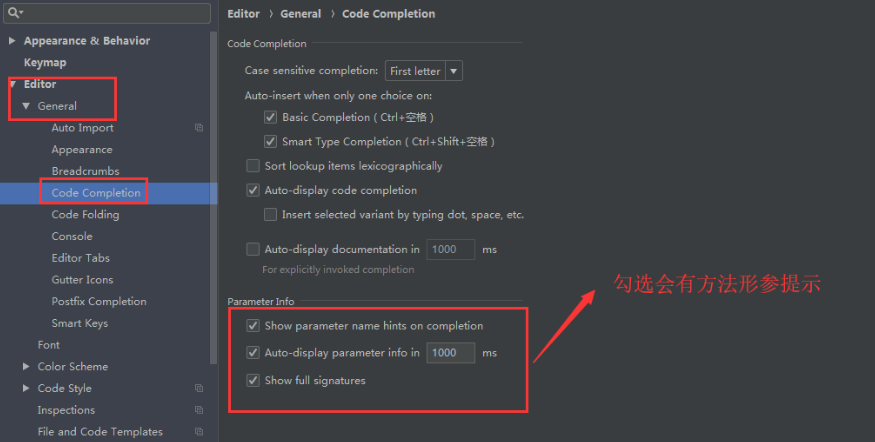
3.5 设置方法形参参数提示
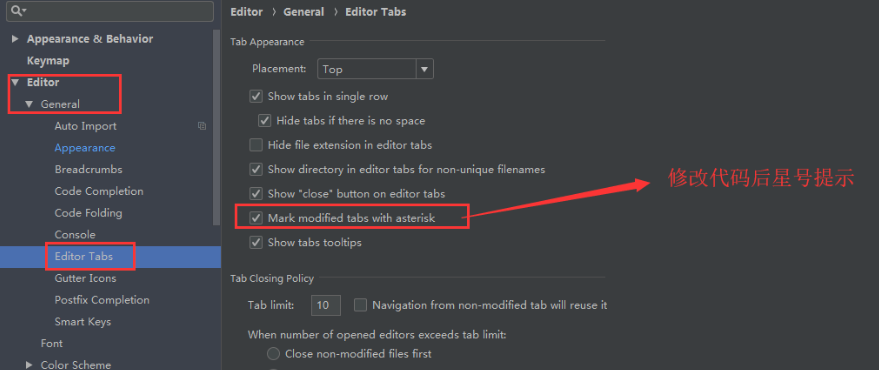
3.6 修改代码后,通过*号提示未保存
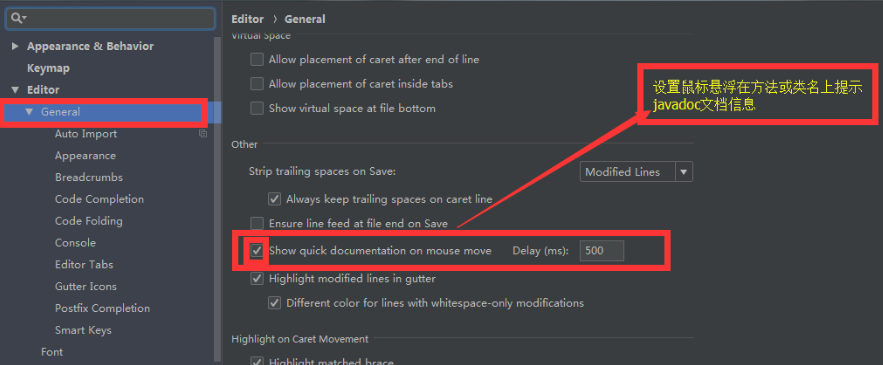
3.7 鼠标悬浮显示 javadoc
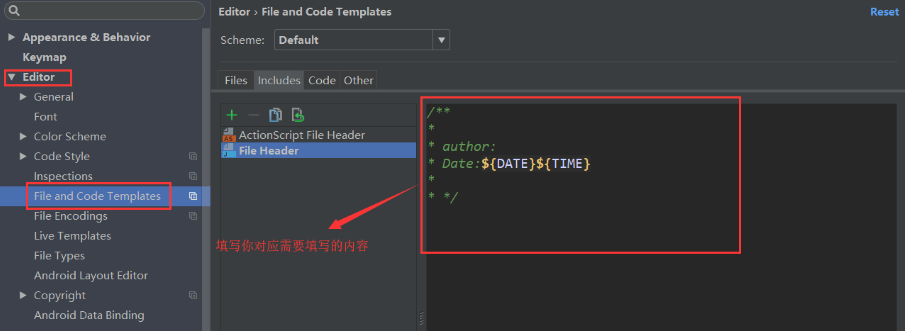
3.8 新建类时,增加默认注释信息
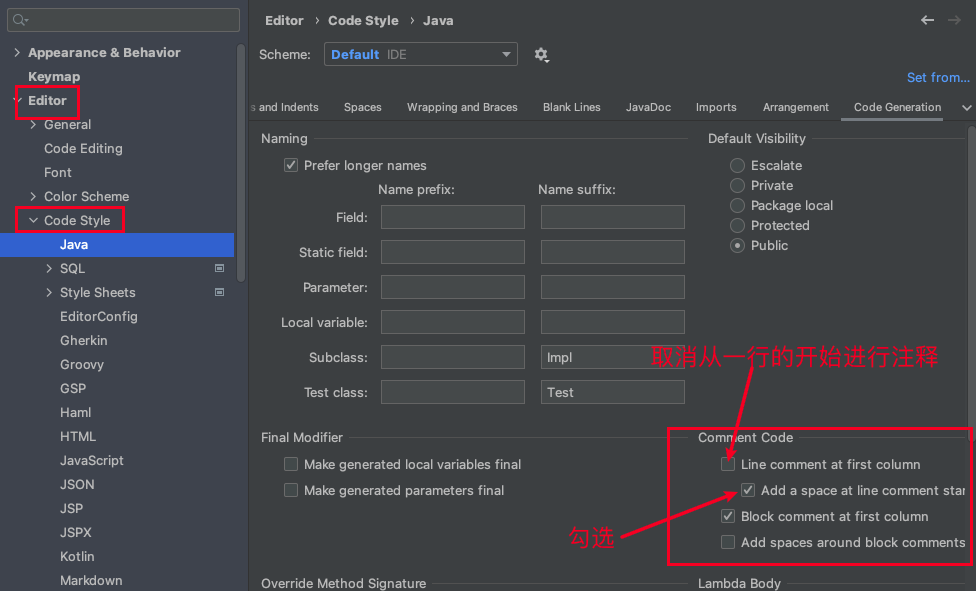
3.9 修改IDEA注释风格
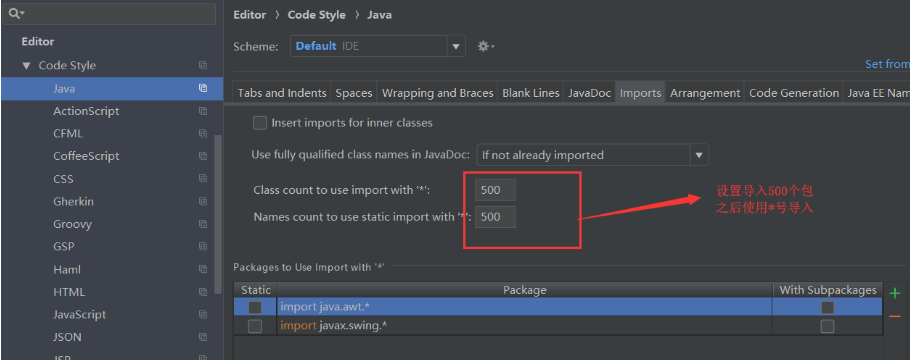
3.10 设置 IDEA 不直接 * 导入所有包
3.11 设置不下载索引,使用本地索引

