Spring整合Junit4和JdbcTemplater如下所示:
我们所使用的junit的jar包不同,可以整合不同版本的junit。
我们导入的依赖如下所示:
<?xml version="1.0" encoding="UTF-8"?>
<project xmlns="http://maven.apache.org/POM/4.0.0"
         xmlns:xsi="http://www.w3.org/2001/XMLSchema-instance"
         xsi:schemaLocation="http://maven.apache.org/POM/4.0.0 http://maven.apache.org/xsd/maven-4.0.0.xsd">
    <modelVersion>4.0.0</modelVersion>

    <groupId>com.rgf.spring</groupId>
    <artifactId>spring-transaction</artifactId>
    <version>1.0-SNAPSHOT</version>
    <packaging>jar</packaging>

    <properties>
        <maven.compiler.source>8</maven.compiler.source>
        <maven.compiler.target>8</maven.compiler.target>
        <project.build.sourceEncoding>UTF-8</project.build.sourceEncoding>
    </properties>
    <dependencies>
        <!--基于Maven依赖传递性,导入spring-context依赖即可导入当前所需所有jar包-->
        <!-- https://mvnrepository.com/artifact/org.springframework/spring-context -->
        <dependency>
            <groupId>org.springframework</groupId>
            <artifactId>spring-context</artifactId>
            <version>5.3.1</version>
        </dependency>
        <!--Spring持久化层支持jar包-->
        <!--Spring在执行持久化层操作,与持久层技术进行整合过程中,需要使用orm,jdbc.trx这三个jar包-->
        <dependency>
            <!--对象关系映射-->
            <groupId>org.springframework</groupId>
            <artifactId>spring-orm</artifactId>
            <version>5.3.1</version>
        </dependency>
        <!--spring测试相关-->
        <dependency>
            <groupId>org.springframework</groupId>
            <artifactId>spring-test</artifactId>
            <version>5.3.1</version>
        </dependency>
        <!--junit测试-->
        <dependency>
            <groupId>junit</groupId>
            <artifactId>junit</artifactId>
            <version>4.12</version>
            <scope>test</scope>
        </dependency>
        <!--MySQL驱动-->
        <dependency>
            <groupId>mysql</groupId>
            <artifactId>mysql-connector-java</artifactId>
            <version>8.0.22</version>
        </dependency>
        <!--数据源-->
        <dependency>
            <groupId>com.alibaba</groupId>
            <artifactId>druid</artifactId>
            <version>1.0.31</version>
        </dependency>
    </dependencies>
</project>
其中的事务管理如下所示:
我们的配置文件编写如下所示:
<?xml version="1.0" encoding="UTF-8"?>
<beans xmlns="http://www.springframework.org/schema/beans"
       xmlns:xsi="http://www.w3.org/2001/XMLSchema-instance"
       xmlns:context="http://www.springframework.org/schema/context"
       xsi:schemaLocation="http://www.springframework.org/schema/beans
       http://www.springframework.org/schema/beans/spring-beans.xsd
       http://www.springframework.org/schema/context
       https://www.springframework.org/schema/context/spring-context.xsd"
>

    <!--引入jdbc.properties-->
    <context:property-placeholder location="classpath:jdbc.properties"></context:property-placeholder>
    <bean id="dataSource" class="com.alibaba.druid.pool.DruidDataSource">
        <property name="driverClassName" value="${jdbc.driver}"></property>
        <property name="url" value="${jdbc.url}"></property>
        <property name="username" value="${jdbc.username}"></property>
        <property name="password" value="${jdbc.password}"></property>
    </bean>
    <bean class="org.springframework.jdbc.core.JdbcTemplate">
        <property name="dataSource" ref="dataSource"></property>
    </bean>

</beans>
我们选定一个数据库表来进行测试如下所示:
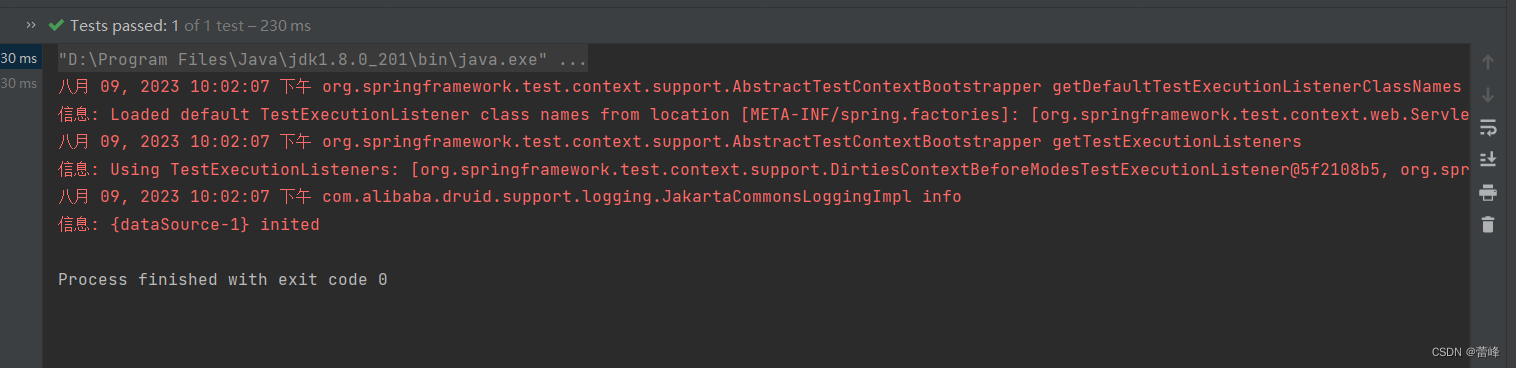
package com.rgf.spring.test;

import org.junit.Test;
import org.junit.runner.RunWith;
import org.springframework.beans.factory.annotation.Autowired;
import org.springframework.jdbc.core.JdbcTemplate;
import org.springframework.test.context.ContextConfiguration;
import org.springframework.test.context.junit4.SpringJUnit4ClassRunner;
//指定当前测试类在spring的测试环境中执行,此时就可以通过注入的方式直接来获取IOC容器中的bean
@RunWith(SpringJUnit4ClassRunner.class)
//设置spring测试环境的配置文件
//classpath:类路径
@ContextConfiguration("classpath:spring-jdbc.xml")
public class JdbcTemplateTest {
    @Autowired
    private JdbcTemplate jdbcTemplate;
    @Test
    public void  testInsert(){
        String sql="insert into t_user values(null,?,?,?,?,?)";
        jdbcTemplate.update(sql,"root","123",23,"男","123@qq.com");
    }
}
我们运行之后如下所示:
我们在数据库表进行刷新之后如下所示:
我们完成添加功能之后,我们进行查看查询功能,我们进行测试如下:
@Test
    public  void  testGetUserById(){
        String sql="select * from t_user where id=?";
        User user = jdbcTemplate.queryForObject(sql, new BeanPropertyRowMapper<>(User.class), 1);
        System.out.println(user);
    }
测试完成之后如下所示:
我们发现成功的查询出来了
我们进行查询多条数据:
 @Test
    public  void  testGetAllUser(){
        String sql="select * from t_user";
        List<User> list = jdbcTemplate.query(sql, new BeanPropertyRowMapper<>(User.class));
        list.forEach(System.out::println);
    }
运行之后如下所示:
我们查询总记录数如下所示:
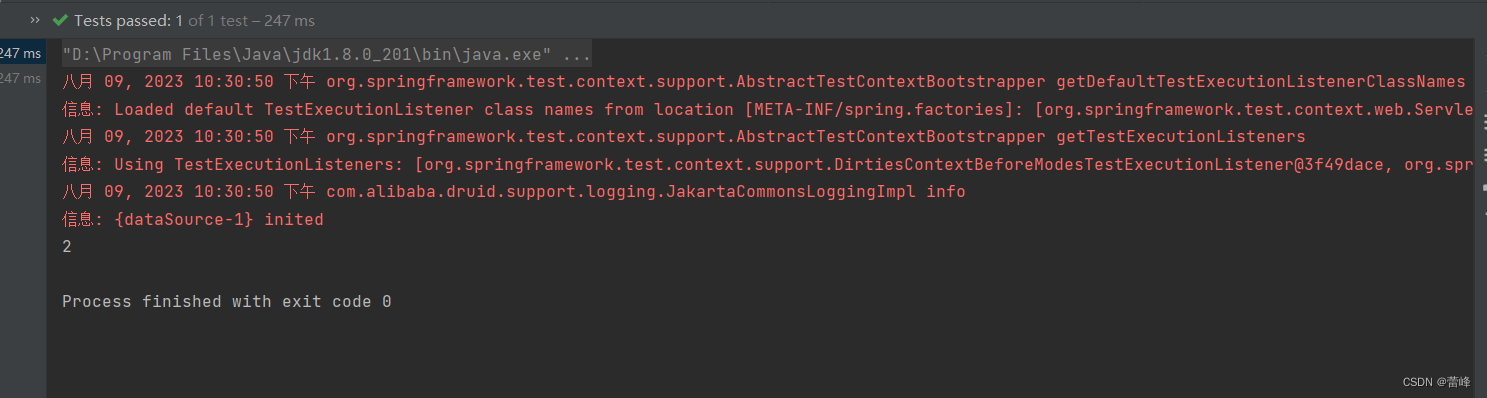
 @Test
    public  void  testGetCount(){
        String sql="select count(*) from t_user";
        Integer count = jdbcTemplate.queryForObject(sql, Integer.class);
        System.out.println(count);
    }
运行之后如下所示:


声明式事务概念:
编程式事务:
事务功能的相关操作全部通过自己编写代码来实现:
 Connection conn=...;
    try

    {
        //开启事务:关闭事务的自动提交
        conn.setAutoCommit(false);
        //核心操作
        //提交事务
        conn.commit();
    }catch(Exception e){
        //回滚事务
        conn.rollback();
    }finally {
        //释放数据库连接
        conn.close();
    }
编程式的方式存在缺陷:
细节没有被屏蔽:具体操作过程中,所以细节都需要程序员自己来完成,比较繁琐。
代码复用性不高:如果没有有效抽取出来,每次实现功能都需要自己编写代码,代码就没有得到复用。
声明式事务:
既然事务控制的代码有规律可循,代码的结构基本是确定的,所以框架就可以将固定模式的代码抽取出来,进行相关的封装。
封装起来后,我们只需要在配置文件中进行简单的配置即可完成操作。
好处1:提高开发效率
好处2:消除了冗余的代码
好处3:框架会综合考虑相关领域中在实际开发环境下有可能遇到的各种问题,进行了健壮性、性能等各个方面的优化
所以,我们可以总结下面两个概念:
编程式:自己写代码实现功能
声明式:通过配置让框架实现功能
基于注解的声明式事务:
我们所导入的依赖如下所示:
<?xml version="1.0" encoding="UTF-8"?>
<project xmlns="http://maven.apache.org/POM/4.0.0"
         xmlns:xsi="http://www.w3.org/2001/XMLSchema-instance"
         xsi:schemaLocation="http://maven.apache.org/POM/4.0.0 http://maven.apache.org/xsd/maven-4.0.0.xsd">
    <modelVersion>4.0.0</modelVersion>

    <groupId>com.rgf.spring</groupId>
    <artifactId>spring-transaction</artifactId>
    <version>1.0-SNAPSHOT</version>
    <packaging>jar</packaging>

    <properties>
        <maven.compiler.source>8</maven.compiler.source>
        <maven.compiler.target>8</maven.compiler.target>
        <project.build.sourceEncoding>UTF-8</project.build.sourceEncoding>
    </properties>
    <dependencies>
        <!--基于Maven依赖传递性,导入spring-context依赖即可导入当前所需所有jar包-->
        <!-- https://mvnrepository.com/artifact/org.springframework/spring-context -->
        <dependency>
            <groupId>org.springframework</groupId>
            <artifactId>spring-context</artifactId>
            <version>5.3.1</version>
        </dependency>
        <!--Spring持久化层支持jar包-->
        <!--Spring在执行持久化层操作,与持久层技术进行整合过程中,需要使用orm,jdbc.trx这三个jar包-->
        <dependency>
            <!--对象关系映射-->
            <groupId>org.springframework</groupId>
            <artifactId>spring-orm</artifactId>
            <version>5.3.1</version>
        </dependency>
        <!--spring测试相关-->
        <dependency>
            <groupId>org.springframework</groupId>
            <artifactId>spring-test</artifactId>
            <version>5.3.1</version>
        </dependency>
        <!--junit测试-->
        <dependency>
            <groupId>junit</groupId>
            <artifactId>junit</artifactId>
            <version>4.12</version>
            <scope>test</scope>
        </dependency>
        <!--MySQL驱动-->
        <dependency>
            <groupId>mysql</groupId>
            <artifactId>mysql-connector-java</artifactId>
            <version>8.0.22</version>
        </dependency>
        <!--数据源-->
        <dependency>
            <groupId>com.alibaba</groupId>
            <artifactId>druid</artifactId>
            <version>1.0.31</version>
        </dependency>
    </dependencies>
</project>
接下来我们创建jdbc.properties:
jdbc.driver=com.mysql.cj.jdbc.Driver
jdbc.url=jdbc:mysql://localhost:3306/ssm?serverTimezone=UTC
jdbc.username=root
jdbc.password=123456
接下来我们进行配置spring的配置文件:
<?xml version="1.0" encoding="UTF-8"?>
<beans xmlns="http://www.springframework.org/schema/beans"
       xmlns:xsi="http://www.w3.org/2001/XMLSchema-instance"
       xmlns:context="http://www.springframework.org/schema/context"
       xsi:schemaLocation="http://www.springframework.org/schema/beans
       http://www.springframework.org/schema/beans/spring-beans.xsd
       http://www.springframework.org/schema/context
       https://www.springframework.org/schema/context/spring-context.xsd"
>

    <!--引入jdbc.properties-->
    <context:property-placeholder location="classpath:jdbc.properties"></context:property-placeholder>
    <bean id="dataSource" class="com.alibaba.druid.pool.DruidDataSource">
        <property name="driverClassName" value="${jdbc.driver}"></property>
        <property name="url" value="${jdbc.url}"></property>
        <property name="username" value="${jdbc.username}"></property>
        <property name="password" value="${jdbc.password}"></property>
    </bean>
    <bean class="org.springframework.jdbc.core.JdbcTemplate">
        <property name="dataSource" ref="dataSource"></property>
    </bean>

</beans>
我们再创建一个tx-annotation配置文件,如下所示:
<?xml version="1.0" encoding="UTF-8"?>
<beans xmlns="http://www.springframework.org/schema/beans"
xmlns:xsi="http://www.w3.org/2001/XMLSchema-instance"
xmlns:context="http://www.springframework.org/schema/context"
xsi:schemaLocation="http://www.springframework.org/schema/beans http://www.springframework.org/schema/beans/spring-beans.xsd http://www.springframework.org/schema/context https://www.springframework.org/schema/context/spring-context.xsd">
<!--引入jdbc.properties-->
<context:property-placeholder location="classpath:jdbc.properties"></context:property-placeholder>
<bean id="dataSource" class="com.alibaba.druid.pool.DruidDataSource">
<property name="driverClassName" value="${jdbc.driver}"></property>
<property name="url" value="${jdbc.url}"></property>
<property name="username" value="${jdbc.username}"></property>
<property name="password" value="${jdbc.password}"></property>
</bean>
<bean class="org.springframework.jdbc.core.JdbcTemplate">
<property name="dataSource" ref="dataSource"></property>
</bean>
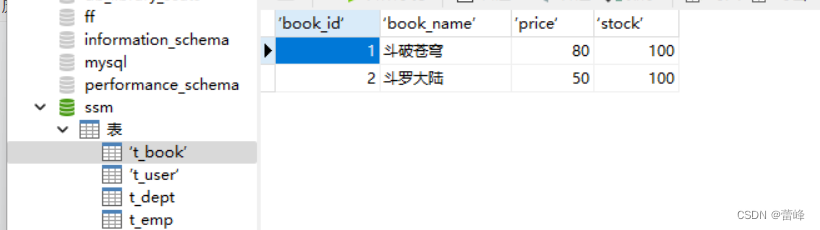
</beans>之后我们进行创建表:
CREATE TABLE ‘t_book’ (
’book_id‘ INT(11) NOT NULL AUTO_INCREMENT COMMENT '主键',
‘book_name’ VARCHAR(20) DEFAULT NULL COMMENT '图书名称',
’price‘ INT(11) DEFAULT NULL COMMENT '价格',
‘stock’ INT(10) UNSIGNED DEFAULT NULL COMMENT '库存(无符号)',
PRIMARY KEY (’book_id‘)
) ENGINE=INNODB AUTO_INCREMENT=3 DEFAULT CHARSET=utf8;
INSERT INTO ‘t_book’ (’book_id‘,‘book_name’,’price‘,‘stock’) VALUES (1,'斗破苍穹',80,100),
(2,'斗罗大陆',50,100);
CREATE TABLE ’t_user‘ (
’user_id‘ INT(11) NOT NULL AUTO_INCREMENT COMMENT '主键',
‘username’ VARCHAR(20) DEFAULT NULL COMMENT '用户名',
’balance‘ INT(10) UNSIGNED DEFAULT NULL COMMENT '余额(无符号)',
PRIMARY KEY(’user_id‘)
) ENGINE=INNODB AUTO_INCREMENT=2 DEFAULT CHARSET=utf8;
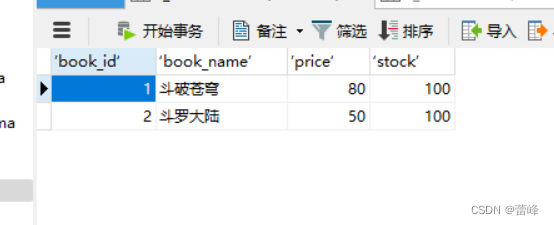
insert into ’t_user‘ (’user_id‘,‘username’,’balance‘) VALUES (1,'admin',50);我们进行运行之后如下所示:
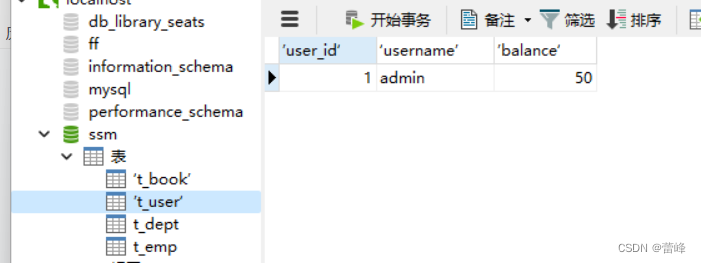
我们成功创建表之后,我们通过用户购买书的过程中,通过余额不足来测试声明式事务。通过表可以看到余额为balance:50
完成表的创建之后,我们进行示例如下所示:
我们现进行创建service层,controller层,dao层,:
我们创建controller层如下所示:
package com.rgf.spring.controller;

import com.rgf.spring.service.BookService;
import org.springframework.beans.factory.annotation.Autowired;
import org.springframework.stereotype.Controller;


@Controller
public class BookController {
    @Autowired
    private BookService bookService;

    public void  buyBook(Integer userId,Integer bookId){

        bookService.buyBook(userId,bookId);
     }
}
之后我们进行创建service层:首先创建接口如下:
package com.rgf.spring.service;

public interface BookService {
    void  buyBook(Integer userId,Integer bookId);
}
我们创建service层的实现类如下所示:
package com.rgf.spring.service;

import com.rgf.spring.dao.BookDao;
import org.springframework.beans.factory.annotation.Autowired;
import org.springframework.jdbc.core.JdbcTemplate;
import org.springframework.stereotype.Service;
import org.springframework.transaction.annotation.Transactional;
@Transactional
@Service
public class BookServiceImpl implements BookService{
    /**
     * 买书
     * @param userId
     * @param bookId
     *
     */
    @Autowired
    private BookDao bookDao;
    @Override
    public void  buyBook(Integer userId, Integer bookId){
        //查询图书的价格
        Integer price=bookDao.getPriceByBookId(bookId);
        //更新图书的库存
        bookDao.updateStock(bookId);
        //更新用户的余额
        bookDao.updateBalance(userId,price);
    }

}
之后我们创建dao层:
package com.rgf.spring.dao;

import org.springframework.beans.factory.annotation.Autowired;
import org.springframework.beans.factory.annotation.Qualifier;
import org.springframework.jdbc.core.JdbcTemplate;
import org.springframework.stereotype.Repository;

@Repository
public class BookDaoImpl implements BookDao{


    @Autowired
    private JdbcTemplate jdbcTemplate;
    @Override
    public Integer getPriceByBookId(Integer bookId) {
       String sql="SELECT price from t_book where book_id=?";
      return jdbcTemplate.queryForObject(sql, Integer.class,bookId);
    }

    @Override
    public void updateStock(Integer bookId) {
        String sql="update t_book set stock-=1 where book_id=?";
        jdbcTemplate.update(sql,bookId);
    }

    @Override
    public void updateBalance(Integer userId, Integer price) {
        String sql="update t_user set balance=balance-? where user_id=?";
        jdbcTemplate.update(sql,price,userId);
    }
}
package com.rgf.spring.dao;

public interface BookDao {
    /**
     * 根据图书的id查询图书的价格
     * @param bookId
     * @return
     */
    Integer getPriceByBookId(Integer bookId);

    /**
     * 更新图书的库存
     * @param bookId
     */
    void updateStock(Integer bookId);

    /**
     * 更新用户的余额
     * @param userId
     * @param price
     */
    void updateBalance(Integer userId,Integer price);
}
我们在接口里面定义方法之后,需要在实现类进行重写。
我们的自动装配如下所示:
我们利用事务进行查看:
package com.rgf.spring.dao;

import org.springframework.beans.factory.annotation.Autowired;
import org.springframework.beans.factory.annotation.Qualifier;
import org.springframework.jdbc.core.JdbcTemplate;
import org.springframework.stereotype.Repository;

@Repository
public class BookDaoImpl implements BookDao{


    @Autowired
    private JdbcTemplate jdbcTemplate;
    @Override
    public Integer getPriceByBookId(Integer bookId) {
       String sql="SELECT price from t_book where book_id=?";
      return jdbcTemplate.queryForObject(sql, Integer.class,bookId);
    }

    @Override
    public void updateStock(Integer bookId) {
        String sql="update t_book set stock-=1 where book_id=?";
        jdbcTemplate.update(sql,bookId);
    }

    @Override
    public void updateBalance(Integer userId, Integer price) {
        String sql="update t_user set balance=balance-? where user_id=?";
        jdbcTemplate.update(sql,price,userId);
    }
}
我们查看表的价格:
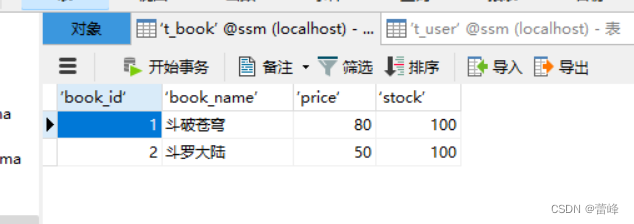

我们进行测试如下:用户1买一号位的书。
package com.rgf.spring.test;

import com.rgf.spring.controller.BookController;
import org.junit.Test;
import org.junit.runner.RunWith;
import org.springframework.beans.factory.annotation.Autowired;
import org.springframework.test.context.ContextConfiguration;
import org.springframework.test.context.junit4.SpringJUnit4ClassRunner;

@RunWith(SpringJUnit4ClassRunner.class)
@ContextConfiguration("classpath:tx-annotation.xml")
public class TxByAnnotationTest {
    @Autowired
    private BookController bookController;

    @Test
    public  void  testBuyBook(){
        bookController.buyBook(1,1);
    }

}
我们进行运行之后发现如下所示: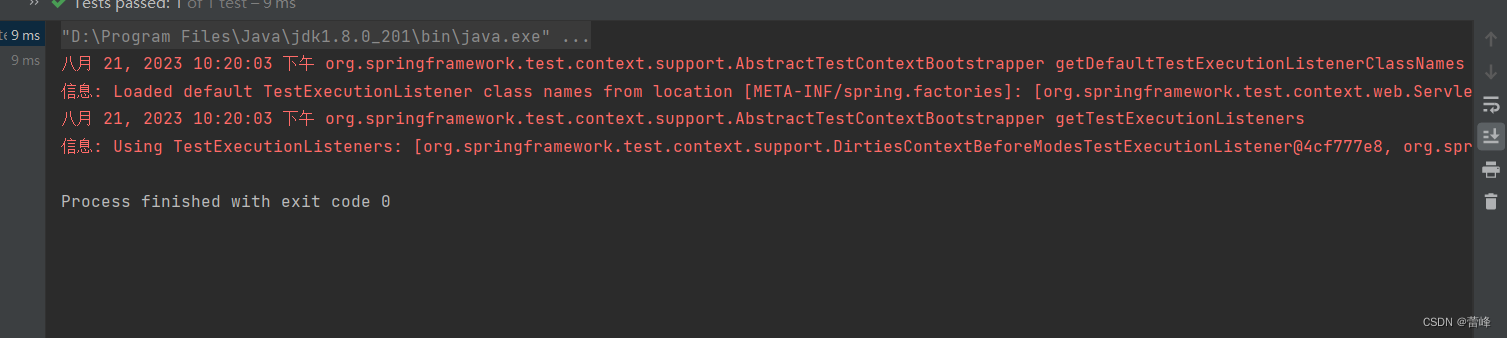
在没有事务的情况下,当我们进行测试的时候,一个sql语句独占一个事务且自动提交。所以前两条SQL语句成功,最后一条SQL语句失败的话,失败的不会影响上面运行成功的。我们只有·将他们放在同一事务里面,通过事务的代码去操作,如果有异常,则将整个事务都进行回滚,出现要么都成功要么都失败的情况。
我们进行测试事务如下所示:
<?xml version="1.0" encoding="UTF-8"?>
<beans xmlns="http://www.springframework.org/schema/beans"
       xmlns:xsi="http://www.w3.org/2001/XMLSchema-instance"
       xmlns:context="http://www.springframework.org/schema/context" xmlns:tx="http://www.springframework.org/schema/tx"
       xsi:schemaLocation="http://www.springframework.org/schema/beans http://www.springframework.org/schema/beans/spring-beans.xsd http://www.springframework.org/schema/context https://www.springframework.org/schema/context/spring-context.xsd http://www.springframework.org/schema/tx http://www.springframework.org/schema/tx/spring-tx.xsd">
  <!--扫描组件-->
    <context:component-scan base-package="com.rgf.spring"></context:component-scan>
    <!--引入jdbc.properties-->
    <context:property-placeholder location="classpath:jdbc.properties"></context:property-placeholder>
    <bean id="dataSource" class="com.alibaba.druid.pool.DruidDataSource">
        <property name="driverClassName" value="${jdbc.driver}"></property>
        <property name="url" value="${jdbc.url}"></property>
        <property name="username" value="${jdbc.username}"></property>
        <property name="password" value="${jdbc.password}"></property>
    </bean>
    <bean class="org.springframework.jdbc.core.JdbcTemplate">
        <property name="dataSource" ref="dataSource"></property>
    </bean>

    <!--配置事务管理器-->
    <bean id="transactionManager" class="org.springframework.jdbc.datasource.DataSourceTransactionManager">
        <property name="dataSource" ref="dataSource"></property>
    </bean>

    <!--开启事务的注解驱动-->
    <!--为环绕通知-->
    <!--在Spring配置文件里面,如果某一个属性的值为环绕型,当前这个属性值就会变为灰色-->
    <!--将事务管理器里面的环绕通知作用于他的连接点-->
    <!--开启事务的注解驱动
     将使用@Transactional注解所标识的方法或类中所有的方法使用事务进行管理
     transaction-manager属性设置事务管理器的id
     若事务管理器的bean的id默认为transactionManager,则该属性可以不写。
  -->
    <tx:annotation-driven transaction-manager="transactionManager"/>

</beans>
我们在service层的实现类里面进行设置事务管理器:
package com.rgf.spring.service;

import com.rgf.spring.dao.BookDao;
import org.springframework.beans.factory.annotation.Autowired;
import org.springframework.jdbc.core.JdbcTemplate;
import org.springframework.stereotype.Service;
import org.springframework.transaction.annotation.Transactional;
@Transactional
@Service
public class BookServiceImpl implements BookService{
    /**
     * 买书
     * @param userId
     * @param bookId
     *
     */
    @Autowired
    private BookDao bookDao;
    @Override
    public void  buyBook(Integer userId, Integer bookId){
        //查询图书的价格
        Integer price=bookDao.getPriceByBookId(bookId);
        //更新图书的库存
        bookDao.updateStock(bookId);
        //更新用户的余额
        bookDao.updateBalance(userId,price);
    }

}
我们进行测试如下所示:
package com.rgf.spring.test;

import com.rgf.spring.controller.BookController;
import org.junit.Test;
import org.junit.runner.RunWith;
import org.springframework.beans.factory.annotation.Autowired;
import org.springframework.test.context.ContextConfiguration;
import org.springframework.test.context.junit4.SpringJUnit4ClassRunner;

/**
 * 声明式事务的配置步骤:
 * 1.在spring的配置文件中来配置事务管理器
 * 2.开启事务的注解驱动
 * 3.在需要被事务管理的方法上,添加@Transactional注解,该方法就会被事务管理
 * @Transactional注解标识的位置:
 * 1.标识在方法上
 * 2.标识在类上,则类中所有的方法都会被事务管理
 */
@RunWith(SpringJUnit4ClassRunner.class)
@ContextConfiguration("classpath:tx-annotation.xml")
public class TxByAnnotationTest {
    @Autowired
    private BookController bookController;

    @Test
    public  void  testBuyBook(){
        bookController.buyBook(1,1);
    }

}
事务属性:
事务属性:只读
介绍:对一个查询操作来说,如果我们把它设置成只读,就能够明确告诉数据库,这个操作不涉及写操作。这样数据库就能够针对查询操作来进行优化。
只有当前的事务中只有查询操作时才可以将事务进行设置为只读,否则则会直接报错。
package com.rgf.spring.service;

import com.rgf.spring.dao.BookDao;
import org.springframework.beans.factory.annotation.Autowired;
import org.springframework.jdbc.core.JdbcTemplate;
import org.springframework.stereotype.Service;
import org.springframework.transaction.annotation.Transactional;
@Service
public class BookServiceImpl implements BookService{
    /**
     * 买书
     * @param userId
     * @param bookId
     *
     */
    @Autowired
    private BookDao bookDao;
    @Override
    @Transactional(
            readOnly = true
    )
    public void  buyBook(Integer userId, Integer bookId){
        //查询图书的价格
        Integer price=bookDao.getPriceByBookId(bookId);
        //更新图书的库存
        bookDao.updateStock(bookId);
        //更新用户的余额
        bookDao.updateBalance(userId,price);
    }

}
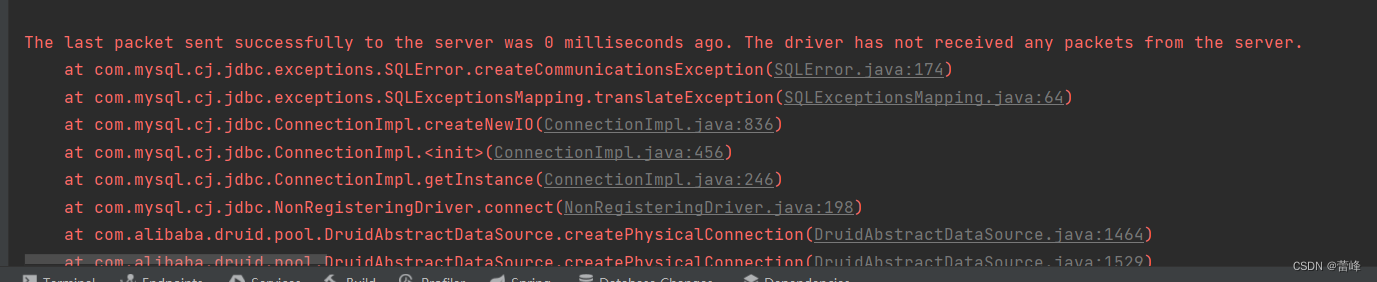
报错信息如下所示:

事务属性:超时
事务在执行过程中,有可能因为遇到某些问题,导致程序卡住,从而长时间占用数据库资源,而长时间占用资源,大概率是因为程序运行出现了问题,此时这个很可能出问题的程序应该被回滚,撤销它已做的操作,事务结束,把资源让出来,让其他正常程序可以执行。
我们进行测试如下所示:
package com.rgf.spring.service;

import com.rgf.spring.dao.BookDao;
import org.springframework.beans.factory.annotation.Autowired;
import org.springframework.jdbc.core.JdbcTemplate;
import org.springframework.stereotype.Service;
import org.springframework.transaction.annotation.Transactional;

import java.util.concurrent.TimeUnit;

@Service
public class BookServiceImpl implements BookService{
    /**
     * 买书
     * @param userId
     * @param bookId
     *
     */
    @Autowired
    private BookDao bookDao;
    @Override
    @Transactional(
           //readOnly=true
            timeout = 3
    )
    public void  buyBook(Integer userId, Integer bookId){
        try{
            TimeUnit.SECONDS.sleep(5);
        }catch (InterruptedException e){
            e.printStackTrace();
        }
        //查询图书的价格
        Integer price=bookDao.getPriceByBookId(bookId);
        //更新图书的库存
        bookDao.updateStock(bookId);
        //更新用户的余额
        bookDao.updateBalance(userId,price);
    }

}
我们发现报错如下所示:
即事务超时异常 。TransactionTimedOutException.
事务属性:回滚策略
声明式事务默认只针对运行时异常回滚,编译时异常不回滚
可以通过@Transactional中相关属性设置回滚策略
rollbackFor属性:需要设置一个Class类型的对象
rollbackForClassName属性:需要设置一个字符串类型的全类名
noRollbackFor属性:需要设置一个Class类型的对象
noRollbackForClassName属性:需要设置一个字符串类型的全类名
package com.rgf.spring.service;

import com.rgf.spring.dao.BookDao;
import org.springframework.beans.factory.annotation.Autowired;
import org.springframework.jdbc.BadSqlGrammarException;
import org.springframework.jdbc.core.JdbcTemplate;
import org.springframework.stereotype.Service;
import org.springframework.transaction.annotation.Transactional;

import java.sql.SQLSyntaxErrorException;
import java.util.concurrent.TimeUnit;

@Service
public class BookServiceImpl implements BookService{
    /**
     * 买书
     * @param userId
     * @param bookId
     *
     */
    @Autowired
    private BookDao bookDao;
    @Override
    @Transactional(
           //readOnly=true
           // timeout = 3
            //noRollbackFor = SQLSyntaxErrorException.class
            noRollbackForClassName="java.sql.SQLSyntaxErrorException.class"
    )
    public void  buyBook(Integer userId, Integer bookId){
        try{
            TimeUnit.SECONDS.sleep(5);
        }catch (InterruptedException e){
            e.printStackTrace();
        }
        //查询图书的价格
        Integer price=bookDao.getPriceByBookId(bookId);
        //更新图书的库存
        bookDao.updateStock(bookId);
        //更新用户的余额
        bookDao.updateBalance(userId,price);
        System.out.println(1/0);
    }

}
我们进行测试之后即会发现不会造成回滚。但是报错信息仍然会有。
事务属性:事务隔离级别
数据库系统必须具有隔离并发运行各个事务的能力,使他们不会相互影响,避免各种并发问题。一个事务与其他事务隔离的程度称为隔离级别。SQL标准中规定了多种事务隔离级别,不同隔离级别对应不同的干扰程度,隔离级别越高,数据一致性就越好,但并发性越弱。
隔离级别一共有四种:
读未提交 READ UNCOMMITED(Transaction01读取Transaction02未提交的修改)
读已提交 READ COMMITTED(要求Transaction01只能读取Transaction02已提交的修改)
可重复读 REPEAABLE READ(确保Transaction01可以多次从一个字段中读取到相同的值,即Transaction01执行期间禁止其他事务对这个字段进行更新)
串行化 SERIALZABLE(确保Transaction01可以多次从一个表中读取到相同的行,在Transaction01执行期间,禁止其他事务对这个表进行添加、更新、删除操作。可以避免任何并发问题。但性能十分低下。
各个隔离级别解决并发问题的能力见下表:
隔离级别 脏读 不可重复读 幻读 READ UNCOMMITED(读未提交) 有 有 有 READ COMMITTED (读已提交) 无 有 有 REPEAABLE READ(可重复读) 无 无 有 SERIALZABLE(串行化) 无 无 无 各种数据库产品对事务隔离级别的支持程度:
隔离级别 Oracle MySQL READ UNCOMMITED(读未提交) no yes READ COMMITTED (读已提交) yes(默认) yes REPEAABLE READ(可重复读) no yes(默认) SERIALZABLE(串行化) yes(默认) yes 我们设置隔离程度如下所示:
package com.rgf.spring.service;

import com.rgf.spring.dao.BookDao;
import org.springframework.beans.factory.annotation.Autowired;
import org.springframework.jdbc.BadSqlGrammarException;
import org.springframework.jdbc.core.JdbcTemplate;
import org.springframework.stereotype.Service;
import org.springframework.transaction.annotation.Isolation;
import org.springframework.transaction.annotation.Transactional;

import java.sql.SQLSyntaxErrorException;
import java.util.concurrent.TimeUnit;

@Service
public class BookServiceImpl implements BookService{
    /**
     * 买书
     * @param userId
     * @param bookId
     *
     */
    @Autowired
    private BookDao bookDao;
    @Override
    @Transactional(
           //readOnly=true
           // timeout = 3
            //noRollbackFor = SQLSyntaxErrorException.class
            //noRollbackForClassName="java.sql.SQLSyntaxErrorException.class"
            isolation = Isolation.DEFAULT
    )
    public void  buyBook(Integer userId, Integer bookId){
        try{
            TimeUnit.SECONDS.sleep(5);
        }catch (InterruptedException e){
            e.printStackTrace();
        }
        //查询图书的价格
        Integer price=bookDao.getPriceByBookId(bookId);
        //更新图书的库存
        bookDao.updateStock(bookId);
        //更新用户的余额
        bookDao.updateBalance(userId,price);
        System.out.println(1/0);
    }

}

事务的传播行为:
我们在controller层里面进行调用如下所示:
package com.rgf.spring.controller;

import com.rgf.spring.service.BookService;
import com.rgf.spring.service.CheckoutService;
import org.springframework.beans.factory.annotation.Autowired;
import org.springframework.stereotype.Controller;


@Controller
public class BookController {
    @Autowired
    private BookService bookService;
    private CheckoutService checkoutService;

    public void  buyBook(Integer userId,Integer bookId){

        bookService.buyBook(userId,bookId);
     }

     public  void  checkout(Integer userId,Integer[] bookIds){
        checkoutService.checkout(userId,bookIds);
     }
}
我们在service层里面调用如下所示:
先写接口:package com.rgf.spring.service; public interface CheckoutService { /** * 结账 * @param userId * @param bookIds */ void checkout(Integer userId, Integer[] bookIds); }然后写接口调用的方法,即为实现类:
package com.rgf.spring.service;

import org.springframework.beans.factory.annotation.Autowired;
import org.springframework.stereotype.Service;
import org.springframework.transaction.annotation.Transactional;

@Service
public class CheckoutServiceImpl implements  CheckoutService{
   @Autowired
   private  BookService bookService;
    @Override
    @Transactional
    public void checkout(Integer userId, Integer[] bookIds) {
        for (Integer bookId:bookIds){
            bookService.buyBook(userId,bookId);
        }
    }
}
我们进行测试如下所示:
package com.rgf.spring.test;

import com.rgf.spring.controller.BookController;
import org.junit.Test;
import org.junit.runner.RunWith;
import org.springframework.beans.factory.annotation.Autowired;
import org.springframework.test.context.ContextConfiguration;
import org.springframework.test.context.junit4.SpringJUnit4ClassRunner;

/**
 * 声明式事务的配置步骤:
 * 1.在spring的配置文件中来配置事务管理器
 * 2.开启事务的注解驱动
 * 3.在需要被事务管理的方法上,添加@Transactional注解,该方法就会被事务管理
 * @Transactional注解标识的位置:
 * 1.标识在方法上
 * 2.标识在类上,则类中所有的方法都会被事务管理
 */
@RunWith(SpringJUnit4ClassRunner.class)
@ContextConfiguration("classpath:tx-annotation.xml")
public class TxByAnnotationTest {
    @Autowired
    private BookController bookController;

    @Test
    public  void  testBuyBook(){
        bookController.buyBook(1,1);
    }

    @Test
    public  void  testCheckoutBook(){
        bookController.checkout(1,new Integer[]{1,2});
    }

}
测试之后出现报错信息:SQLStateSQLExceptionTranslator.java
我们进行刷新之后发现书的数量没有发生变化。此即为第二本书买不了的话,当前的所有书都无法进行购买。当数据出错的时候,回滚的是整个结账的操作。
我们将买书操作的事务的属性设置如下所示:
package com.rgf.spring.service;

import com.rgf.spring.dao.BookDao;
import org.springframework.beans.factory.annotation.Autowired;
import org.springframework.jdbc.BadSqlGrammarException;
import org.springframework.jdbc.core.JdbcTemplate;
import org.springframework.stereotype.Service;
import org.springframework.transaction.annotation.Isolation;
import org.springframework.transaction.annotation.Propagation;
import org.springframework.transaction.annotation.Transactional;

import java.sql.SQLSyntaxErrorException;
import java.util.concurrent.TimeUnit;

@Service
public class BookServiceImpl implements BookService{
    /**
     * 买书
     * @param userId
     * @param bookId
     *
     */
    @Autowired
    private BookDao bookDao;
    @Override
    @Transactional(
           //readOnly=true
           // timeout = 3
            //noRollbackFor = SQLSyntaxErrorException.class
            //noRollbackForClassName="java.sql.SQLSyntaxErrorException.class"
          //  isolation = Isolation.DEFAULT
            propagation = Propagation.REQUIRES_NEW
    )
    public void  buyBook(Integer userId, Integer bookId){
        try{
            TimeUnit.SECONDS.sleep(5);
        }catch (InterruptedException e){
            e.printStackTrace();
        }
        //查询图书的价格
        Integer price=bookDao.getPriceByBookId(bookId);
        //更新图书的库存
        bookDao.updateStock(bookId);
        //更新用户的余额
        bookDao.updateBalance(userId,price);
        System.out.println(1/0);
    }

}
此时用的是买书自身的事务,即会将第一本书购买成功,第二本购买不成功。可以通过@Transaction中的propagation属性设置事务传播行为。
@Transactional(propagation = Propagation.REQUIRED),默认情况。使用调用者的事务@Transactional(propagation = Propagation.REQUIRES_NEW),被调用者被调用的方法本身的事务
基于XML的声明式事务:
我们的配置文件如下所示:
<?xml version="1.0" encoding="UTF-8"?>
<beans xmlns="http://www.springframework.org/schema/beans"
       xmlns:xsi="http://www.w3.org/2001/XMLSchema-instance"
       xmlns:context="http://www.springframework.org/schema/context" xmlns:tx="http://www.springframework.org/schema/tx"
       xmlns:aop="http://www.springframework.org/schema/aop"
       xsi:schemaLocation="http://www.springframework.org/schema/beans http://www.springframework.org/schema/beans/spring-beans.xsd http://www.springframework.org/schema/context https://www.springframework.org/schema/context/spring-context.xsd http://www.springframework.org/schema/tx http://www.springframework.org/schema/tx/spring-tx.xsd http://www.springframework.org/schema/aop https://www.springframework.org/schema/aop/spring-aop.xsd">
  <!--扫描组件-->
    <context:component-scan base-package="com.rgf.spring"></context:component-scan>
    <!--引入jdbc.properties-->
    <context:property-placeholder location="classpath:jdbc.properties"></context:property-placeholder>
    <bean id="dataSource" class="com.alibaba.druid.pool.DruidDataSource">
        <property name="driverClassName" value="${jdbc.driver}"></property>
        <property name="url" value="${jdbc.url}"></property>
        <property name="username" value="${jdbc.username}"></property>
        <property name="password" value="${jdbc.password}"></property>
    </bean>
    <bean class="org.springframework.jdbc.core.JdbcTemplate">
        <property name="dataSource" ref="dataSource"></property>
    </bean>

    <!--配置事务管理器-->
    <bean id="transactionManager" class="org.springframework.jdbc.datasource.DataSourceTransactionManager">
        <property name="dataSource" ref="dataSource"></property>
    </bean>
    <!--配置事务通知-->
    <tx:advice id="tx" transaction-manager="transactionManager">
        <tx:attributes>
            <tx:method name="buyBook" />
        </tx:attributes>
    </tx:advice>

    <aop:config>
        <aop:advisor advice-ref="tx" pointcut="execution(* com.rgf.spring.service.*.*(..))"></aop:advisor>
    </aop:config>

</beans>
我们的测试代码如下所示:
package com.rgf.spring.test;

import com.rgf.spring.controller.BookController;
import org.junit.Test;
import org.junit.runner.RunWith;
import org.springframework.beans.factory.annotation.Autowired;
import org.springframework.test.context.ContextConfiguration;
import org.springframework.test.context.junit4.SpringJUnit4ClassRunner;

/**
 * 声明式事务的配置步骤:
 * 1.在spring的配置文件中来配置事务管理器
 * 2.开启事务的注解驱动
 * 3.在需要被事务管理的方法上,添加@Transactional注解,该方法就会被事务管理
 * @Transactional注解标识的位置:
 * 1.标识在方法上
 * 2.标识在类上,则类中所有的方法都会被事务管理
 */
@RunWith(SpringJUnit4ClassRunner.class)
@ContextConfiguration("classpath:tx-xml.xml")
public class TxByXMLTest {
    @Autowired
    private BookController bookController;

    @Test
    public  void  testBuyBook(){
        bookController.buyBook(1,1);
    }

    @Test
    public  void  testCheckoutBook(){
        bookController.checkout(1,new Integer[]{1,2});
    }

}
我们进行测试的时候发现出现如下问题:
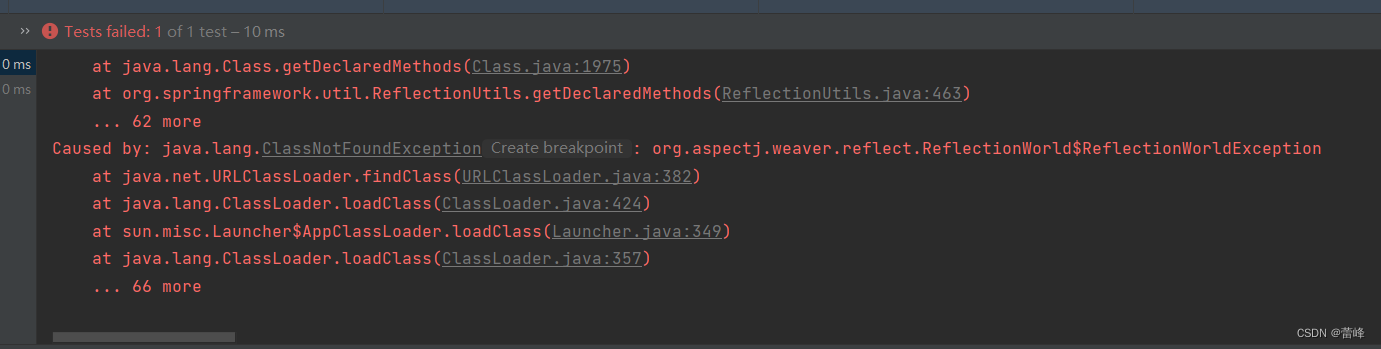
我们发现缺少jar包。我们来进行添加:
 <!--spring-aspects会帮我们传递过来aspectjweaver-->
        <dependency>
            <groupId>org.springframework</groupId>
            <artifactId>spring-aspects</artifactId>
            <version>5.3.1</version>
        </dependency>
我们进行导入依赖。
完成之后我们继续测试即可。
注意:基于xml实现的声明式事务,必须引入aspectj的依赖
我们可以用*默认为全部方法:
<?xml version="1.0" encoding="UTF-8"?>
<beans xmlns="http://www.springframework.org/schema/beans"
       xmlns:xsi="http://www.w3.org/2001/XMLSchema-instance"
       xmlns:context="http://www.springframework.org/schema/context" xmlns:tx="http://www.springframework.org/schema/tx"
       xmlns:aop="http://www.springframework.org/schema/aop"
       xsi:schemaLocation="http://www.springframework.org/schema/beans http://www.springframework.org/schema/beans/spring-beans.xsd http://www.springframework.org/schema/context https://www.springframework.org/schema/context/spring-context.xsd http://www.springframework.org/schema/tx http://www.springframework.org/schema/tx/spring-tx.xsd http://www.springframework.org/schema/aop https://www.springframework.org/schema/aop/spring-aop.xsd">
  <!--扫描组件-->
    <context:component-scan base-package="com.rgf.spring"></context:component-scan>
    <!--引入jdbc.properties-->
    <context:property-placeholder location="classpath:jdbc.properties"></context:property-placeholder>
    <bean id="dataSource" class="com.alibaba.druid.pool.DruidDataSource">
        <property name="driverClassName" value="${jdbc.driver}"></property>
        <property name="url" value="${jdbc.url}"></property>
        <property name="username" value="${jdbc.username}"></property>
        <property name="password" value="${jdbc.password}"></property>
    </bean>
    <bean class="org.springframework.jdbc.core.JdbcTemplate">
        <property name="dataSource" ref="dataSource"></property>
    </bean>

    <!--配置事务管理器-->
    <bean id="transactionManager" class="org.springframework.jdbc.datasource.DataSourceTransactionManager">
        <property name="dataSource" ref="dataSource"></property>
    </bean>
    <!--配置事务通知-->
    <tx:advice id="tx" transaction-manager="transactionManager">
        <tx:attributes>
            <tx:method name="buyBook" />
            <tx:method name="*"/>
            <tx:method name="get*" read-only="true"/>
            <tx:method name="query*" read-only="true"/>
            <tx:method name="find*" read-only="true"/>
            <!--read-only属性:设置只读属性-->
            <!--rollback-for属性:设置回滚的异常-->
            <!--no-rollback-for属性:设置不回滚的异常-->
            <!--isolation属性:设置事务的隔离级别-->
            <!--timeout属性:设置事务的超时属性-->
            <!--propagation属性:设置事务的传播行为-->
            <tx:method name="save*" read-only="false" rollback-for="java.lang.Exception" propagation="REQUIRES_NEW"/>
            <tx:method name="update*" read-only="false" rollback-for="java.lang.Exception" propagation="REQUIRES_NEW"/>
            <tx:method name="delete" read-only="false" rollback-for="java.lang.Exception" propagation="REQUIRES_NEW"/>
        </tx:attributes>
    </tx:advice>

    <aop:config>
        <aop:advisor advice-ref="tx" pointcut="execution(* com.rgf.spring.service.*.*(..))"></aop:advisor>
    </aop:config>

</beans>