目录
一、前言
二.正文
2.1定义颜色
2.2目标检测主代码详解
2.3读取视频or图片进行检测
注意:opencv-python 本文使用的版本为4.5.2.52
一、前言
YOLO系列是one-stage且是基于深度学习的回归方法,而R-CNN、Fast-RCNN、Faster-RCNN等是two-stage且是基于深度学习的分类方法。
YOLOv5是一种单阶段目标检测算法,该算法在YOLOv4的基础上添加了一些新的改进思路,使其速度与精度都得到了极大的性能提升。主要的改进思路如下所示:
输入端:在模型训练阶段,提出了一些改进思路,主要包括Mosaic数据增强、自适应锚框计算、自适应图片缩放;
基准网络:融合其它检测算法中的一些新思路,主要包括:Focus结构与CSP结构;
Neck网络:目标检测网络在BackBone与最后的Head输出层之间往往会插入一些层,Yolov5中添加了FPN+PAN结构;
Head输出层:输出层的锚框机制与YOLOv4相同,主要改进的是训练时的损失函数GIOU_Loss,以及预测框筛选的DIOU_nms。
6.2 YOLOv5算法详解
6.2.1 YOLOv5网络架构

上图展示了YOLOv5目标检测算法的整体框图。对于一个目标检测算法而言,我们通常可以将其划分为4个通用的模块,具体包括:输入端、基准网络、Neck网络与Head输出端,对应于上图中的4个红色模块。YOLOv5算法具有4个版本,具体包括:YOLOv5s、YOLOv5m、YOLOv5l、YOLOv5x四种,本文重点讲解YOLOv5s,其它的版本都在该版本的基础上对网络进行加深与加宽。
输入端-输入端表示输入的图片。该网络的输入图像大小为608*608,该阶段通常包含一个图像预处理阶段,即将输入图像缩放到网络的输入大小,并进行归一化等操作。在网络训练阶段,YOLOv5使用Mosaic数据增强操作提升模型的训练速度和网络的精度;并提出了一种自适应锚框计算与自适应图片缩放方法。
基准网络-基准网络通常是一些性能优异的分类器种的网络,该模块用来提取一些通用的特征表示。YOLOv5中不仅使用了CSPDarknet53结构,而且使用了Focus结构作为基准网络。
Neck网络-Neck网络通常位于基准网络和头网络的中间位置,利用它可以进一步提升特征的多样性及鲁棒性。虽然YOLOv5同样用到了SPP模块、FPN+PAN模块,但是实现的细节有些不同。
Head输出端-Head用来完成目标检测结果的输出。针对不同的检测算法,输出端的分支个数不尽相同,通常包含一个分类分支和一个回归分支。YOLOv4利用GIOU_Loss来代替Smooth L1 Loss函数,从而进一步提升算法的检测精度。
YOLOv5基础组件
CBL-CBL模块由Conv+BN+Leaky_relu激活函数组成,如上图中的模块1所示。
Res unit-借鉴ResNet网络中的残差结构,用来构建深层网络,CBM是残差模块中的子模块,如上图中的模块2所示。
CSP1_X-借鉴CSPNet网络结构,该模块由CBL模块、Res unint模块以及卷积层、Concate组成而成,如上图中的模块3所示。
CSP2_X-借鉴CSPNet网络结构,该模块由卷积层和X个Res unint模块Concate组成而成,如上图中的模块4所示。
Focus-如上图中的模块5所示,Focus结构首先将多个slice结果Concat起来,然后将其送入CBL模块中。
SPP-采用1×1、5×5、9×9和13×13的最大池化方式,进行多尺度特征融合,如上图中的模块6所示。
输入端细节详解
Mosaic数据增强-YOLOv5中在训练模型阶段仍然使用了Mosaic数据增强方法,该算法是在CutMix数据增强方法的基础上改进而来的。CutMix仅仅利用了两张图片进行拼接,而Mosaic数据增强方法则采用了4张图片,并且按照随机缩放、随机裁剪和随机排布的方式进行拼接而成,具体的效果如下图所示。这种增强方法可以将几张图片组合成一张,这样不仅可以丰富数据集的同时极大的提升网络的训练速度,而且可以降低模型的内存需求。
自适应锚框计算-在YOLOv5系列算法中,针对不同的数据集,都需要设定特定长宽的锚点框。在网络训练阶段,模型在初始锚点框的基础上输出对应的预测框,计算其与GT框之间的差距,并执行反向更新操作,从而更新整个网络的参数,因此设定初始锚点框也是比较关键的一环。在YOLOv3和YOLOv4检测算法中,训练不同的数据集时,都是通过单独的程序运行来获得初始锚点框。YOLOv5中将此功能嵌入到代码中,每次训练时,根据数据集的名称自适应的计算出最佳的锚点框,用户可以根据自己的需求将功能关闭或者打开,具体的指令为parser.add_argument(’–noautoanchor’, action=‘store_ true’, help=‘disable autoanchor check’),如果需要打开,只需要在训练代码时增加–noautoanch or选项即可。
自适应图片缩放-针对不同的目标检测算法而言,我们通常需要执行图片缩放操作,即将原始的输入图片缩放到一个固定的尺寸,再将其送入检测网络中。YOLO系列算法中常用的尺寸包括416*416,608 *608等尺寸。原始的缩放方法存在着一些问题,由于在实际的使用中的很多图片的长宽比不同,因此缩放填充之后,两端的黑边大小都不相同,然而如果填充的过多,则会存在大量的信息冗余,从而影响整个算法的推理速度。为了进一步提升YOLOv5算法的推理速度,该算法提出一种方法能够自适应的添加最少的黑边到缩放之后的图片中。
基准网络细节详解
Focus结构-该结构的主要思想是通过slice操作来对输入图片进行裁剪。如下图所示,原始输入图片大小为608*608*3,经过Slice与Concat操作之后输出一个304*304*12的特征映射;接着经过一个通道个数为32的Conv层(该通道个数仅仅针对的是YOLOv5s结构,其它结构会有相应的变化),输出一个304*304*32大小的特征映射。
CSP结构-YOLOv4网络结构中,借鉴了CSPNet的设计思路,仅仅在主干网络中设计了CSP结构。而YOLOv5中设计了两种CSP结构,以YOLOv5s网络为例,CSP1_X结构应用于Backbone主干网络中,另一种CSP2_X结构则应用于Neck网络中。CSP1_X与CSP2_X模块的实现细节如3.1所示。
Neck网络细节详解
FPN+PAN-YOLOv5的Neck网络仍然使用了FPN+PAN结构,但是在它的基础上做了一些改进操作,YOLOv4的Neck结构中,采用的都是普通的卷积操作。而YOLOv5的Neck网络中,采用借鉴CSPnet设计的CSP2结构,从而加强网络特征融合能力。下图展示了YOLOv4与YOLOv5的Neck网络的具体细节,通过比较我们可以发现:(1)灰色区域表示第1个不同点,YOLOv5不仅利用CSP2_\1结构代替部分CBL模块,而且去掉了下方的CBL模块;(2)绿色区域表示第2个不同点,YOLOv5不仅将Concat操作之后的CBL模块更换为CSP2_1模块,而且更换了另外一个CBL模块的位置;(3)蓝色区域表示第3个不同点,YOLOv5中将原始的CBL模块更换为CSP2_1模块。

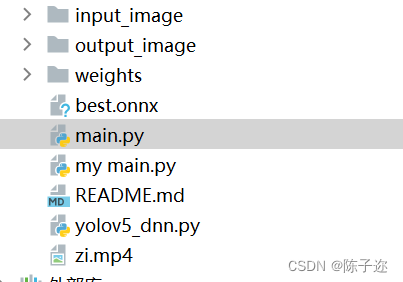
文章内容可按如下排版。onnx文件文末自提

二.正文
2.1定义颜色
用于生成目标类别对应的独特颜色
class Colors:
    # Ultralytics color palette https://ultralytics.com/
    def __init__(self):
        # hex = matplotlib.colors.TABLEAU_COLORS.values()
        hex = ('FF3838', 'FF9D97', 'FF701F', 'FFB21D', 'CFD231', '48F90A', '92CC17', '3DDB86', '1A9334', '00D4BB',
               '2C99A8', '00C2FF', '344593', '6473FF', '0018EC', '8438FF', '520085', 'CB38FF', 'FF95C8', 'FF37C7')
        self.palette = [self.hex2rgb('#' + c) for c in hex]
        self.n = len(self.palette)

    def __call__(self, i, bgr=False):
        c = self.palette[int(i) % self.n]
        return (c[2], c[1], c[0]) if bgr else c

    @staticmethod
    def hex2rgb(h):  # rgb order (PIL)
        return tuple(int(h[1 + i:1 + i + 2], 16) for i in (0, 2, 4))

colors = Colors()-
hex是一个包含颜色的十六进制值的元组。这些颜色来自于Ultralytics提供的色板,用于给不同的目标类别分配颜色。 -
self.palette是一个列表,用于存储将十六进制颜色值转换为RGB格式后的颜色。它通过调用hex2rgb方法将十六进制值转换为RGB格式,并存储在self.palette中。 -
self.n存储了颜色列表中颜色的数量。 -
__call__方法接受一个参数i,表示目标类别的索引,返回对应的颜色。它首先使用int(i) % self.n来确保索引值在颜色列表范围内,然后返回对应索引的颜色。如果bgr参数为True,则返回BGR格式的颜色,否则返回RGB格式的颜色。 -
hex2rgb方法用于将十六进制的颜色值转换为RGB格式的颜色。它接受一个参数h,表示十六进制的颜色值,并使用int(h[1 + i:1 + i + 2], 16)将每个十六进制值转换为十进制值,最后返回一个包含RGB颜色值的元组。
最后,通过实例化Colors类并赋值给colors变量,我们可以使用colors对象来获取目标类别对应的颜色。调用colors(i)方法,传入目标类别的索引,即可返回对应的颜色值。
2.2目标检测主代码详解
class yolov5():
    def __init__(self, onnx_path, confThreshold=0.25, nmsThreshold=0.45):
        self.classes = ['person', 'bicycle', 'car', 'motorcycle', 'airplane', 'bus', 'train', 'truck', 'boat', 'traffic light',
        'fire hydrant', 'stop sign', 'parking meter', 'bench', 'bird', 'cat', 'dog', 'horse', 'sheep', 'cow',
        'elephant', 'bear', 'zebra', 'giraffe', 'backpack', 'umbrella', 'handbag', 'tie', 'suitcase', 'frisbee',
        'skis', 'snowboard', 'sports ball', 'kite', 'baseball bat', 'baseball glove', 'skateboard', 'surfboard',
        'tennis racket', 'bottle', 'wine glass', 'cup', 'fork', 'knife', 'spoon', 'bowl', 'banana', 'apple',
        'sandwich', 'orange', 'broccoli', 'carrot', 'hot dog', 'pizza', 'donut', 'cake', 'chair', 'couch',
        'potted plant', 'bed', 'dining table', 'toilet', 'tv', 'laptop', 'mouse', 'remote', 'keyboard', 'cell phone',
        'microwave', 'oven', 'toaster', 'sink', 'refrigerator', 'book', 'clock', 'vase', 'scissors', 'teddy bear',
        'hair drier', 'toothbrush']
        self.colors = [np.random.randint(0, 255, size=3).tolist() for _ in range(len(self.classes))]
        num_classes = len(self.classes)
        self.anchors = [[10, 13, 16, 30, 33, 23], [30, 61, 62, 45, 59, 119], [116, 90, 156, 198, 373, 326]]
        self.nl = len(self.anchors)
        self.na = len(self.anchors[0]) // 2
        self.no = num_classes + 5
        self.stride = np.array([8., 16., 32.])
        self.inpWidth = 640
        self.inpHeight = 640
        self.net = cv2.dnn.readNetFromONNX(onnx_path)

        self.confThreshold = confThreshold
        self.nmsThreshold = nmsThreshold

    def _make_grid(self, nx=20, ny=20):
        xv, yv = np.meshgrid(np.arange(ny), np.arange(nx))
        return np.stack((xv, yv), 2).reshape((-1, 2)).astype(np.float32)

    def letterbox(self, im, new_shape=(640, 640), color=(114, 114, 114), auto=True, scaleFill=False, scaleup=True, stride=32):
     # Resize and pad image while meeting stride-multiple constraints
        shape = im.shape[:2]  # current shape [height, width]
        if isinstance(new_shape, int):
            new_shape = (new_shape, new_shape)

        # Scale ratio (new / old)
        r = min(new_shape[0] / shape[0], new_shape[1] / shape[1])
        if not scaleup:  # only scale down, do not scale up (for better val mAP)
            r = min(r, 1.0)

        # Compute padding
        ratio = r, r  # width, height ratios
        new_unpad = int(round(shape[1] * r)), int(round(shape[0] * r))
        dw, dh = new_shape[1] - new_unpad[0], new_shape[0] - new_unpad[1]  # wh padding
        if auto:  # minimum rectangle
            dw, dh = np.mod(dw, stride), np.mod(dh, stride)  # wh padding
        elif scaleFill:  # stretch
            dw, dh = 0.0, 0.0
            new_unpad = (new_shape[1], new_shape[0])
            ratio = new_shape[1] / shape[1], new_shape[0] / shape[0]  # width, height ratios

        dw /= 2  # divide padding into 2 sides
        dh /= 2

        if shape[::-1] != new_unpad:  # resize
            im = cv2.resize(im, new_unpad, interpolation=cv2.INTER_LINEAR)
        top, bottom = int(round(dh - 0.1)), int(round(dh + 0.1))
        left, right = int(round(dw - 0.1)), int(round(dw + 0.1))
        im = cv2.copyMakeBorder(im, top, bottom, left, right, cv2.BORDER_CONSTANT, value=color)  # add border
        return im, ratio, (dw, dh)


    def box_area(self,boxes :array):
        return (boxes[:, 2] - boxes[:, 0]) * (boxes[:, 3] - boxes[:, 1])

    def box_iou(self,box1 :array, box2: array):
        """
        :param box1: [N, 4]
        :param box2: [M, 4]
        :return: [N, M]
        """
        area1 = self.box_area(box1)  # N
        area2 = self.box_area(box2)  # M
        # broadcasting, 两个数组各维度大小 从后往前对比一致, 或者 有一维度值为1;
        lt = np.maximum(box1[:, np.newaxis, :2], box2[:, :2])
        rb = np.minimum(box1[:, np.newaxis, 2:], box2[:, 2:])
        wh = rb - lt
        wh = np.maximum(0, wh) # [N, M, 2]
        inter = wh[:, :, 0] * wh[:, :, 1]
        iou = inter / (area1[:, np.newaxis] + area2 - inter)
        return iou  # NxM

    def numpy_nms(self, boxes :array, scores :array, iou_threshold :float):

        idxs = scores.argsort()  # 按分数 降序排列的索引 [N]
        keep = []
        while idxs.size > 0:  # 统计数组中元素的个数
            max_score_index = idxs[-1]
            max_score_box = boxes[max_score_index][None, :]
            keep.append(max_score_index)

            if idxs.size == 1:
                break
            idxs = idxs[:-1]  # 将得分最大框 从索引中删除; 剩余索引对应的框 和 得分最大框 计算IoU;
            other_boxes = boxes[idxs]  # [?, 4]
            ious = self.box_iou(max_score_box, other_boxes)  # 一个框和其余框比较 1XM
            idxs = idxs[ious[0] <= iou_threshold]

        keep = np.array(keep)
        return keep

    def xywh2xyxy(self,x):
        # Convert nx4 boxes from [x, y, w, h] to [x1, y1, x2, y2] where xy1=top-left, xy2=bottom-right
       # y = x.clone() if isinstance(x, torch.Tensor) else np.copy(x)
        y = np.copy(x)
        y[:, 0] = x[:, 0] - x[:, 2] / 2  # top left x
        y[:, 1] = x[:, 1] - x[:, 3] / 2  # top left y
        y[:, 2] = x[:, 0] + x[:, 2] / 2  # bottom right x
        y[:, 3] = x[:, 1] + x[:, 3] / 2  # bottom right y
        return y

    def non_max_suppression(self,prediction, conf_thres=0.25,agnostic=False):                                                 #25200 = 20*20*3 + 40*40*3 + 80*80*3
        xc = prediction[..., 4] > conf_thres  # candidates,获取置信度,prediction为所有的预测结果.shape(1, 25200, 21),batch为1,25200个预测结果,21 = x,y,w,h,c + class个数
        # Settings
        min_wh, max_wh = 2, 4096  # (pixels) minimum and maximum box width and height
        max_nms = 30000  # maximum number of boxes into torchvision.ops.nms()
        output = [np.zeros((0, 6))] * prediction.shape[0]
        # for p in prediction:
        #     for i in p:
        #         with open('./result.txt','a') as f:
        #             f.write(str(i) + '\n')
        for xi, x in enumerate(prediction):  # image index, image inference
            # Apply constraints
            x = x[xc[xi]]  # confidence,获取confidence大于conf_thres的结果
            if not x.shape[0]:
                continue
            # Compute conf
            x[:, 5:] *= x[:, 4:5]  # conf = obj_conf * cls_conf
            # Box (center x, center y, width, height) to (x1, y1, x2, y2)
            box = self.xywh2xyxy(x[:, :4])
            # Detections matrix nx6 (xyxy, conf, cls)
            conf = np.max(x[:, 5:], axis=1)    #获取类别最高的置信度
            j = np.argmax(x[:, 5:],axis=1)     #获取下标
            #转为array:  x = torch.cat((box, conf, j.float()), 1)[conf.view(-1) > conf_thres]
            re = np.array(conf.reshape(-1)> conf_thres)
            #转为维度
            conf =conf.reshape(-1,1)
            j = j.reshape(-1,1)
            #numpy的拼接
            x = np.concatenate((box,conf,j),axis=1)[re]
            # Check shape
            n = x.shape[0]  # number of boxes
            if not n:  # no boxes
                continue
            elif n > max_nms:  # excess boxes
                x = x[x[:, 4].argsort(descending=True)[:max_nms]]  # sort by confidence
            # Batched NMS
            c = x[:, 5:6] * (0 if agnostic else max_wh)  # classes
            boxes, scores = x[:, :4] + c, x[:, 4]  # boxes (offset by class), scores
            i = self.numpy_nms(boxes, scores, self.nmsThreshold)
            output[xi] = x[i]
        return output

    def detect(self, srcimg):
        im = srcimg.copy()
        im, ratio, wh = self.letterbox(srcimg, self.inpWidth, stride=self.stride, auto=False)
        # Sets the input to the network
        blob = cv2.dnn.blobFromImage(im, 1 / 255.0,swapRB=True, crop=False)
        self.net.setInput(blob)
        outs = self.net.forward(self.net.getUnconnectedOutLayersNames())[0]
        #NMS
        pred = self.non_max_suppression(outs, self.confThreshold,agnostic=False)
        #draw box
        for i in pred[0]:
            left = int((i[0] - wh[0])/ratio[0])
            top = int((i[1]-wh[1])/ratio[1])
            width = int((i[2] - wh[0])/ratio[0])
            height = int((i[3]-wh[1])/ratio[1])
            conf = i[4]
            classId = i[5]
            cv2.rectangle(srcimg, (int(left), int(top)), (int(width),int(height)), colors(classId, True), 2, lineType=cv2.LINE_AA)
            label = '%.2f' % conf
            label = '%s:%s' % (self.classes[int(classId)], label)
            # Display the label at the top of the bounding box
            labelSize, baseLine = cv2.getTextSize(label, cv2.FONT_HERSHEY_SIMPLEX, 0.5, 1)
            top = max(top, labelSize[1])
            cv2.putText(srcimg, label, (int(left-20),int(top - 10)), cv2.FONT_HERSHEY_SIMPLEX, 0.5, (0,255,255), thickness=1, lineType=cv2.LINE_AA)
return srcimg首先,在__init__方法中,我们定义了一些初始化的参数和模型。其中包括:
self.names:目标类别的名称列表。self.colors:每个类别对应的独特颜色,用于在图像中绘制边界框和标签。self.stride:特征图与原始图像的比例因子。self.anchors:锚框的宽度和高度列表,用于预测边界框的位置和大小。
接下来,我们定义了一些辅助方法:
_make_grid方法用于生成网格坐标。这是在特征图上创建网格,用于预测边界框的位置。letterbox方法用于将输入的图像进行缩放和填充,以满足模型的输入要求。它会保持图像的纵横比,并在空白区域填充灰色像素。box_area方法用于计算边界框的面积。box_iou方法用于计算两个边界框之间的IoU(Intersection over Union)值,用于衡量它们的重叠程度。numpy_nms方法用于对预测结果进行非极大值抑制(NMS)。它会筛选置信度高于阈值的边界框,并删除与置信度最高的边界框重叠度高于阈值的边界框。xywh2xyxy方法用于将边界框的格式由[x, y, w, h]转换为[x1, y1, x2, y2],其中[x1, y1]是左上角坐标,[x2, y2]是右下角坐标。
最后,detect方法是目标检测的核心方法。它接受一张图像作为输入,并返回带有检测结果的图像。具体的实现步骤如下:
- 将输入图像进行缩放和填充,使其符合模型的输入要求。
- 将图像传递给YOLOv5模型进行前向推理,得到预测结果。
- 对每个预测的边界框,计算其置信度以及类别概率。
- 根据置信度阈值筛选边界框。
- 对剩余的边界框进行非极大值抑制,去除冗余的检测结果。
- 绘制筛选后的边界框和类别标签在输出图像上,并返回结果。
2.3读取视频or图片进行检测
def mult_test(onnx_path, img_dir, save_root_path, video=False):
    # 创建 yolov5 模型对象
    model = yolov5(onnx_path)

    # 如果 video 参数为 True,则执行视频目标检测
    if video:
        # 打开视频文件
        cap = cv2.VideoCapture(0)  # 这里的参数 0 表示使用摄像头设备,也可以传入视频文件路径
        frame_height = int(cap.get(cv2.CAP_PROP_FRAME_HEIGHT))
        frame_width = int(cap.get(cv2.CAP_PROP_FRAME_WIDTH))
        fps = cap.get(cv2.CAP_PROP_FPS)  # 视频平均帧率
        size = (frame_height, frame_width)  # 尺寸和帧率和原视频相同
        fourcc = cv2.VideoWriter_fourcc(*'XVID')  # 视频编码格式,这里使用 XVID
        out = cv2.VideoWriter('zi.mp4', fourcc, fps, size)  # 创建输出视频文件对象

        # 循环读取视频帧,并进行目标检测
        pTime = 0
        while cap.isOpened():
            ok, frame = cap.read()  # 读取一帧图像
            if not ok:  # 如果读取失败,说明视频已经结束
                break

            # 对当前帧执行目标检测
            frame = model.detect(frame)

            cTime = time.time()
            fps = 1 / (cTime - pTime)
            pTime = cTime
            cv2.putText(frame, str(int(fps)), (10, 70), cv2.FONT_HERSHEY_PLAIN, 3,
                        (255, 0, 255), 3)

            # 将目标检测结果写入输出视频
            out.write(frame)

            # 在窗口中显示目标检测结果
            cv2.imshow('result', frame)

            # 等待用户按键,如果按下 'q' 键或者 Esc 键,则退出循环
            c = cv2.waitKey(1) & 0xFF
            if c == 27 or c == ord('q'):
                break

        # 释放视频对象并关闭窗口
        cap.release()
        out.release()
        cv2.destroyAllWindows()

    # 如果 video 参数为 False,则执行图像目标检测
    else:
        # 创建保存结果的根目录,如果不存在的话
        if not os.path.exists(save_root_path):
            os.mkdir(save_root_path)

        # 遍历输入的图像目录
        for root, dir, files in os.walk(img_dir):
            for file in files:
                image_path = os.path.join(root, file)  # 图像文件路径
                save_path = os.path.join(save_root_path, file)  # 保存结果的路径

                # 如果输入的是视频文件,则执行视频目标检测
                if "mp4" in file or 'avi' in file:
                    cap = cv2.VideoCapture(image_path)  # 打开视频文件
                    frame_height = int(cap.get(cv2.CAP_PROP_FRAME_HEIGHT))
                    frame_width = int(cap.get(cv2.CAP_PROP_FRAME_WIDTH))
                    fps = cap.get(cv2.CAP_PROP_FPS)
                    size = (frame_width, frame_height)
                    fourcc = cv2.VideoWriter_fourcc(*'XVID')  # 视频编码格式,这里使用 XVID
                    out = cv2.VideoWriter(save_path, fourcc, fps, size)  # 创建输出视频文件对象

                    # 循环读取视频帧,并进行目标检测
                    while cap.isOpened():
                        ok, frame = cap.read()  # 读取一帧图像
                        if not ok:  # 如果读取失败,说明视频已经结束
                            break

                        # 对当前帧执行目标检测
                        frame = model.detect(frame)

                        # 将目标检测结果写入输出视频
                        out.write(frame)

                    # 释放视频对象
                    cap.release()
                    out.release()
                    print("  finish:   ", file)

                # 如果输入的是图像文件,则执行图像目标检测
                elif 'jpg' in file or 'png' in file:
                    srcimg = cv2.imread(image_path)  # 读取图像
                    srcimg = model.detect(srcimg)  # 对图像执行目标检测
                    print("  finish:   ", file)

                    # 将目标检测结果保存为图像文件
cv2.imwrite(save_path, srcimg)- 首先创建一个yolov5模型对象。
- 如果video参数为True,则执行视频目标检测。
- 打开视频文件,并获取视频的帧高、帧宽和帧率。
- 创建输出视频文件对象,并设置视频编码格式为XVID。
- 循环读取视频帧,并对每一帧进行目标检测。
- 将目标检测结果写入输出视频文件。
- 显示目标检测结果在窗口中,并等待用户按键,如果按下'q'键或者Esc键,则退出循环。
- 释放视频对象并关闭窗口。
- 如果video参数为False,则执行图像目标检测。
- 创建保存结果的根目录(如果不存在)。
- 遍历输入的图像目录。
- 对于每一个图像文件,执行图像目标检测。
- 如果输入的是视频文件,则执行视频目标检测。
- 打开视频文件,并获取视频的帧高、帧宽和帧率。
- 创建输出视频文件对象,并设置视频编码格式为XVID。
- 循环读取视频帧,并对每一帧进行目标检测。
- 将目标检测结果写入输出视频文件。
- 释放视频对象。
- 如果输入的是图像文件,则执行图像目标检测。
- 读取图像文件。
- 对图像执行目标检测。
- 将目标检测结果保存为图像文件。
- 如果输入的是视频文件,则执行视频目标检测。
全部代码
import cv2
import numpy as np
import time
import os
from numpy import array


class Colors:
    # Ultralytics color palette https://ultralytics.com/
    def __init__(self):
        # hex = matplotlib.colors.TABLEAU_COLORS.values()
        hex = ('FF3838', 'FF9D97', 'FF701F', 'FFB21D', 'CFD231', '48F90A', '92CC17', '3DDB86', '1A9334', '00D4BB',
               '2C99A8', '00C2FF', '344593', '6473FF', '0018EC', '8438FF', '520085', 'CB38FF', 'FF95C8', 'FF37C7')
        self.palette = [self.hex2rgb('#' + c) for c in hex]
        self.n = len(self.palette)

    def __call__(self, i, bgr=False):
        c = self.palette[int(i) % self.n]
        return (c[2], c[1], c[0]) if bgr else c

    @staticmethod
    def hex2rgb(h):  # rgb order (PIL)
        return tuple(int(h[1 + i:1 + i + 2], 16) for i in (0, 2, 4))

colors = Colors()


class yolov5():
    def __init__(self, onnx_path, confThreshold=0.25, nmsThreshold=0.45):
        self.classes = ['person', 'bicycle', 'car', 'motorcycle', 'airplane', 'bus', 'train', 'truck', 'boat', 'traffic light',
        'fire hydrant', 'stop sign', 'parking meter', 'bench', 'bird', 'cat', 'dog', 'horse', 'sheep', 'cow',
        'elephant', 'bear', 'zebra', 'giraffe', 'backpack', 'umbrella', 'handbag', 'tie', 'suitcase', 'frisbee',
        'skis', 'snowboard', 'sports ball', 'kite', 'baseball bat', 'baseball glove', 'skateboard', 'surfboard',
        'tennis racket', 'bottle', 'wine glass', 'cup', 'fork', 'knife', 'spoon', 'bowl', 'banana', 'apple',
        'sandwich', 'orange', 'broccoli', 'carrot', 'hot dog', 'pizza', 'donut', 'cake', 'chair', 'couch',
        'potted plant', 'bed', 'dining table', 'toilet', 'tv', 'laptop', 'mouse', 'remote', 'keyboard', 'cell phone',
        'microwave', 'oven', 'toaster', 'sink', 'refrigerator', 'book', 'clock', 'vase', 'scissors', 'teddy bear',
        'hair drier', 'toothbrush']
        self.colors = [np.random.randint(0, 255, size=3).tolist() for _ in range(len(self.classes))]
        num_classes = len(self.classes)
        self.anchors = [[10, 13, 16, 30, 33, 23], [30, 61, 62, 45, 59, 119], [116, 90, 156, 198, 373, 326]]
        self.nl = len(self.anchors)
        self.na = len(self.anchors[0]) // 2
        self.no = num_classes + 5
        self.stride = np.array([8., 16., 32.])
        self.inpWidth = 640
        self.inpHeight = 640
        self.net = cv2.dnn.readNetFromONNX(onnx_path)

        self.confThreshold = confThreshold
        self.nmsThreshold = nmsThreshold

    def _make_grid(self, nx=20, ny=20):
        xv, yv = np.meshgrid(np.arange(ny), np.arange(nx))
        return np.stack((xv, yv), 2).reshape((-1, 2)).astype(np.float32)

    def letterbox(self, im, new_shape=(640, 640), color=(114, 114, 114), auto=True, scaleFill=False, scaleup=True, stride=32):
     # Resize and pad image while meeting stride-multiple constraints
        shape = im.shape[:2]  # current shape [height, width]
        if isinstance(new_shape, int):
            new_shape = (new_shape, new_shape)

        # Scale ratio (new / old)
        r = min(new_shape[0] / shape[0], new_shape[1] / shape[1])
        if not scaleup:  # only scale down, do not scale up (for better val mAP)
            r = min(r, 1.0)

        # Compute padding
        ratio = r, r  # width, height ratios
        new_unpad = int(round(shape[1] * r)), int(round(shape[0] * r))
        dw, dh = new_shape[1] - new_unpad[0], new_shape[0] - new_unpad[1]  # wh padding
        if auto:  # minimum rectangle
            dw, dh = np.mod(dw, stride), np.mod(dh, stride)  # wh padding
        elif scaleFill:  # stretch
            dw, dh = 0.0, 0.0
            new_unpad = (new_shape[1], new_shape[0])
            ratio = new_shape[1] / shape[1], new_shape[0] / shape[0]  # width, height ratios

        dw /= 2  # divide padding into 2 sides
        dh /= 2

        if shape[::-1] != new_unpad:  # resize
            im = cv2.resize(im, new_unpad, interpolation=cv2.INTER_LINEAR)
        top, bottom = int(round(dh - 0.1)), int(round(dh + 0.1))
        left, right = int(round(dw - 0.1)), int(round(dw + 0.1))
        im = cv2.copyMakeBorder(im, top, bottom, left, right, cv2.BORDER_CONSTANT, value=color)  # add border
        return im, ratio, (dw, dh)


    def box_area(self,boxes :array):
        return (boxes[:, 2] - boxes[:, 0]) * (boxes[:, 3] - boxes[:, 1])

    def box_iou(self,box1 :array, box2: array):
        """
        :param box1: [N, 4]
        :param box2: [M, 4]
        :return: [N, M]
        """
        area1 = self.box_area(box1)  # N
        area2 = self.box_area(box2)  # M
        # broadcasting, 两个数组各维度大小 从后往前对比一致, 或者 有一维度值为1;
        lt = np.maximum(box1[:, np.newaxis, :2], box2[:, :2])
        rb = np.minimum(box1[:, np.newaxis, 2:], box2[:, 2:])
        wh = rb - lt
        wh = np.maximum(0, wh) # [N, M, 2]
        inter = wh[:, :, 0] * wh[:, :, 1]
        iou = inter / (area1[:, np.newaxis] + area2 - inter)
        return iou  # NxM

    def numpy_nms(self, boxes :array, scores :array, iou_threshold :float):

        idxs = scores.argsort()  # 按分数 降序排列的索引 [N]
        keep = []
        while idxs.size > 0:  # 统计数组中元素的个数
            max_score_index = idxs[-1]
            max_score_box = boxes[max_score_index][None, :]
            keep.append(max_score_index)

            if idxs.size == 1:
                break
            idxs = idxs[:-1]  # 将得分最大框 从索引中删除; 剩余索引对应的框 和 得分最大框 计算IoU;
            other_boxes = boxes[idxs]  # [?, 4]
            ious = self.box_iou(max_score_box, other_boxes)  # 一个框和其余框比较 1XM
            idxs = idxs[ious[0] <= iou_threshold]

        keep = np.array(keep)
        return keep

    def xywh2xyxy(self,x):
        # Convert nx4 boxes from [x, y, w, h] to [x1, y1, x2, y2] where xy1=top-left, xy2=bottom-right
       # y = x.clone() if isinstance(x, torch.Tensor) else np.copy(x)
        y = np.copy(x)
        y[:, 0] = x[:, 0] - x[:, 2] / 2  # top left x
        y[:, 1] = x[:, 1] - x[:, 3] / 2  # top left y
        y[:, 2] = x[:, 0] + x[:, 2] / 2  # bottom right x
        y[:, 3] = x[:, 1] + x[:, 3] / 2  # bottom right y
        return y

    def non_max_suppression(self,prediction, conf_thres=0.25,agnostic=False):                                                 #25200 = 20*20*3 + 40*40*3 + 80*80*3
        xc = prediction[..., 4] > conf_thres  # candidates,获取置信度,prediction为所有的预测结果.shape(1, 25200, 21),batch为1,25200个预测结果,21 = x,y,w,h,c + class个数
        # Settings
        min_wh, max_wh = 2, 4096  # (pixels) minimum and maximum box width and height
        max_nms = 30000  # maximum number of boxes into torchvision.ops.nms()
        output = [np.zeros((0, 6))] * prediction.shape[0]
        # for p in prediction:
        #     for i in p:
        #         with open('./result.txt','a') as f:
        #             f.write(str(i) + '\n')
        for xi, x in enumerate(prediction):  # image index, image inference
            # Apply constraints
            x = x[xc[xi]]  # confidence,获取confidence大于conf_thres的结果
            if not x.shape[0]:
                continue
            # Compute conf
            x[:, 5:] *= x[:, 4:5]  # conf = obj_conf * cls_conf
            # Box (center x, center y, width, height) to (x1, y1, x2, y2)
            box = self.xywh2xyxy(x[:, :4])
            # Detections matrix nx6 (xyxy, conf, cls)
            conf = np.max(x[:, 5:], axis=1)    #获取类别最高的置信度
            j = np.argmax(x[:, 5:],axis=1)     #获取下标
            #转为array:  x = torch.cat((box, conf, j.float()), 1)[conf.view(-1) > conf_thres]
            re = np.array(conf.reshape(-1)> conf_thres)
            #转为维度
            conf =conf.reshape(-1,1)
            j = j.reshape(-1,1)
            #numpy的拼接
            x = np.concatenate((box,conf,j),axis=1)[re]
            # Check shape
            n = x.shape[0]  # number of boxes
            if not n:  # no boxes
                continue
            elif n > max_nms:  # excess boxes
                x = x[x[:, 4].argsort(descending=True)[:max_nms]]  # sort by confidence
            # Batched NMS
            c = x[:, 5:6] * (0 if agnostic else max_wh)  # classes
            boxes, scores = x[:, :4] + c, x[:, 4]  # boxes (offset by class), scores
            i = self.numpy_nms(boxes, scores, self.nmsThreshold)
            output[xi] = x[i]
        return output

    def detect(self, srcimg):
        im = srcimg.copy()
        im, ratio, wh = self.letterbox(srcimg, self.inpWidth, stride=self.stride, auto=False)
        # Sets the input to the network
        blob = cv2.dnn.blobFromImage(im, 1 / 255.0,swapRB=True, crop=False)
        self.net.setInput(blob)
        outs = self.net.forward(self.net.getUnconnectedOutLayersNames())[0]
        #NMS
        pred = self.non_max_suppression(outs, self.confThreshold,agnostic=False)
        #draw box
        for i in pred[0]:
            left = int((i[0] - wh[0])/ratio[0])
            top = int((i[1]-wh[1])/ratio[1])
            width = int((i[2] - wh[0])/ratio[0])
            height = int((i[3]-wh[1])/ratio[1])
            conf = i[4]
            classId = i[5]
            cv2.rectangle(srcimg, (int(left), int(top)), (int(width),int(height)), colors(classId, True), 2, lineType=cv2.LINE_AA)
            label = '%.2f' % conf
            label = '%s:%s' % (self.classes[int(classId)], label)
            # Display the label at the top of the bounding box
            labelSize, baseLine = cv2.getTextSize(label, cv2.FONT_HERSHEY_SIMPLEX, 0.5, 1)
            top = max(top, labelSize[1])
            cv2.putText(srcimg, label, (int(left-20),int(top - 10)), cv2.FONT_HERSHEY_SIMPLEX, 0.5, (0,255,255), thickness=1, lineType=cv2.LINE_AA)
        return srcimg


def mult_test(onnx_path, img_dir, save_root_path, video=False):
    # 创建 yolov5 模型对象
    model = yolov5(onnx_path)

    # 如果 video 参数为 True,则执行视频目标检测
    if video:
        # 打开视频文件
        cap = cv2.VideoCapture(0)  # 这里的参数 0 表示使用摄像头设备,也可以传入视频文件路径
        frame_height = int(cap.get(cv2.CAP_PROP_FRAME_HEIGHT))
        frame_width = int(cap.get(cv2.CAP_PROP_FRAME_WIDTH))
        fps = cap.get(cv2.CAP_PROP_FPS)  # 视频平均帧率
        size = (frame_height, frame_width)  # 尺寸和帧率和原视频相同
        fourcc = cv2.VideoWriter_fourcc(*'XVID')  # 视频编码格式,这里使用 XVID
        out = cv2.VideoWriter('zi.mp4', fourcc, fps, size)  # 创建输出视频文件对象

        # 循环读取视频帧,并进行目标检测
        pTime = 0
        while cap.isOpened():
            ok, frame = cap.read()  # 读取一帧图像
            if not ok:  # 如果读取失败,说明视频已经结束
                break

            # 对当前帧执行目标检测
            frame = model.detect(frame)

            cTime = time.time()
            fps = 1 / (cTime - pTime)
            pTime = cTime
            cv2.putText(frame, str(int(fps)), (10, 70), cv2.FONT_HERSHEY_PLAIN, 3,
                        (255, 0, 255), 3)

            # 将目标检测结果写入输出视频
            out.write(frame)

            # 在窗口中显示目标检测结果
            cv2.imshow('result', frame)

            # 等待用户按键,如果按下 'q' 键或者 Esc 键,则退出循环
            c = cv2.waitKey(1) & 0xFF
            if c == 27 or c == ord('q'):
                break

        # 释放视频对象并关闭窗口
        cap.release()
        out.release()
        cv2.destroyAllWindows()

    # 如果 video 参数为 False,则执行图像目标检测
    else:
        # 创建保存结果的根目录,如果不存在的话
        if not os.path.exists(save_root_path):
            os.mkdir(save_root_path)

        # 遍历输入的图像目录
        for root, dir, files in os.walk(img_dir):
            for file in files:
                image_path = os.path.join(root, file)  # 图像文件路径
                save_path = os.path.join(save_root_path, file)  # 保存结果的路径

                # 如果输入的是视频文件,则执行视频目标检测
                if "mp4" in file or 'avi' in file:
                    cap = cv2.VideoCapture(image_path)  # 打开视频文件
                    frame_height = int(cap.get(cv2.CAP_PROP_FRAME_HEIGHT))
                    frame_width = int(cap.get(cv2.CAP_PROP_FRAME_WIDTH))
                    fps = cap.get(cv2.CAP_PROP_FPS)
                    size = (frame_width, frame_height)
                    fourcc = cv2.VideoWriter_fourcc(*'XVID')  # 视频编码格式,这里使用 XVID
                    out = cv2.VideoWriter(save_path, fourcc, fps, size)  # 创建输出视频文件对象

                    # 循环读取视频帧,并进行目标检测
                    while cap.isOpened():
                        ok, frame = cap.read()  # 读取一帧图像
                        if not ok:  # 如果读取失败,说明视频已经结束
                            break

                        # 对当前帧执行目标检测
                        frame = model.detect(frame)

                        # 将目标检测结果写入输出视频
                        out.write(frame)

                    # 释放视频对象
                    cap.release()
                    out.release()
                    print("  finish:   ", file)

                # 如果输入的是图像文件,则执行图像目标检测
                elif 'jpg' in file or 'png' in file:
                    srcimg = cv2.imread(image_path)  # 读取图像
                    srcimg = model.detect(srcimg)  # 对图像执行目标检测
                    print("  finish:   ", file)

                    # 将目标检测结果保存为图像文件
                    cv2.imwrite(save_path, srcimg)
主函数
import time
import cv2
from yolov5_dnn import mult_test

if __name__ == "__main__":


    onnx_path = r'.\weights\yolov5s.onnx'
    input_path = r'./input_image'
    save_path = r'./output_image'
    # opencv的版本为4.5.2.52  其他版本不行
    #video=True代表开启摄像头
    mult_test(onnx_path, input_path, save_path, video=True)
权重文件及全部代码
链接:https://pan.baidu.com/s/1vdQUnq9bdB37gBgA5arhRA
提取码:07sy

