目录
线程池的实现过程
线程池的创建
添加任务队列
线程进行处理任务
线程池资源释放
线程池完整程序
线程池v1.0版本总结
线程池的实现过程
实现线程池首先要确定线程池有哪些属性
- 线程池中线程的数量
- 线程池中已工作的线程数量
- 任务队列
- 任务队列的大小
- 任务队列的锁
还需要确定线程池的三种条件情况
(1)任务队列为空时:线程池里的线程需要阻塞等待
(2)任务队列为满:不能再新增任务
(3)任务队列不为空:线程池里的线程处理任务
线程池的创建
定义任务队列结构体
所有任务以函数指针的方式存储。
struct job
{
    void *(*func)(void *arg);
    void *arg;
    struct job *next;
};
定义线程池结构体
struct threadpool
{
    int thread_num;         //已开启的线程数量
    pthread_t *pthread_ids; //保存线程池中线程的id

    struct job *head;  //任务队列的头
    struct job *tail;  //任务队列的尾
    int queue_max_num; //任务队列的最大数
    int queue_cur_num; //任务队列已有多少个任务

    pthread_mutex_t mutex;
    pthread_cond_t queue_empty;     //控制任务队列为空的条件
    pthread_cond_t queue_not_empty; //控制任务队列不为空的条件
    pthread_cond_t queue_not_full;  //控制任务队列不为满的条件
};
在main函数中,创建一个线程池,并初始化线程池中线程数量和任务数量,最后分配线程号
    struct threadpool *pool = (struct threadpool*)malloc(sizeof(struct threadpool));
    //malloc
    int thread_num = 20;
    int queue_max_num = 100;

    pool->thread_num = thread_num;
    pool->pthread_ids = malloc(sizeof(pthread_t)*thread_num);
//malloc接着创建线程池中线程,注意要将线程池作为参数传入到线程处理函数中,让每个线程知道当前属于哪个线程池,还要知道当前处理的是哪个任务队列(任务队列的头和尾刚好存储在线程池中)。
注:也可以将struct threadpool *pool = (struct threadpool*)malloc(sizeof(struct threadpool));放在全局范围内,这样每个线程都可以看到,但是不安全。因此我们定义为局部变量。
    void* threadpool_function(void *arg)
    {
        struct threadpool *pool = (struct threadpool*)arg;
        while (1)
        {

        }
    }
    ...
    int main()
    ...
    for(int i = 0;i<pool->thread_num;i++)
    {
        pthread_create(&(pool->pthread_ids[i]),NULL,threadpool_function,(void*)pool);
    }
    ...
初始化任务队列
    pool->queue_max_num = queue_max_num;
    pool->queue_cur_num=0;
    pool->head=NULL;
    pool->tail=NULL;
最后初始化锁和条件变量
    pthread_mutex_init(&(pool->mutex),NULL);
    pthread_cond_init(&(pool->queue_empty),NULL);
    pthread_cond_init(&(pool->queue_not_empty),NULL);
    pthread_cond_init(&(pool->queue_not_full),NULL);
对于上面线程池的创建我们可以封装成一个函数
struct threadpool* threadpool_init(int thread_num,int queue_max_num)
{
    struct threadpool *pool = (struct threadpool*)malloc(sizeof(struct threadpool));
    //malloc
    pool->queue_max_num = queue_max_num;
    pool->queue_cur_num=0;
    pool->head=NULL;
    pool->tail=NULL;

    pthread_mutex_init(&(pool->mutex),NULL);
    pthread_cond_init(&(pool->queue_empty),NULL);
    pthread_cond_init(&(pool->queue_not_empty),NULL);
    pthread_cond_init(&(pool->queue_not_full),NULL);

    pool->thread_num = thread_num;
    pool->pthread_ids = malloc(sizeof(pthread_t)*thread_num);
    //malloc

    for(int i = 0;i<pool->thread_num;i++)
    {
        pthread_create(&(pool->pthread_ids[i]),NULL,threadpool_function,(void*)pool);
    }
    return pool;
}
我们一个要实现三个接口:创建好线程池之后,线程池需要去处理任务,我们还需要向任务队列里面添加任务。
线程池怎么用,核心就是实现线程池里面的线程处理函数,再一个就是往任务队列里添加任务。
添加任务队列
线程如何工作需要依托于任务队列里的任务来做,因此我们先不继续写线程处理函数,我们先往任务队列里存放任务。
任务队列里每一个节点放的是一个函数指针,我们将想要每个线程做的操作封装成一个函数,然后把函数的地址传给这个指针。这样的话,每一个节点函数指针对应的就是所要执行的任务。
我们让每个任务都打印两句话
void *work(void *arg)
{
    char *p = (char *)arg;
    printf("hello world! %s\n", p);
    printf("welcome to Nanjing! %s\n", p);
    sleep(1);
}
我们将向任务队列里添加一个任务的操作也封装成函数
void threadpool_add_job(struct threadpool *pool, void *(*func)(void *arg), void *arg)
{
    struct job *pjob = (struct job *)malloc(sizeof(struct job));

    pjob->func = func;
    pjob->arg = arg;

    if (pool->head == NULL)
    {
        pool->head = pool->tail = pjob;
    }
    else
    {
        pool->tail->next = pjob;
        pool->tail = pjob;
    }
    pool->queue_cur_num++;
}
上面只是最基本的添加任务,我们还需要对任务队列进行状态判断
对任务队列已满的情况添加进来,将上锁解锁和条件变量用上
void threadpool_add_job(struct threadpool *pool, void *(*func)(void *arg), void *arg)
{
    pthread_mutex_lock(&(pool->mutex));
    //如果任务队列已满
    while(pool->queue_cur_num == pool->queue_max_num)
    {
        pthread_cond_wait(&(pool->queue_not_full),&(pool->mutex));
    }
    struct job *pjob = (struct job *)malloc(sizeof(struct job));

    pjob->func = func;
    pjob->arg = arg;

    if (pool->head == NULL)
    {
        pool->head = pool->tail = pjob;
    }
    else
    {
        pool->tail->next = pjob;
        pool->tail = pjob;
    }
    pool->queue_cur_num++;
    pthread_mutex_unlock(&(pool->mutex));
}
线程进行处理任务
在线程处理函数中对任务队列进行任务处理,线程的工作方式是每次从任务队列取一个任务去执行操作,执行完成之后回头来再取,来回往复
void *threadpool_function(void *arg)
{
    struct threadpool *pool = (struct threadpool *)arg;
    struct job *pjob = NULL;
    while (1)
    {
        pthread_mutex_lock(&(pool->mutex));
        pjob = pool->head;
        pool->queue_cur_num--;

        if(pool->queue_cur_num==0)
        {
            pool->head =pool->tail=NULL;
        }
        else
        {
            pool->head=pool->head->next;
        }

        pthread_mutex_unlock(&(pool->mutex));

        (*(pjob->func))(pjob->arg);
        free(pjob);
        pjob=NULL;
    }
}
但是我们在向任务队列添加任务前就已经创建好了线程池,也就是说线程会在任务添加进前已经运行。因此对于线程处理函数中pjob = pool->head;(第7行),如果开始时任务还没来得及添加进任务队列,会导致pool->head为NULL,从而导致 pool->head=pool->head->next; 以及 (*(pjob->func))(pjob->arg);发生段错误。

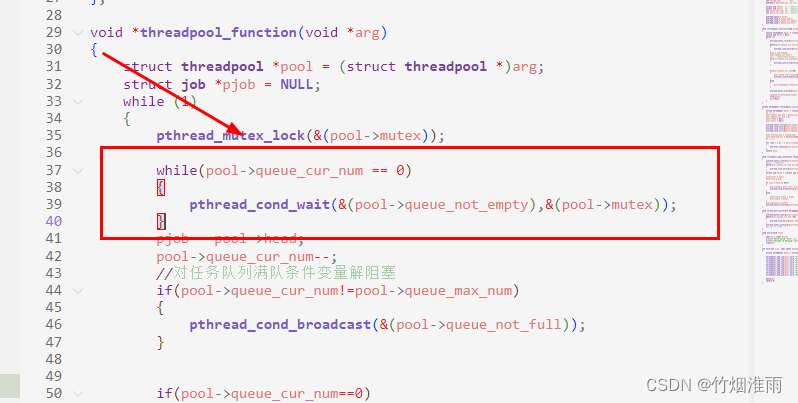
因此还需要进行判断任务队列是否为空,使用条件变量进行阻塞,等待任务添加进来
void *threadpool_function(void *arg)
{
    struct threadpool *pool = (struct threadpool *)arg;
    struct job *pjob = NULL;
    while (1)
    {
        pthread_mutex_lock(&(pool->mutex));
        //判断任务队列是否为空
        while(pool->queue_cur_num == 0)
        {
            pthread_cond_wait(&(pool->queue_not_empty),&(pool->mutex));
        }
        pjob = pool->head;
        pool->queue_cur_num--;

        if(pool->queue_cur_num==0)
        {
            pool->head =pool->tail=NULL;
        }
        else
        {
            pool->head=pool->head->next;
        }

        pthread_mutex_unlock(&(pool->mutex));

        (*(pjob->func))(pjob->arg);
        free(pjob);
        pjob=NULL;
    }
}
然后在添加任务队列函数中,如果任务队列为空就进行广播,解阻塞
    void threadpool_add_job(struct threadpool *pool, void *(*func)(void *arg), void *arg)
    {
    ...
    if (pool->head == NULL)
    {
        pool->head = pool->tail = pjob;
        pthread_cond_broadcast(&(pool->queue_not_empty));
    }
    ...
    }
在main函数中创建10个任务
int main(int argc, char const *argv[])
{
struct threadpool *pool = threadpool_init(10, 100);
threadpool_add_job(pool,work,"1");
threadpool_add_job(pool,work,"2");
threadpool_add_job(pool,work,"3");
threadpool_add_job(pool,work,"4");
threadpool_add_job(pool,work,"5");
threadpool_add_job(pool,work,"6");
threadpool_add_job(pool,work,"7");
threadpool_add_job(pool,work,"8");
threadpool_add_job(pool,work,"9");
threadpool_add_job(pool,work,"10");
while(1);
return 0;
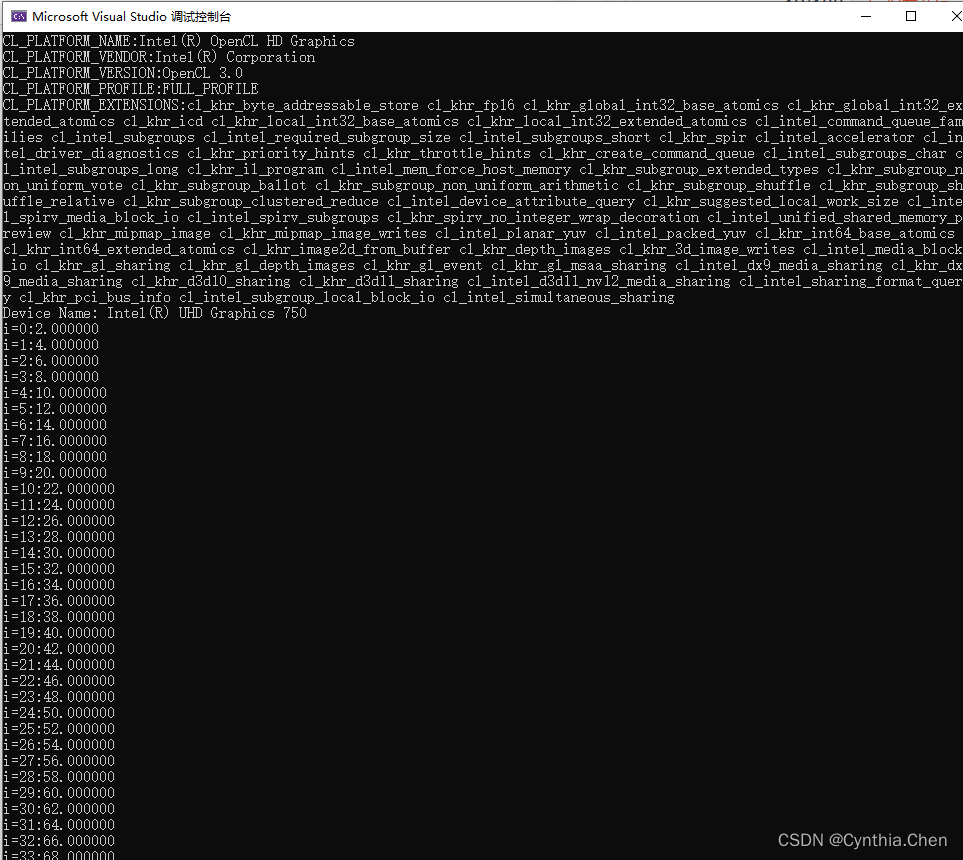
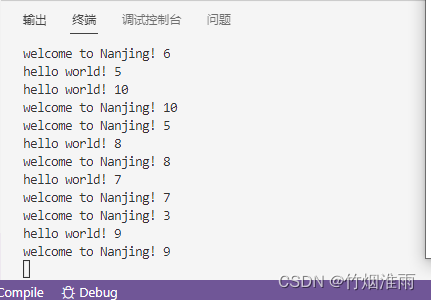
}运行效果如下:
所有的任务都被执行了,执行顺序由线程调度器的时间片调度决定

对于任务队列已满的条件变量我们还需要在线程处理函数中判断进行解阻塞
void threadpool_add_job(struct threadpool *pool, void *(*func)(void *arg), void *arg)
{
... ...
//如果任务队列已满
while(pool->queue_cur_num == pool->queue_max_num)
{
    pthread_cond_wait(&(pool->queue_not_full),&(pool->mutex));
}
...
}
线程处理函数
void *threadpool_function(void *arg)
{
    struct threadpool *pool = (struct threadpool *)arg;
    struct job *pjob = NULL;
    while (1)
    {
        pthread_mutex_lock(&(pool->mutex));

        while(pool->queue_cur_num == 0)
        {
            pthread_cond_wait(&(pool->queue_not_empty),&(pool->mutex));
        }
        pjob = pool->head;
        pool->queue_cur_num--;
        //对任务队列满队条件变量解阻塞
        if(pool->queue_cur_num!=pool->queue_max_num)
        {
            pthread_cond_broadcast(&(pool->queue_not_full));
        }

        if(pool->queue_cur_num==0)
        {
            pool->head =pool->tail=NULL;
        }
        else
        {
            pool->head=pool->head->next;
        }

        pthread_mutex_unlock(&(pool->mutex));

        (*(pjob->func))(pjob->arg);
        free(pjob);
        pjob=NULL;
    }
}
至此线程池的全部实现已完成80%,我们还需要对线程池进行线程资源释放等操作,如果不销毁会导致僵尸线程。
线程池资源释放
我们一定要当任务队列为空的时候,才能对线程池进行销毁,因此我们在线程销毁函数里要使用任务为空的条件变量进行阻塞等待
void thread_destroy(struct threadpool *pool)
{
    pthread_mutex_lock(&(pool->mutex));
    while(pool->queue_cur_num !=0)
    {
        pthread_cond_wait(&(pool->queue_empty),&(pool->mutex));
    }
    pthread_mutex_unlock(&(pool->mutex));
... ...
}
在线程函数中,当判断任务数量为0时,进行信号量解阻塞
...
if(pool->queue_cur_num==0)
{
pool->head =pool->tail=NULL;
pthread_cond_broadcast(&(pool->queue_empty));
}
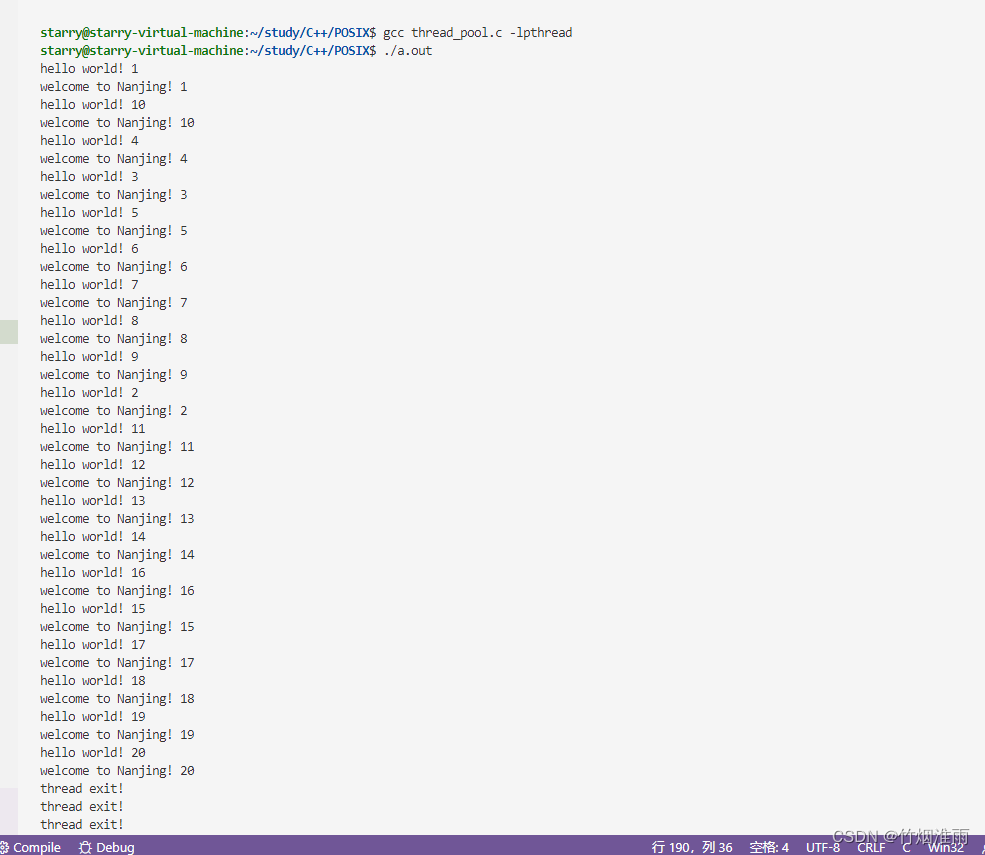
...而当任务队列里任务为空时,所有线程都将阻塞:
因此我们在要销毁线程的时候,通知所有阻塞的线程继续执行(可省略),线程池资源回收函数如下(其中要注意使用pthread_cancel进行线程退出时线程需要有系统调用,如sleep):
void thread_destroy(struct threadpool *pool)
{
    pthread_mutex_lock(&(pool->mutex));
    while(pool->queue_cur_num !=0)
    {
        pthread_cond_wait(&(pool->queue_empty),&(pool->mutex));
    }
    pthread_mutex_unlock(&(pool->mutex));
    //通知所有阻塞的线程
    pthread_cond_broadcast(&(pool->queue_not_empty));
    pthread_cond_broadcast(&(pool->queue_not_full));//可不要

    for(int i=0;i<pool->thread_num;i++)
    {
        printf("thread exit!\n");
        pthread_cancel(pool->pthread_ids[i]);
        pthread_join(pool->pthread_ids[i],NULL);
    }

    pthread_mutex_destroy(&(pool->mutex));
    pthread_cond_destroy(&(pool->queue_empty));
    pthread_cond_destroy(&(pool->queue_not_empty));
    pthread_cond_destroy(&(pool->queue_not_full));

    free(pool->pthread_ids);

    //为了以防万一,任务队列不为空,要对所有任务进行销毁
    struct job *temp;
    while(pool->head!=NULL)
    {
        temp = pool->head;
        pool->head=temp->next;
        free(temp);
    }

    free(pool);
}
线程池完整程序
#include <stdio.h>
#include <stdlib.h>
#include <string.h>
#include <pthread.h>
#include <unistd.h>
struct job
{
    void *(*func)(void *arg);
    void *arg;
    struct job *next;
};

struct threadpool
{
    int thread_num;         //已开启的线程数量
    pthread_t *pthread_ids; //保存线程池中线程的id

    struct job *head;  //任务队列的头
    struct job *tail;  //任务队列的尾
    int queue_max_num; //任务队列的最大数
    int queue_cur_num; //任务队列已有多少个任务

    pthread_mutex_t mutex;
    pthread_cond_t queue_empty;     //控制任务队列为空的条件
    pthread_cond_t queue_not_empty; //控制任务队列不为空的条件
    pthread_cond_t queue_not_full;  //控制任务队列不为满的条件
};

void *threadpool_function(void *arg)
{
    struct threadpool *pool = (struct threadpool *)arg;
    struct job *pjob = NULL;
    while (1)
    {
        pthread_mutex_lock(&(pool->mutex));

        while(pool->queue_cur_num == 0)
        {
            pthread_cond_wait(&(pool->queue_not_empty),&(pool->mutex));
        }
        pjob = pool->head;
        pool->queue_cur_num--;
        //对任务队列满队条件变量解阻塞
        if(pool->queue_cur_num!=pool->queue_max_num)
        {
            pthread_cond_broadcast(&(pool->queue_not_full));
        }


        if(pool->queue_cur_num==0)
        {
            pool->head =pool->tail=NULL;
            pthread_cond_broadcast(&(pool->queue_empty));
        }
        else
        {
            pool->head=pool->head->next;
        }

        pthread_mutex_unlock(&(pool->mutex));

        (*(pjob->func))(pjob->arg);
        free(pjob);
        pjob=NULL;
    }
}

struct threadpool *threadpool_init(int thread_num, int queue_max_num)
{
    struct threadpool *pool = (struct threadpool *)malloc(sizeof(struct threadpool));
    // malloc
    pool->queue_max_num = queue_max_num;
    pool->queue_cur_num = 0;
    pool->head = NULL;
    pool->tail = NULL;

    pthread_mutex_init(&(pool->mutex), NULL);
    pthread_cond_init(&(pool->queue_empty), NULL);
    pthread_cond_init(&(pool->queue_not_empty), NULL);
    pthread_cond_init(&(pool->queue_not_full), NULL);

    pool->thread_num = thread_num;
    pool->pthread_ids = malloc(sizeof(pthread_t) * thread_num);
    // malloc

    for (int i = 0; i < pool->thread_num; i++)
    {
        pthread_create(&(pool->pthread_ids[i]), NULL, threadpool_function, (void *)pool);
    }
    return pool;
}

void threadpool_add_job(struct threadpool *pool, void *(*func)(void *arg), void *arg)
{
    pthread_mutex_lock(&(pool->mutex));
    //如果任务队列已满
    while(pool->queue_cur_num == pool->queue_max_num)
    {
        pthread_cond_wait(&(pool->queue_not_full),&(pool->mutex));
    }
    struct job *pjob = (struct job *)malloc(sizeof(struct job));

    pjob->func = func;
    pjob->arg = arg;

    if (pool->head == NULL)
    {
        pool->head = pool->tail = pjob;
        pthread_cond_broadcast(&(pool->queue_not_empty));
    }
    else
    {
        pool->tail->next = pjob;
        pool->tail = pjob;
    }
    pool->queue_cur_num++;
    pthread_mutex_unlock(&(pool->mutex));
}

void thread_destroy(struct threadpool *pool)
{
    pthread_mutex_lock(&(pool->mutex));
    while(pool->queue_cur_num !=0)
    {
        pthread_cond_wait(&(pool->queue_empty),&(pool->mutex));
    }
    pthread_mutex_unlock(&(pool->mutex));
    //通知所有阻塞的线程
    pthread_cond_broadcast(&(pool->queue_not_empty));
    pthread_cond_broadcast(&(pool->queue_not_full));//可不要

    for(int i=0;i<pool->thread_num;i++)
    {
        printf("thread exit!\n");
        pthread_cancel(pool->pthread_ids[i]);
        pthread_join(pool->pthread_ids[i],NULL);
    }

    pthread_mutex_destroy(&(pool->mutex));
    pthread_cond_destroy(&(pool->queue_empty));
    pthread_cond_destroy(&(pool->queue_not_empty));
    pthread_cond_destroy(&(pool->queue_not_full));

    free(pool->pthread_ids);

    //为了以防万一,任务队列不为空,要对所有任务进行销毁
    struct job *temp;
    while(pool->head!=NULL)
    {
        temp = pool->head;
        pool->head=temp->next;
        free(temp);
    }

    free(pool);
}

void *work(void *arg)
{
    char *p = (char *)arg;
    printf("hello world! %s\n", p);
    printf("welcome to Nanjing! %s\n", p);
    sleep(1);
}

int main(int argc, char const *argv[])
{
    struct threadpool *pool = threadpool_init(10, 100);

    threadpool_add_job(pool,work,"1");
    threadpool_add_job(pool,work,"2");
    threadpool_add_job(pool,work,"3");
    threadpool_add_job(pool,work,"4");
    threadpool_add_job(pool,work,"5");
    threadpool_add_job(pool,work,"6");
    threadpool_add_job(pool,work,"7");
    threadpool_add_job(pool,work,"8");
    threadpool_add_job(pool,work,"9");
    threadpool_add_job(pool,work,"10");

    threadpool_add_job(pool,work,"11");
    threadpool_add_job(pool,work,"12");
    threadpool_add_job(pool,work,"13");
    threadpool_add_job(pool,work,"14");
    threadpool_add_job(pool,work,"15");
    threadpool_add_job(pool,work,"16");
    threadpool_add_job(pool,work,"17");
    threadpool_add_job(pool,work,"18");
    threadpool_add_job(pool,work,"19");
    threadpool_add_job(pool,work,"20");

    thread_destroy(pool);
    sleep(5);
    return 0;
}
线程池v1.0版本总结
我们现在实现的线程池,比如线程数量定义为10,如果任务数量很多的情况下就会导致线程池运行效率下降。而如果定义的线程数量很多,而任务数量很少,就会导致资源浪费。
概况来说就是以下两个问题:
- 线程数量小,但任务多,导致效率下降
- 线程数量多,但任务少,导致资源浪费
我们可以根据任务的多少来动态分配线程池中线程的个数:当任务队列里,任务很多,但线程数量很少的时候,我们就往线程池里增加线程;而当任务队列里,任务数量少,但线程数量多的情况,我们就关闭一些线程。
线程池的v1.0版本到此全部介绍结束,后面就来实现可伸缩性线程池。