记录一下SpringBoot自定义事件监听器的使用方法
案例源码:SpringBoot使用自定义事件监听器的demo
使用的SpringBoot2.0.x版本
<parent>
    <groupId>org.springframework.boot</groupId>
    <artifactId>spring-boot-starter-parent</artifactId>
    <version>2.0.5.RELEASE</version>
    <relativePath/> <!-- lookup parent from repository -->
</parent>
自定义事件监听: 自定义事件 和 自定义监听两部分
自定义事件
继承自ApplicationEvent抽象类,定义自己的构造器
自定义监听
实现ApplicationListener接口,然后实现onApplicationEvent方法
首先自定义事件
ApplicationEvent抽象类

实现继承,用对象方式,新建对象
DemoUser.java
package boot.example.event.events;

public class DemoUser {

    private String username;

    private String password;

    public String getUsername() {
        return username;
    }

    public void setUsername(String username) {
        this.username = username;
    }

    public String getPassword() {
        return password;
    }

    public void setPassword(String password) {
        this.password = password;
    }
}
EventDemoUser.java
package boot.example.event.events;

import org.springframework.context.ApplicationEvent;

public class EventDemoUser extends ApplicationEvent {

    private final DemoUser demoUser;

    public EventDemoUser(Object source, DemoUser demoUser) {
        super(source);
        this.demoUser = demoUser;
    }

    public DemoUser getDemoUser() {
        return demoUser;
    }
}
ApplicationListener接口

自定义监听类
EventDemoUserListener.java
package boot.example.event.listener;

import boot.example.event.events.EventDemoUser;
import org.springframework.context.ApplicationListener;
import org.springframework.scheduling.annotation.Async;
import org.springframework.stereotype.Component;
import org.springframework.stereotype.Service;

//  将监听器装载入spring容器
@Component
//@Service
public class EventDemoUserListener implements ApplicationListener<EventDemoUser> {

    @Async
    @Override
    public void onApplicationEvent(EventDemoUser eventDemoUser) {
        System.out.println("自定义事件监听器(EventDemoUserListener)收到发布的消息: " + eventDemoUser.getDemoUser().getUsername());
        System.out.println("自定义事件监听器(EventDemoUserListener)收到发布的消息: " + eventDemoUser.getDemoUser().getPassword());
    }
}
我这里使用接口的方式来触发
EventDemoUserController.java
package boot.example.event.controller;

import boot.example.event.events.DemoUser;
import boot.example.event.events.EventDemo;
import boot.example.event.events.EventDemoUser;
import org.springframework.context.ApplicationContext;
import org.springframework.context.ApplicationEventPublisher;
import org.springframework.web.bind.annotation.RequestMapping;
import org.springframework.web.bind.annotation.RestController;

import javax.annotation.Resource;

@RestController
@RequestMapping(value="/eventDemoUser")
public class EventDemoUserController {

	@Resource
	private ApplicationContext applicationContext;

	@RequestMapping(value="/test1")
	public String test1() {
		DemoUser demoUser = new DemoUser();
		demoUser.setUsername("admin");
		demoUser.setPassword("123456");

		applicationContext.publishEvent(new EventDemoUser(this, demoUser));
		return "testEventDemo";
	}

	@Resource
	private ApplicationEventPublisher applicationEventPublisher;

	@RequestMapping(value="/test2")
	public String test2() {
		DemoUser demoUser = new DemoUser();
		demoUser.setUsername("admin2");
		demoUser.setPassword("654321");

		applicationContext.publishEvent(new EventDemoUser(this, demoUser));
		return "testEventDemo";
	}

}
这里使用了两种触发方式
@Resource
private ApplicationContext applicationContext;
@Resource
private ApplicationEventPublisher applicationEventPublisher;
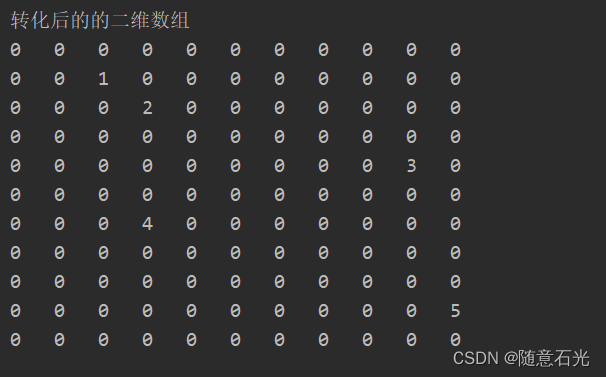
控制台输出查看

自定义监听的几种方式
1.启动时手动向ApplicationContext中添加监听器
EventDemo.java
package boot.example.event.events;

import org.springframework.context.ApplicationEvent;

public class EventDemo extends ApplicationEvent {

    public EventDemo(Object source) {
        super(source);
    }
}
AppEventDemo.java
package boot.example.event;

import boot.example.event.listener.EventDemoListener1;
import org.springframework.boot.SpringApplication;
import org.springframework.boot.autoconfigure.SpringBootApplication;
import org.springframework.context.ConfigurableApplicationContext;
import org.springframework.scheduling.annotation.EnableAsync;

@SpringBootApplication
@EnableAsync
public class AppEventDemo {

    public static void main( String[] args ) {
        ConfigurableApplicationContext context = SpringApplication.run(AppEventDemo.class, args);

        // 手动向ApplicationContext中添加监听器
        context.addApplicationListener(new EventDemoListener1());
        System.out.println( "Hello World!" );
    }

    //  事件监听,自定义事件和自定义监听器类
    //  自定义事件:继承自ApplicationEvent抽象类,定义自己的构造器
    //  自定义监听:实现ApplicationListener接口,实现onApplicationEvent方法


}
EventDemoListener1.java
package boot.example.event.listener;

import boot.example.event.events.EventDemo;
import org.springframework.context.ApplicationListener;

//  手动向ApplicationContext中添加监听器  不要@Component注解就能监听到
public class EventDemoListener1 implements ApplicationListener<EventDemo> {

    @Override
    public void onApplicationEvent(EventDemo eventDemo) {
        Object msg = eventDemo.getSource();
        System.out.println("自定义事件监听器(MyEventListener1)收到发布的消息: " + msg);
    }
}
2.使用@Component注解自动监听
EventDemoListener2.java
package boot.example.event.listener;

import boot.example.event.events.EventDemo;
import org.springframework.context.ApplicationListener;
import org.springframework.stereotype.Component;


//  将监听器装载入spring容器
@Component
public class EventDemoListener2 implements ApplicationListener<EventDemo> {
    @Override
    public void onApplicationEvent(EventDemo eventDemo) {
        Object msg = eventDemo.getSource();
        System.out.println("自定义事件监听器(MyEventListener2)收到发布的消息: " + msg);
    }
}
3.在application.properties中配置监听器,可以不用注解
EventDemoListener3.java
package boot.example.event.listener;

import boot.example.event.events.EventDemo;
import org.springframework.context.ApplicationListener;


//  在application.properties中配置监听器,可以不用注解
public class EventDemoListener3 implements ApplicationListener<EventDemo> {
    @Override
    public void onApplicationEvent(EventDemo eventDemo) {
        Object msg = eventDemo.getSource();
        System.out.println("自定义事件监听器(MyEventListener3)收到发布的消息: " + msg);
    }

}
application.properties配置
context.listener.classes=boot.example.event.listener.EventDemoListener3
4.通过@EventListener注解实现事件监听(使用最方便)
EventDemoListener4.java
package boot.example.event.listener;

import boot.example.event.events.EventDemo;
import org.springframework.context.event.EventListener;
import org.springframework.stereotype.Component;


//  通过@EventListener注解实现事件监听
@Component
public class EventDemoListener4 {
    @EventListener
    public void listener(EventDemo eventDemo) {
        Object msg = eventDemo.getSource();
        System.out.println("自定义事件监听器(MyEventListener4)收到发布的消息: " + msg);
    }

}
触发监听
EventDemoController .java
package boot.example.event.controller;

import boot.example.event.events.EventDemo;
import org.springframework.context.ApplicationContext;
import org.springframework.web.bind.annotation.RequestMapping;
import org.springframework.web.bind.annotation.RestController;

import javax.annotation.Resource;

@RestController
@RequestMapping(value="/eventDemo")
public class EventDemoController {

	@Resource
	private ApplicationContext applicationContext;

	@RequestMapping(value="/test")
	public String test() {
		applicationContext.publishEvent(new EventDemo("测试监听事件"));
		return "testEventDemo";
	}
}
控制台查看 四种方式执行默认是有先后顺序的

还有一种方式 这种方式使用更方便
DemoRole.java 和 DemoUser.java
package boot.example.event.events;

public class DemoRole {

    private Integer roleId;

    private String roleName;

    public Integer getRoleId() {
        return roleId;
    }

    public void setRoleId(Integer roleId) {
        this.roleId = roleId;
    }

    public String getRoleName() {
        return roleName;
    }

    public void setRoleName(String roleName) {
        this.roleName = roleName;
    }
}
package boot.example.event.events;

public class DemoUser {

    private String username;

    private String password;

    public String getUsername() {
        return username;
    }

    public void setUsername(String username) {
        this.username = username;
    }

    public String getPassword() {
        return password;
    }

    public void setPassword(String password) {
        this.password = password;
    }
}
监听类EventDemoListenerMultiple.java
package boot.example.event.listener;


import boot.example.event.events.DemoRole;
import boot.example.event.events.DemoUser;
import org.springframework.context.event.EventListener;
import org.springframework.scheduling.annotation.Async;
import org.springframework.stereotype.Component;
import org.springframework.stereotype.Service;

@Component
//@Service
public class EventDemoListenerMultiple {

    @Async
    @EventListener(DemoUser.class)
    public void listenerDemoUser(DemoUser demoUser) {
        String name = demoUser.getUsername();
        System.out.println("listenerDemoUser---"+name);
    }

    @Async
    @EventListener(DemoRole.class)
    public void listenerDemoUser(DemoRole demoRole) {
        String name = demoRole.getRoleName();
        System.out.println("listenerDemoUser---"+name);
    }

}
监听器触发类EventDemoMultipleController.java
package boot.example.event.controller;

import boot.example.event.events.DemoRole;
import boot.example.event.events.DemoUser;
import org.springframework.context.ApplicationContext;
import org.springframework.context.ApplicationEventPublisher;
import org.springframework.web.bind.annotation.RequestMapping;
import org.springframework.web.bind.annotation.RestController;
import javax.annotation.Resource;

@RestController
@RequestMapping(value="/eventDemo")
public class EventDemoMultipleController {

	@Resource
	private ApplicationContext applicationContext;

	@RequestMapping(value="/demoUser")
	public String demoUser() {
		DemoUser demoUser = new DemoUser();
		demoUser.setUsername("admin");
		demoUser.setPassword("123456");

		applicationContext.publishEvent(demoUser);
		return "testEventDemo";
	}

	@Resource
	private ApplicationEventPublisher applicationEventPublisher;

	@RequestMapping(value="/demoRole")
	public String demoRole() {
		DemoRole demoRole = new DemoRole();
		demoRole.setRoleId(4);
		demoRole.setRoleName("角色");

		applicationContext.publishEvent(demoRole);
		return "testEventDemo";
	}

}
Servlet渐渐地淡出视野,也记录一下使用
CustomServletContextListener.java
package boot.example.event.config;

import javax.servlet.ServletContextEvent;
import javax.servlet.ServletContextListener;
import javax.servlet.annotation.WebListener;


/**
 *  servelt的监听器
 */
@WebListener
public class CustomServletContextListener implements ServletContextListener {

    @Override
    public void contextInitialized(ServletContextEvent sce) {
        //  SpringBoot WEB启动间执行一次
        System.out.println("CustomServletContextListener--contextInitialized");
    }

    @Override
    public void contextDestroyed(ServletContextEvent sce) {
        //  SpringBoot WEB销毁执行
        System.out.println("CustomServletContextListener--contextDestroyed");
    }


}
在启动类加上扫描注解
@ServletComponentScan("boot.example.event.config")
项目结构

记录到此!



![linux鲁班猫代码初尝试[编译镜像][修改根文件系统重编译][修改设备树改屏幕为MIPI]](https://img-blog.csdnimg.cn/625fa74898f84a52b8366e8cd4e00f6b.png)

