文章目录
- 映射关系多对一
- 映射关系-官方文档
- 映射关系多对1-基本介绍
- 基本介绍
- 注意细节
- 映射关系多对1-映射方式
- 映射方式
- 配置Mapper.xml 方式-应用实例
- 注解实现多对1 映射-应用实例
映射关系多对一
映射关系-官方文档
文档地址: https://mybatis.org/mybatis-3/zh/sqlmap-xml.html
映射关系多对1-基本介绍
基本介绍
- 项目中多对1 的关系是一个基本的映射关系, 多对1, 也可以理解成是1 对多.
- User — Pet: 一个用户可以养多只宠物
- Dep —Emp : 一个部门可以有多个员工
注意细节
- 我们直接讲双向的多对一的关系,单向的多对一比双向的多对一简单。
- 在实际的项目开发中, 要求会使用双向的多对一的映射关系
- 什么是双向的多对一的关系: 比如通过User 可以查询到对应的Pet, 反过来,通过Pet 也可以级联查询到对应的User 信息.
- 多对多的关系,是在多对1 的基础上扩展.
映射关系多对1-映射方式
映射方式
方式1:通过配置XxxMapper.xml 实现多对1
方式2:通过注解的方式实现多对1
配置Mapper.xml 方式-应用实例
需求说明: 实现级联查询,通过user 的id 可以查询到用户信息,并可以查询到关联的pet信息,
反过来,通过Pet 的id 可以查询到Pet 的信息,并且可以级联查询到它的主人User对象信息。
- 创建mybatis_user 和mybatis_pet 表
CREATE TABLE mybatis_user
(
        id INT PRIMARY KEY AUTO_INCREMENT,
	NAME VARCHAR(32) NOT NULL DEFAULT ''
)CHARSET=utf8 ;

CREATE TABLE mybatis_pet
(
        id INT PRIMARY KEY AUTO_INCREMENT,
        nickname VARCHAR(32) NOT NULL DEFAULT '',
        user_id INT ,
        FOREIGN KEY (user_id) REFERENCES mybatis_user(id)
)CHARSET=utf8 ;

INSERT INTO mybatis_user
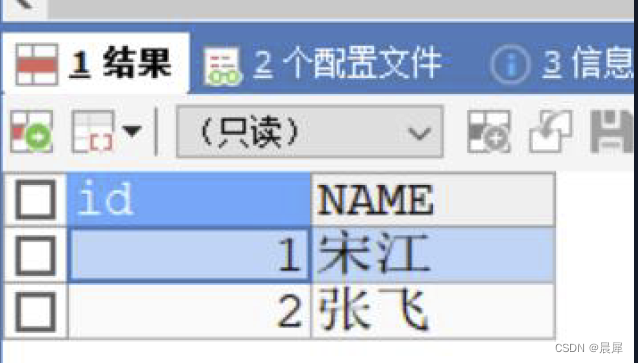
VALUES(NULL,'宋江'),(NULL,'张飞');
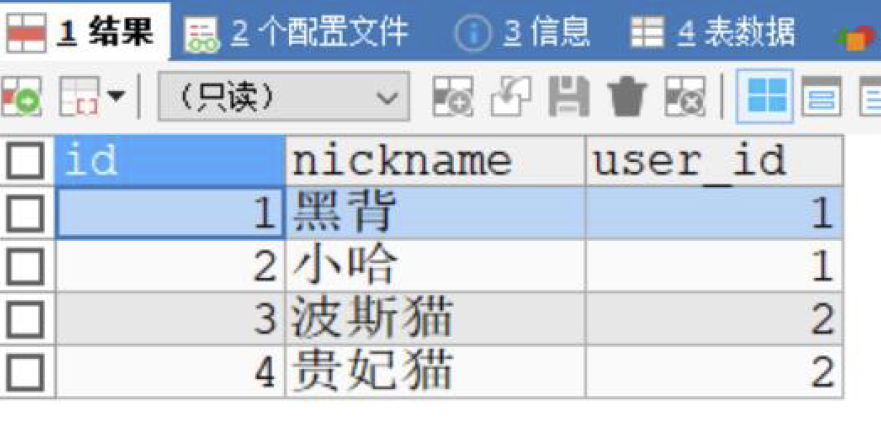
INSERT INTO mybatis_pet
VALUES(1,'黑背',1),(2,'小哈',1);
INSERT INTO mybatis_pet
VALUES(3,'波斯猫',2),(4,'贵妃猫',2);

SELECT * FROM mybatis_user;
SELECT * FROM mybatis_pet;
- 创建src\main\java\com\nlc\entity\Pet.java
public class Pet {
    private Integer id;
    private String nickname;
    //一个pet对应一个主人 User对象
    private User user;

    public Integer getId() {
        return id;
    }

    public void setId(Integer id) {
        this.id = id;
    }

    public String getNickname() {
        return nickname;
    }

    public void setNickname(String nickname) {
        this.nickname = nickname;
    }

    public User getUser() {
        return user;
    }

    public void setUser(User user) {
        this.user = user;
    }

}
创建src\main\java\com\nlc\entity\User.java
public class User {
    private Integer id;
    private String name;
    //因为一个user可以养多个宠物,mybatis 使用集合List<Pet>体现这个关系
    private List<Pet> pets;

    public Integer getId() {
        return id;
    }

    public void setId(Integer id) {
        this.id = id;
    }

    public String getName() {
        return name;
    }

    public void setName(String name) {
        this.name = name;
    }

    public List<Pet> getPets() {
        return pets;
    }

    public void setPets(List<Pet> pets) {
        this.pets = pets;
    }

    //这toString会带来麻烦=>会造成StackOverFlow
    //@Override
    //public String toString() {
    //    return "User{" +
    //            "id=" + id +
    //            ", name='" + name + '\'' +
    //            ", pets=" + pets +
    //            '}';
    //}
}
-
创建PetMapper.java
public interface PetMapper {
    //通过User的id来获取pet对象,可能有多个,因此使用List接收
    public List<Pet> getPetByUserId(Integer userId);

    //通过pet的id获取Pet对象, 同时会查询到pet对象关联的user对象
    public Pet getPetById(Integer id);
}
创建UserMapper.java
public interface UserMapper {

    //通过id获取User对象
    public User getUserById(Integer id);

}
-
创建UserMapper.xml
<?xml version="1.0" encoding="UTF-8" ?> <!DOCTYPE mapper PUBLIC "-//mybatis.org//DTD Mapper 3.0//EN" "http://mybatis.org/dtd/mybatis-3-mapper.dtd"> <mapper nameNlcace="com.nlc.mapper.UserMapper"> <!--解读 1、一定要想一想我们前面1-1是如何实现 2、配置/实现 public User getUserById(Integer id); 3、思路(1) 先通过user-id 查询得到user信息 (2) 再根据user-id查询对应的pet信息 并映射到User-List<Pet> pets --> <resultMap id="UserResultMap" type="User"> <id property="id" column="id"/> <result property="name" column="name"/> <!--解读:因为pets属性是集合,因此这里需要是collection标签来处理 1. ofType="Pet" 指定返回的集合中存放的数据类型Pet 2. collection 表示 pets 是一个集合 3. property="pets" 是返回的user对象的属性 pets 4. column="id" SELECT * FROM `mybatis_user` WHERE `id` = #{id} 返回的id字段对应的值 --> <collection property="pets" column="id" ofType="Pet" select="com.nlc.mapper.PetMapper.getPetByUserId"/> </resultMap> <select id="getUserById" parameterType="Integer" resultMap="UserResultMap"> SELECT * FROM `mybatis_user` WHERE `id` = #{id} </select> </mapper> -
创建PetMapper.xml
<?xml version="1.0" encoding="UTF-8" ?>
<!DOCTYPE mapper
        PUBLIC "-//mybatis.org//DTD Mapper 3.0//EN"
        "http://mybatis.org/dtd/mybatis-3-mapper.dtd">
<mapper nameNlcace="com.nlc.mapper.PetMapper">

    <!--
        1、通过User的id来获取pet对象,可能有多个,因此使用List接收
        2、public List<Pet> getPetByUserId(Integer userId);
        3. 完成的思路和前面大体相同.
    -->
    <resultMap id="PetResultMap" type="Pet">
        <id property="id" column="id"/>
        <result property="nickname" column="nickname"/>
        <association property="user" column="user_id"
                     select="com.nlc.mapper.UserMapper.getUserById" />
    </resultMap>
    <select id="getPetByUserId" parameterType="Integer" resultMap="PetResultMap">
        SELECT * FROM `mybatis_pet` WHERE `user_id` = #{userId}
    </select>

    <!--说明
        1. 注意体会resultMap带来好处, 直接复用
        2. 实现/配置public Pet getPetById(Integer id);
        3. 通过pet的id获取Pet对象
    -->
    <select id="getPetById"  parameterType="Integer"  resultMap="PetResultMap">
        SELECT * FROM `mybatis_pet` WHERE `id` = #{id}
    </select>
</mapper>
-
创建PetMapperTest.java 完成测试
public class PetMapperTest { //属性 private SqlSession sqlSession; private PetMapper petMapper; //初始化 @Before public void init() { //获取到sqlSession sqlSession = MyBatisUtils.getSqlSession(); petMapper = sqlSession.getMapper(PetMapper.class); } @Test public void getPetByUserId() { List<Pet> pets = petMapper.getPetByUserId(2); for (Pet pet : pets) { System.out.println("pet信息-" + pet.getId() + "-" + pet.getNickname()); User user = pet.getUser(); System.out.println("user信息 name-" + user.getName()); } if(sqlSession != null) { sqlSession.close(); } } @Test public void getPetById() { Pet pet = petMapper.getPetById(2); System.out.println("pet信息-" + pet.getId() + "-" + pet.getNickname()); User user = pet.getUser(); System.out.println("user信息-" + user.getId() + "-" + user.getName()); if(sqlSession != null) { sqlSession.close(); } } } -
创建UserMapperTest.java 完成测试
public class UserMapperTest {

    //属性
    private SqlSession sqlSession;
    private UserMapper userMapper;

    //初始化
    @Before
    public void init() {
        //获取到sqlSession
        sqlSession = MyBatisUtils.getSqlSession();
        userMapper = sqlSession.getMapper(UserMapper.class);
    }

    @Test
    public void getUserById() {
        User user = userMapper.getUserById(2);

        System.out.println("user信息-" + user.getId() + "-" + user.getName());

        List<Pet> pets = user.getPets();
        for (Pet pet : pets) {
            System.out.println("养的宠物信息-" + pet.getId() + "-" + pet.getNickname());
        }
        if(sqlSession != null) {
            sqlSession.close();
        }
    }
}
注解实现多对1 映射-应用实例
需求说明: 通过注解的方式来实现下面的多对1 的映射关系,实现级联查询,
完成前面完成的任务,通过User–>Pet 也可Pet->User , 在实际开发中推荐使用配置方式来做
- 创建UserMapperAnnotation.java
// UserMapperAnnotation:以注解的方式来配置多对一
public interface UserMapperAnnotation {
    //通过id获取User对象
    /**
     * 1. 注解的配置就是对应的Mapper.xml文件配置的,改写
     * 2.
     *     1、一定要想一想我们前面1-1是如何实现
     *     2、配置/实现 public User getUserById(Integer id);
     *     3、思路(1) 先通过user-id 查询得到user信息 (2) 再根据user-id查询对应的pet信息
     *       并映射到User-List<Pet> pets
     *     <resultMap id="UserResultMap" type="User">
     *         <id property="id" column="id"/>
     *         <result property="name" column="name"/>
     *         1. ofType="Pet" 指定返回的集合中存放的数据类型Pet
     *         2. collection 表示 pets 是一个集合
     *         3. property="pets" 是返回的user对象的属性 pets
     *         4. column="id" SELECT * FROM `mybatis_user` WHERE `id` = #{id} 返回的id字段对应的值
     *         <collection property="pets" column="id" ofType="Pet"
     *                     select="com.nlc.mapper.PetMapper.getPetByUserId"/>
     *     </resultMap>
     *     <select id="getUserById" parameterType="Integer" resultMap="UserResultMap">
     *         SELECT * FROM `mybatis_user` WHERE `id` = #{id}
     *     </select>
     */

    @Select("SELECT * FROM `mybatis_user` WHERE `id` = #{id}")
    @Results({
          @Result(id = true, property = "id", column = "id"),
          @Result(property = "name", column = "name"),
          //这里注意,pets属性对应的是集合
          @Result(property = "pets",
                        column = "id",
                        many = @Many(select = "com.nlc.mapper.PetMapperAnnotation.getPetByUserId"))
    })
    public User getUserById(Integer id);
}
- 创建PetMapperAnnotation.java
public interface PetMapperAnnotation {
    //通过User的id来获取pet对象,可能有多个,因此使用List接收
    /**
     * 1、通过User的id来获取pet对象,可能有多个,因此使用List接收
     * 2、public List<Pet> getPetByUserId(Integer userId);
     * 3. 完成的思路和前面大体相同.
     * <resultMap id="PetResultMap" type="Pet">
     * <id property="id" column="id"/>
     * <result property="nickname" column="nickname"/>
     * <association property="user" column="user_id"
     * select="com.nlc.mapper.UserMapper.getUserById" />
     * </resultMap>
     * <select id="getPetByUserId" parameterType="Integer" resultMap="PetResultMap">
     * SELECT * FROM `mybatis_pet` WHERE `user_id` = #{userId}
     * </select>
     */

    //id = "PetResultMap" 就是给我们的Results[Result Map] 指定一个名字
    //目的是为了后面复用
    @Select("SELECT * FROM `mybatis_pet` WHERE `user_id` = #{userId}")
    @Results(id = "PetResultMap", value = {
            @Result(id = true, property = "id", column = "id"),
            @Result(property = "nickname", column = "nickname"),
            @Result(property = "user",
                    column = "user_id",
                    one = @One(select = "com.nlc.mapper.UserMapperAnnotation.getUserById"))

    })
    public List<Pet> getPetByUserId(Integer userId);
    //通过pet的id获取Pet对象, 同时会查询到pet对象关联的user对象
    /**
     * <select id="getPetById"  parameterType="Integer"  resultMap="PetResultMap">
     * SELECT * FROM `mybatis_pet` WHERE `id` = #{id}
     * </select>
     * @ResultMap("PetResultMap") 使用/引用我们上面定义的 Results[ResultMap]
     */
    @Select("SELECT * FROM `mybatis_pet` WHERE `id` = #{id}")
    @ResultMap("PetResultMap")
    public Pet getPetById(Integer id);
}
- 创建UserMapperAnnotationTest.java 完成测试
public class UserMapperAnnotationTest {
    //属性
    private SqlSession sqlSession;
    private UserMapperAnnotation userMapperAnnotation;

    //初始化
    @Before
    public void init() {
        //获取到sqlSession
        sqlSession = MyBatisUtils.getSqlSession();
        userMapperAnnotation = sqlSession.getMapper(UserMapperAnnotation.class);
    }

    @Test
    public void getUserById() {

        User user = userMapperAnnotation.getUserById(2);
        System.out.println("user信息-" + user.getId() + "-" + user.getName());

        List<Pet> pets = user.getPets();
        for (Pet pet : pets) {
            System.out.println("宠物信息-" + pet.getId() + "-" + pet.getNickname());
        }

        if(sqlSession != null) {
            sqlSession.close();
        }
    }
}
- 创建PetMapperAnnotationTest.java 完成测试
public class PetMapperAnnotationTest {
    //属性
    private SqlSession sqlSession;
    private PetMapperAnnotation petMapperAnnotation;

    //初始化
    @Before
    public void init() {
        //获取到sqlSession
        sqlSession = MyBatisUtils.getSqlSession();
        petMapperAnnotation = sqlSession.getMapper(PetMapperAnnotation.class);
    }

    @Test
    public void getPetByUserId() {

        List<Pet> pets = petMapperAnnotation.getPetByUserId(1);
        for (Pet pet : pets) {
            System.out.println("宠物信息-" + pet.getId() + "-" + pet.getNickname());
        }

        if(sqlSession != null) {
            sqlSession.close();
        }
    }

    @Test
    public void getPetById() {

        Pet pet = petMapperAnnotation.getPetById(1);
        System.out.println("pet信息-" + pet.getId() + "-" +pet.getNickname());
        User user = pet.getUser();
        System.out.println("user信息-" + user.getId() + "-" + user.getName());
        if(sqlSession != null) {
            sqlSession.close();
        }
    }
}


