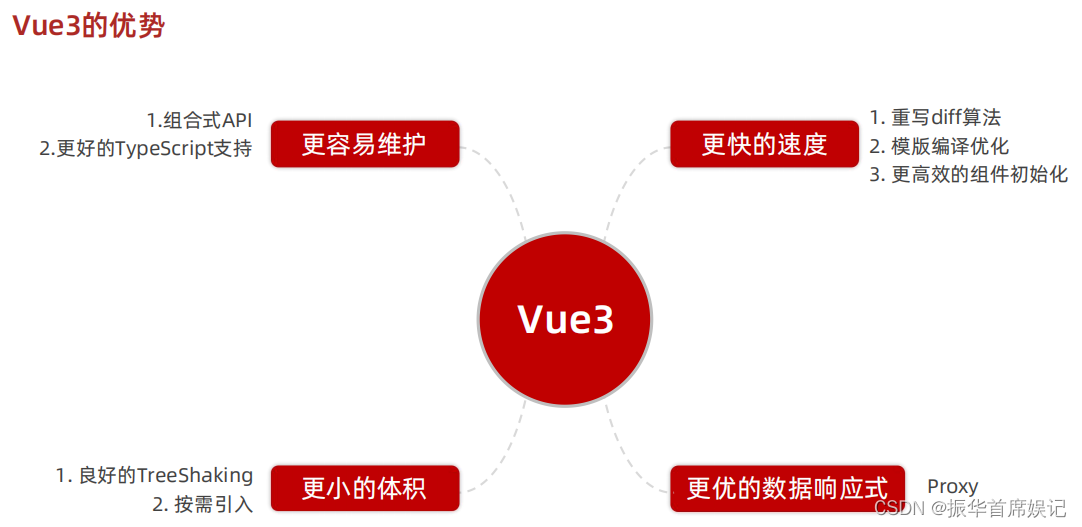
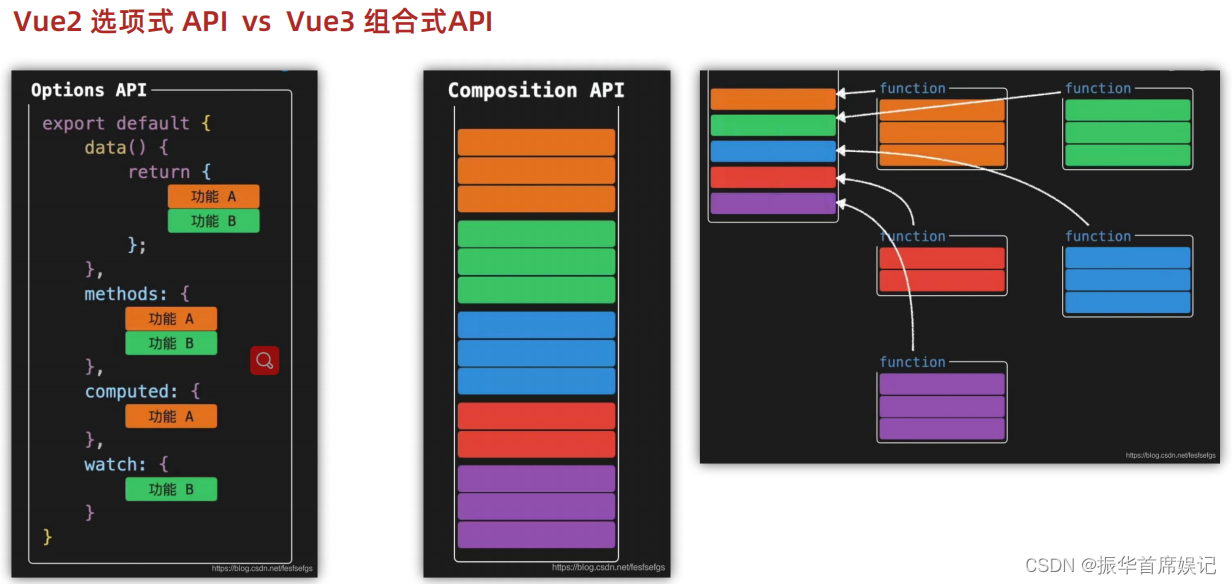
Vue3
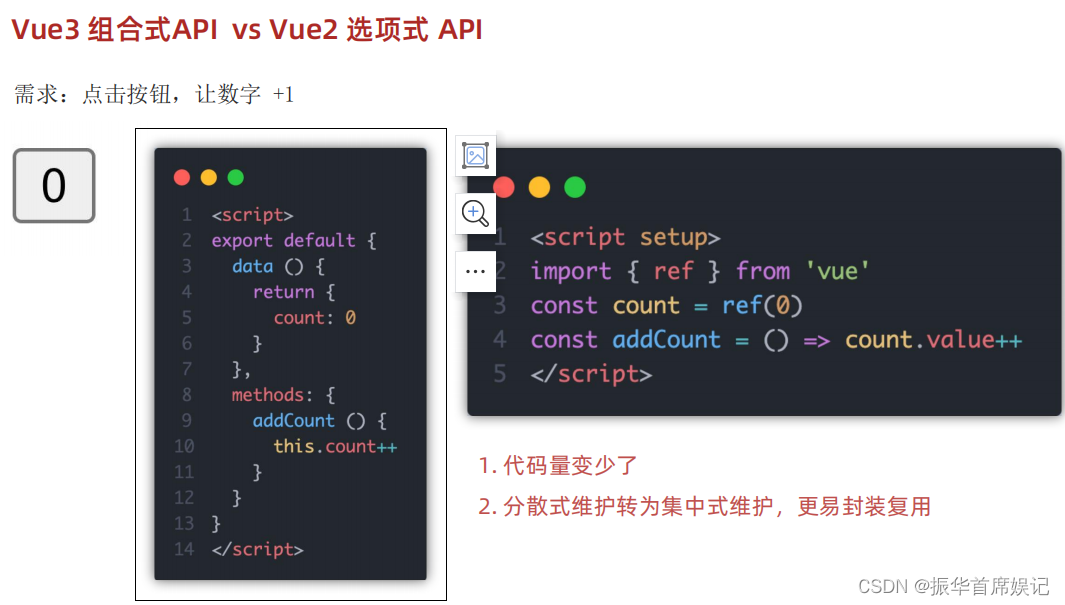
create-vue搭建Vue3项目
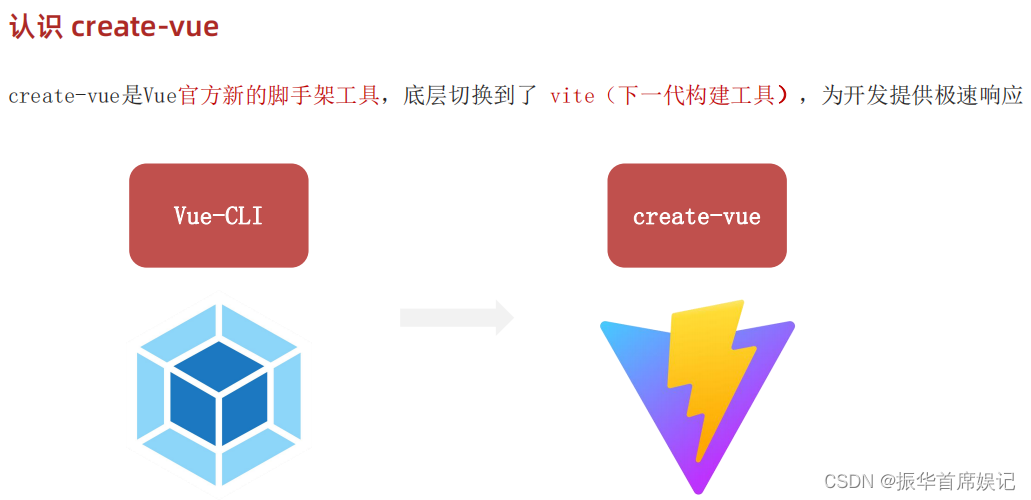
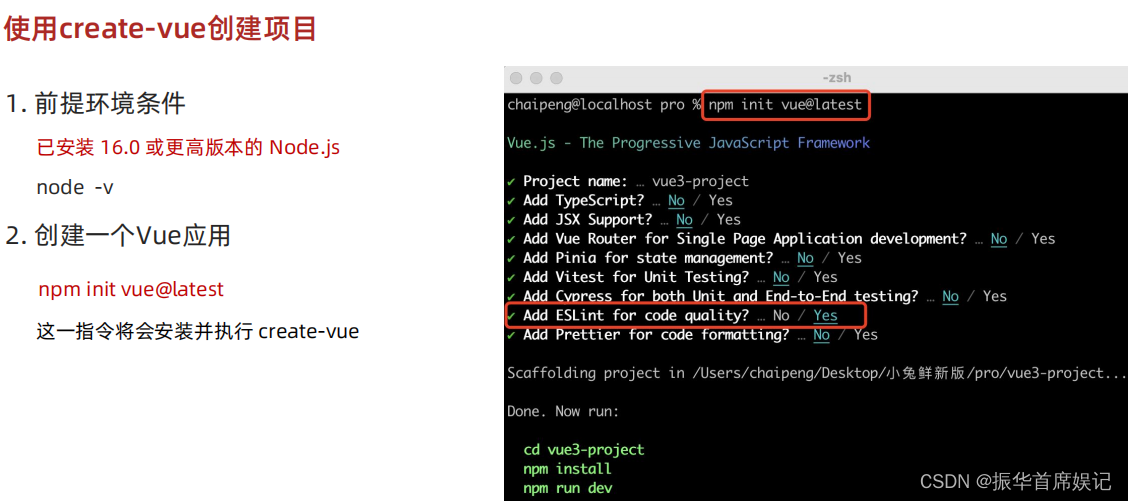
注意要使用nodejs16.0版本以上,windows升级node可以西安使用where node查看本地node位置,然后到官网下载msi文件,在本地路径下安装即可

安装完可以使用node -v检查版本信息
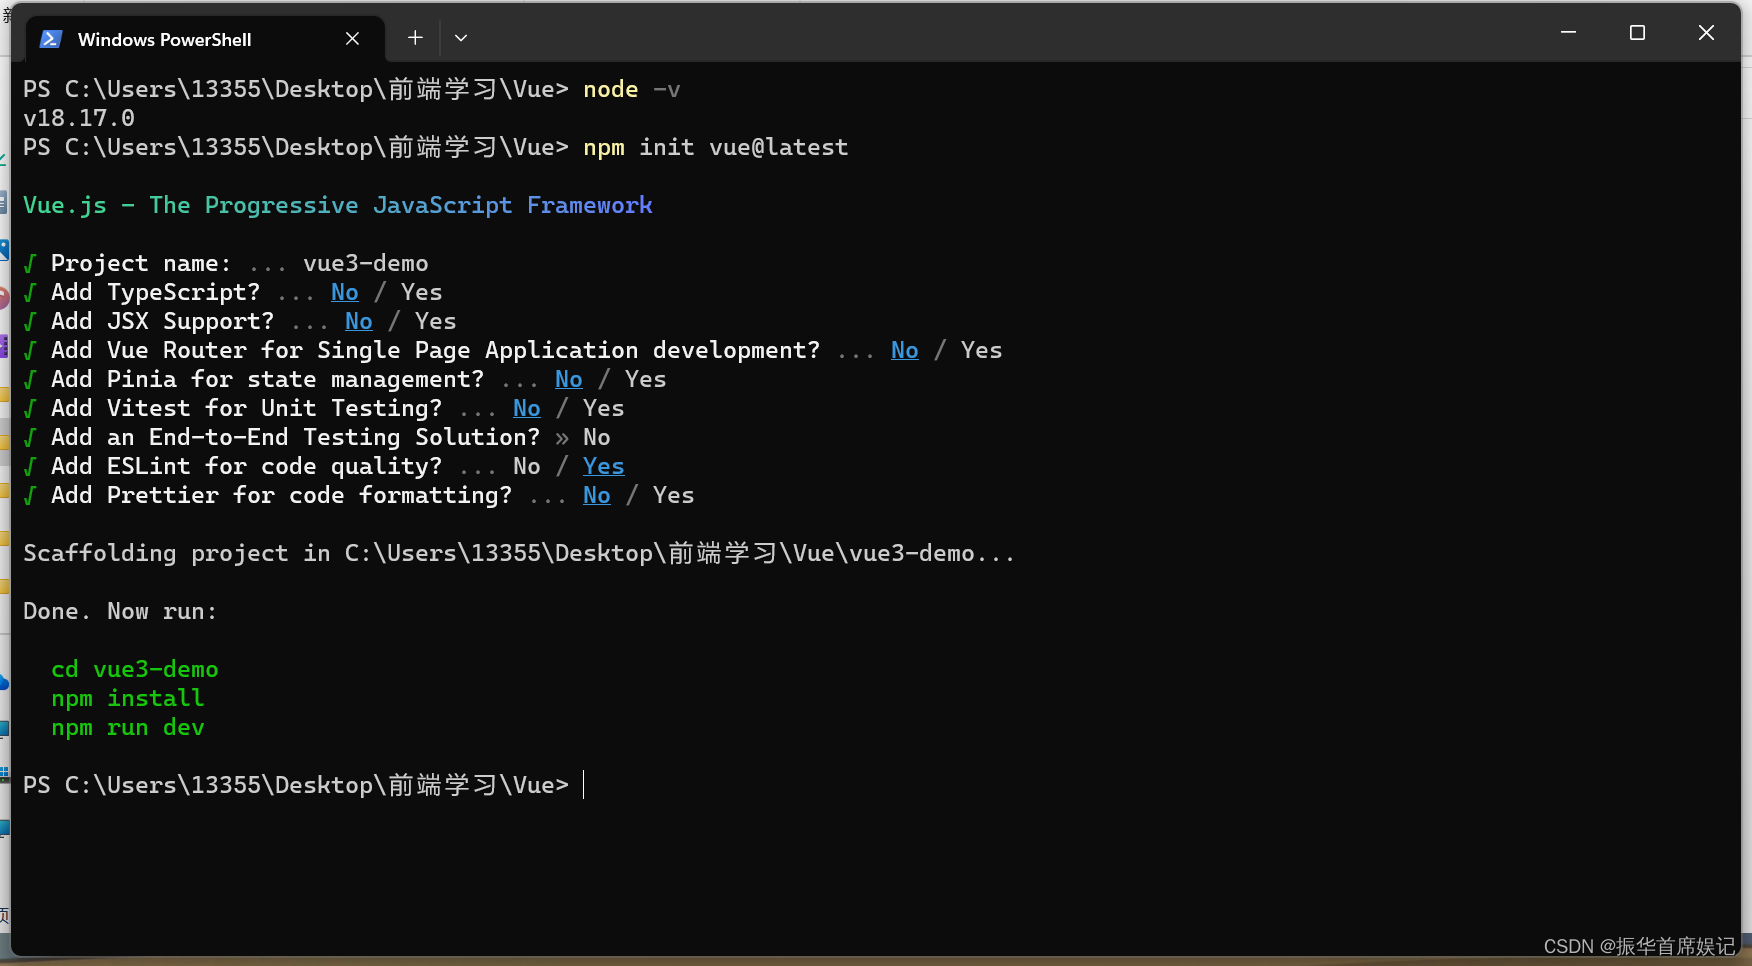
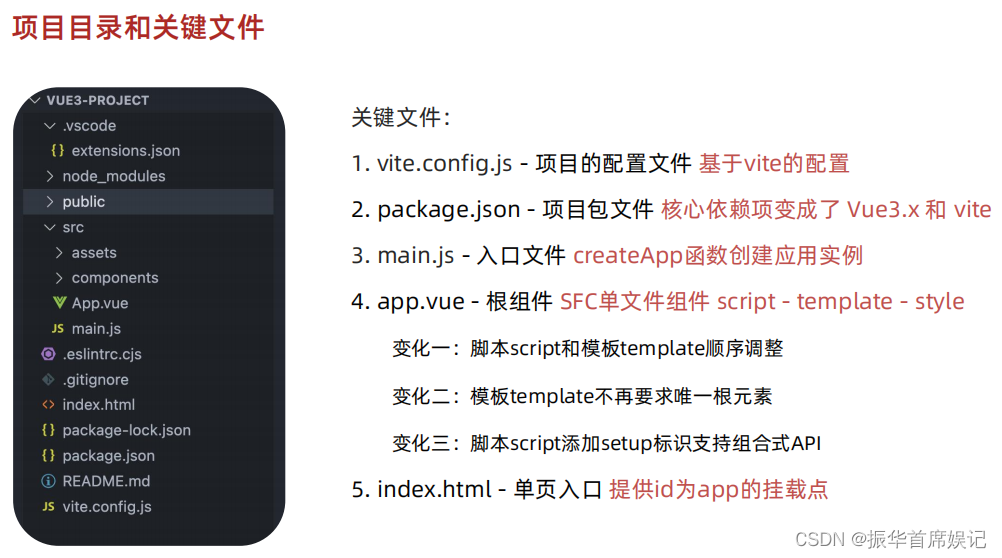
项目目录和关键文件
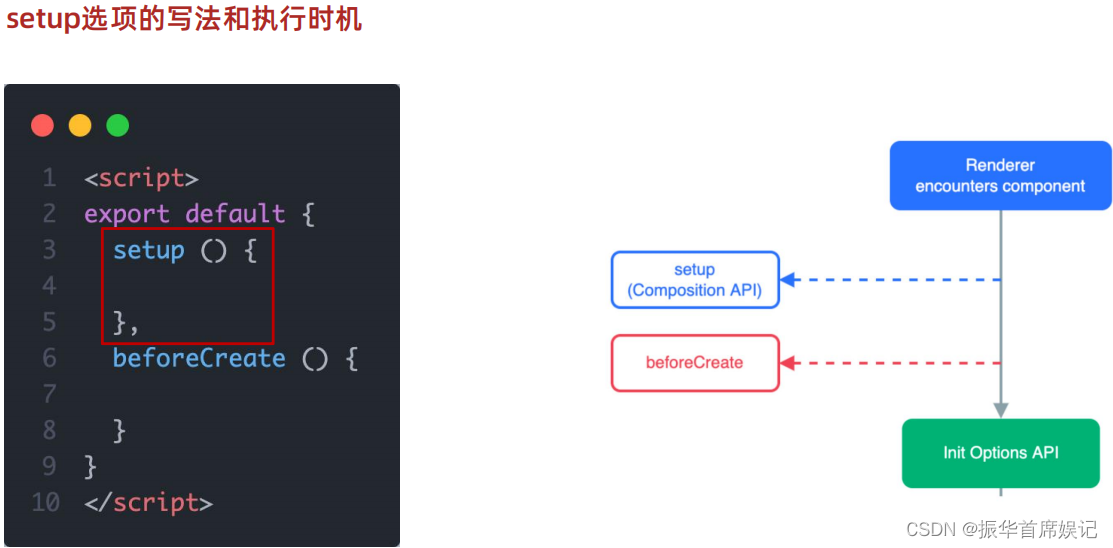
组合式API - setup选项
<script>
// setup函数
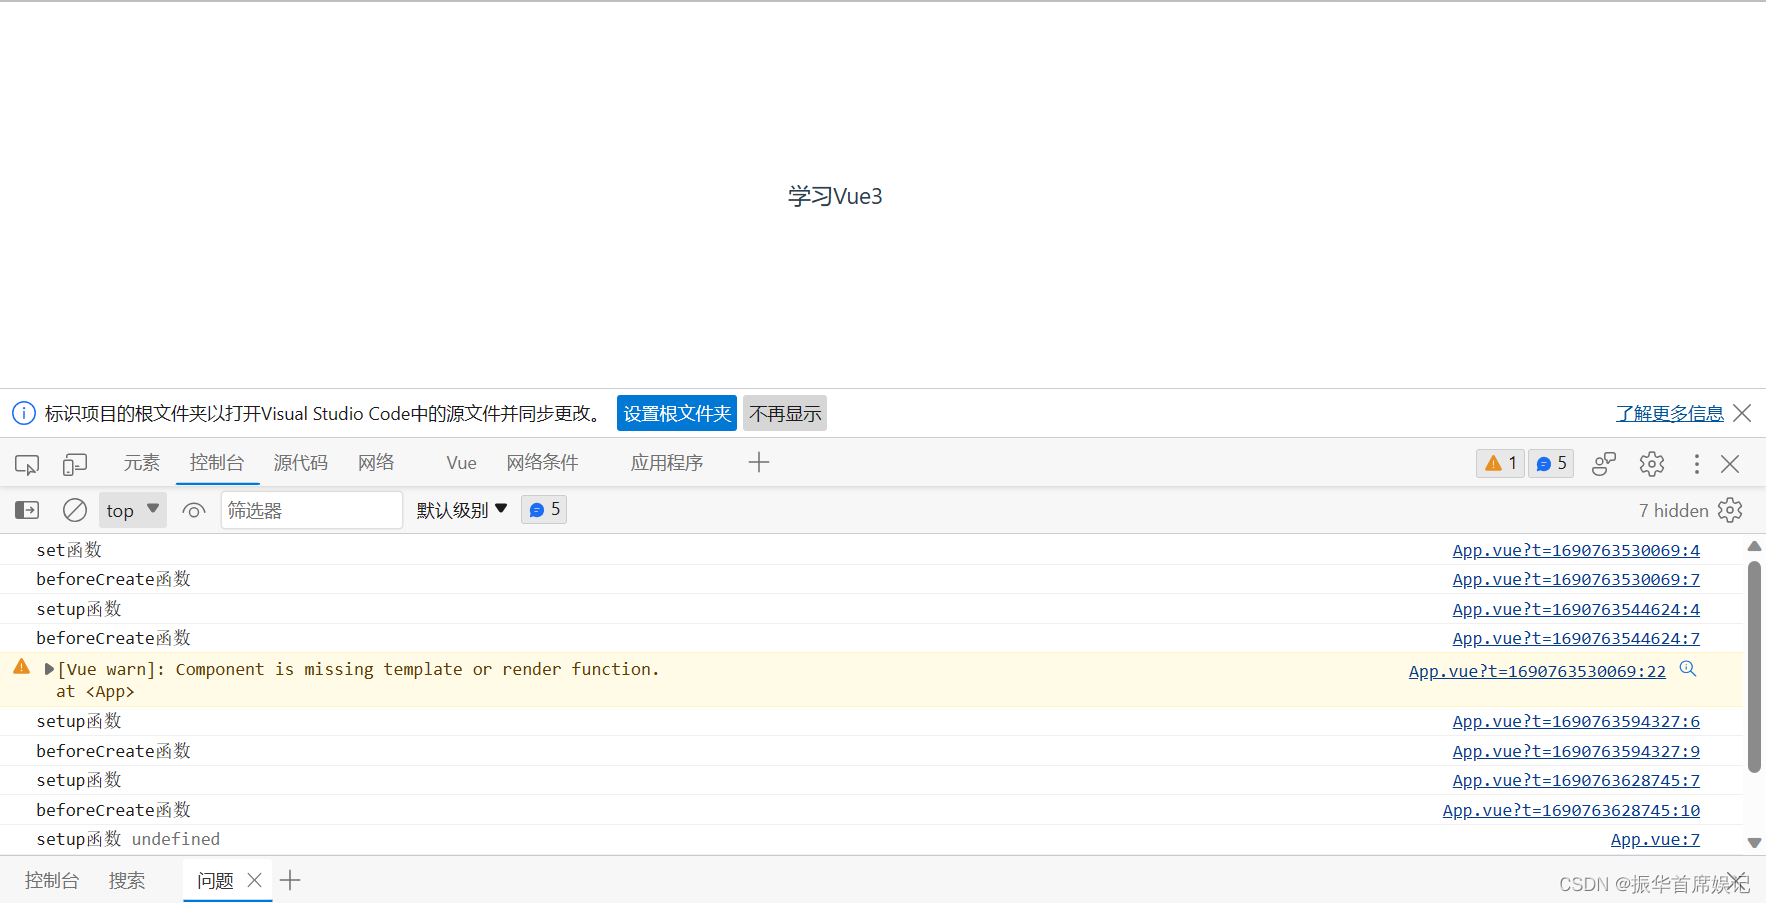
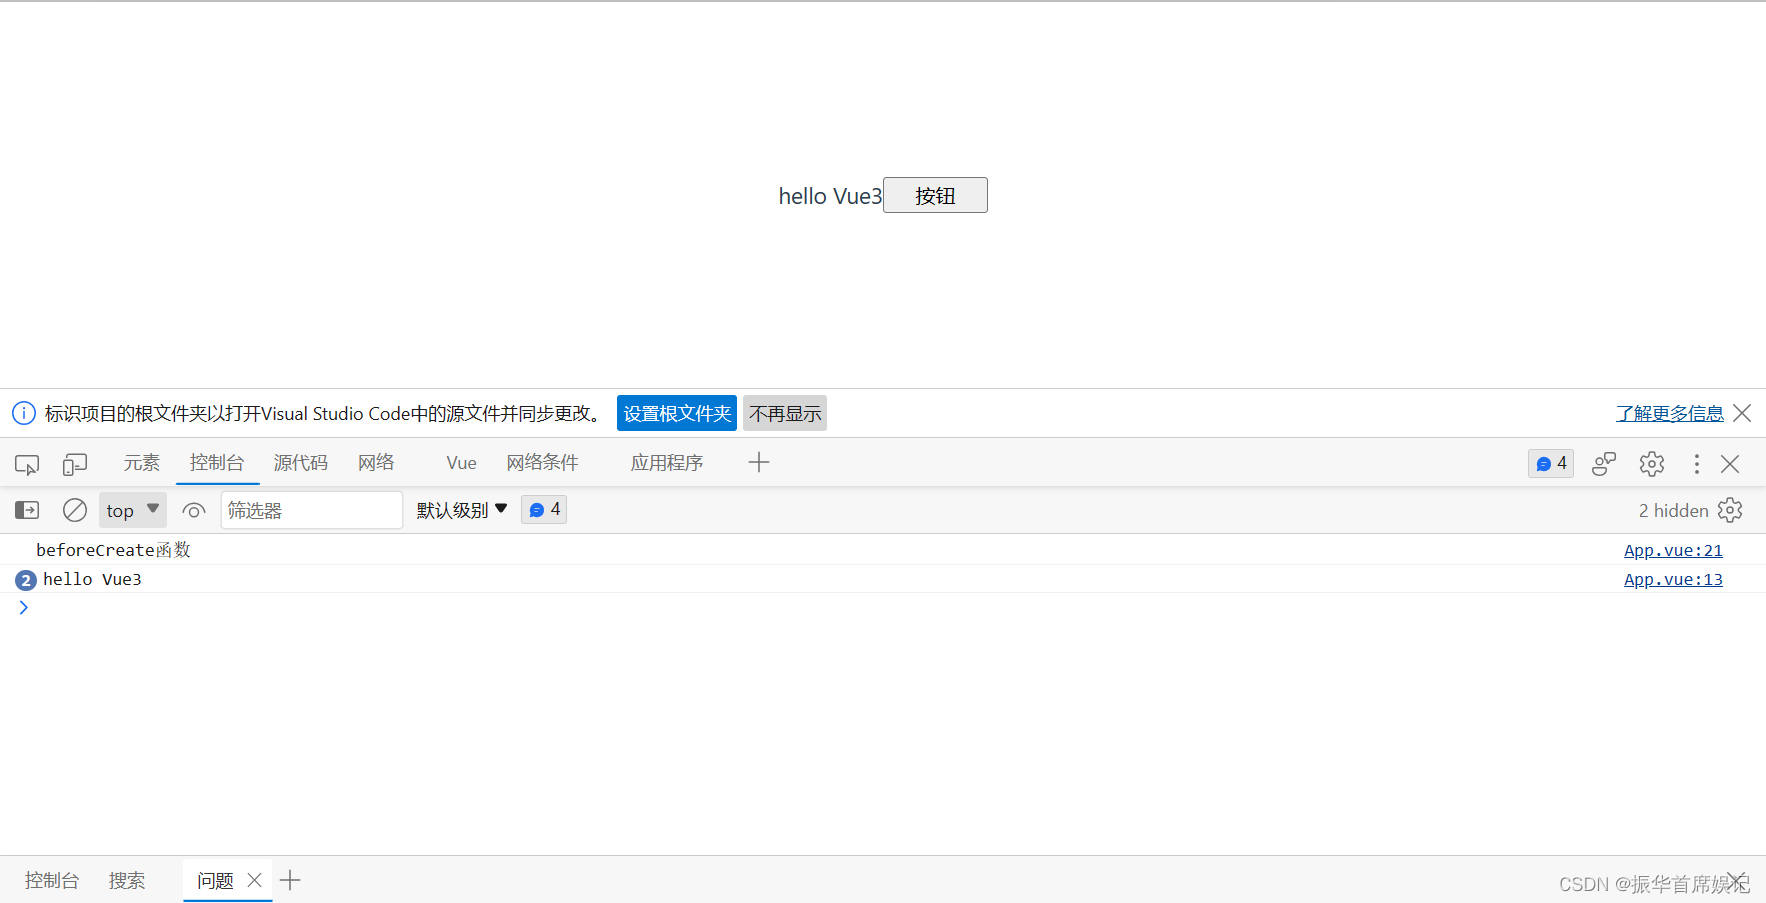
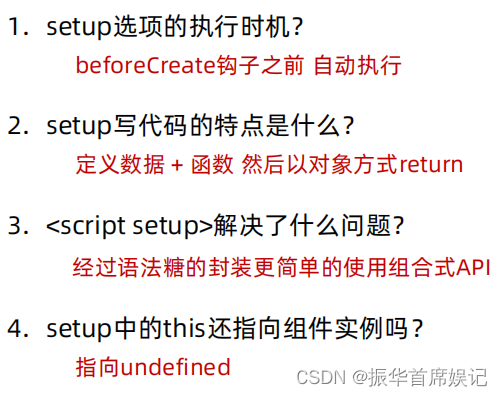
// 1. 执行时机:比beforeCreate还要早
// 2. setup函数中,获取不到this(this是undefined)
export default{
  setup(){
    // console.log('setup函数',this);
  },
  beforeCreate(){
    console.log('beforeCreate函数');
  }
}
</script>

<template>
  <div>学习Vue3</div>
</template>
<script>
// setup函数
// 1. 执行时机:比beforeCreate还要早
// 2. setup函数中,获取不到this(this是undefined)
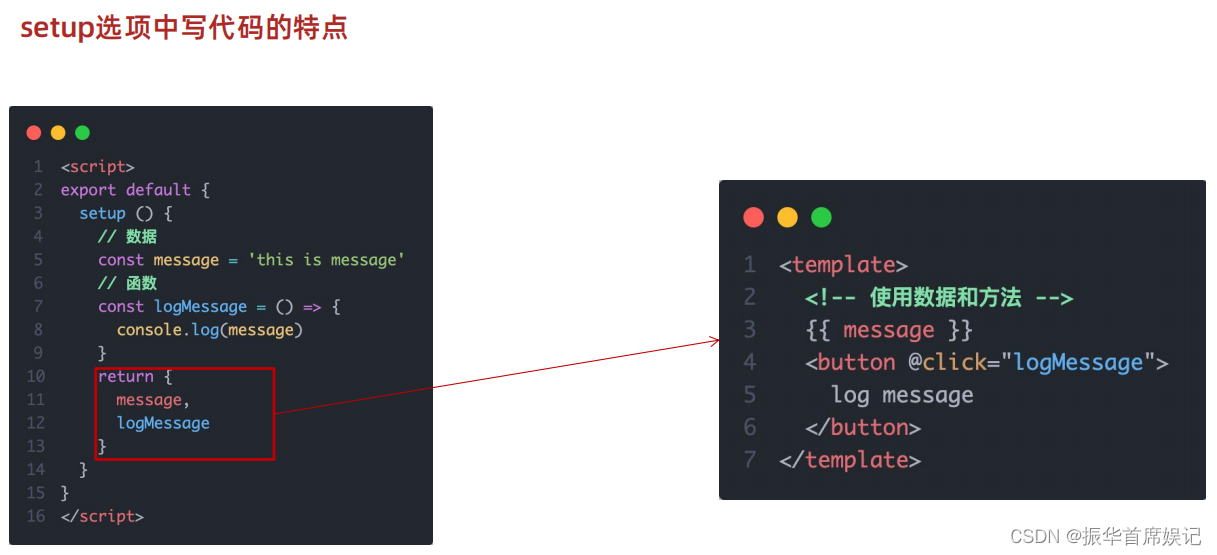
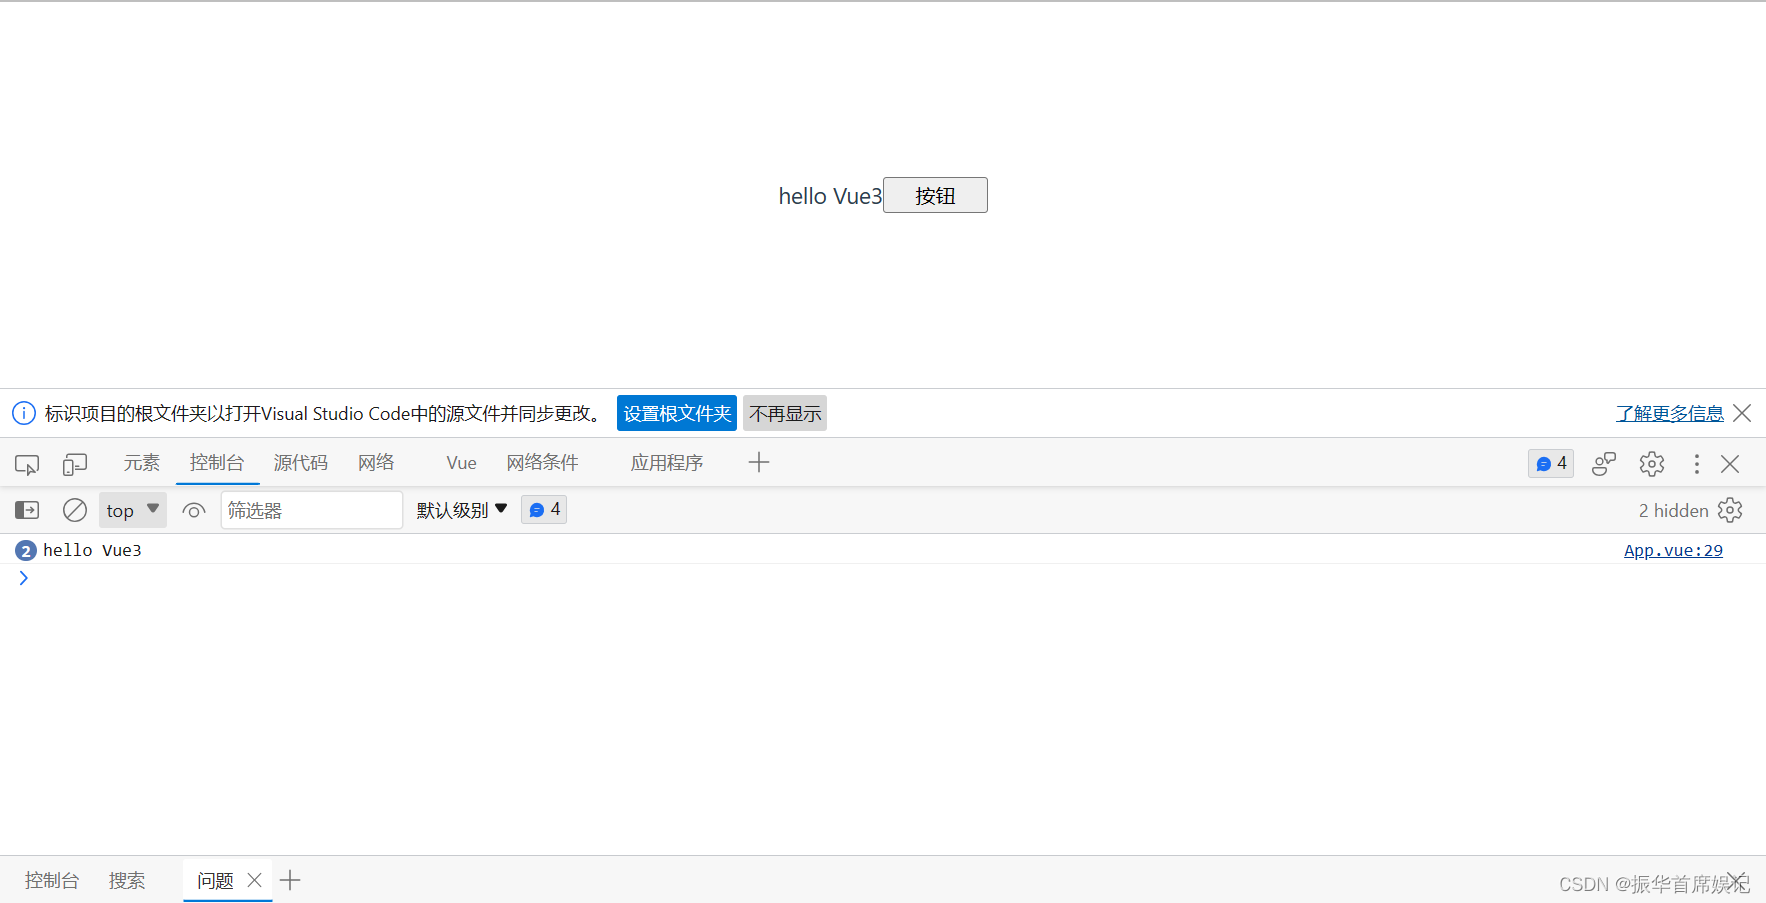
// 3. 数据和函数,需要在setup最后return才能在模板中应用
export default{
  setup(){
    // console.log('setup函数',this);
    // 数据
    const message = 'hello Vue3'
    // 函数
    const logMessage = () => {
      console.log(message)
    }
    return {
      message,
      logMessage
    }
  },
  beforeCreate(){
    console.log('beforeCreate函数');
  }
}
</script>

<template>
  <div>{{ message }}</div>
  <button @click="logMessage">按钮</button>
</template>
<!-- <script>
// setup函数
// 1. 执行时机:比beforeCreate还要早
// 2. setup函数中,获取不到this(this是undefined)
// 3. 数据和函数,需要在setup最后return才能在模板中应用
export default{
  setup(){
    // console.log('setup函数',this);
    // 数据
    const message = 'hello Vue3'
    // 函数
    const logMessage = () => {
      console.log(message)
    }
    return {
      message,
      logMessage
    }
  },
  beforeCreate(){
    console.log('beforeCreate函数');
  }
}
</script> -->

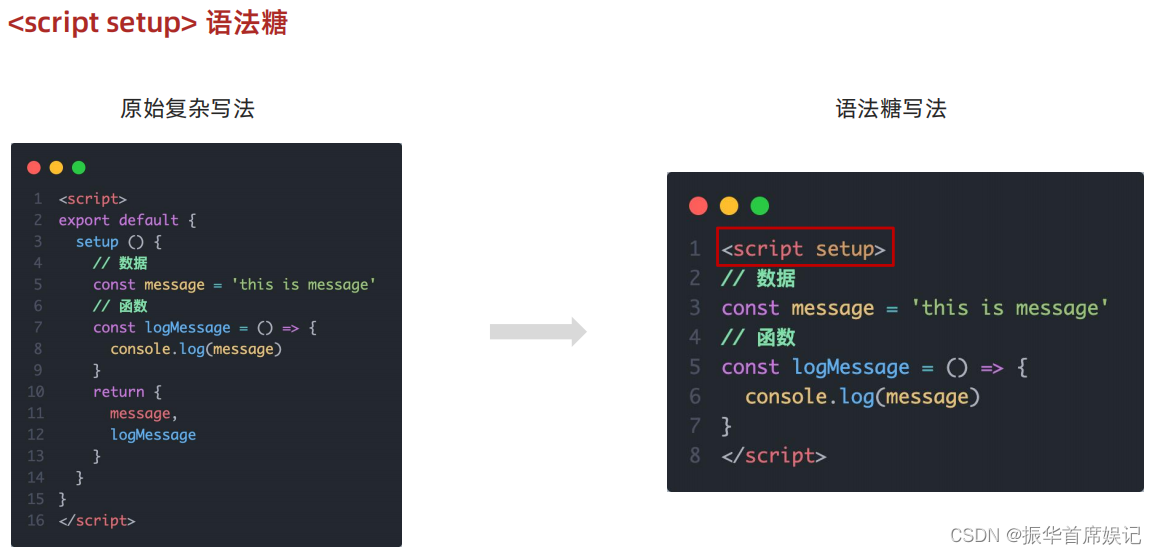
<script setup>
const message = 'hello Vue3'
const logMessage=()=>{
  console.log(message)
}
</script>

<template>
  <div>{{ message }}</div>
  <button @click="logMessage">按钮</button>
</template>
组合式API - reactive和ref函数
reactive()
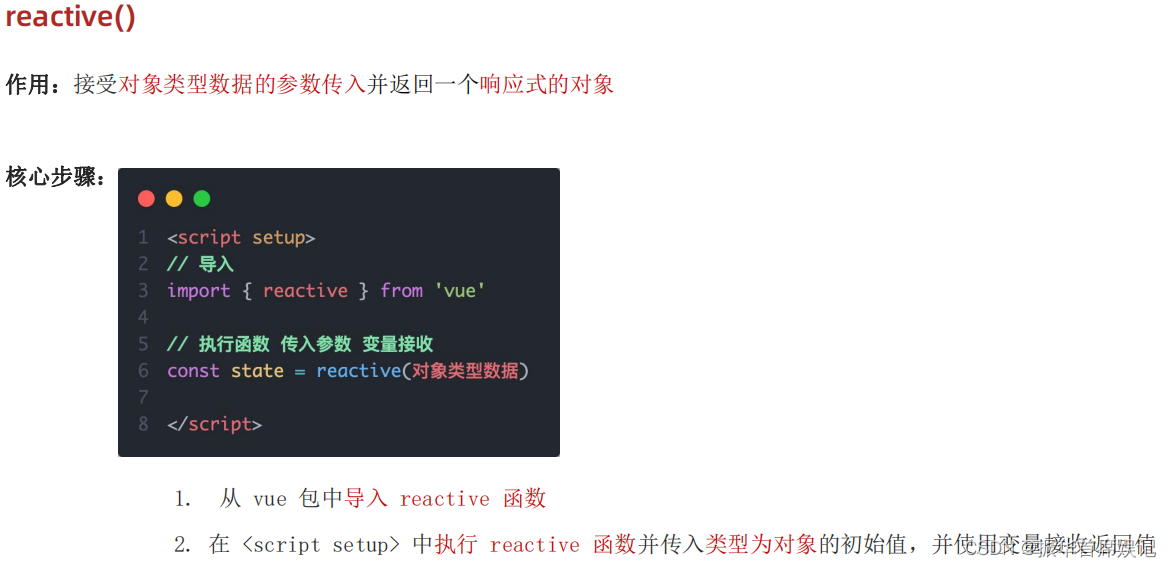
<script setup>
// reactive语法:接受对象类型数据的参数传入,并返回一个响应式的对象
import { reactive } from 'vue';
const state = reactive({
  count:100
})
const setCount=()=>{
  state.count++
}
</script>

<template>
  <div>
    <div>{{ state.count }}</div>
    <button @click="setCount">+1</button>
  </div>
</template>

ref()
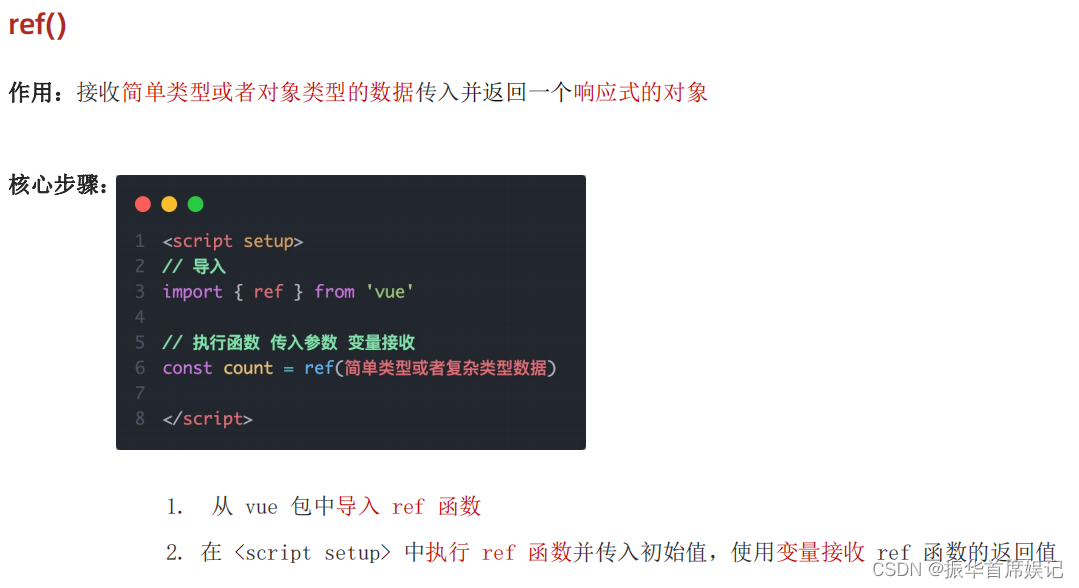
<script setup>
// reactive语法:接受对象类型数据的参数传入,并返回一个响应式的对象
// import { reactive } from 'vue';
// const state = reactive({
//   count:100
// })
// const setCount=()=>{
//   state.count++
// }

// 如果是简单类型,怎么办?
// 脚本中访问数据,需要通过value
// 在template中,.value不需要加
import { ref } from 'vue'
const count = ref(0)
const setCount=()=>{
  count.value++
}
</script>

<template>
  <div>
    <div>{{ count }}</div>
    <button @click="setCount">+1</button>
  </div>
</template>

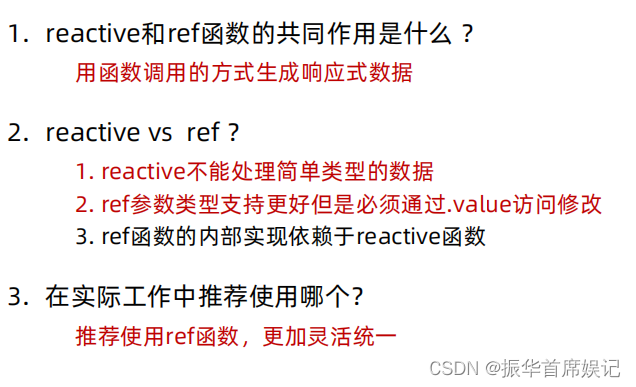
日后编码统一使用ref()
组合式API - computed
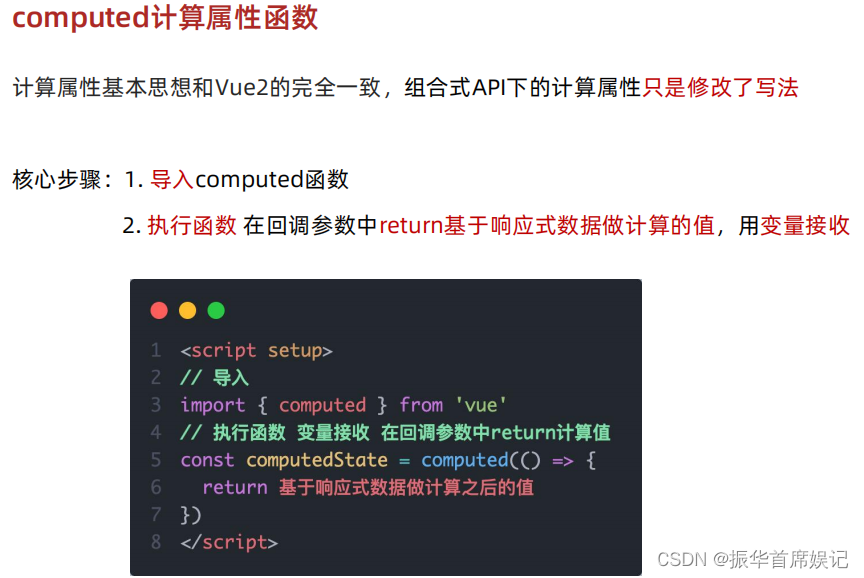
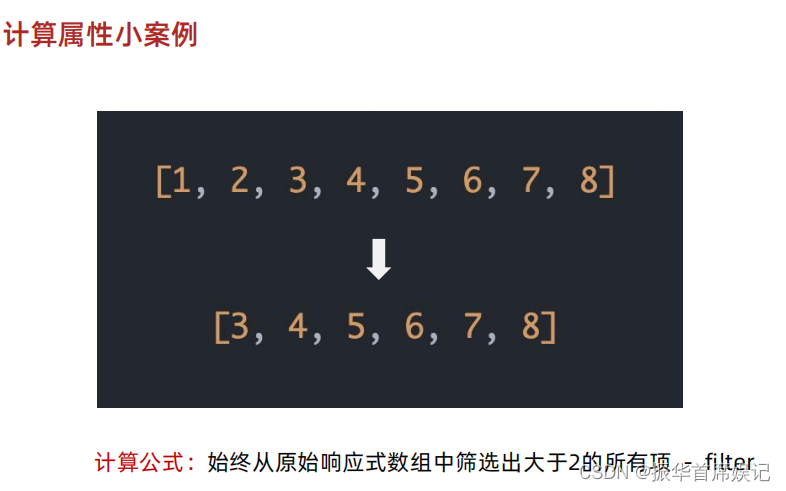
<script setup>
// const 计算属性 = computed(() => {return计算返回的结果})

import { computed, ref } from "vue";
// 声明数据
const list = ref([1, 2, 3, 4, 5, 6, 7, 8]);

// 基于list派生一个计算属性,从list中过滤出大于2
const computedList = computed(() => {
  return list.value.filter((item) => item > 2);
});

// 定义一个修改数组的方法
const addFn=()=>{
  list.value.push(666)
}
</script>

<template>
  <div>原始数据:{{ list }}</div>
  <div>计算后的数据:{{ computedList }}</div>
  <button @click="addFn" type="button">修改</button>
</template>

组合式API - watch

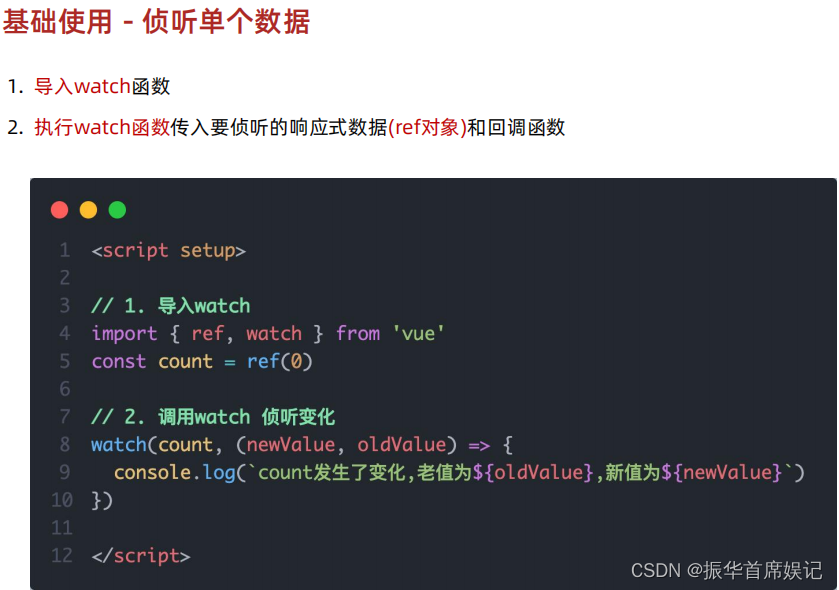
基础使用 - 侦听单个数据
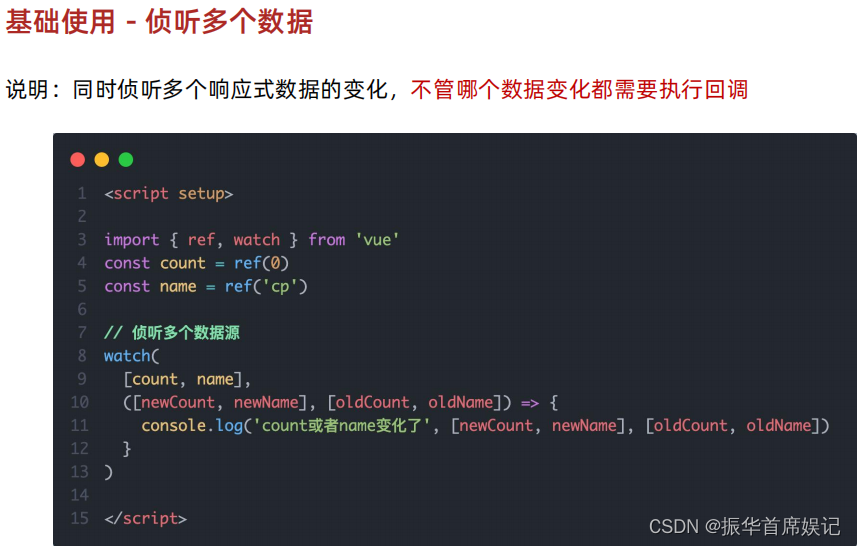
基础使用 - 侦听多个数据
<script setup>
import {ref,watch} from 'vue'
const count = ref(0)
const nickname = ref('张三')

const changeCount=()=>{
  count.value++
}
const changeName=()=>{
  nickname.value = '里四'
}

// 1.监视单个数据的变化
// watch(ref对象,(newValue,oldValue)=>{...})
watch(count,(newValue,oldValue)=>{
  console.log(newValue,oldValue)
})
// 2.监视多个数据的变化
// watch([ref对象1,ref对象2],(newArr,oldArr)=>{...})
watch([count,nickname],(newArr,oldArr)=>{
  console.log(newArr,oldArr)
})
</script>

<template>
  <div>{{ count }}</div>
  <button @click="changeCount">改数字</button>
  <div>{{ nickname }}</div>
  <button @click="changeName">改昵称</button>
</template>
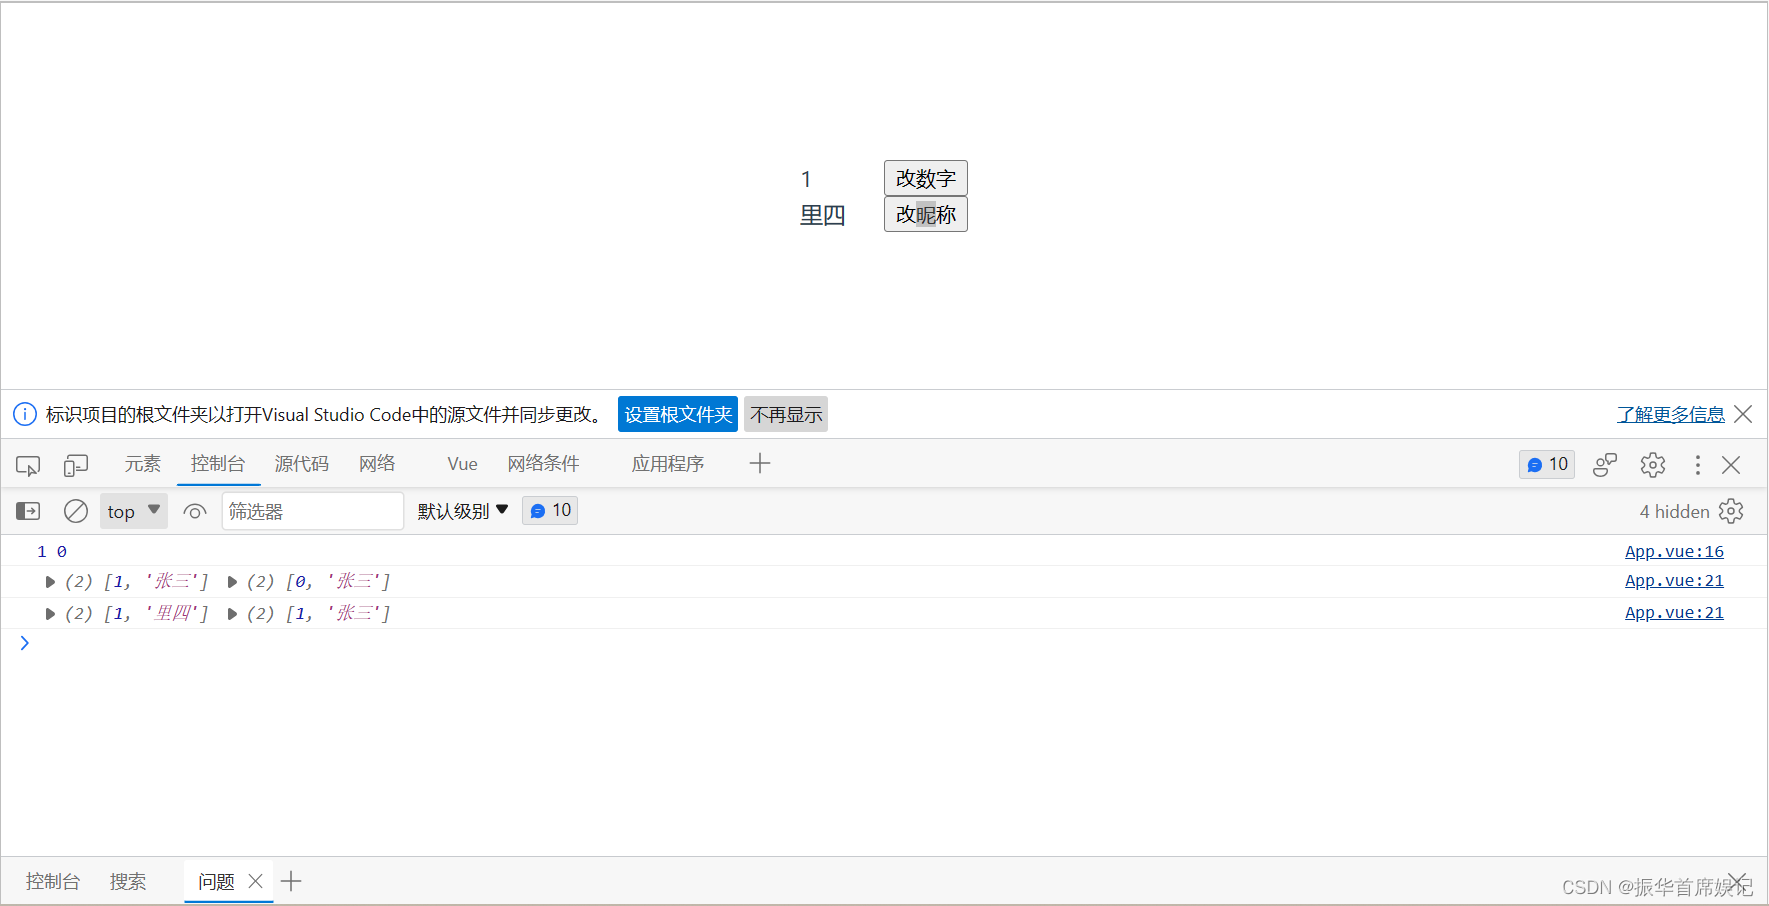
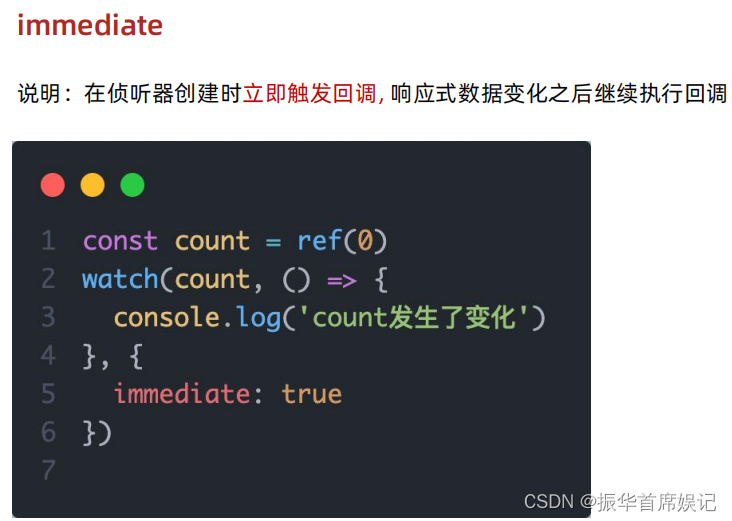
immediate
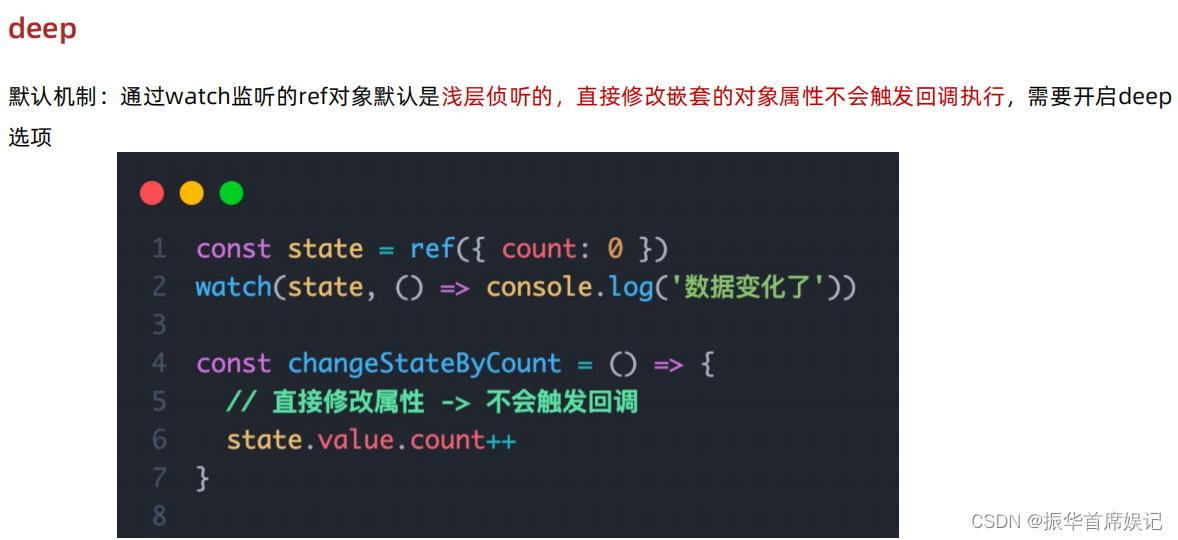
deep
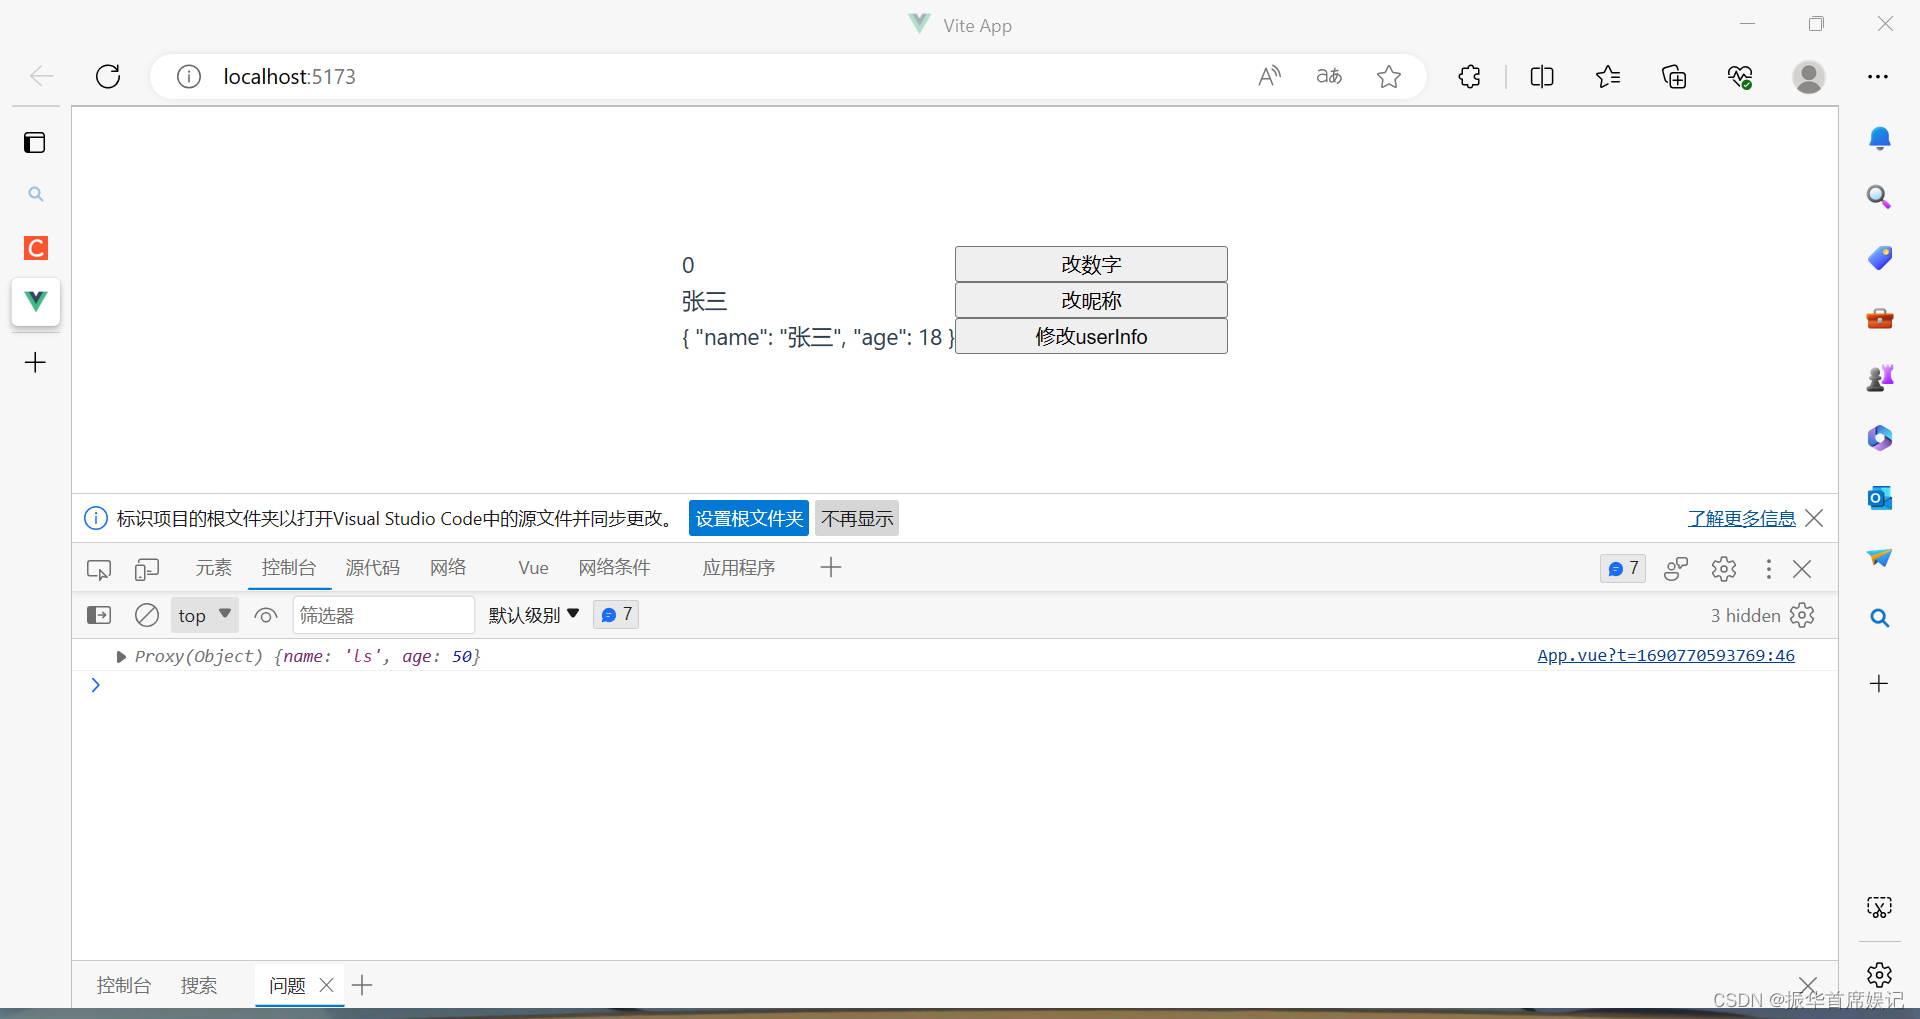
<script setup>
import {ref,watch} from 'vue'
const count = ref(0)
const nickname = ref('张三')

const changeCount=()=>{
  count.value++
}
const changeName=()=>{
  nickname.value = '里四'
}

// 1.监视单个数据的变化
// watch(ref对象,(newValue,oldValue)=>{...})
// watch(count,(newValue,oldValue)=>{
//   console.log(newValue,oldValue)
// })

// 2.监视多个数据的变化
// watch([ref对象1,ref对象2],(newArr,oldArr)=>{...})
// watch([count,nickname],(newArr,oldArr)=>{
//   console.log(newArr,oldArr)
// })

// 3.immediate立即执行
// watch(count,(newValue,oldValue)=>{
//   console.log(newValue,oldValue)
// },{
//   immediate:true
// })

// 4.deep深度监视:默认watch进行的是浅层监视
const useInfo = ref({
  name:'张三',
  age:18
})
const setUserInfo=()=>{
  // 修改了useInfo.value 修改了对象的地址,才能监视到
  // useInfo.value = {name : 'ls',age:50}
  useInfo.value.age++
}
watch(useInfo,(newValue)=>{
  console.log(newValue)
},{
  deep:true
})
</script>

<template>
  <div>{{ count }}</div>
  <button @click="changeCount">改数字</button>
  <div>{{ nickname }}</div>
  <button @click="changeName">改昵称</button>
  <div>{{ useInfo }}</div>
  <button @click="setUserInfo">修改userInfo</button>
</template>
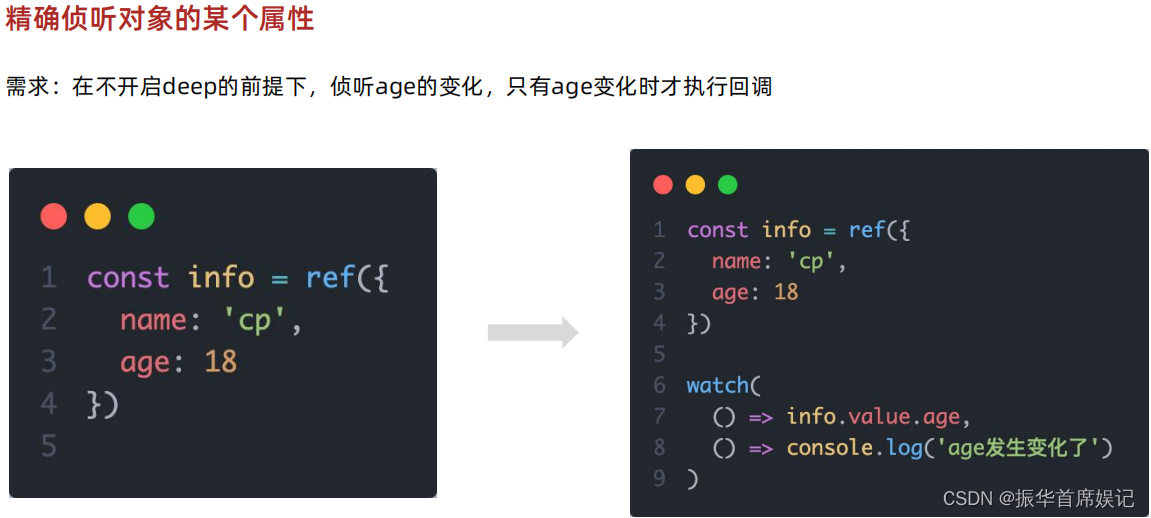
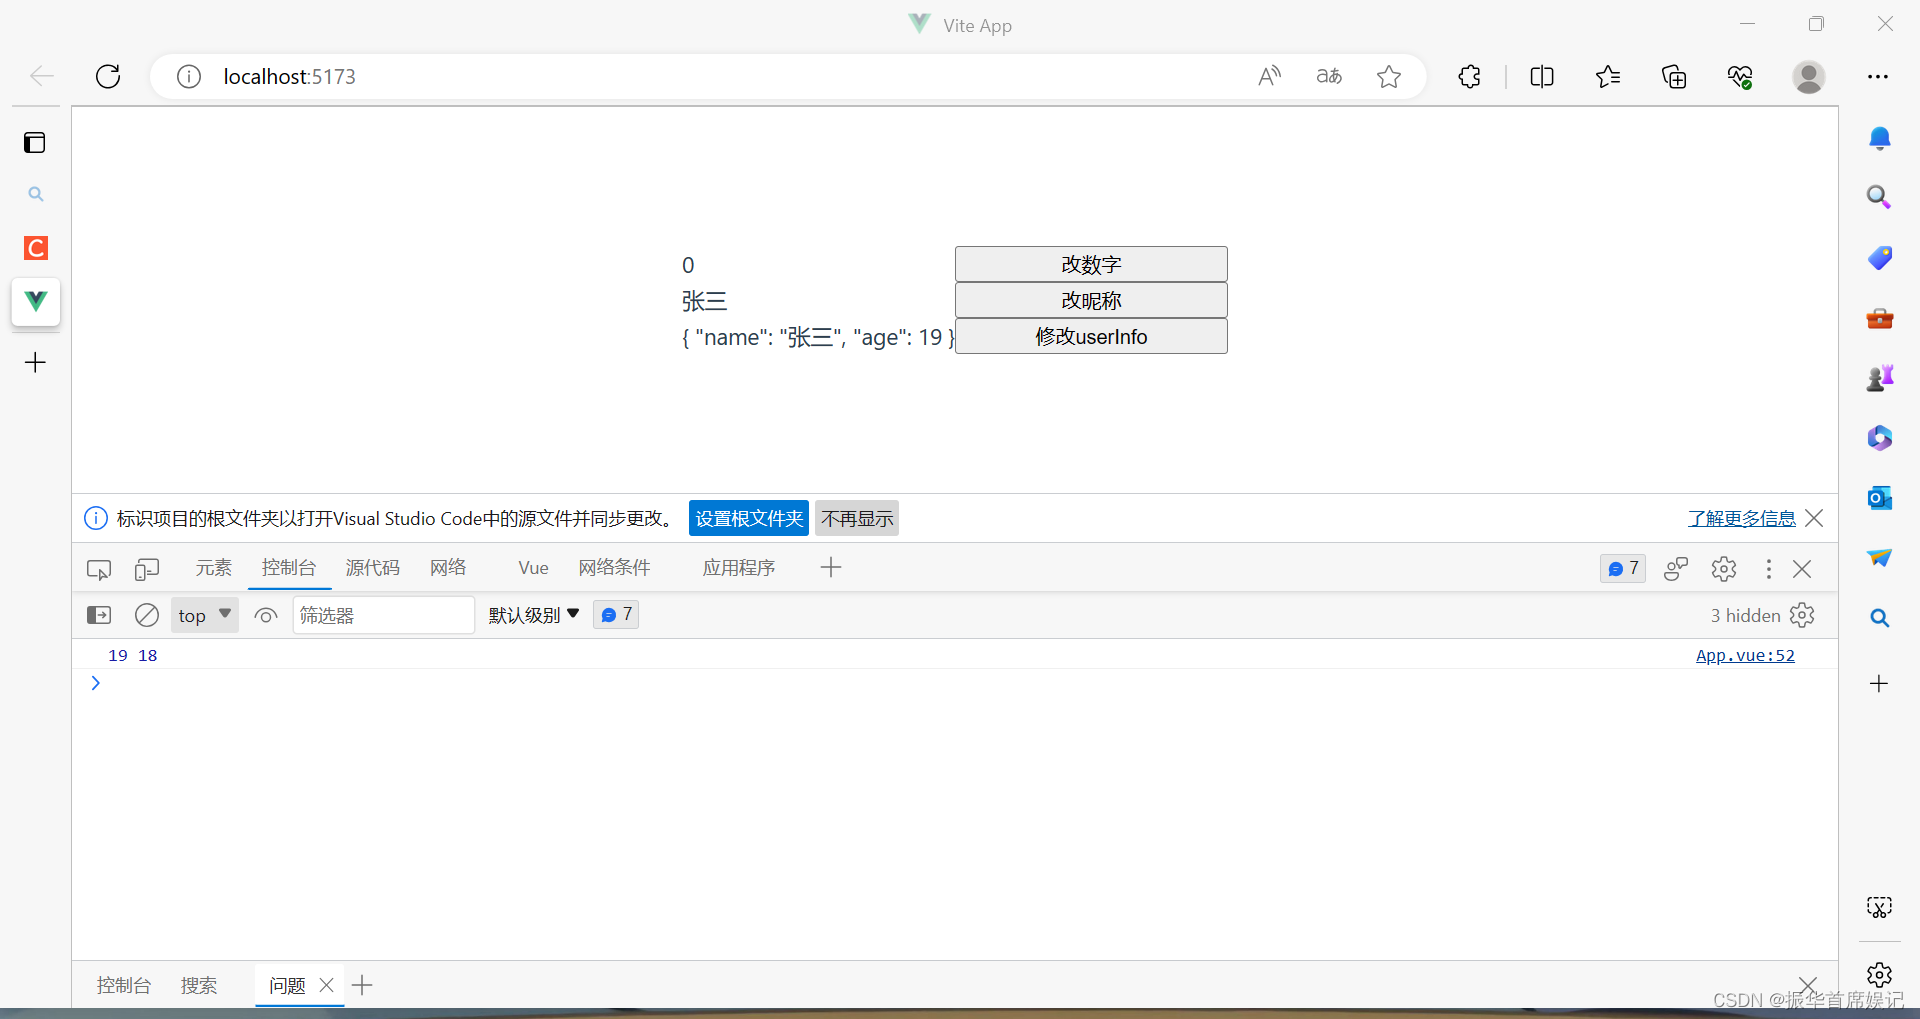
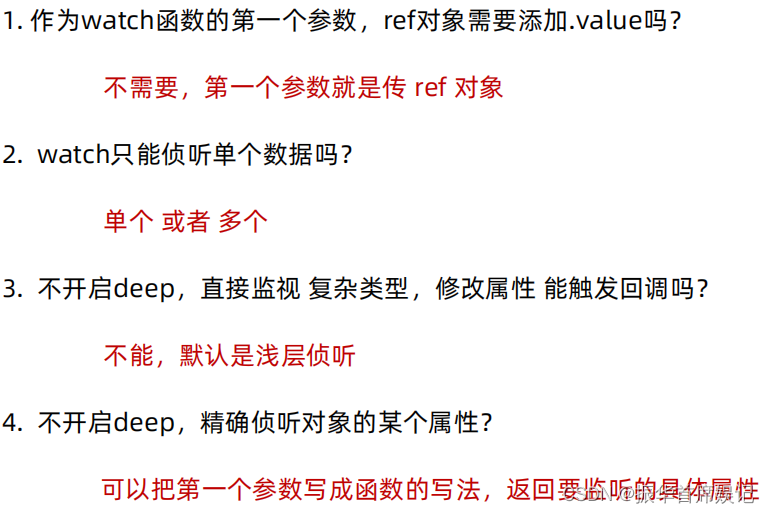
精确侦听对象的某个属性
<script setup>
import {ref,watch} from 'vue'
const count = ref(0)
const nickname = ref('张三')

const changeCount=()=>{
  count.value++
}
const changeName=()=>{
  nickname.value = '里四'
}

// 1.监视单个数据的变化
// watch(ref对象,(newValue,oldValue)=>{...})
// watch(count,(newValue,oldValue)=>{
//   console.log(newValue,oldValue)
// })

// 2.监视多个数据的变化
// watch([ref对象1,ref对象2],(newArr,oldArr)=>{...})
// watch([count,nickname],(newArr,oldArr)=>{
//   console.log(newArr,oldArr)
// })

// 3.immediate立即执行
// watch(count,(newValue,oldValue)=>{
//   console.log(newValue,oldValue)
// },{
//   immediate:true
// })

// 4.deep深度监视:默认watch进行的是浅层监视
const useInfo = ref({
  name:'张三',
  age:18
})
const setUserInfo=()=>{
  // 修改了useInfo.value 修改了对象的地址,才能监视到
  // useInfo.value = {name : 'ls',age:50}
  useInfo.value.age++
}

// 4. deep深度监视
// watch(useInfo,(newValue)=>{
//   console.log(newValue)
// },{
//   deep:true
// })

// 5. 对于对象中的属性,进行监视
watch(()=>useInfo.value.age,(newValue,oldValue)=>{
  console.log(newValue,oldValue)
})
</script>

<template>
  <div>{{ count }}</div>
  <button @click="changeCount">改数字</button>
  <div>{{ nickname }}</div>
  <button @click="changeName">改昵称</button>
  <div>{{ useInfo }}</div>
  <button @click="setUserInfo">修改userInfo</button>
</template>
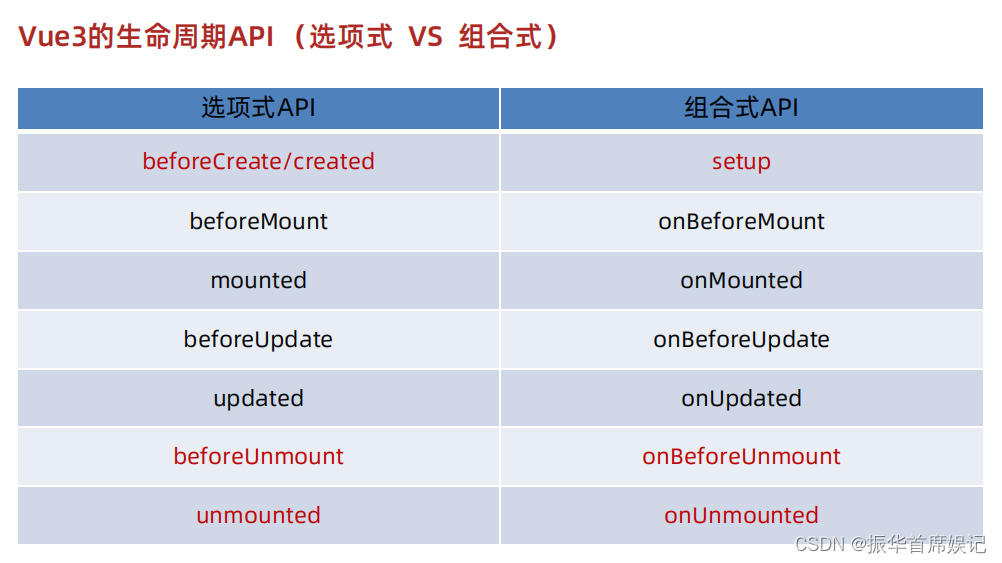
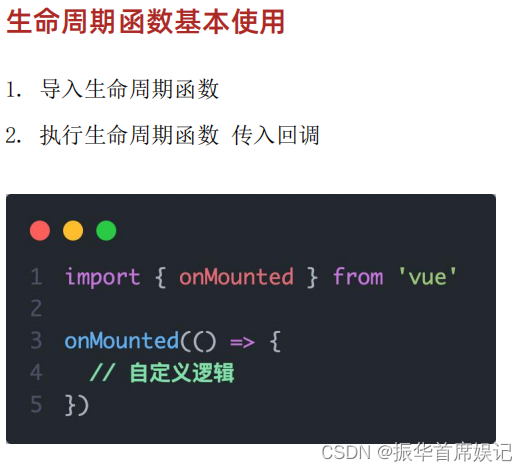
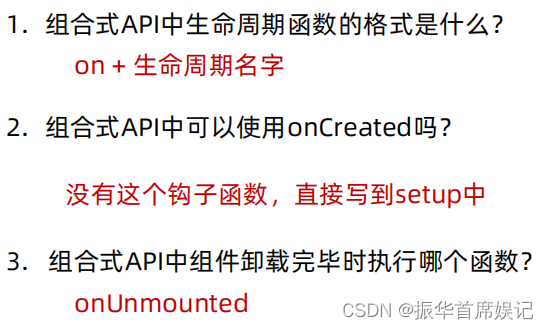
组合式API - 生命周期函数
生命周期函数基本使用
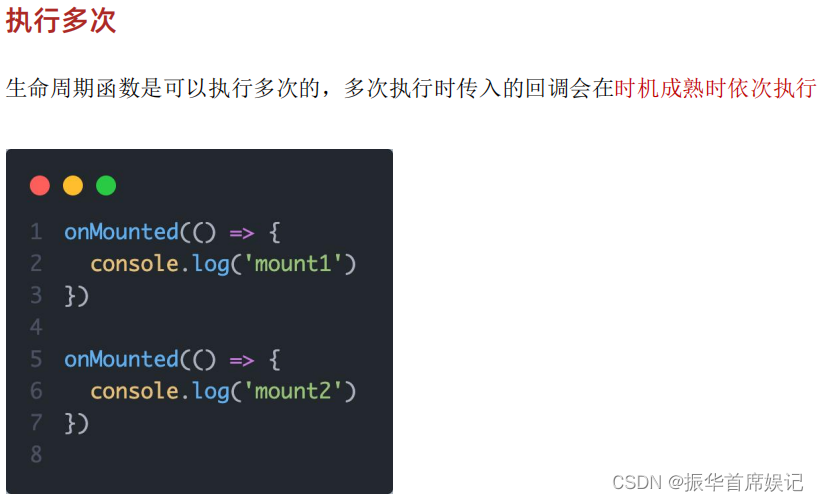
执行多次
<script setup>

import { onMounted } from 'vue';
// beforeCreated 和 created 的相关代码放在 setup 中执行
const getList = () =>{
  setTimeout(()=>{
    console.log('发送请求,获取数据')
  },2000)
}

// 已进入页面的请求
getList()

// 如果有写代码需要在mounted生命周期中执行
onMounted(()=>{
  console.log('mounted生命周期函数')
})
// 可调用多次,不会冲突,按照顺序依次执行
onMounted(()=>{
  console.log('mounted生命周期函数1')
})
</script>

<template>
  <div></div>
</template>

组合式API - 父子通信
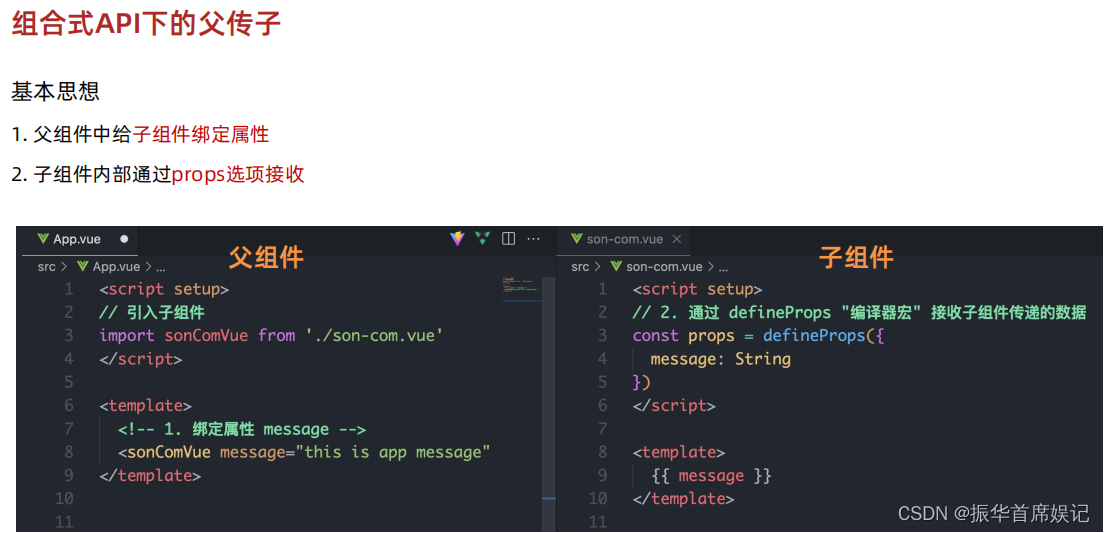
组合式API下的父传子
<script setup>
// 注意:由于写了setup,所以无法直接配置props
// 此处要借助于编译器宏函数接收
const props = defineProps({
    car:String,
    money:Number
})
console.log(props.car)
console.log(props.money)
</script>

<template>
  <div class="son">我是子组件 - {{ car }}</div>
</template>

<style scoped>
.son {
    border: 1px solid #000;
    padding: 30px;
}

</style>
<script setup>
import SonCom from '@/components/son-com.vue'
import {ref} from 'vue'
// 局部组件导入进来就能用
const money = ref(100)
const getMoney = () => {
  money.value+=10
}
</script>

<template>
  <div>
    <h1>
      父组件 - {{ money }}
      <button @click="getMoney">挣钱</button>
    </h1>
    <!-- 给子组件,以添加属性的方式传值 -->
    <SonCom car="宝马车" :money="money"></SonCom>
  </div>
</template>
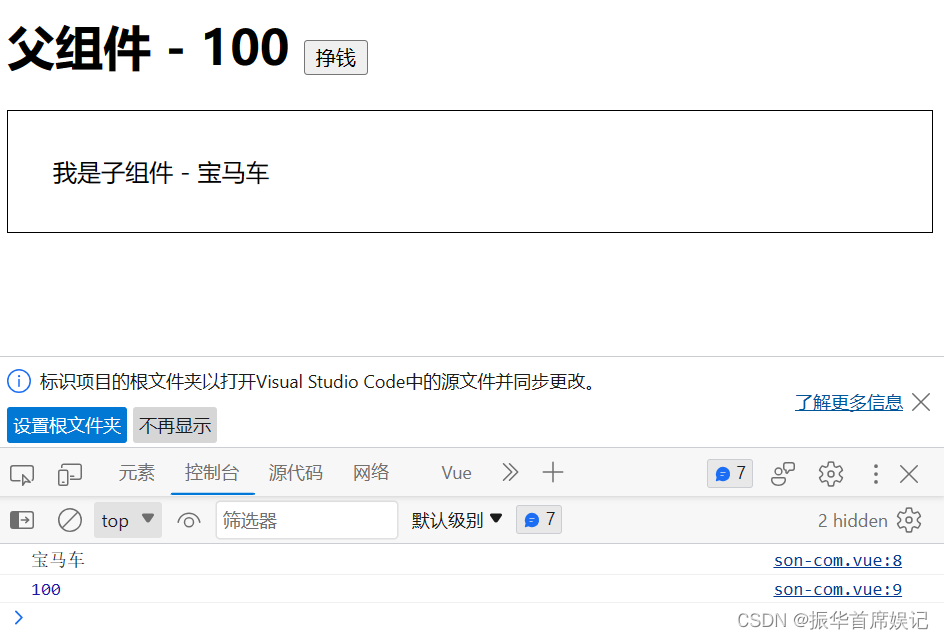
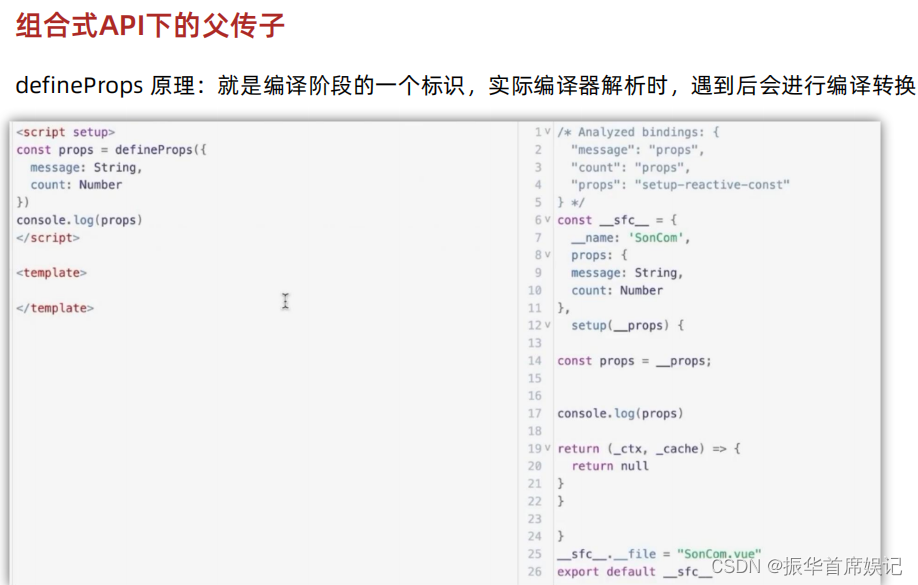
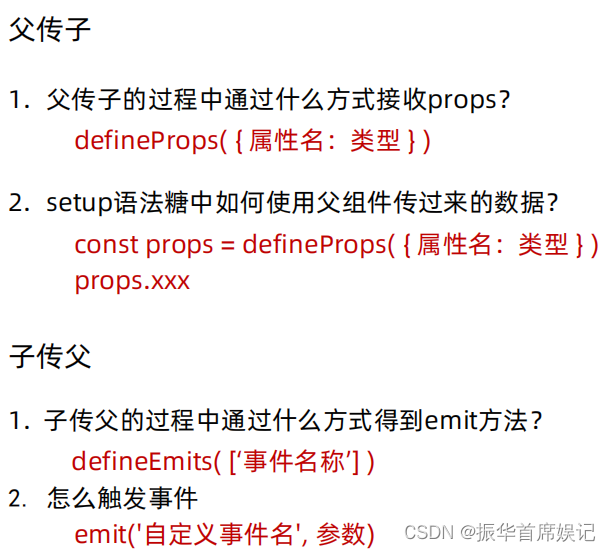
组合式API下的子传父

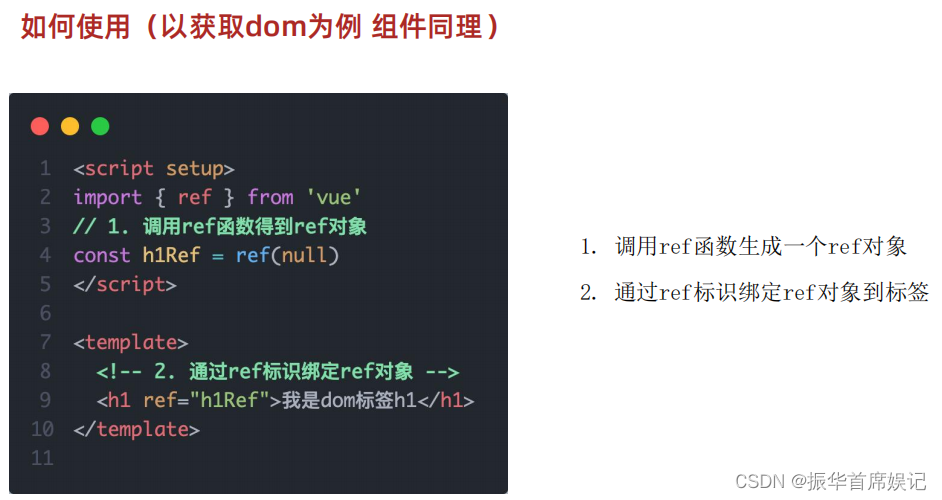
组合式API - 模版引用
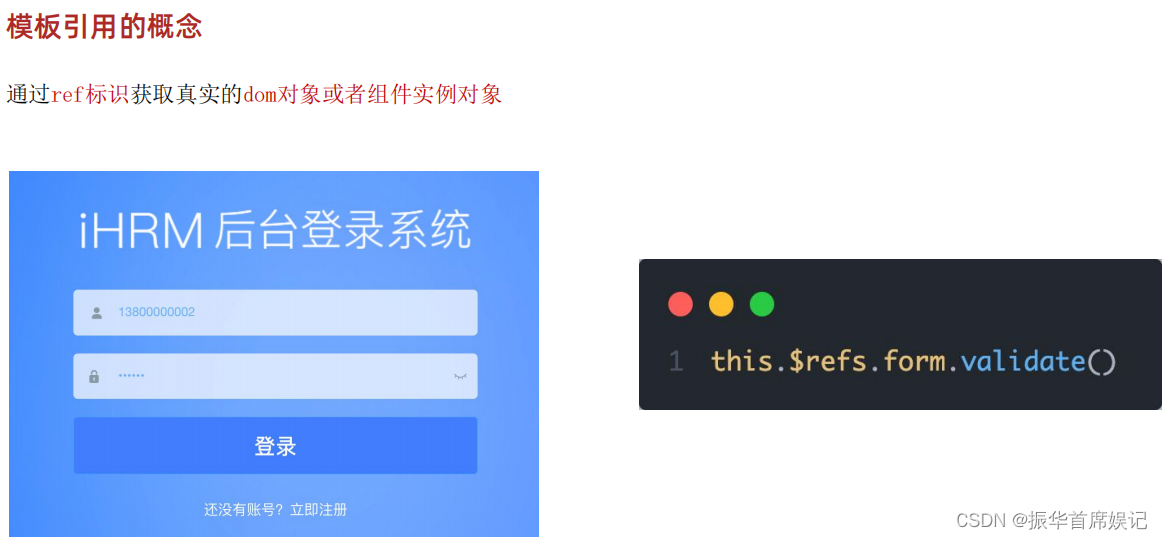
如何使用(以获取dom为例 组件同理)
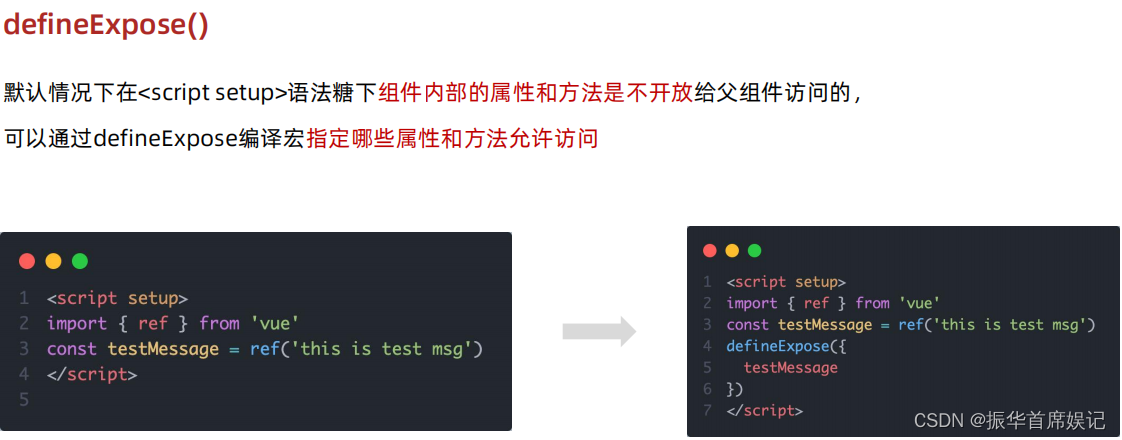
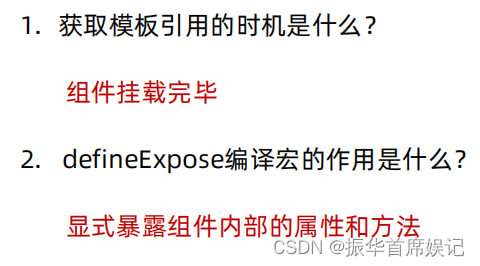
defineExpose()
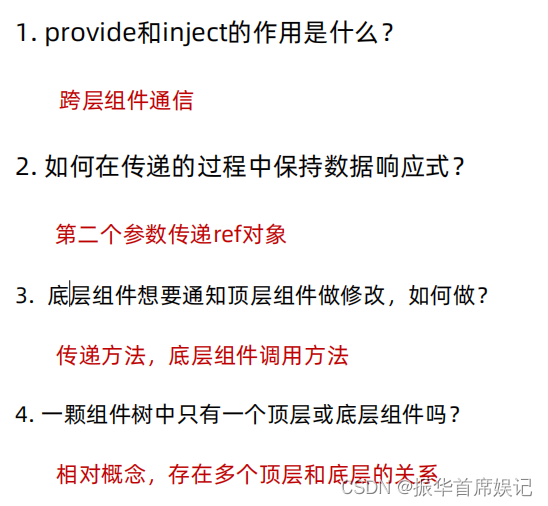
组合式API - provide和inject
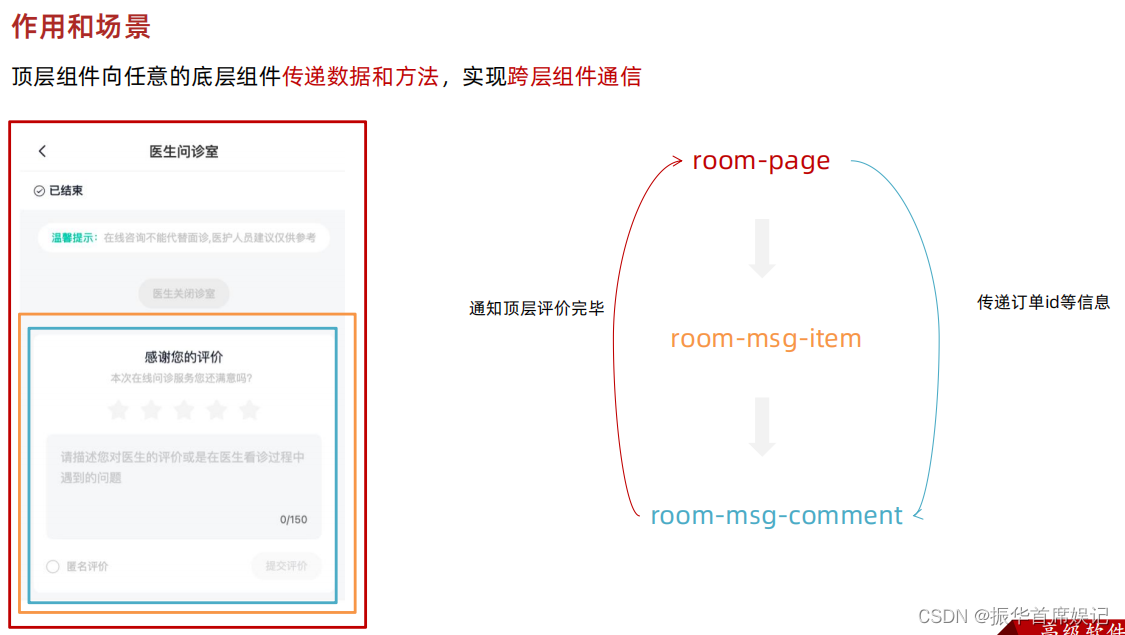
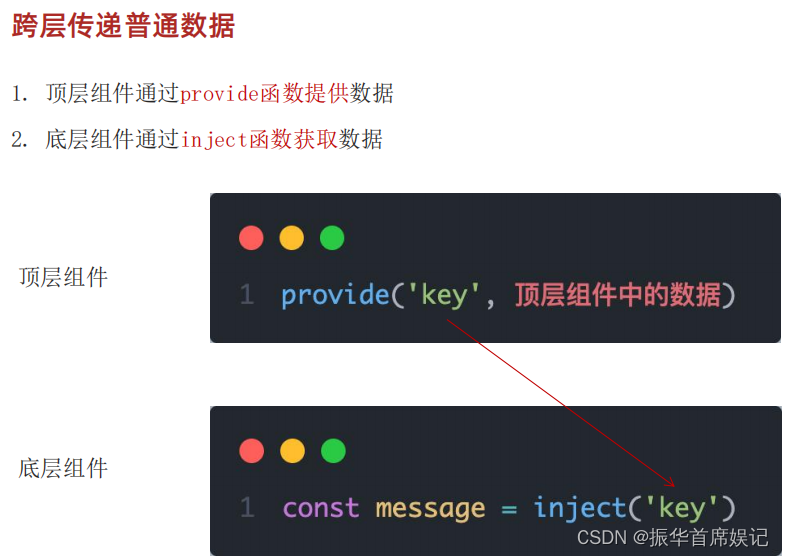
跨层传递普通数据
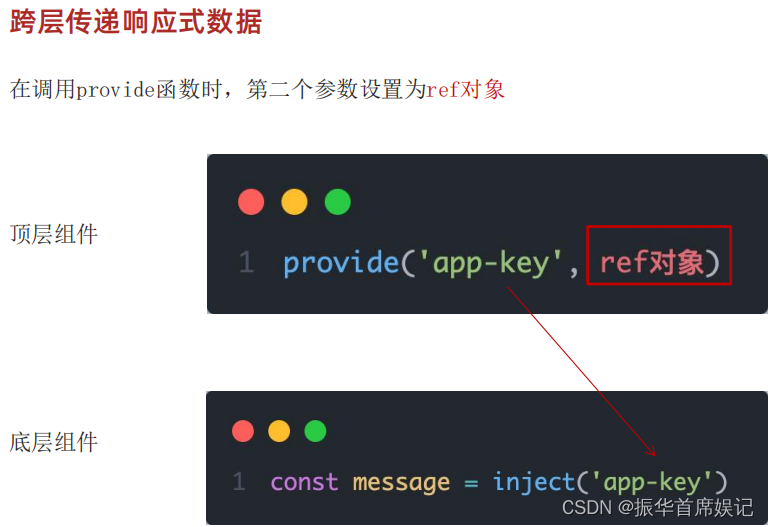
跨层传递响应式数据
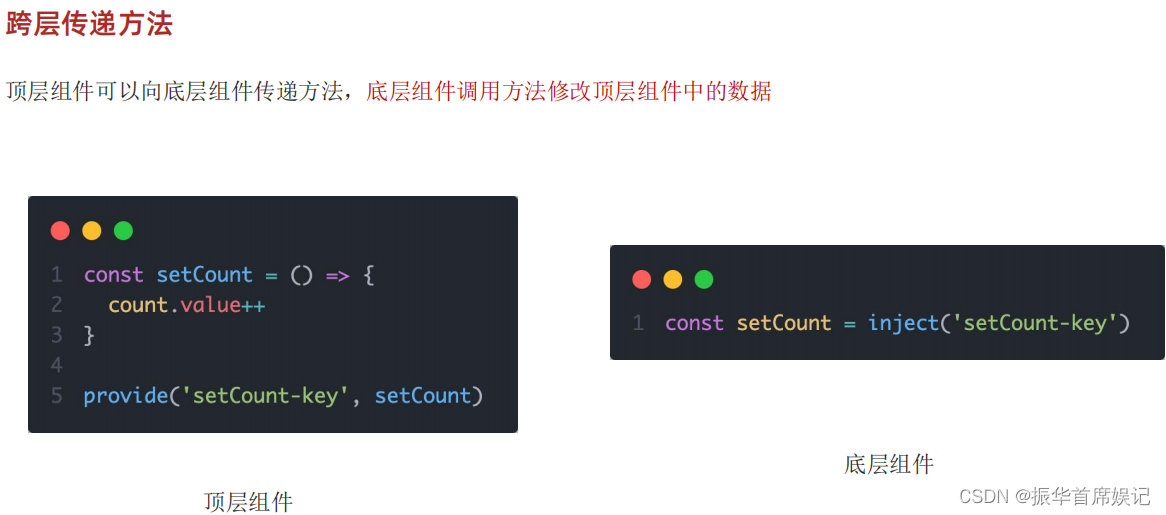
跨层传递方法
<script setup>
import CenterCom from "@/components/center-com.vue";
import { provide, ref } from "vue";

// 1.跨层传递普通数据
provide("theme-color", "pink");

// 2.跨层传递响应式数据
const count = ref(100);
provide("count", count);

setTimeout(() => {
  count.value = 500;
}, 2000);

// 3.跨层级传递函数,给子孙后代传递可以修改数据的方法
provide("changeCount", (newCount) => {
  count.value = newCount;
});
</script>

<template>
  <div>
    <h1>顶层组件</h1>
    <CenterCom></CenterCom>
  </div>
</template>
<script setup>
import BottomCom from './bottom-com.vue'

</script>

<template>
  <div>
    <h2>中间组件</h2>
    <BottomCom></BottomCom>
  </div>
</template>
<script setup>
import {inject} from 'vue'
const themeColor = inject('theme-color')
const count = inject('count')
const changeCount = inject('changeCount')
const clickFn=()=>{
    changeCount(1000)
}
</script>

<template>
  <div>
    <h3>底层组件 - {{ themeColor }} - {{ count }}</h3>
    <button @click="clickFn">更新count</button>
  </div>
</template>

Vue3.3新特性-defineOptions

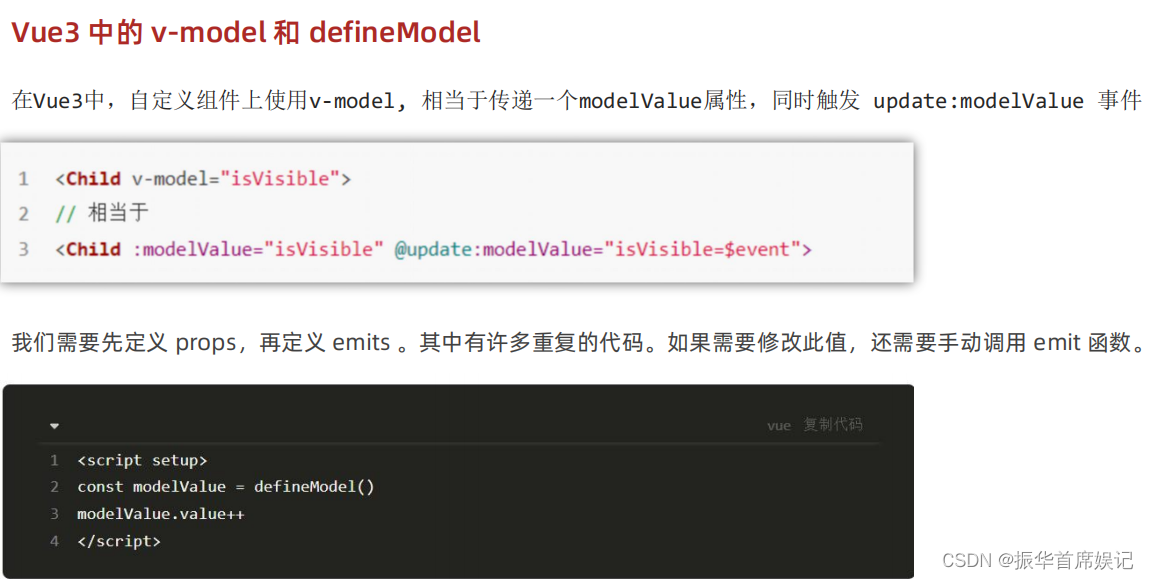
Vue3.3新特性-defineModel
