接了个单子,需要添加一个文章模块,一看用到的技术这么老,人傻了,纯html css js 。
在普通页面中
<!DOCTYPE html>
<html lang="en">

<head>
    <meta charset="UTF-8">
    <meta name="viewport" content="width=device-width, initial-scale=1.0">
    <title>Document</title>
    <link href="https://unpkg.com/@wangeditor/editor@latest/dist/css/style.css" rel="stylesheet">
    <!-- Bootstrap CSS -->
    <link href="https://stackpath.bootstrapcdn.com/bootstrap/4.3.1/css/bootstrap.min.css" rel="stylesheet">
    <style>
        #editor—wrapper {
            border: 1px solid #ccc;
            z-index: 100;
        }

        #toolbar-container {
            border-bottom: 1px solid #ccc;
        }

        #editor-container {
            height: 500px;
        }

        .row {
            width: 98%;
            padding-left: 10px;
            padding-right: 10px;
            display: flex;
            justify-content: space-between;
        }

        .half-width {
            width: 45%;
        }

        .marginLeft {
            margin-left: 30px;
        }
    </style>
</head>

<body>

<div class="row marginLeft">
    <div id="editor—wrapper" class="half-width">
        <div id="toolbar-container"><!-- 工具栏 --></div>
        <div id="editor-container"><!-- 编辑器 --></div>
    </div>

    <div class="half-width">
        <h1 style="text-align: center; font-family: '楷体'; margin: 0 0; height: 10%;">展示效果</h1>
        <div id="editor-showNode"  style="border: 1px solid #ccc;height: 90%;"><!-- 编辑器 --></div>
    </div>
</div>

<div class="marginLeft" style="margin-top: 50px; display: flex; align-items: center;">
    <p style="margin-right: 10px; display: inline-block; margin-top: 13px;">文件名称:</p>
    <input style="display: inline-block; width: 80%;" type="text" class="form-control" placeholder="文件名称" aria-describedby="basic-addon2">
</div>

<div class="marginLeft" style="margin-top: 50px; display: flex; align-items: center;">
    <p style="margin-right: 10px; display: inline-block; margin-top: 13px;">添加备注:</p>
    <input style="display: inline-block; width: 80%;" type="text" class="form-control" placeholder="添加备注" aria-describedby="basic-addon2">
</div>
<br/>
<div class="marginLeft" style="margin-top: 50px; display: flex; align-items: center;">
    <p style="margin-right: 10px; display: inline-block; margin-top: 15px;">选择附件:</p>
    <input type="file" class="btn btn-primary" data-toggle="button" aria-pressed="false">
</div>

<div class="d-flex justify-content-center mb-3" style="margin-top: 80px; margin-left: -50px; margin-bottom: 40px">
    <button id="clear-editor" class="btn btn-primary" style="width: 300px;">提交公告摘要</button> <!-- 使用了Bootstrap的按钮样式 -->
</div>
<div style="height: 50px">

</div>

</body>

<!-- Bootstrap JS -->
<script src="https://stackpath.bootstrapcdn.com/bootstrap/4.3.1/js/bootstrap.min.js"></script>

<script src="https://unpkg.com/@wangeditor/editor@latest/dist/index.js"></script>
<script>
    const { createEditor, createToolbar } = window.wangEditor

    const editorConfig = {
        placeholder: 'Type here...',
        onChange(editor) {
            const html = editor.getHtml()
            console.log('', html)  //html是当前编辑器的内容
            // 也可以同步到 <textarea>
            document.getElementById("editor-showNode").innerHTML=html;
        }
    }

    const editor = createEditor({
        selector: '#editor-container',
        html: '<p><br></p>',  //这是编辑器默认显示的内容
        config: editorConfig,
        mode: 'default', // or 'simple'
    })

    const toolbarConfig = {}

    const toolbar = createToolbar({
        editor,
        selector: '#toolbar-container',
        config: toolbarConfig,
        mode: 'default', // or 'simple'
    });

    // 为按钮添加点击事件处理函数
    document.getElementById('clear-editor').addEventListener('click', function() {
        // 使用编辑器的 clear 方法来清空内容
        editor.clear()
    })
</script>

</html>
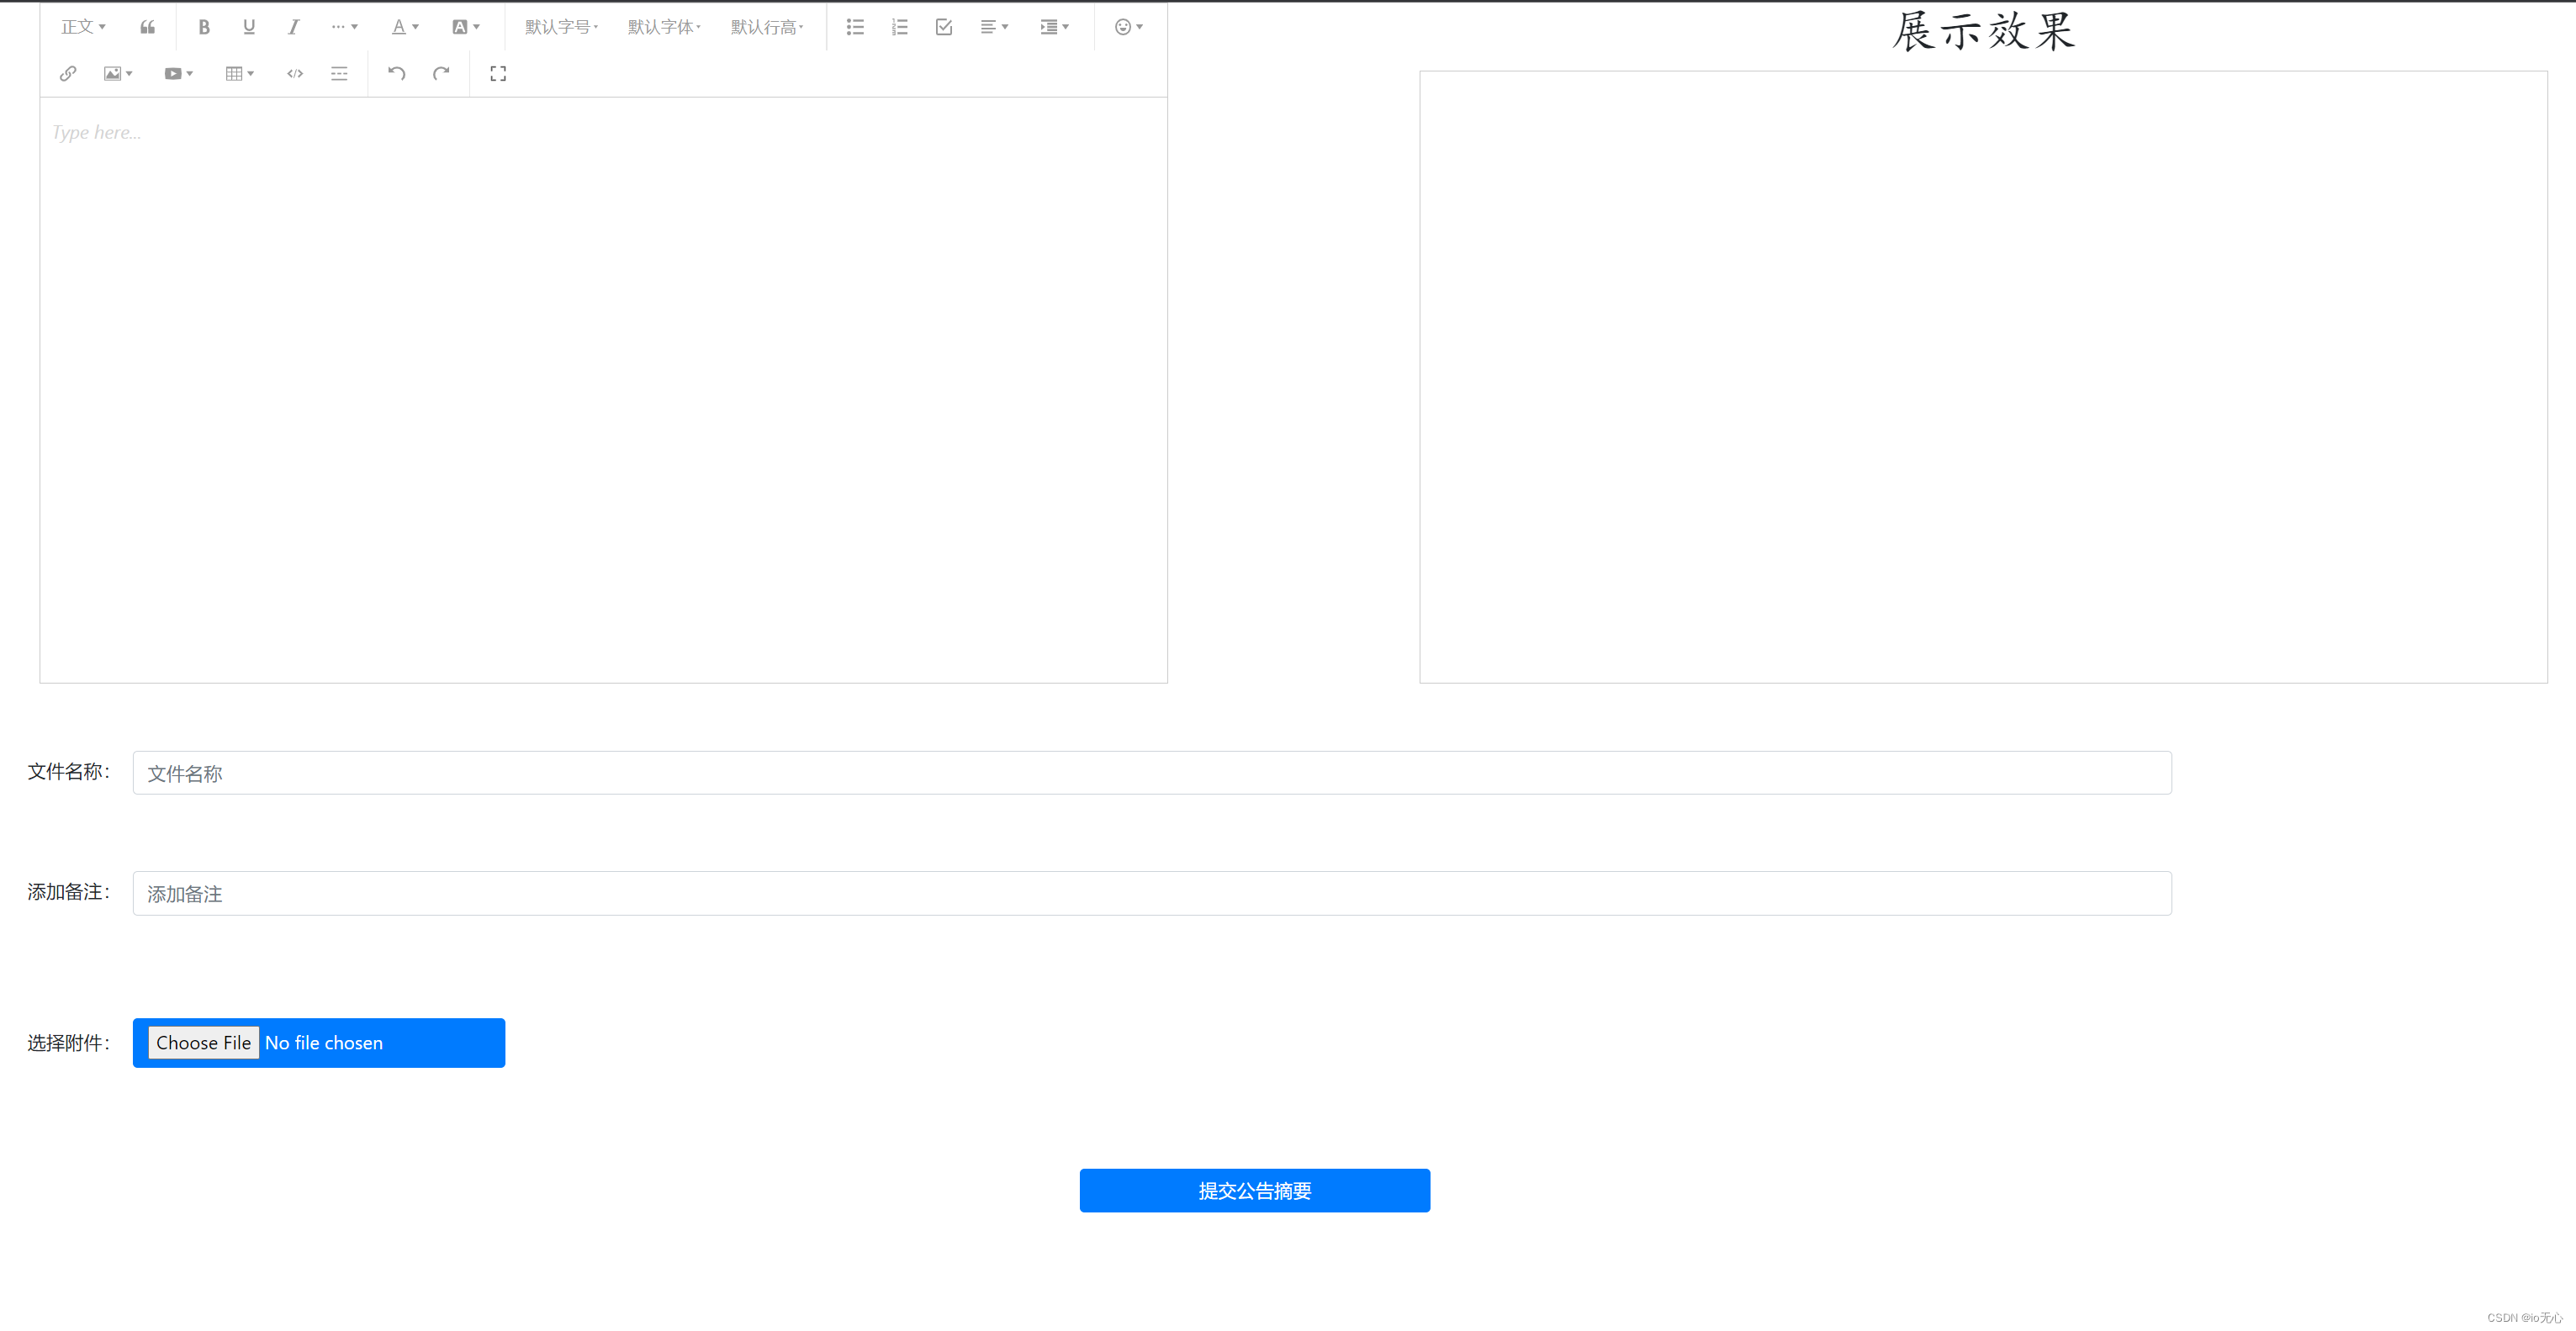
效果

在表单页面中,需要与要上传的文件一起添加到服务器
添加了一个隐藏的<textarea>标签来存储编辑器的内容,在提交表单时更新这个字段的值。改改了了按钮的点击事件处理函数,使其在提交表单时阻止默认的表单提交行为,并通过XMLHttpRequest发送一个POST请求,把所有内容提交到后台。
<!DOCTYPE html>
<html lang="en">
<head>
    <meta charset="UTF-8">
    <meta name="viewport" content="width=device-width, initial-scale=1.0">
    <title>Document</title>
    <link href="https://unpkg.com/@wangeditor/editor@latest/dist/css/style.css" rel="stylesheet">
    <!-- Bootstrap CSS -->
    <link href="https://stackpath.bootstrapcdn.com/bootstrap/4.3.1/css/bootstrap.min.css" rel="stylesheet">
    <style>
        #editor—wrapper {
            border: 1px solid #ccc;
            z-index: 100;
        }

        #toolbar-container {
            border-bottom: 1px solid #ccc;
        }

        #editor-container {
            height: 500px;
        }

        .row {
            width: 98%;
            padding-left: 10px;
            padding-right: 10px;
            display: flex;
            justify-content: space-between;
        }

        .half-width {
            width: 45%;
        }

        .marginLeft {
            margin-left: 30px;
        }
    </style>
</head>
<body>
<form id="myForm" method="post" enctype="multipart/form-data">
    <div class="row marginLeft">
        <div id="editor—wrapper" class="half-width">
            <div id="toolbar-container"><!-- 工具栏 --></div>
            <div id="editor-container"><!-- 编辑器 --></div>
        </div>

        <div class="half-width">
            <h1 style="text-align: center; font-family: '楷体'; margin: 0 0; height: 10%;">展示效果</h1>
            <div id="editor-showNode"  style="border: 1px solid #ccc;height: 90%;"><!-- 编辑器 --></div>
        </div>
    </div>

    <div class="marginLeft" style="margin-top: 50px; display: flex; align-items: center;">
        <p style="margin-right: 10px; display: inline-block; margin-top: 13px;">文件名称:</p>
        <input name="fileName" style="display: inline-block; width: 80%;" type="text" class="form-control" placeholder="文件名称" aria-describedby="basic-addon2">
    </div>

    <div class="marginLeft" style="margin-top: 50px; display: flex; align-items: center;">
        <p style="margin-right: 10px; display: inline-block; margin-top: 13px;">添加备注:</p>
        <input name="note" style="display: inline-block; width: 80%;" type="text" class="form-control" placeholder="添加备注" aria-describedby="basic-addon2">
    </div>

    <div class="marginLeft" style="margin-top: 50px; display: flex; align-items: center;">
        <p style="margin-right: 10px; display: inline-block; margin-top: 15px;">选择附件:</p>
        <input name="file" type="file" class="btn btn-primary" data-toggle="button" aria-pressed="false">
    </div>

    <textarea id="editorContent" name="editorContent" style="display: none;"></textarea>

    <div class="d-flex justify-content-center mb-3" style="margin-top: 80px; margin-left: -50px; margin-bottom: 40px">
        <button id="submit" class="btn btn-primary" style="width: 300px;">提交公告摘要</button>
    </div>
</form>

<!-- Bootstrap JS -->
<script src="https://stackpath.bootstrapcdn.com/bootstrap/4.3.1/js/bootstrap.min.js"></script>
<script src="https://unpkg.com/@wangeditor/editor@latest/dist/index.js"></script>

<script>
    const { createEditor, createToolbar } = window.wangEditor

    const editorConfig = {
        placeholder: 'Type here...',
        onChange(editor) {
            const html = editor.getHtml()
            console.log('', html)
            document.getElementById("editor-showNode").innerHTML=html;
        }
    }

    const editor = createEditor({
        selector: '#editor-container',
        html: '<p><br></p>',
        config: editorConfig,
        mode: 'default',
    })

    const toolbarConfig = {}

    const toolbar = createToolbar({
        editor,
        selector: '#toolbar-container',
        config: toolbarConfig,
        mode: 'default',
    });

    document.getElementById('submit').addEventListener('click', function(event) {
        event.preventDefault();

        document.getElementById('editorContent').value = editor.getHtml();

        var formElement = document.querySelector("form");
        var formData = new FormData(formElement);

        var request = new XMLHttpRequest();
        request.open("POST", "/submit");
        request.send(formData);
    })
</script>
</body>
</html>
效果