- Spring项目的创建
- 普通的存和取
- 存储Bean
- 创建Bean
- 将Bean注册到容器中
- 获取并使用Bean
- 获取Spring上下文
- 获取并使用
- 更简单的存和取
- 存储Bean
- 配置扫描路径
- 添加注解
- 类注解
- Bean的命名规则
- 五大注解的区别
- 方法注解@Bean
- 方法注解要配合类注解使用
- 重命名 Bean
- 有参数的方法
- 获取Bean
- 属性注入
- Setter 注入
- 构造方法注入
- 三种注入的优缺点
- @Resource
- Bean的作用域和生命周期
- Bean的作用域
- singleton
- prototype
- request
- session
- application
- websocket
- singleton和application的比较
- 设置作用域
- Spring的执行流程
- Bean的生命周期
Spring项目的创建
1.新建一个新的Maven项目。
2.引入Spring的依赖。在 <dependencies> 中添加如下配置:
        <dependency>
            <groupId>org.springframework</groupId>
            <artifactId>spring-context</artifactId>
            <version>5.2.3.RELEASE</version>
        </dependency>
3.添加启动类
public class App {
    public static void main(String[] args) {

    }
}
普通的存和取
存储Bean
在 Java中对象也叫做 Bean,所以后⾯再遇到对象就以 Bean 著称。
存储 Bean 分为以下 2 步:
1.存储 Bean 之前,先得有 Bean ,因此先要创建⼀个 Bean。
2.将创建的 Bean 注册到 Spring 容器中。
创建Bean
public class User {
    private String name;
    private Integer age;

    public void sayHi(){
     System.out.println("hi~");
    }

    public String getName() {
        return name;
    }

    public void setName(String name) {
        this.name = name;
    }

    public Integer getAge() {
        return age;
    }

    public void setAge(Integer age) {
        this.age = age;
    }
}
将Bean注册到容器中
在创建好的项⽬中添加 Spring 配置⽂件 spring-config.xml。
<?xml version="1.0" encoding="UTF-8"?>
<beans xmlns="http://www.springframework.org/schema/beans"
       xmlns:xsi="http://www.w3.org/2001/XMLSchema-instance"
       xsi:schemaLocation="http://www.springframework.org/schema/beans http://www.springframework.org/schema/beans/spring-beans.xsd">

</beans>
再将对象注册到 Spring 中就可以,具体操作是在 <beans>中添加如下配置:
<bean id="user" class="com.example.User"></bean>
注意,class中写的是全限定名,也就是需要指定类的路径。
获取并使用Bean
获取并使用 Bean 对象,分为以下 3 步:
1.得到 Spring 上下⽂对象。因为对象都交给 Spring 管理了,所以获取对象要从 Spring 中获取,那么就得先得到 Spring 的上下⽂。
2.通过 Spring 上下⽂,获取某⼀个指定的 Bean 对象。
3.使⽤ Bean 对象。
获取Spring上下文
方式一:ApplicationContext
ApplicationContext,可以称为Spring运行环境,创建时指定Spring的配置信息。
public class App {
    public static void main(String[] args) {
        //获取Spring上下文
        ApplicationContext context = new ClassPathXmlApplicationContext("spring-config.xml");
    }
}
方式二:BeanFactory
public class App {
    public static void main(String[] args) {
        //获取Spring上下文
        BeanFactory beanFactory = new XmlBeanFactory(new ClassPathResource("spring-config.xml"));
    }
}
ApplicationContext 和 BeanFactory 效果是⼀样的,ApplicationContext 属于 BeanFactory 的⼦类,它们的区别如下:
继承关系和功能方面来说:Spring 容器有两个顶级的接⼝:BeanFactory 和ApplicationContext。其中 BeanFactory 提供了基础的访问容器的能⼒,⽽ ApplicationContext属于 BeanFactory 的⼦类,它除了继承了 BeanFactory 的所有功能之外,它还拥有独特的特性,还添加了对国际化⽀持、资源访问⽀持、以及事件传播等⽅⾯的⽀持。
从性能方面来说:ApplicationContext 是⼀次性加载并初始化所有的 Bean 对象,这也是一种典型的空间换时间的方式。⽽BeanFactory 是需要那个才去加载那个,因此更加轻量,属于懒加载。
获取并使用
以ApplicationContext方式为例,BeanFactory获取Bean的方式和ApplicationContext相同。
public class App {
    public static void main(String[] args) {
        //获取Spring上下文
        ApplicationContext context = new ClassPathXmlApplicationContext("spring-config.xml");
        //获取Bean
        //方式1,通过getBean(String str)获取对象
        User user = (User) context.getBean("user");
        //使用Bean
        user.sayHi();
//        //方式2,通过getBean(Class<T> var)来获取Bean
//        User user1 = context.getBean(User.class);
//        user1.sayHi();
        //方式3,通过getBean(String str,Class<T> var)来获取Bean
        User user2= context.getBean("user1",User.class);
        user2.sayHi();
    }
}
注意:
1.bean 中的id要唯一且需要和调用时保持一致。
2.当有⼀个类型被重复注册到 spring-config.xml 中时,如果只使用方式2获取会报错。
3.通过Spring xml的配置的方式,也可以传递参数。注意,当需要传递的是对象是,此时要将value改为ref。


4.不论拿了多少次,或者使用哪种方式取对象,获取到的都是同一个对象。
操作流程:

更简单的存和取
在 Spring 中想要更简单的存储和读取对象的核心是使用注解。
存储Bean
在前面的方法中,存储Bean时,需要在spring-config中添加一行bean的注册内容。现在只需要添加注解就可以达到这个目的。
配置扫描路径
新建spring-config,xml文件,添加如下代码:
<?xml version="1.0" encoding="UTF-8"?>
<beans xmlns="http://www.springframework.org/schema/beans"
       xmlns:xsi="http://www.w3.org/2001/XMLSchema-instance"
       xmlns:content="http://www.springframework.org/schema/context"
       xsi:schemaLocation="http://www.springframework.org/schema/beans http://www.springframework.org/schema/beans/spring-beans.xsd http://www.springframework.org/schema/context https://www.springframework.org/schema/context/spring-context.xsd">
    <content:component-scan base-package="org.example"></content:component-scan>
</beans>
以上述示例为例会扫描org.example下的所有文件。如果不是在配置的扫描包下的类对象,即使添加了注解,也是不能被存储到 Spring 中的。
添加注解
想要将对象存储在 Spring 中,有两种注解类型可以实现:
1.类注解:@Controller、@Service、@Repository、@Component、@Configuration
2.⽅法注解:@Bean
类注解
1.@Controller
使用 @Controller 存储 bean:
@Controller
public class UserController {
    public void sayHi(){
        System.out.println("这是Controller注解");
    }
}
启动类的代码如下:
public class App {
    public static void main(String[] args) {
        ApplicationContext context = new ClassPathXmlApplicationContext("spring-config.xml");
        UserController userController = (UserController) context.getBean("userController");
        userController.sayHi();
    }
}
2.@Service
使⽤ @Service 存储 bean:
@Service
public class UserService {
    public void doService(){
        System.out.println("这是Service注解");
    }
}
启动类示例:
public class App {
    public static void main(String[] args) {
        ApplicationContext context = new ClassPathXmlApplicationContext("spring-config.xml");
        UserService userService = (UserService) context.getBean("userService");
        userService.doService();
    }
}
3.@Repository
使用 @Repository存储 bean:
@Repository
public class UserRepository {
    public void doRepository(){
        System.out.println("这是Repository注解");
    }
}
启动类的代码如下:
public class App {
    public static void main(String[] args) {
        ApplicationContext context = new ClassPathXmlApplicationContext("spring-config.xml");
        UserRepository userRepository = (UserRepository) context.getBean("userRepository");
        userRepository.doRepository();
    }
}
4.@Component
使用 @Component存储 bean:
@Component
public class UserComponent {
    public void doComponent(){
        System.out.println("这是Component注解");
    }
}
启动类的代码如下:
public class App {
    public static void main(String[] args) {
        ApplicationContext context = new ClassPathXmlApplicationContext("spring-config.xml");
        UserComponent userComponent = (UserComponent) context.getBean("userComponent");
        userComponent.doComponent();
    }
}
5.@Configuration
使用 @Configuration存储 bean:
@Configuration
public class UserConfiguration {
    public void doConfiguration(){
        System.out.println("这是Configuration注解");
    }
}
启动类的代码如下:
public class App {
    public static void main(String[] args) {
        ApplicationContext context = new ClassPathXmlApplicationContext("spring-config.xml");
        UserConfiguration userConfiguration = (UserConfiguration) context.getBean("userConfiguration");
        userConfiguration.doConfiguration();
    }
}
Bean的命名规则
我们可以看到,上面的示例中, bean 使用的都是标准的⼤驼峰命名,而读取的时候首字母小写就可以获取到 bean 。

但是,当我们首字母和第⼆个字母都是大写时,就不能正常读取到 bean 了:

那到底Bean的命名规则是怎样的呢?这时候需要去看源码。
在搜索框中搜索bean,顺藤摸瓜,找到了 bean 对象的命名规则的⽅法:

点开返回方法,就找到了bean 对象的命名的真正方法:

所以,如果命名时的前两个字母都是大写,那存储时的首字母也需要大写。
此外,还可以对类注解进行重命名,也可以存储bean。
@Component("usercomponent")
public class UserComponent {
    public void doComponent(){
        System.out.println("这是Component注解");
    }
}
public class App {
    public static void main(String[] args) {
        ApplicationContext context = new ClassPathXmlApplicationContext("spring-config.xml");
        UserComponent userComponent = (UserComponent) context.getBean("usercomponent");
        userComponent.doComponent();

    }
}
五大注解的区别
既然功能是⼀样的,那为什么还需要这么多的类注解呢?就是因为不同的注解有不同的用途。
@Controller:控制器,通常是指程序的入口,比如参数的校验、类型转换等前置处理工作;
@Servie:服务,一般写业务代码,服务编排;
@Repository:仓库,通常是值DB操作相关的代码,Dao;
@Component:其他的对象
@Configuration:配置。

同时还可以发现,查看 @Controller / @Service / @Repository / @Configuration 等注解的源码时,这些注解⾥⾯都有⼀个注解 @Component,说明它们本身就是属于 @Component 的“子类”。

方法注解@Bean
不是所有的对象都是通过类来生成的。类注解是添加到某个类上的,⽽方法注解是放到某个方法上的。
public class BeanConfig {
    @Bean
    public User user(){
        User user = new User();
        user.setName("zhangsan");
        user.setAge(18);
        return user;
    }
}
启动类:
public class App {
    public static void main(String[] args) {
        ApplicationContext context = new ClassPathXmlApplicationContext("spring-config.xml");
        User user = (User) context.getBean("user");
        System.out.println(user.getName());
    }
}
然⽽,当我们写完以上代码,尝试获取 bean 对象中的 user 时却发现,根本获取不到,报出如下错误:

方法注解要配合类注解使用
在 Spring 框架的设计中,⽅法注解 @Bean 要配合类注解才能将对象正常的存储到 Spring 容器中,同时通常情况下,@Bean中bean的命名规则是方法名。
@Component
public class BeanConfig {
    @Bean
    public User user(){
        User user = new User();
        user.setName("zhangsan");
        user.setAge(18);
        return user;
    }
}

重命名 Bean
可以通过设置 name 属性给 Bean 对象进行重命名操作,代码如下:
@Component
public class BeanConfig {
    @Bean(name = {"aaa","bbb"})
    public User user(){
        User user = new User();
        user.setName("zhangsan");
        user.setAge(18);
        return user;
    }
}
此时只能通过新的名字来拿,用原来的方法名就拿不到了。注意,当只写一个名字时,name可以省略,直接写名字即可。
@Component
public class BeanConfig {
    @Bean("aaa")
    public User user(){
        User user = new User();
        user.setName("zhangsan");
        user.setAge(18);
        return user;
    }
}
有参数的方法
@Component
public class BeanConfig {
    @Bean
    public Integer age(){
        return 11;
    }
    @Bean
    public Integer age1(){
        return 12;
    }
    @Bean(name = {"aaa","user"})
    public User user(Integer age){
        User user = new User();
        user.setName("zhangsan");
        user.setAge(age);
        return user;
    }
}
注意,在匹配参数时,首先以类型来匹配,如果以类型匹配出来多个对象,再以名称来匹配。 所以这里的返回结果为11。
获取Bean
获取 bean 对象也叫做对象装配,是把对象取出来放到某个类中,有时候也叫对象注⼊。
对象装配(对象注⼊)的实现⽅法以下 3 种:
1.属性注⼊
2.构造⽅法注⼊
3.Setter 注⼊
属性注入
属性注⼊是使⽤ @Autowired 实现的。
@Controller
public class UserController {
    @Autowired
    private UserService userService;

    public void sayHi(){
        userService.doService();
        System.out.println("这是Controller注解");
    }
}
Autowired的注入方式和@Bean类似,先以类型匹配,如果匹配出来是一个对象就直接注入,如果以类型匹配出来多个对象,就以名称来匹配。
Setter 注入
需要写Set方法,然后在Set方法上写@Autowired注解。
@Controller
public class UserController2 {

    private UserService userService;

    @Autowired
    public void setUserService(UserService userService) {
        this.userService = userService;
    }

    public void sayHi(){
        userService.doService();
        System.out.println("这是Controller注解");
    }
}
构造方法注入
@Controller
public class UserController3 {

    private UserService userService;

    public UserController3(UserService userService) {
        this.userService = userService;
    }

    public void sayHi(){
        userService.doService();
        System.out.println("这是Controller注解");
    }
}
如果写多个构造方法就会报错。原因在于创建对象需要调用构造方法,当存在多个构造方法时,Spring就不知道使用哪个构造方法了,所以会报错。

此时需要告诉Spring要使用哪个构造方法去创建对象,就要在指定的构造方法上加@Autowired。
@Controller
public class UserController3 {

    private UserService userService;
    private UserConfiguration userConfiguration;

    @Autowired
    public UserController3(UserService userService) {
        this.userService = userService;
    }

    public UserController3(UserService userService, UserConfiguration userConfiguration) {
        this.userService = userService;
        this.userConfiguration = userConfiguration;
    }

    public void sayHi(){
        userService.doService();
        System.out.println("这是Controller注解");
    }
}
三种注入的优缺点
属性注入
优点:简洁,使⽤方便;
缺点:只能⽤于 IoC 容器,如果是⾮ IoC 容器不可⽤,并且只有在使⽤的时候才会出现 NPE(空指针异常);不能注入一个final修饰的属性。

Setter 注入
优点: 方便在类实例之后,重新对该对象进行配置或注入。
缺点:不能注入一个final修饰的属性;注入对象可能会被改变。因为setter方法可能会被多次调用,有被修改的风险。
构造方法注⼊
优点:可以注入final修饰的属性;注入的对象不会被修改;依赖对象在使用前一定会被完全初始化,因为依赖是在类的构造方法中执行的,而构造方法是在类加载阶段就会执行的方法;通用性好,构造方法是JDK支持的,所以更换任何框架都适用。
缺点:注入多个对象时,代码会比较繁琐。
@Resource
在进⾏属性注⼊时,除了可以使⽤ @Autowired 关键字之外,我们还可以使⽤ @Resource 进⾏注⼊。
@Controller
public class UserController4 {
    @Resource
    private  UserService userService;


    public void sayHi(){
        userService.doService();
        System.out.println("这是Controller注解");
    }
}
@Autowired 和 @Resource 的区别:
出身不同:@Autowired 来⾃于 Spring,⽽ @Resource 来⾃于 JDK 的注解;
使用时设置的参数不同:相比于 @Autowired 来说,@Resource ⽀持更多的参数设置,例如name 设置,根据指定的名称获取 Bean。而 @Autowired 不支持。

虽然 @Autowired不支持这样的写法,但是@Autowired配合@Qualifier使用可以根据名称获取指定的bean 。
所以,单独使用@Resource 或者@Autowired配合@Qualifier使用可以处理同⼀类型多个 Bean 报错的问题。

此外,@Autowired 可⽤于 Setter 注⼊、构造方法注⼊和属性注⼊,⽽ @Resource 只能⽤于 Setter 注⼊和属性注⼊,不能⽤于构造方法注⼊。
Bean的作用域和生命周期
Bean的作用域
Bean 的作⽤域是指 Bean 在 Spring 整个框架中的某种⾏为模式。Spring 容器在初始化⼀个 Bean 的实例时,同时会指定该实例的作⽤域。Spring有 6 种作⽤域,在普通的 Spring 项⽬中只有前两种,最后四种是基于 Spring MVC 生效的:
1.singleton:单例作用域
2.prototype:原型作用域(多例作⽤域)
3.request:请求作用域
4.session:回话作用域
5.application:全局作用域
6.websocket:HTTP WebSocket 作⽤域
singleton
官方说明:(Default) Scopes a single bean definition to a single object instance for each Spring IoC container.
描述:该作用域下的Bean在IoC容器中只存在⼀个实例:获取Bean(即通过applicationContext.getBean等方法获取)及装配Bean(即通过@Autowired注入)都是同⼀个对象。
场景:通常无状态的Bean使⽤该作用域。无状态表示Bean对象的属性状态不需要更新。
备注:Spring默认选择该作用域。

prototype
官方说明:Scopes a single bean definition to any number of objectinstances.
描述:每次对该作⽤域下的Bean的请求都会创建新的实例:获取Bean(即通过applicationContext.getBean等⽅法获取)及装配Bean(即通过@Autowired注⼊)都是新的对象实例。
场景:通常有状态的Bean使⽤该作⽤域。
request
官方说明:Scopes a single bean definition to the lifecycle of a single HTTP request. That is,each HTTP request has its own instance of a bean created off the back of a single bean definition. Only valid in the context of a web-aware Spring ApplicationContext.
描述:每次http请求会创建新的Bean实例,类似于prototype。
场景:⼀次http的请求和响应的共享Bean。
备注:限定SpringMVC中使⽤。
session
官方说明:Scopes a single bean definition to the lifecycle of an HTTP Session. Only valid in the context of a web-aware Spring ApplicationContext.
描述:在⼀个http session中,定义⼀个Bean实例。
场景:⽤户回话的共享Bean, ⽐如:记录⼀个⽤户的登陆信息。
备注:限定SpringMVC中使⽤。
application
官方说明:Scopes a single bean definition to the lifecycle of a ServletContext. Only valid in the context of a web-aware Spring ApplicationContext.
描述:在⼀个http servlet Context中,定义⼀个Bean实例。
场景:Web应⽤的上下文信息,⽐如:记录⼀个应⽤的共享信息。
备注:限定SpringMVC中使⽤。
websocket
官方说明:Scopes a single bean definition to the lifecycle of a WebSocket. Only valid in the context of a web-aware Spring ApplicationContext.
描述:在⼀个HTTP WebSocket的⽣命周期中,定义⼀个Bean实例。
场景:WebSocket的每次会话中,保存了⼀个Map结构的头信息,将⽤来包裹客户端消息头。第⼀次初始化后,直到WebSocket结束都是同⼀个Bean。
备注:限定Spring WebSocket中使用。
singleton和application的比较
singleton 是 Spring Core 的作用域;application 是 Spring Web 中的作用域;
singleton 作用于 IoC 的容器,而 application 作用于 Servlet 容器。
所谓的application 作用域就是对于整个web容器来说,bean的作用域是ServletContext级别的,这个和singleton有点类似,但是区别在于,application 作用域是ServletContext的单例,singleton是一个ApplicationContex(可以理解成Spring的运行环境)t的单例。在一个web容器中ApplicationContext可以有多个,但是只能有一个ServletContext。

设置作用域
使用 @Scope 标签就可以⽤来声明 Bean 的作⽤域。
    @Scope("prototype")
    @Bean
    public User user2(){
        User user = new User();
        user.setName("lisi");
        user.setAge(19);
        return user;
    }
将单例作用域提升到多例作用域之后,尽管修改了对象的内容,但是第二次拿到的不再是修改之后的对象,而是一个新的对象。

Spring的执行流程
①启动 Spring 容器

②解析配置文件,根据配置文件内容初始化 Bean(分配内存空间,从无到有)

③扫描配置路径下的Spring注解,注册Bean 到 容器中(存操作)(五大注解)

④将 Bean 装配到需要的类中(取操作)(@Autowired、@Resource)

Bean的生命周期
Bean 的生命周期分为以下 5 大部分:
1.实例化 Bean(为 Bean 分配内存空间)
2.设置属性(Bean 注入和装配。比如@Autowired)
3.Bean 初始化
- 执行各种通知。如 BeanNameAware、BeanFactoryAware、ApplicationContextAware
的接口方法; - 执行初始化前置方法;
– xml定义init-method
– 使用注解@PostConstruc - 执行初始化方法;
- 执行BeanPostProcessor 初始化后置方法
4.使用 Bean
5.销毁 Bean。比如destroy-method方法。

这个过程类似于买新房子:
- 先买房(实例化,从⽆到有);
- 装修(设置属性);
- 买家电,如洗⾐机、冰箱、电视、空调等([各种]初始化);
- ⼊住(使用 Bean);
- 卖出去(Bean 销毁)。
实例化和初始化的区别:
实例化和属性设置是 Java 级别的系统“事件”,其操作过程不可人工干预和修改;而初始化是给开发者提供的,可以在实例化之后,类加载完成之前进行自定义“事件”处理。
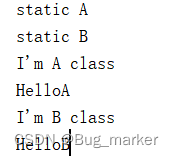
代码演示:
//@Component
public class BeanLife implements BeanNameAware {
    public BeanLife(){
        System.out.println("执行了构造函数");
    }
    @Override
    public void setBeanName(String s) {
        System.out.println("设置Bean Name:" + s);
    }
    @PostConstruct
    public void postConstruct(){
        System.out.println("执行postConstruct方法");
    }
    public void init(){
        System.out.println("执行init方法");
    }
    public void hi(){
        System.out.println("hi~");
    }
    @PreDestroy
    public void destory(){
        System.out.println("执行destory方法");
    }
    public void destoryXml(){
        System.out.println("执行destoryXml方法");
    }
}
在初始化时,先执行注解,再执行xml配置的方法;在销毁时,同样是先执行注解,再执行xml配置的方法。

继续加油~