文章目录
- 1、创建一个空项目
- 2、在新建的空项目中添加starter模块
- 3、添加autoconfigure模块
- 4、配置starter模块的pom文件
- 5、配置autoconfigure模块
- 1. 配置pom依赖
- 2、创建xxProperties配置类
- 3、创建服务提供类xxxService
- 4、创建自动配置类xxxGenerateAutoConfiguration
- 5 、META-INF/spring.factories
- 6、打包
- 6、测试
- 7、总结创建步骤
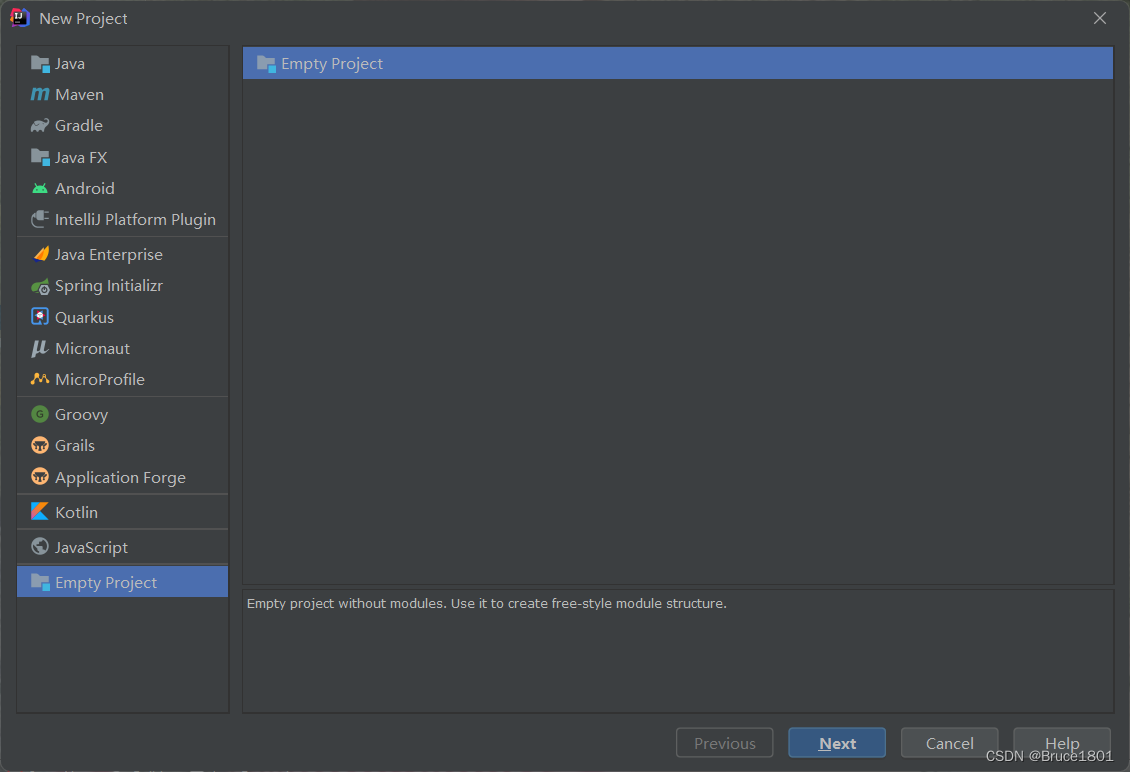
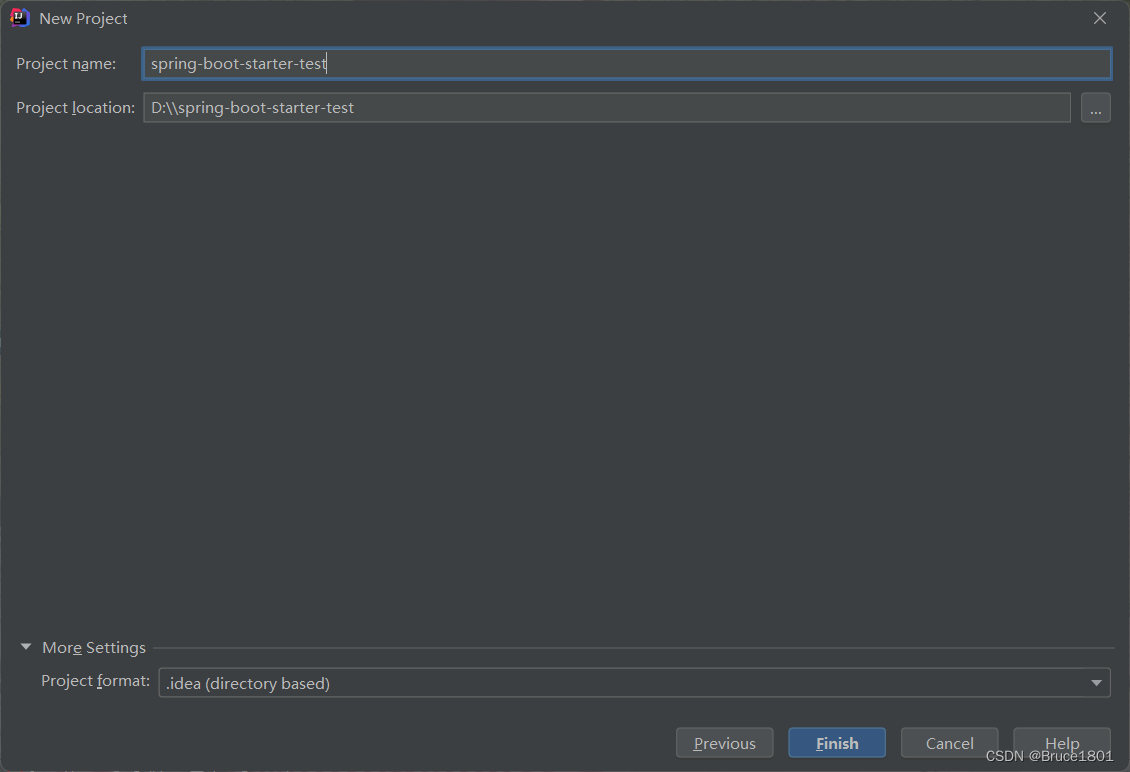
1、创建一个空项目
首先创建一个空的Project。用以承载starter和autoconfigure
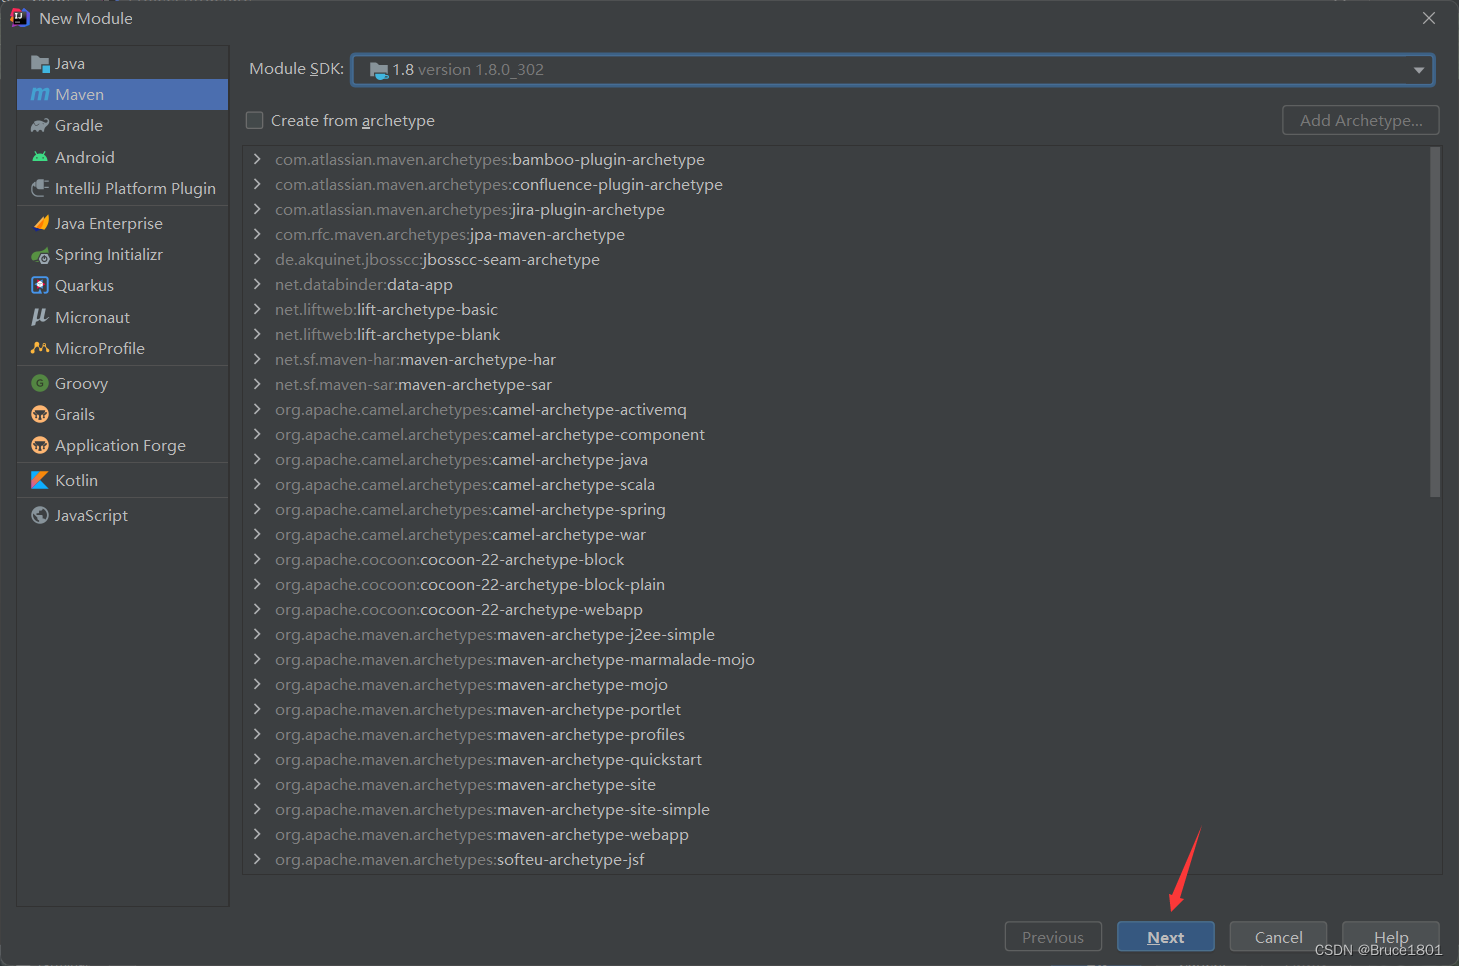
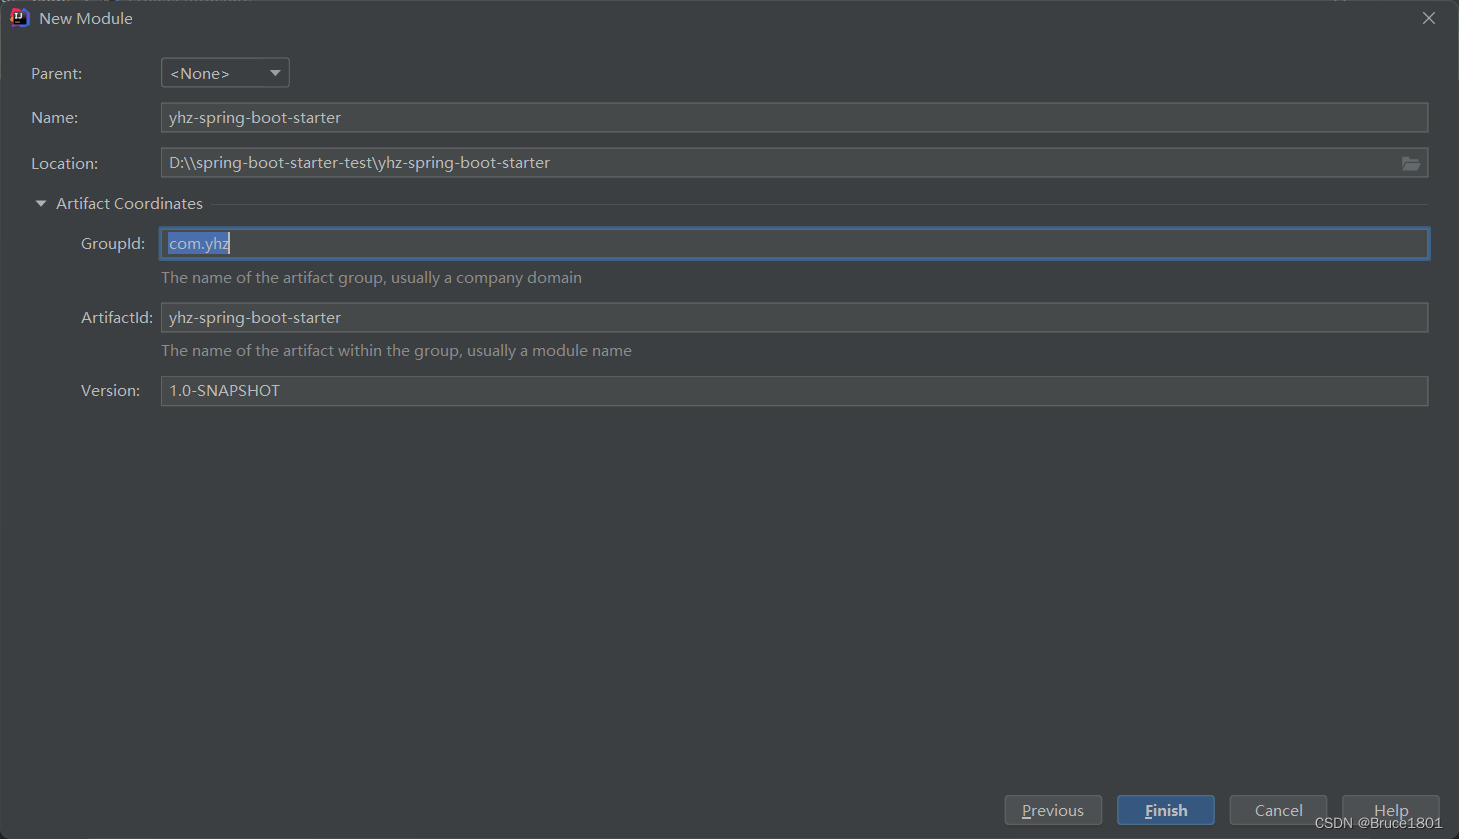
2、在新建的空项目中添加starter模块
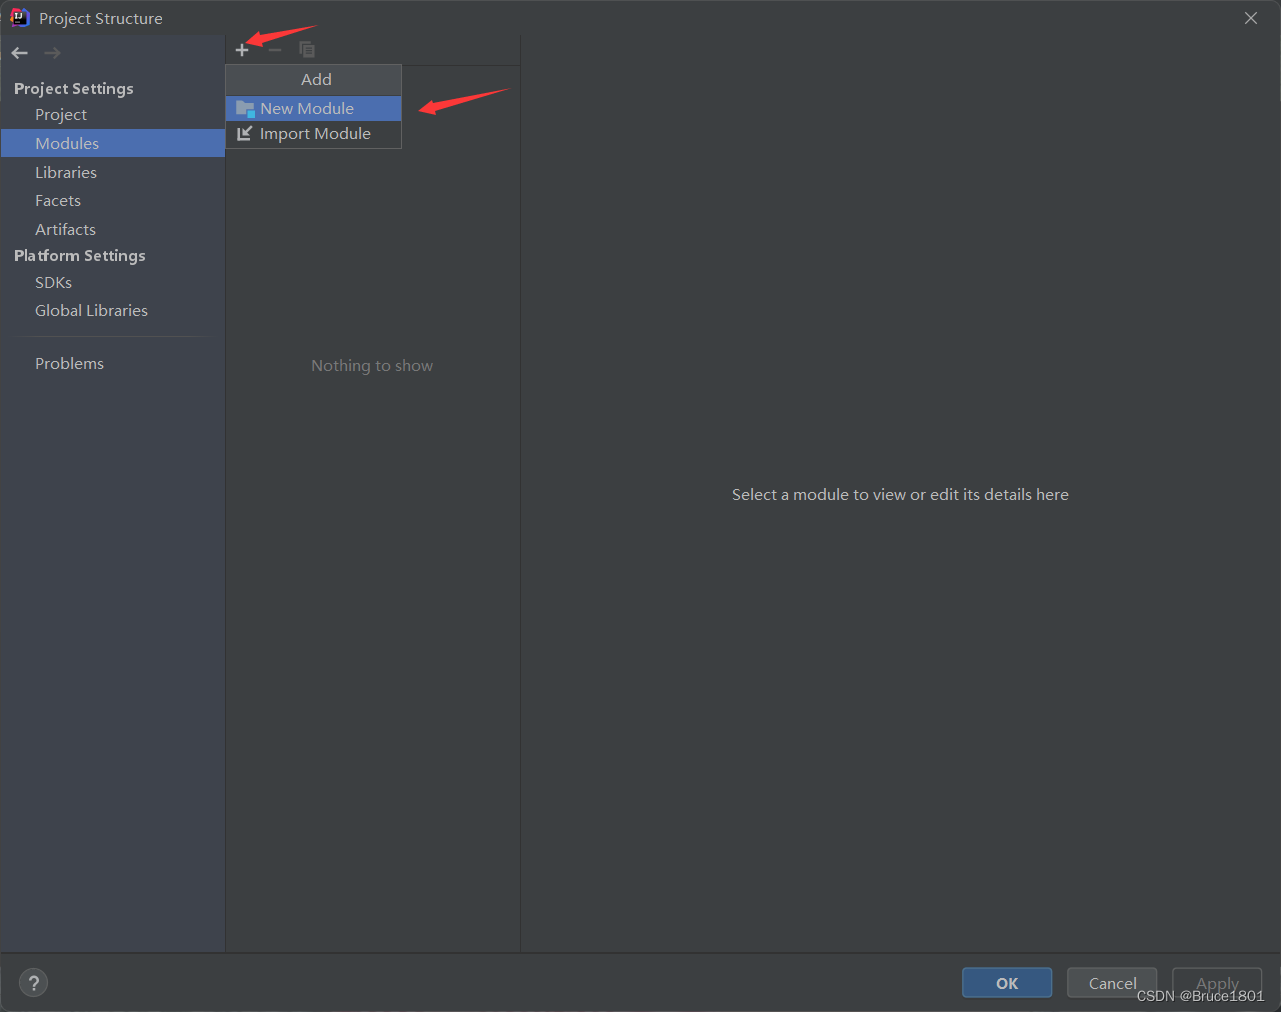
创建一个maven项目
3、添加autoconfigure模块
这里因为是要借助Spring Boot做自动配置,就可以直接使用Spring Initializer来创建。
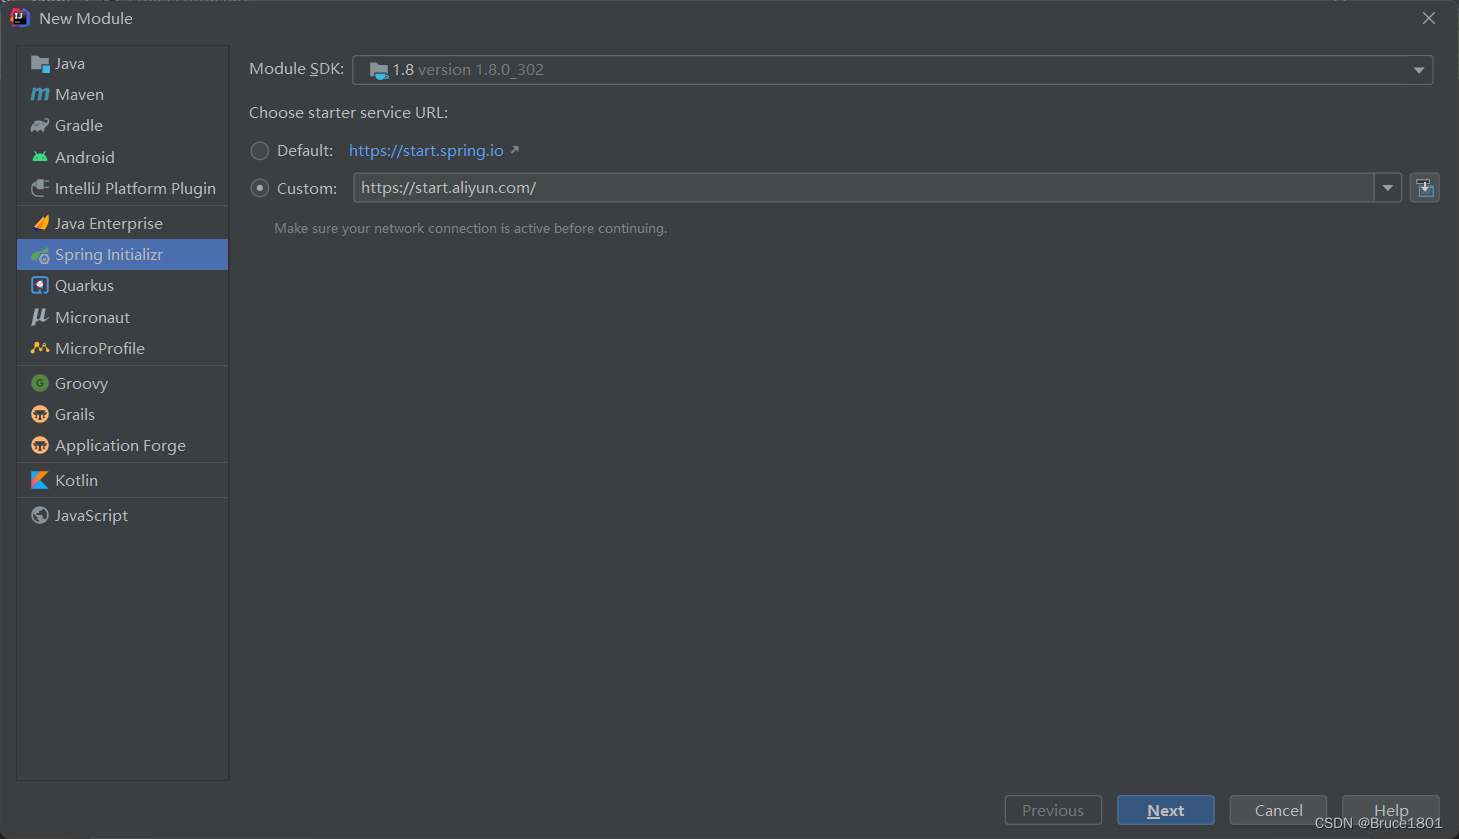
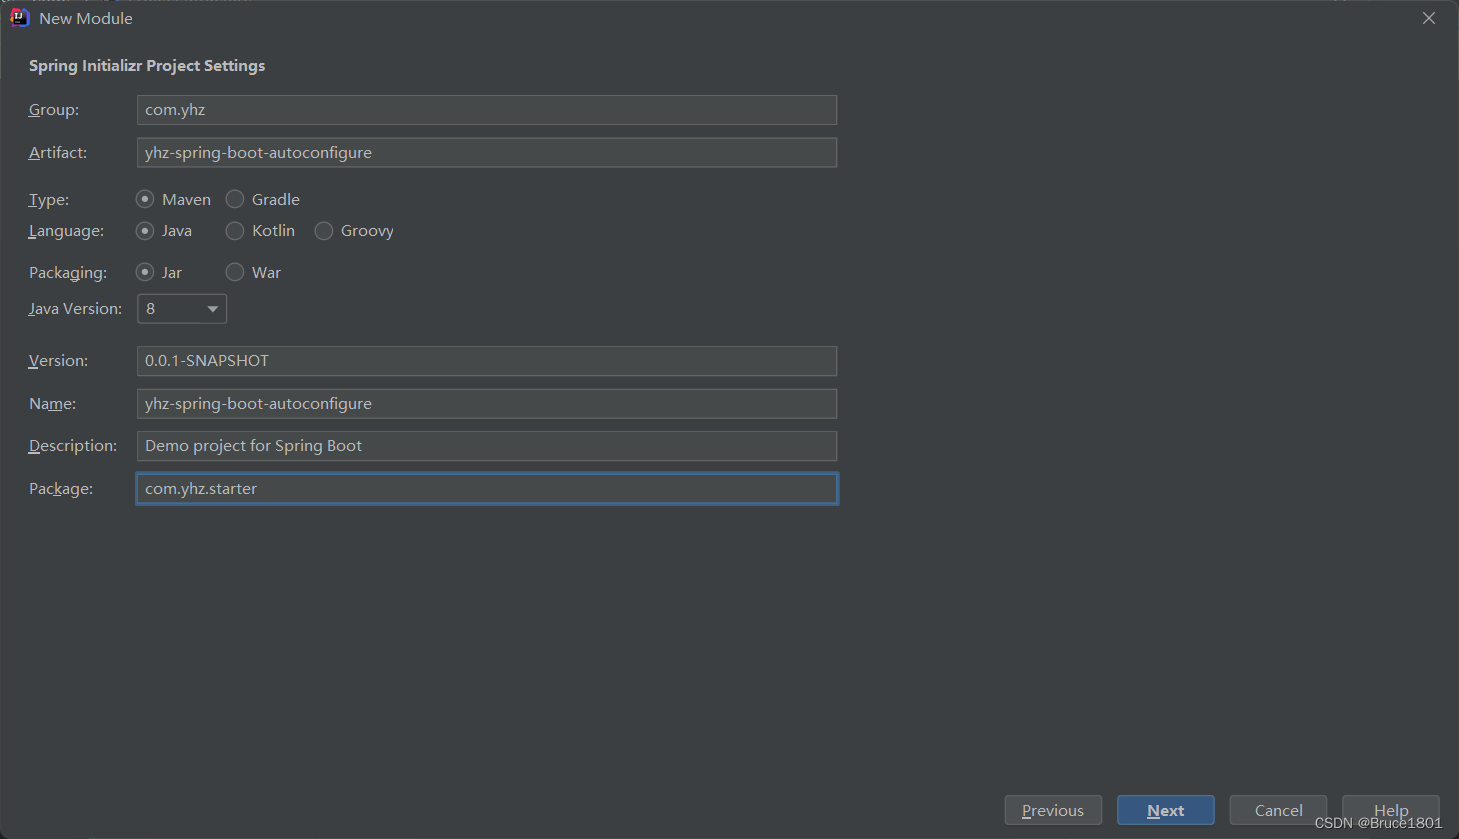
Package:com.yhz.starter.autoConfigure
后面一路点击Next,最后,直接点finish就OK了
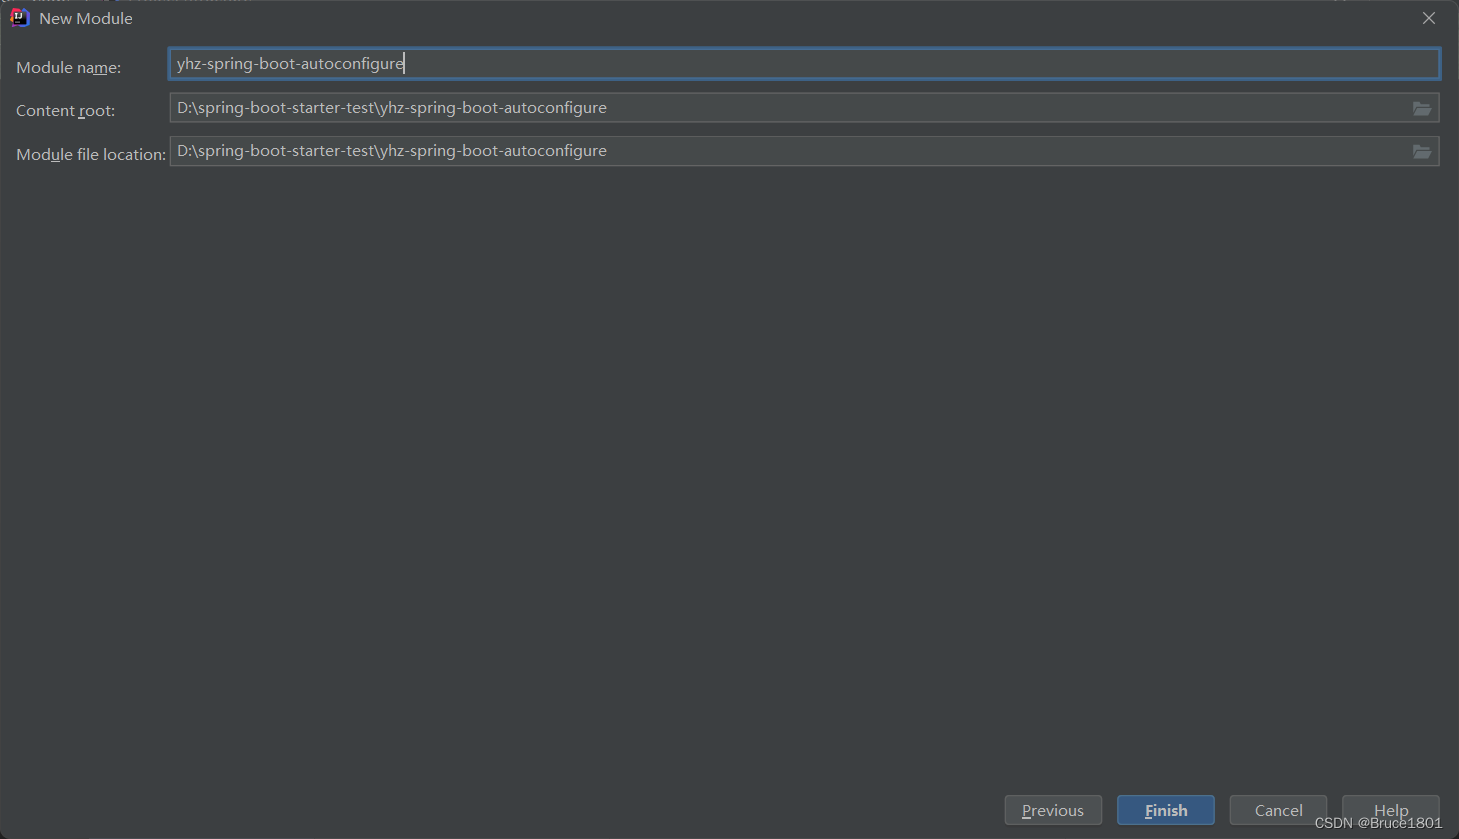
添加完模块后,一定先点Apply,再点OK,否则白干
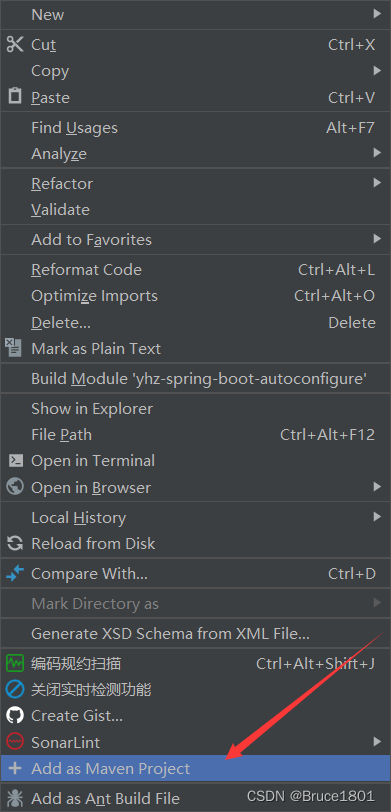
如果autoconfigure模块下的pom文件是红的:
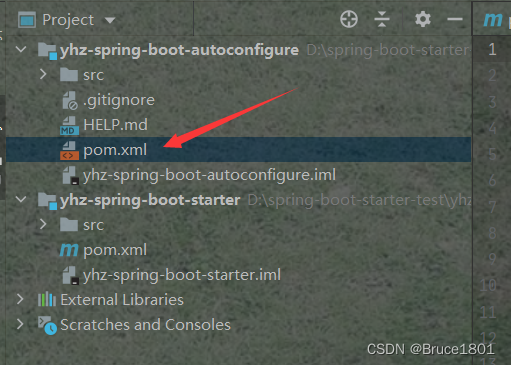
鼠标右击该pom文件,点靠近最下方的,Add as Maven Project 就好了
4、配置starter模块的pom文件
 <dependencies>
        <dependency>
            <groupId>com.yhz</groupId>
            <artifactId>yhz-spring-boot-autoconfigure</artifactId>
            <version>0.0.1-SNAPSHOT</version>
        </dependency>
    </dependencies>
刷新maven。
5、配置autoconfigure模块
Either way, your starter must reference the core Spring Boot starter (spring-boot-starter) directly or indirectly (i.e. no need to add it if your starter relies on another starter). If a project is created with only your custom starter, Spring Boot’s core features will be honoured by the presence of the core starter.
无论哪种方式,您的启动器都必须直接或间接引用核心Spring Boot启动器(Spring Boot起动器)(即,如果您的启动器依赖于另一个启动器,则无需添加它)。如果一个项目只使用您的自定义启动器创建,那么Spring Boot的核心功能将因核心启动器的出现而受到表彰。百度翻译的
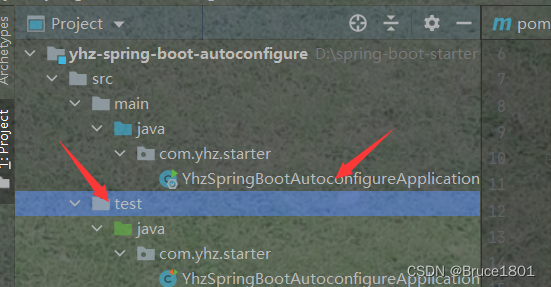
这个模块只用来配置,所以可以把其他无关的文件删掉:
1. 配置pom依赖
将test的依赖删掉,在pom文件中添加spring-boot-configuration-processor依赖
		<dependency>
            <groupId>org.springframework.boot</groupId>
            <artifactId>spring-boot-configuration-processor</artifactId>
            <optional>true</optional>
        </dependency>
作用是:
确保在使用@ConfigurationProperties注解时,可以优雅的读取配置信息,引入该依赖后,IDEA不会出现“spring boot configuration annotation processor not configured”的错误。
2、创建xxProperties配置类
package com.yhz.starter.autoConfigure;

import org.springframework.boot.context.properties.ConfigurationProperties;

/**
 * @BelongsProject: spring-boot-starter-test
 * @Author: YHZ
 * @CreateTime: 2023-07-17  17:45
 * @Description: TODO
 * @Version: 1.0
 */
@ConfigurationProperties(prefix = MyProperties.PREFIX)
public class MyProperties {
    public static final String PREFIX = "yhz";
    private Long workId;
    public Long getWorkId() {
        return workId;
    }
    public void setWorkId(Long workId) {
        this.workId = workId;
    }
}
这里注解 @ConfigurationProperties 表示这是一个配置文件,其中的属性字段可以在application.properties中指定。prefix =MyProperties.PREFIX表示匹配 yhz前缀。例如这里,我们将来使用的时候就可以通过配置yhz.workId=xxx来配置前缀。
3、创建服务提供类xxxService
表示我们这个starter可以提供的服务
package com.yhz.starter.autoConfigure;

import java.util.Random;

/**
 * @BelongsProject: spring-boot-starter-test
 * @Author: YHZ
 * @CreateTime: 2023-07-17  17:56
 * @Description: TODO
 * @Version: 1.0
 */
public class MyGenerateService {
    private Long workId;

    public MyGenerateService(Long workId) {
        this.workId = workId;
    }

    public Long generate() {
        return new Random().nextInt(100) + this.workId;
    }
}
4、创建自动配置类xxxGenerateAutoConfiguration
package com.yhz.starter.autoConfigure;

import org.springframework.beans.factory.annotation.Autowired;
import org.springframework.boot.autoconfigure.condition.ConditionalOnProperty;
import org.springframework.boot.context.properties.EnableConfigurationProperties;
import org.springframework.context.annotation.Bean;
import org.springframework.context.annotation.Configuration;

/**
 * @BelongsProject: spring-boot-starter-test
 * @Author: YHZ
 * @CreateTime: 2023-07-17  17:58
 * @Description: TODO
 * @Version: 1.0
 */
// 必须,指明这是一个配置类
@Configuration
// 必须,绑定我们的配置文件类
@EnableConfigurationProperties(MyProperties.class)
// 可选,表示可以在配置文件中,通过 myGenerateService.enable来设置是否配置该类
// 如果没有指明,则默认为true,即表示配置,如果指明为false,就不配置了
@ConditionalOnProperty(prefix = "myGenerateService", value = "enable", matchIfMissing = true)
public class MyGenerateAutoConfiguration {
    @Autowired
    private MyProperties myProperties;

//    用@Bean将 MyGenerateService 注入到Spring容器中,并把配置文件传进去,以供 MyGenerateService 使用
    @Bean
    public MyGenerateService myGenerateService(){
        return new MyGenerateService(myProperties.getWorkId());
    }

}
5 、META-INF/spring.factories
Spring Boot的自动配置会自动加载类路径下META-INF/spring.factories文件,并将以类EnableAutoConfiguration的全限定类名对应的值作为候选配置类。所以这里还需要新建该文件。
在main目录下新建一个resource目录

创建spring.factories文件

文件中填入
org.springframework.boot.autoconfigure.EnableAutoConfiguration=\
com.yhz.starter.autoConfigure.MyGenerateAutoConfiguration
这样,Spring Boot就能自动扫描到我们这个配置类并加载了。
6、打包
编写完后,将两个模块打包发布到maven仓库,先将autoconfigure模块打包,再将starter模块打包
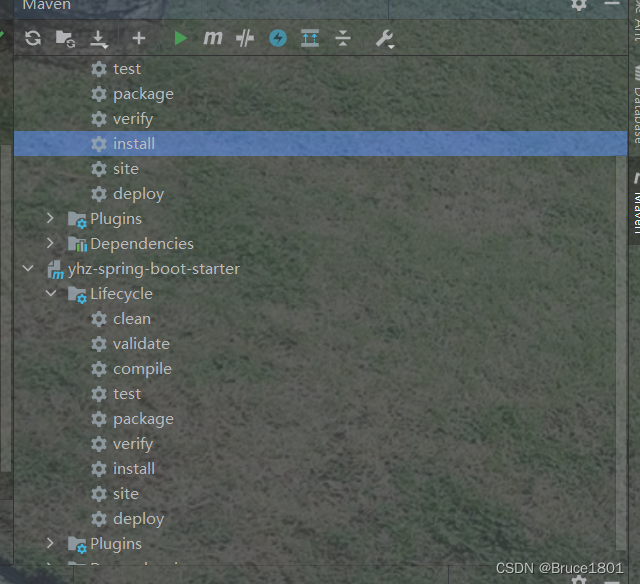
到此,自定义starter就算完成了
6、测试
新建一个测试模块
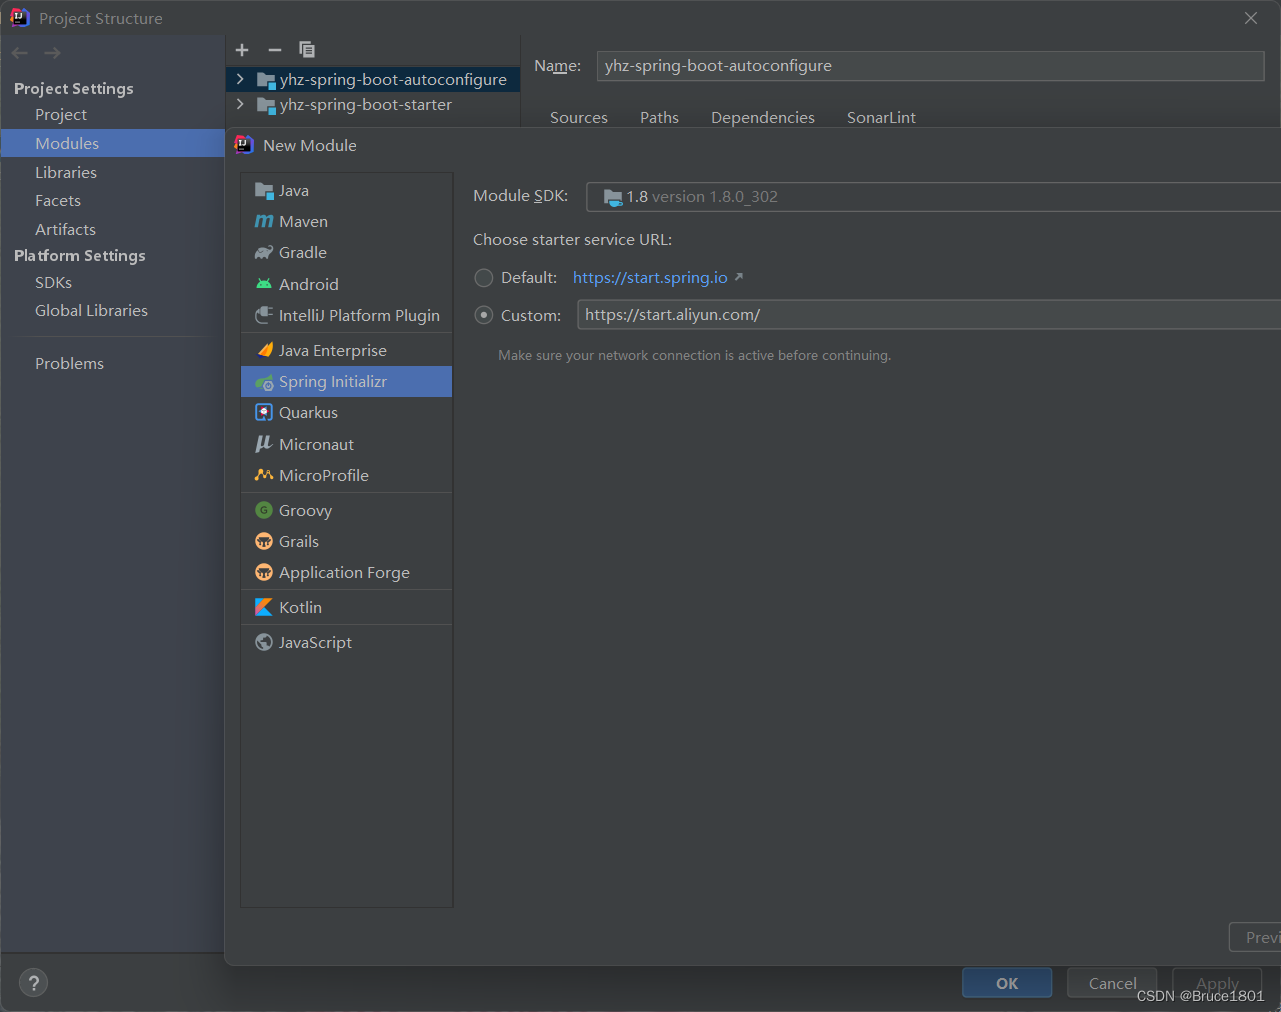
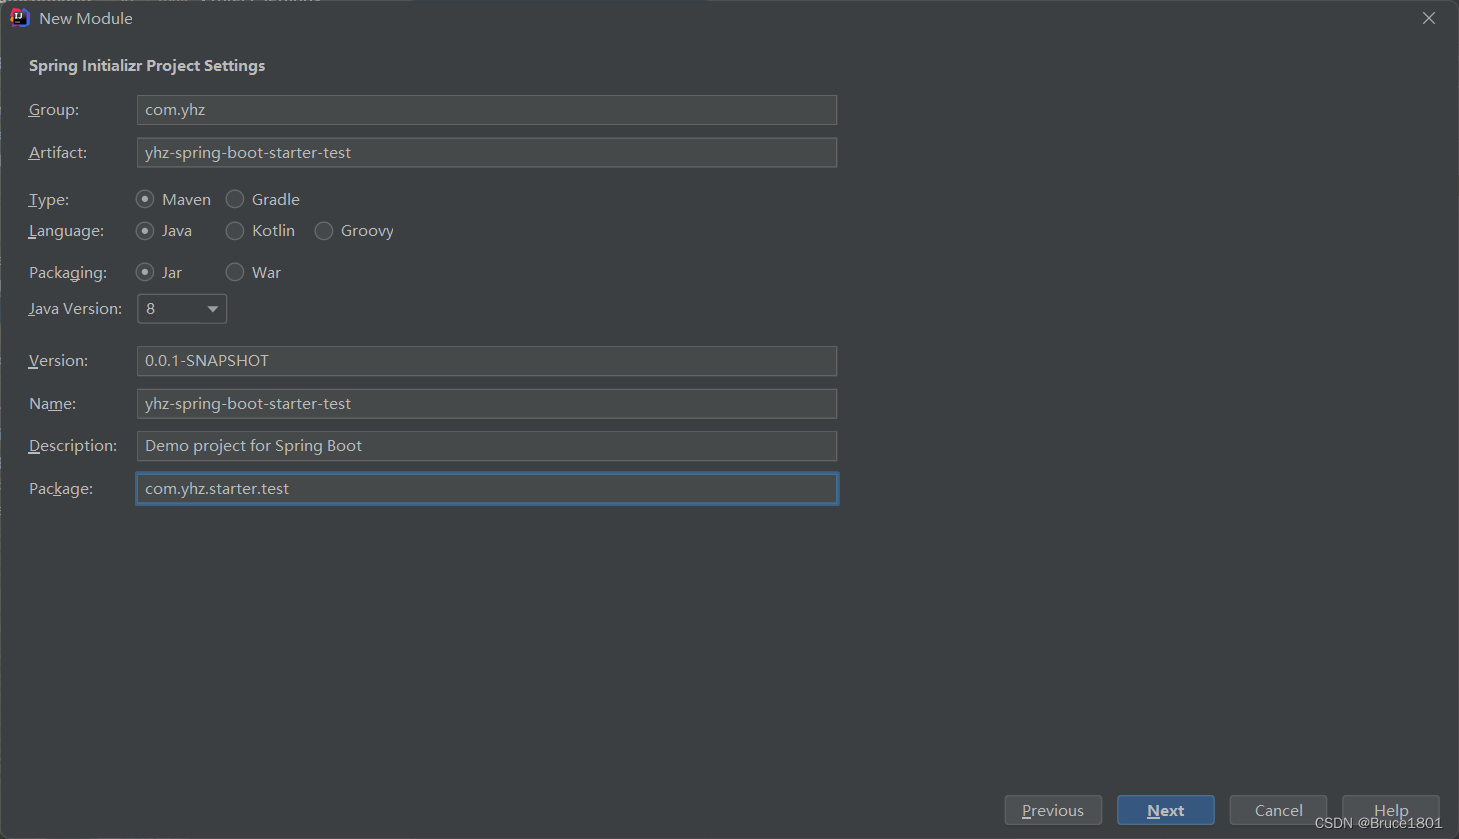
添加一个web依赖,通过浏览器调用接口,查看结果
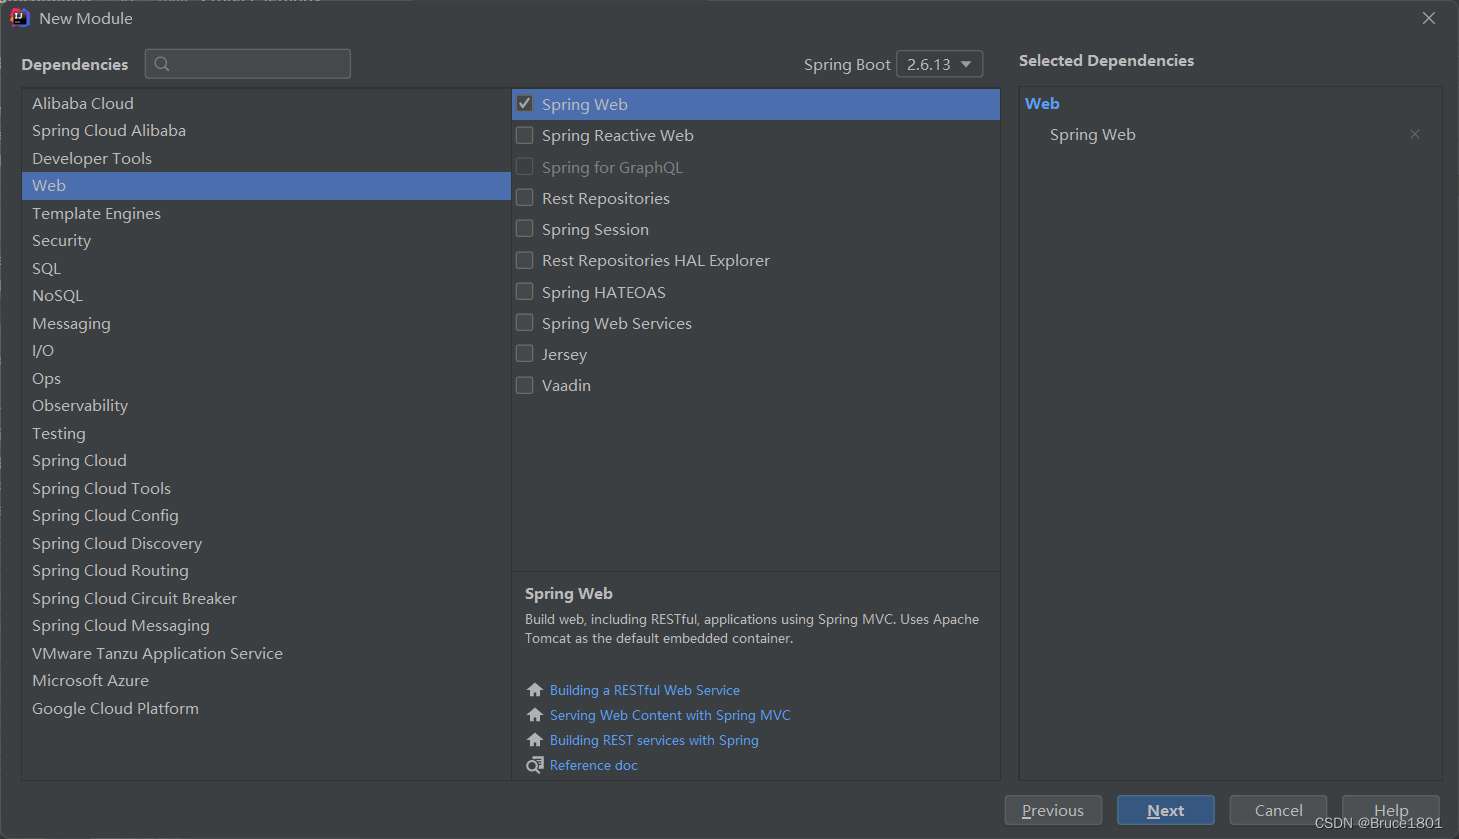
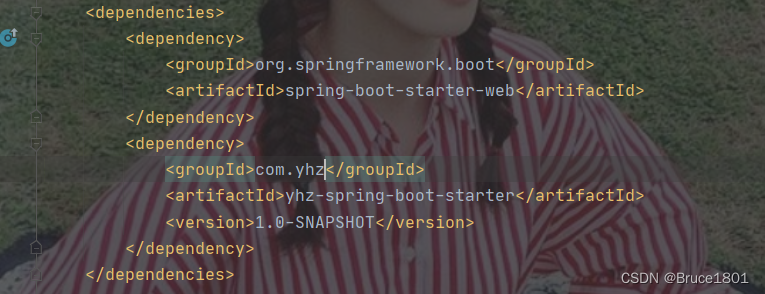
新建完成后,在test模块的pom文件里,添加我们刚才上传的starter,刷新maven。
		<dependency>
            <groupId>com.yhz</groupId>
            <artifactId>yhz-spring-boot-starter</artifactId>
            <version>1.0-SNAPSHOT</version>
        </dependency>
可以在application.properties文件中,做自定义配置
yhz:
  workId: 100086
创建一个TestController

@RestController
@RequestMapping("/test")
public class TestController {

    @Autowired
    private MyGenerateService myGenerateService;

    @RequestMapping("starter")
    public Long starter(){
       //调用 自定义starter中myGenerateService的generate方法
       return myGenerateService.generate();
    }
}
启动项目,浏览器输入http://localhost:8080/test/starter
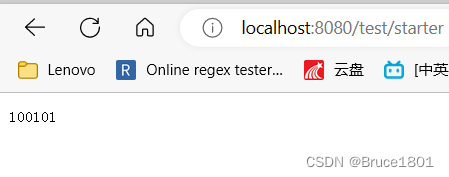
说明我们确实可以使用myGenerateService的服务,并且可以自定义前缀。
7、总结创建步骤
规范的starter包含两个model,一个autoconfigure,提供自动配置代码,一个starter,会加载 autoconfigure,并提供启动所需的所有依赖。
- 定义一个starter模块和autoconfigure模块,starter模块依赖autoconfigure模块,并提供启动所需的依赖。starter模块不提供服务。
- 定义Starter需要的配置类(Properties)xxxProperties
- 编写Starter项目的业务功能xxxService
- 编写自动配置类xxAutoConfigure
- 编写spring.factories文件,把自己的配置类全类名绑定到Spring Boot自动配置类的全类名上
- 打包安装
- 其它项目引用







![Android性能优化篇[谷歌官方]](https://img-blog.csdnimg.cn/img_convert/b0054765d5f6cfa7e156028dd38b3f4a.jpeg)


