目录
spring整合rabbitmq——生产者
rabbitmq配置文件信息
倒入生产者工程的相关代码
简单工作模式
spring整合rabbitmq——消费者
spring整合rabbitmq——配置详解
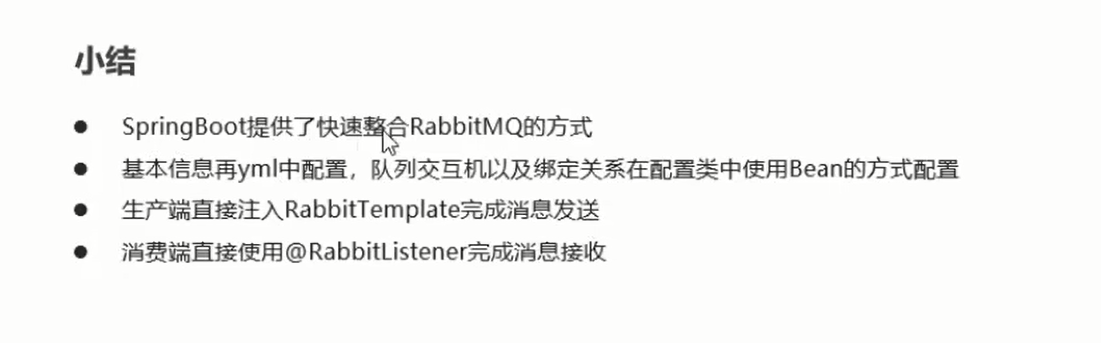
SpringBoot整合RabbitMQ——生产者
SpringBoot整合RabbitMQ——消费者
spring整合rabbitmq——生产者

使用原生amqp来写应该已经没有这样的公司了
创建两个工程,一个生产者一个消费者,分别倒入如下依赖
    <dependencies>
        <!--上下文-->
        <dependency>
            <groupId>org.springframework</groupId>
            <artifactId>spring-context</artifactId>
            <version>5.1.7.RELEASE</version>
        </dependency>
        <!--spring整合amqp-->
        <dependency>
            <groupId>org.springframework.amqp</groupId>
            <artifactId>spring-rabbit</artifactId>
            <version>2.1.8.RELEASE</version>
        </dependency>
        <!--单元测试-->
        <dependency>
            <groupId>junit</groupId>
            <artifactId>junit</artifactId>
            <version>4.12</version>
        </dependency>

        <dependency>
            <groupId>org.springframework</groupId>
            <artifactId>spring-test</artifactId>
            <version>5.1.7.RELEASE</version>
        </dependency>
    </dependencies>

    <build>
        <plugins>
            <!--编译插件-->
            <plugin>
                <groupId>org.apache.maven.plugins</groupId>
                <artifactId>maven-compiler-plugin</artifactId>
                <version>3.8.0</version>
                <configuration>
                    <source>1.8</source>
                    <target>1.8</target>
                </configuration>
            </plugin>
        </plugins>
    </build>
rabbitmq配置文件信息
rabbitmq.properties文件如下
rabbitmq.host=172.16.98.133
rabbitmq.port=5672
rabbitmq.username=heima
rabbitmq.password=heima
rabbitmq.virtual-host=/itcast
倒入生产者工程的相关代码
<?xml version="1.0" encoding="UTF-8"?>
<beans xmlns="http://www.springframework.org/schema/beans"
xmlns:xsi="http://www.w3.org/2001/XMLSchema-instance"
xmlns:context="http://www.springframework.org/schema/context"
xmlns:rabbit="http://www.springframework.org/schema/rabbit"
xsi:schemaLocation="http://www.springframework.org/schema/beans
http://www.springframework.org/schema/beans/spring-beans.xsd
http://www.springframework.org/schema/context
https://www.springframework.org/schema/context/spring-context.xsd
http://www.springframework.org/schema/rabbit
http://www.springframework.org/schema/rabbit/spring-rabbit.xsd">
<!--加载配置文件-->
<context:property-placeholder location="classpath:/rabbitmq.properties"/>
<!-- 定义rabbitmq connectionFactory -->
<rabbit:connection-factory id="connectionFactory" host="${rabbitmq.host}"
port="${rabbitmq.port}"
username="${rabbitmq.username}"
password="${rabbitmq.password}"
virtual-host="${rabbitmq.virtual-host}"/>
<!--定义管理交换机、队列-->
<rabbit:admin connection-factory="connectionFactory"/>
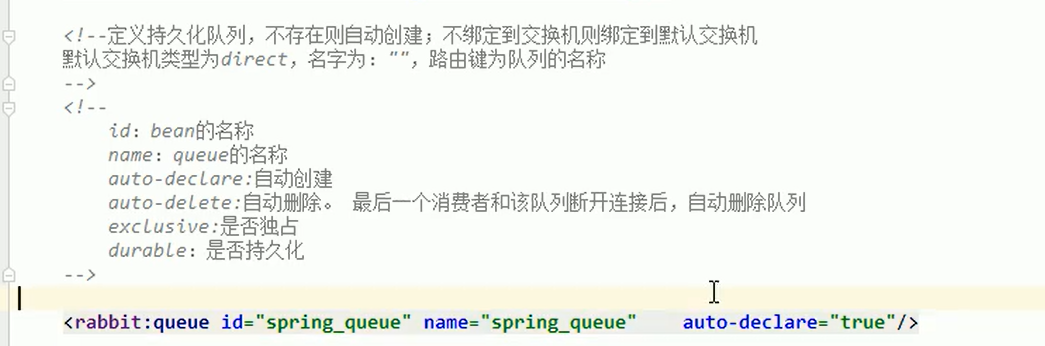
<!--定义持久化队列,不存在则自动创建;不绑定到交换机则绑定到默认交换机
默认交换机类型为direct,名字为:"",路由键为队列的名称
-->
<rabbit:queue id="spring_queue" name="spring_queue" auto-declare="true"/>
<!-- ~~~~~~~~~~~~~~~~~~~~~~~~~~~~广播;所有队列都能收到消息~~~~~~~~~~~~~~~~~~~~~~~~~~~~ -->
<!--定义广播交换机中的持久化队列,不存在则自动创建-->
<rabbit:queue id="spring_fanout_queue_1" name="spring_fanout_queue_1" auto-declare="true"/>
<!--定义广播交换机中的持久化队列,不存在则自动创建-->
<rabbit:queue id="spring_fanout_queue_2" name="spring_fanout_queue_2" auto-declare="true"/>
<!--定义广播类型交换机;并绑定上述两个队列-->
<rabbit:fanout-exchange id="spring_fanout_exchange" name="spring_fanout_exchange" auto-declare="true">
<rabbit:bindings>
<rabbit:binding queue="spring_fanout_queue_1"/>
<rabbit:binding queue="spring_fanout_queue_2"/>
</rabbit:bindings>
</rabbit:fanout-exchange>
<!-- ~~~~~~~~~~~~~~~~~~~~~~~~~~~~通配符;*匹配一个单词,#匹配多个单词 ~~~~~~~~~~~~~~~~~~~~~~~~~~~~ -->
<!--定义广播交换机中的持久化队列,不存在则自动创建-->
<rabbit:queue id="spring_topic_queue_star" name="spring_topic_queue_star" auto-declare="true"/>
<!--定义广播交换机中的持久化队列,不存在则自动创建-->
<rabbit:queue id="spring_topic_queue_well" name="spring_topic_queue_well" auto-declare="true"/>
<!--定义广播交换机中的持久化队列,不存在则自动创建-->
<rabbit:queue id="spring_topic_queue_well2" name="spring_topic_queue_well2" auto-declare="true"/>
<rabbit:topic-exchange id="spring_topic_exchange" name="spring_topic_exchange" auto-declare="true">
<rabbit:bindings>
<rabbit:binding pattern="heima.*" queue="spring_topic_queue_star"/>
<rabbit:binding pattern="heima.#" queue="spring_topic_queue_well"/>
<rabbit:binding pattern="itcast.#" queue="spring_topic_queue_well2"/>
</rabbit:bindings>
</rabbit:topic-exchange>
<!--定义rabbitTemplate对象操作可以在代码中方便发送消息-->
<rabbit:template id="rabbitTemplate" connection-factory="connectionFactory"/>
</beans>上面这个配置文件准备了三种工作模式需要的队列和交换机。
简单工作模式
在测试类中加载配置文件并发送消息
@RunWith(SpringJUnit4ClassRunner.class)
@ContextConfiguration(locations = "classpath:spring-rabbitmq-producer.xml")
public class ProducerTest {
    //1.注入RabbitTemplate
    @Autowired
    private RabbitTemplate rabbitTemplate;

    @Test
    public void testHelloWorld(){
        //2.发送消息
        rabbitTemplate.convertAndSend("spring_queue","hello-yhy");
    }

    /**
     * 发送fanout
     */
    @Test
    public void testFaonut(){
        //2.发送消息
        rabbitTemplate.convertAndSend("spring_fanout_exchange","","spring fanout....");
    }

    /**
     * 发送topic消息
     */
    @Test
    public void testTopic(){
        //2.发送消息
        rabbitTemplate.convertAndSend("spring_topic_exchange","heima.hehe.haha","spring topic....");
    }


}
运行上三个测试方法过后管理端如下,出现了新的队列和交换机和信息


spring整合rabbitmq——消费者
导入消费者的XML配置文件
消费者中还要创建对应的监听器的类,不然配置文件爆红
<?xml version="1.0" encoding="UTF-8"?>
<beans xmlns="http://www.springframework.org/schema/beans"
       xmlns:xsi="http://www.w3.org/2001/XMLSchema-instance"
       xmlns:context="http://www.springframework.org/schema/context"
       xmlns:rabbit="http://www.springframework.org/schema/rabbit"
       xsi:schemaLocation="http://www.springframework.org/schema/beans
       http://www.springframework.org/schema/beans/spring-beans.xsd
       http://www.springframework.org/schema/context
       https://www.springframework.org/schema/context/spring-context.xsd
       http://www.springframework.org/schema/rabbit
       http://www.springframework.org/schema/rabbit/spring-rabbit.xsd">
    <!--加载配置文件-->
    <context:property-placeholder location="classpath:rabbitmq.properties"/>

    <!-- 定义rabbitmq connectionFactory -->
    <rabbit:connection-factory id="connectionFactory" host="${rabbitmq.host}"
                               port="${rabbitmq.port}"
                               username="${rabbitmq.username}"
                               password="${rabbitmq.password}"
                               virtual-host="${rabbitmq.virtual-host}"/>

    <bean id="springQueueListener" class="com.yhy.rabbitmq.listener.SpringQueueListener"/>
<!--    <bean id="fanoutListener1" class="com.yhy.rabbitmq.listener.FanoutListener1"/>-->
<!--    <bean id="fanoutListener2" class="com.yhy.rabbitmq.listener.FanoutListener2"/>-->
<!--    <bean id="topicListenerStar" class="com.yhy.rabbitmq.listener.TopicListenerStar"/>-->
<!--    <bean id="topicListenerWell" class="com.yhy.rabbitmq.listener.TopicListenerWell"/>-->
<!--    <bean id="topicListenerWell2" class="com.yhy.rabbitmq.listener.TopicListenerWell2"/>-->

    <rabbit:listener-container connection-factory="connectionFactory" auto-declare="true">
        <rabbit:listener ref="springQueueListener" queue-names="spring_queue"/>
<!--        <rabbit:listener ref="fanoutListener1" queue-names="spring_fanout_queue_1"/>-->
<!--        <rabbit:listener ref="fanoutListener2" queue-names="spring_fanout_queue_2"/>-->
<!--        <rabbit:listener ref="topicListenerStar" queue-names="spring_topic_queue_star"/>-->
<!--        <rabbit:listener ref="topicListenerWell" queue-names="spring_topic_queue_well"/>-->
<!--        <rabbit:listener ref="topicListenerWell2" queue-names="spring_topic_queue_well2"/>-->
    </rabbit:listener-container>
</beans>
然后创建一个简单工作模式需要的对应类
public class SpringQueueListener implements MessageListener {
    @Override
    public void onMessage(Message message) {
        /**
         * 打印消息
         */
        System.out.println(new String(message.getBody()));
    }
}
在测试类中弄个方法用来加载配置文件,配置文件一加载,上面的监听器就会自动执行的。
@RunWith(SpringJUnit4ClassRunner.class)
@ContextConfiguration(locations = "classpath:spring-rabbitmq-consumer.xml")
public class ConsumerTest {
    @Test
    public void test1(){
        while(true){

        }
    }
}
其余的都是一模一样的写法。
spring整合rabbitmq——配置详解
队列声明的参数
广播类型的交换机和队列绑定时不需要指定路由key,direct和topic都要指定路由key.
SpringBoot整合RabbitMQ——生产者
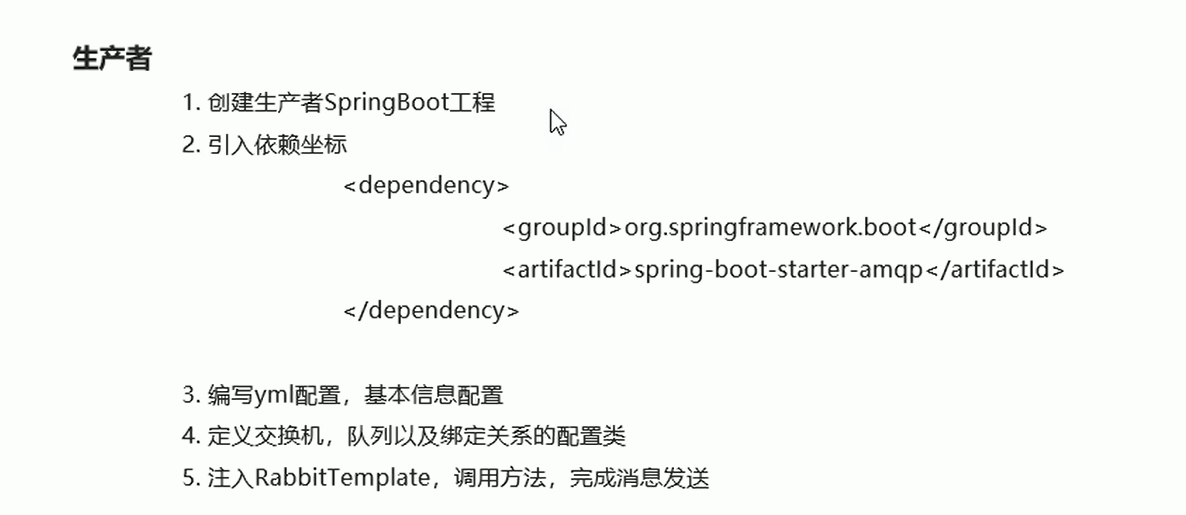
引入如下依赖
 <dependency>
            <groupId>org.springframework.boot</groupId>
            <artifactId>spring-boot-starter-amqp</artifactId>
        </dependency>
        <dependency>
            <groupId>org.springframework.boot</groupId>
            <artifactId>spring-boot-starter-test</artifactId>
        </dependency>
再在resources目录下写一个配置文件类
# 配置RabbitMQ的基本信息 ip 端口 username password ...
spring:
  rabbitmq:
    host:
    post: 5672
    username: guest
    password: guest
    virtual-host: /
创建启动类
package com.yhy;

import org.springframework.boot.SpringApplication;
import org.springframework.boot.autoconfigure.SpringBootApplication;

@SpringBootApplication
public class ProducerApplication {
    public static void main(String[] args) {
        SpringApplication.run(ProducerApplication.class);
    }
}
准备一个配置类
package com.yhy.rabbit.config;

import org.springframework.amqp.core.*;
import org.springframework.beans.factory.annotation.Qualifier;
import org.springframework.context.annotation.Bean;
import org.springframework.context.annotation.Configuration;


@Configuration
public class RabbitConfig {
    public static final String EXCHANGE_NAME="boot_topic_exchange";
    public static final String QUEUE_NAME="boot_queue";

    //1.交换机
    @Bean("bootExchange")
    public Exchange bootExchange(){
        return ExchangeBuilder.topicExchange(EXCHANGE_NAME).durable(true).build();
    }
    //2.Queue队列
    @Bean("bootQueue")
    public Queue bootQueue(){
        return QueueBuilder.durable(QUEUE_NAME).build();
    }
    //3.队列和交换机绑定关系,Binding
    /**
     * 1.知道哪个队列
     * 2.知道哪个交换机
     * 3.routing key
     */
    @Bean
    public Binding bindQueueExchange(@Qualifier("bootQueue") Queue queue,@Qualifier("bootExchange") Exchange exchange){
        return BindingBuilder.bind(queue).to(exchange).with("boot.#").noargs();
    }
}
在测试类中准备如下测试方法
@SpringBootTest
@RunWith(SpringRunner.class)
public class ProducerTest {
    //1.注入RabbitTemplate
    @Autowired
    private RabbitTemplate rabbitTemplate;

    @Test
    public void testSend(){
        rabbitTemplate.convertAndSend(RabbitConfig.EXCHANGE_NAME,"boot.haha","boot mq hello");
    }
}
运行后可以看见出现有新队列和消息

SpringBoot整合RabbitMQ——消费者
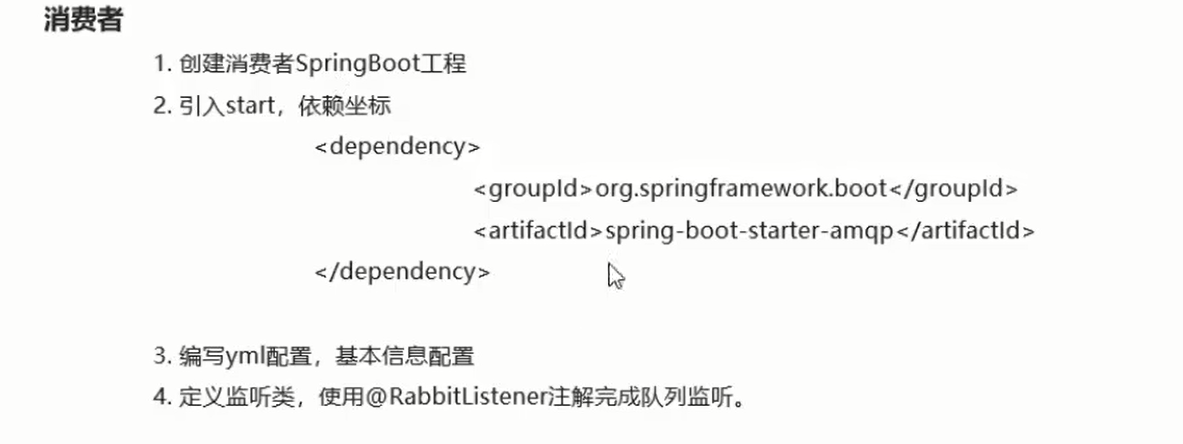
在性工程创建一个监听类如下,加上@Component注解之后就可以自动执行一次了
@Component
public class RabbitMQListener {
    @RabbitListener(queues="boot_queue")
    public void ListenerQueue(Message message){
        System.out.println(message);
    }
}
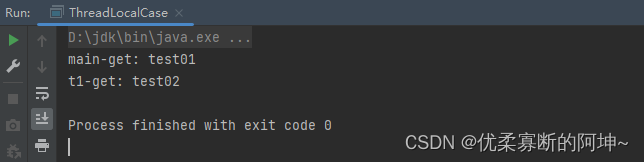
输出如下,成功获取到上面生产者发出的消息


![[黑苹果EFI]Lenovo ThinkPad T490电脑 Hackintosh 黑苹果引导文件](https://img-blog.csdnimg.cn/189ebc1b34c64e26b7d5258c75c7a526.png)