Redis入门和Jedis连接池:
- 基本介绍
- 实例Demo
- 源码分析
SpringCloud章节复习已经过去,新的章节Redis开始了,这个章节中将会回顾Redis
主要依照以下几个原则
- 基础+实战的Demo和Coding上传到我的代码仓库
- 在原有基础上加入一些设计模式,stream+lamdba等新的糖
- 通过DeBug调试,进入组件源码去分析底层运行的规则和设计模式
代码会同步在我的gitee中去,觉得不错的同学记得一键三连求关注,感谢:
链接: RedisJedisDemo
可以进入去看,觉得不错的博主记得一键三连支持下
基本介绍
- 1、什么是 Redis?
Redis 是一个使用 C 语言写成的,开源的高性能key-value非关系缓存数据库。
它支持存储的value 类型相对更多,包括string(字符串)、list(链表)、set(集合)、zset(sorted set --有序集合)和 hash(哈希类型)。
Redis的数据都基于缓存的,所以很快,每秒可以处理超过 10万次读写操作,是已知性能最快的Key-Value DB。Redis也可以实现数据写入磁盘中,保证了数据的安全不丢 失,而且Redis的操作是原子性的。
-
- jedis
jedis就是基于java语言的redis客户端,集成了redis的命令操作,提供了连接池管理。
redis-cli是redis官方提供的客户端,可以看作一个shell程序,它可以发送命令对redis进行操作。
对于jedis同理是使用java语言操作redis,双方都遵循redis提供的协议,按照协议开发对应的客户端。
实例Demo
这里第一要注意在cmd中开启redis
我在环境变量里配置了redis-server, 可以直接通过redis-server.exe开启

然后进行连接,通过ping命令去检测开启

可以使用redismanager进行可视化管理

- 配置Maven依赖
    <dependencies>
<!--jedis-->
        <dependency>
            <groupId>redis.clients</groupId>
            <artifactId>jedis</artifactId>
            <version>3.7.0</version>
        </dependency>
<!--测试-->
        <dependency>
            <groupId>org.junit.jupiter</groupId>
            <artifactId>junit-jupiter</artifactId>
            <version>5.7.0</version>
            <scope>test</scope>
        </dependency>
<!--log日志-->
        <dependency>
            <groupId>org.slf4j</groupId>
            <artifactId>slf4j-log4j12</artifactId>
            <version>1.7.21</version>
            <scope>test</scope>
        </dependency>

        <!-- https://mvnrepository.com/artifact/log4j/log4j -->
        <dependency>
            <groupId>log4j</groupId>
            <artifactId>log4j</artifactId>
            <version>1.2.17</version>
        </dependency>

    </dependencies>
- 配置jedis连接池,类似于线程池,可以帮助创建和销毁新的连接
public class JedisConnectFactory {

    public static Jedis getJedis(){
        JedisPoolConfig jedisPoolConfig = new JedisPoolConfig();
        jedisPoolConfig.setMaxTotal(8);
        jedisPoolConfig.setMaxIdle(8);
        jedisPoolConfig.setMinIdle(0);
        JedisPool pool = new JedisPool(jedisPoolConfig, "127.0.0.1", 6379, 1000);
        return pool.getResource();
    }
}
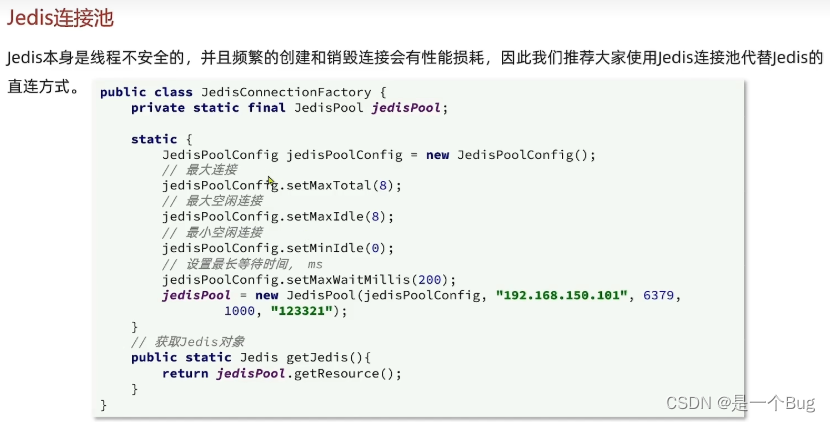
- 这里@BeforeEach等注解是test注解,类似于一个aop,做了前后插入
public class TestRedisDemo {

    private Jedis jedis;

    @BeforeEach
    void SetUp(){
//        jedis = new Jedis("127.0.0.1", 6379);
        jedis = JedisConnectFactory.getJedis();
//        jedis.auth("")

        this.jedis.select(0);

    }
        @AfterEach
    void  testDown(){
        if (jedis != null) {

            jedis.close();
        }
    }

}
下面是实际操作,jedis和redis的cmd中的操作一样
    @Test
    void  testHash(){
        Long result = jedis.hset("user2","name", "虎哥1");
        Long result1 = jedis.hset("user2","age", "22");
        System.out.println(result);
        System.out.println(result1);
        Map<String, String> user1 = jedis.hgetAll("user2");
        System.out.println(user1);

    }

    @Test
    void  testString(){
        String result = jedis.set("name", "虎哥1");
        System.out.println(result);
        String name = jedis.get("name");
        System.out.println(name);

    }
源码分析
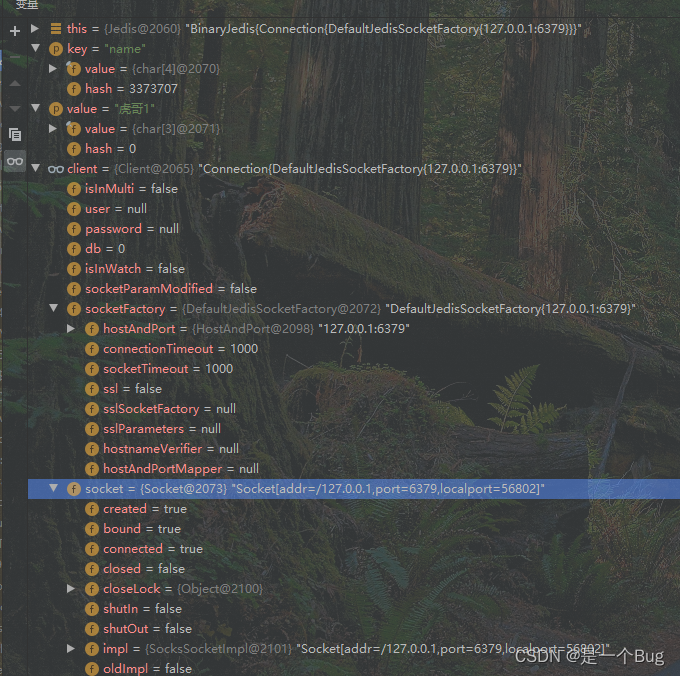
简单debug了,没啥好说的
    @Test
    void  testString(){
        String result = jedis.set("name", "虎哥1");
        System.out.println(result);
        String name = jedis.get("name");
        System.out.println(name);

    }
  @Override
  public String set(final String key, final String value) {
    checkIsInMultiOrPipeline();
    client.set(key, value);
    return client.getStatusCodeReply();
  }




![[附源码]Python计算机毕业设计SSM基于数据挖掘的毕业生离校信息系统(程序+LW)](https://img-blog.csdnimg.cn/943f15acc0774605920744688d73c9c0.png)





![[附源码]计算机毕业设计健康医疗体检Springboot程序](https://img-blog.csdnimg.cn/8653bcadbd434742814921f7fef9cca6.png)

