效果如图
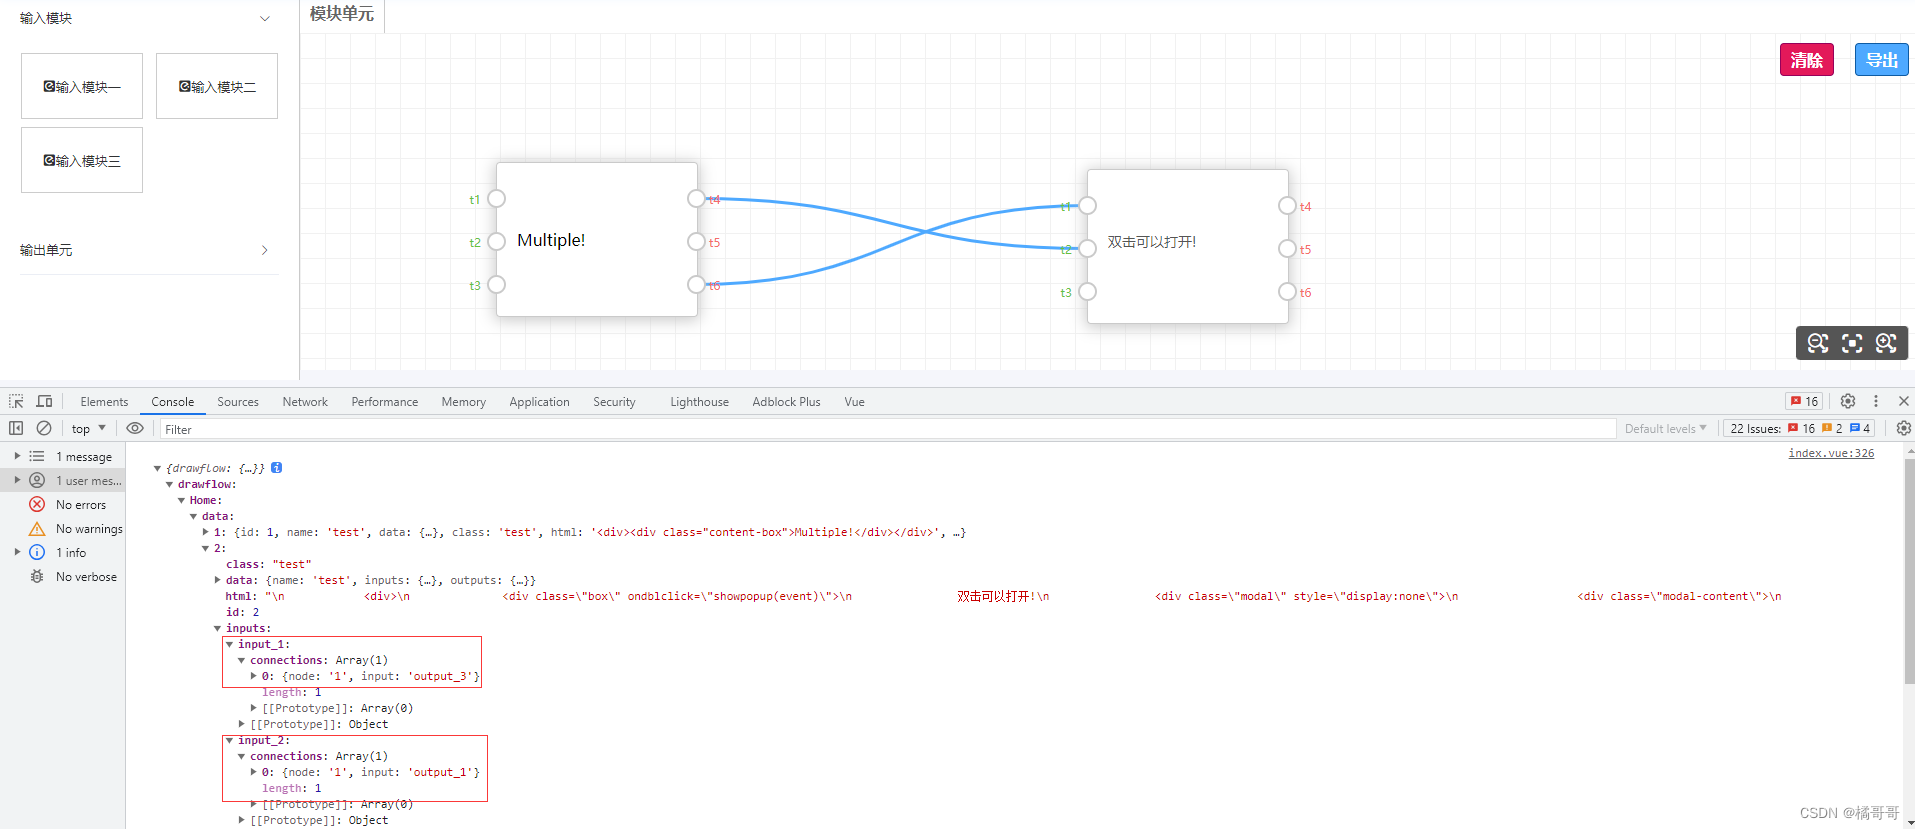
场景:项目中需要拖拽模块并连线,有输入端和输出端之分,不同模块不同端口才能相连
文档相关
点击前往------->原项目git地址
点击前往------->提供端口既可输出又可输出方案
点击前往----->查阅发现原项目无法对端口命名

public文件夹下创建drawflow文件夹,将原项目的对应文件放在drawflow文件夹中,并且在public文件下的html中对对应的文件进行引用,这样对应的js就挂载在window上
<link rel="stylesheet" href="./Drawflow/dist/drawflow.min.css">
<link rel="stylesheet" href="./Drawflow/docs/beautiful.css">
<script src="./Drawflow/dist/drawflow.min.js"></script>
<template>
<div>
<div class="wrapper drawflow-box">
<div class="col">
<el-collapse accordion>
<div v-for="(item,index) in listData" :key="index">
<el-collapse-item :title="item.name">
<el-row :gutter="12">
<el-col :span="12" v-for="(data,key) in item.children" :key="key">
<div class="drawflow-drag" draggable="true" @dragstart="drag($event)" :data-node="data.type">
<i class="el-icon-platform-eleme"></i>
<span>{{data.name}}</span>
</div>
</el-col>
</el-row>
</el-collapse-item>
</div>
</el-collapse>
</div>
<div class="col-right">
<div class="menu">
<ul>
<li @click="changeModule($event);" class="selected">模块单元</li>
<!-- <li @click="editor.changeModule('Home'); changeModule($event);" class="selected">模块单元</li> -->
<!-- <li @click="editor.changeModule('Other'); changeModule($event);">Other Module</li> -->
</ul>
</div>
<div id="drawflow" @drop="drop($event)" @dragover="allowDrop($event)">
<div class="btn-export" @click="handleExport(editor.export())">导出</div>
<div class="btn-clear" @click="editor.clearModuleSelected()">清除</div>
<!-- <div class="btn-lock">
<i id="lock" class="fas fa-lock" onclick="editor.editor_mode='fixed'; changeMode('lock');"></i>
<i id="unlock" class="fas fa-lock-open" onclick="editor.editor_mode='edit'; changeMode('unlock');" style="display:none;"></i>
</div> -->
<div class="bar-zoom">
<i class="icon-suoxiao" title="缩小" @click="editor.zoom_out()"></i>
<i class="icon-fuwei" title="复位" @click="editor.zoom_reset()"></i>
<i class="icon-fangda" title="放大" @click="editor.zoom_in()"></i>
</div>
</div>
</div>
</div>
</div>
</template>
<script>
// Drawflow 连线插件
export default {
data() {
return {
active: "",
editor: null,
mobile_item_selec: "",
mobile_last_move: null,
transform: "",
listData: [
{
type: "in",
name: "输入模块",
children: [
{
name: "输入模块一",
type: "test",
},
{
name: "输入模块二",
type: "test",
},
{
name: "输入模块三",
type: "test",
},
],
},
{
type: "out",
name: "输出单元",
children: [
{
name: "输出单元一",
type: "dbclick",
},
{
name: "输出单元二",
type: "dbclick",
},
{
name: "输出单元三",
type: "dbclick",
},
],
},
],
};
},
mounted() {
this.$nextTick(() => {
this.init();
//挂载方法事件
window.showpopup = this.showpopup;
window.closemodal = this.closemodal;
});
},
methods: {
init() {
var id = document.getElementById("drawflow");
this.editor = new window.Drawflow(id);
this.editor.reroute = true;
this.editor.reroute_fix_curvature = true;
this.editor.force_first_input = false;
const dataToImport = {
drawflow: {
Home: {
data: {},
},
},
};
this.editor.start();
this.editor.import(dataToImport);
this.editor.addNode(
"test",
3,
3,
180,
200,
"test",
{
name: "",
inputs: {
input_1: { connections: [], name: "t1" },
input_2: { connections: [], name: "t2" },
input_3: { connections: [], name: "t3" },
},
outputs: {
output_1: { connections: [], name: "t4" },
output_2: { connections: [], name: "t5" },
output_3: { connections: [], name: "t6" },
},
},
'<div><div class="content-box">Multiple!</div></div>'
);
},
//下面的所有方法都是从原项目html中直接搬过来,有问题去原项目看
showpopup(e) {
e.target.closest(".drawflow-node").style.zIndex = "9999";
e.target.children[0].style.display = "block";
//document.getElementById("modalfix").style.display = "block";
//e.target.children[0].style.transform = 'translate('+translate.x+'px, '+translate.y+'px)';
this.transform = this.editor.precanvas.style.transform;
this.editor.precanvas.style.transform = "";
this.editor.precanvas.style.left = this.editor.canvas_x + "px";
this.editor.precanvas.style.top = this.editor.canvas_y + "px";
//e.target.children[0].style.top = -editor.canvas_y - editor.container.offsetTop +'px';
//e.target.children[0].style.left = -editor.canvas_x - editor.container.offsetLeft +'px';
this.editor.editor_mode = "fixed";
},
closemodal(e) {
e.target.closest(".drawflow-node").style.zIndex = "2";
e.target.parentElement.parentElement.style.display = "none";
//document.getElementById("modalfix").style.display = "none";
this.editor.precanvas.style.transform = this.transform;
this.editor.precanvas.style.left = "0px";
this.editor.precanvas.style.top = "0px";
this.editor.editor_mode = "edit";
},
allowDrop(ev) {
ev.preventDefault();
},
drag(ev) {
if (ev.type === "touchstart") {
this.mobile_item_selec = ev.target
.closest(".drag-drawflow")
.getAttribute("data-node");
} else {
ev.dataTransfer.setData("node", ev.target.getAttribute("data-node"));
}
},
drop(ev) {
if (ev.type === "touchend") {
var parentdrawflow = document
.elementFromPoint(
mobile_last_move.touches[0].clientX,
mobile_last_move.touches[0].clientY
)
.closest("#drawflow");
if (parentdrawflow != null) {
this.addNodeToDrawFlow(
mobile_item_selec,
mobile_last_move.touches[0].clientX,
mobile_last_move.touches[0].clientY
);
}
mobile_item_selec = "";
} else {
ev.preventDefault();
var data = ev.dataTransfer.getData("node");
this.addNodeToDrawFlow(data, ev.clientX, ev.clientY);
}
},
addNodeToDrawFlow(name, pos_x, pos_y) {
let editor = this.editor;
if (editor.editor_mode === "fixed") {
return false;
}
pos_x =
pos_x *
(editor.precanvas.clientWidth /
(editor.precanvas.clientWidth * editor.zoom)) -
editor.precanvas.getBoundingClientRect().x *
(editor.precanvas.clientWidth /
(editor.precanvas.clientWidth * editor.zoom));
pos_y =
pos_y *
(editor.precanvas.clientHeight /
(editor.precanvas.clientHeight * editor.zoom)) -
editor.precanvas.getBoundingClientRect().y *
(editor.precanvas.clientHeight /
(editor.precanvas.clientHeight * editor.zoom));
switch (name) {
case "test":
var test = `
<div>
<div class="box" ondblclick="showpopup(event)">
双击可以打开!
<div class="modal" style="display:none">
<div class="modal-content">
<span class="close" onclick="closemodal(event)">×</span>
插入文本
<input type="text">
</div>
</div>
</div>
</div>
`;
editor.addNode(
"test",
3,
3,
pos_x,
pos_y,
"test",
{
name: "test",
inputs: {
input_1: { connections: [], name: "t1" },
input_2: { connections: [], name: "t2" },
input_3: { connections: [], name: "t3" },
},
outputs: {
output_1: { connections: [], name: "t4" },
output_2: { connections: [], name: "t5" },
output_3: { connections: [], name: "t6" },
},
},
test
);
break;
case "multiple":
var multiple = `
<div>
<div class="box">
Multiple!
</div>
</div>
`;
editor.addNode(
"multiple",
3,
4,
pos_x,
pos_y,
"multiple",
{},
multiple
);
break;
case "dbclick":
var dbclick = `
<div>
<div class="title-box"><i class="fas fa-mouse"></i> Db Click</div>
<div class="box dbclickbox" ondblclick="showpopup(event)">
Db Click here
<div class="modal" style="display:none">
<div class="modal-content">
<span class="close" onclick="closemodal(event)">×</span>
插入文本
<input type="text" df-name>
</div>
</div>
</div>
</div>
`;
editor.addNode("dbclick", 3, 3, pos_x, pos_y, "dbclick", {}, dbclick);
break;
default:
}
},
changeModule(event) {
var all = document.querySelectorAll(".menu ul li");
for (var i = 0; i < all.length; i++) {
all[i].classList.remove("selected");
}
event.target.classList.add("selected");
},
handleExport(val) {
console.log(val);
},
},
};
</script>
<style>
.drawflow .drawflow-node .input::before {
//通过操作标签上的属性,动态获取对应的文字
content: attr(data-before);
position: absolute;
width: 64px;
text-align: right;
top: 0;
left: -72px;
font-size: 12px;
color: #67C23A;
}
.drawflow .drawflow-node .output::before {
content: attr(data-before);
position: absolute;
text-align: left;
width: 64px;
top: 0;
left: 20px;
font-size: 12px;
color: #F56C6C;
}
</style>
<style lang="scss">
.drawflow-box {
/** 样式调整 */
.col {
background: #fff;
padding: 0 20px;
box-sizing: border-box;
.el-row {
margin-top: 10px;
.el-col {
.drawflow-drag {
width: 120px;
height: 64px;
border: 1px solid #ccc;
margin: 0 auto;
cursor: move;
user-select: none;
display: flex;
justify-content: center;
align-items: center;
}
}
}
}
.test .drawflow_content_node {
height: 100%;
}
.content-box {
padding: 20px;
}
}
</style>
修改 Drawflow/dist 文件夹下的drawflow.min.js文件对应的addNode方法(拖拽组件时执行)
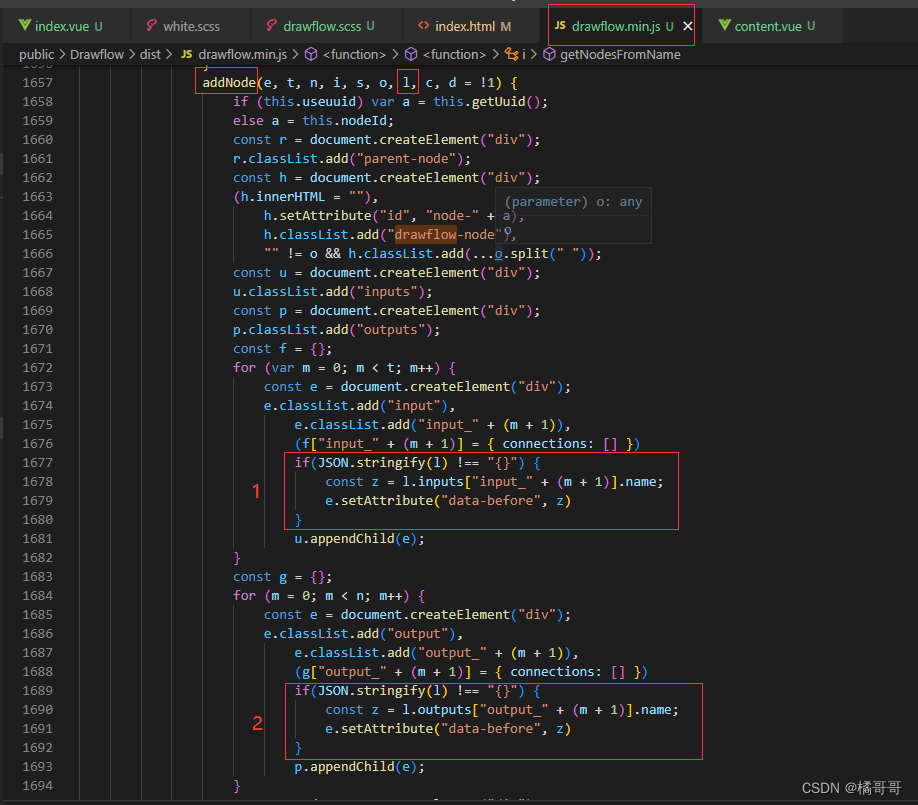
添加1,2两处代码后,
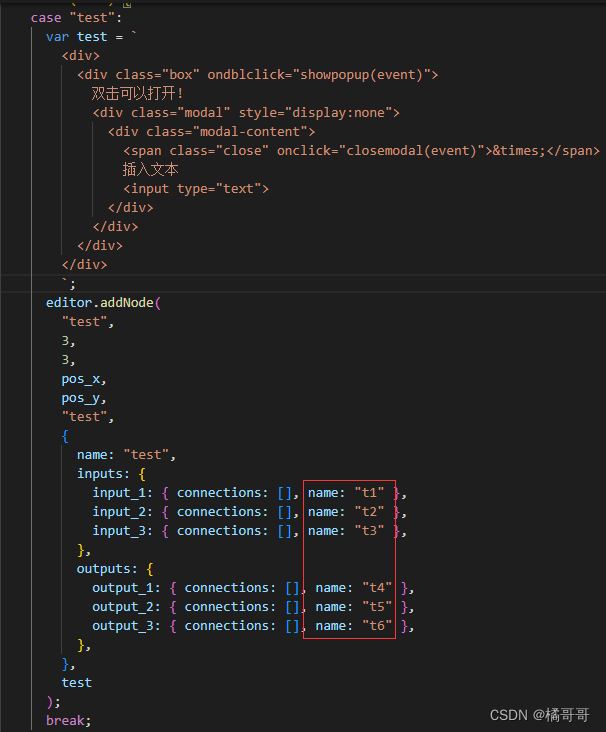
如果自定义节点类型中带了name属性,对应的端口就会出现对应的名称,如果没有name就按原项目逻辑执行