log , addr 和 header
从本文开始,我们将介绍 warp 中 Filter 的核心模块。在文档中有 filter 相关模块的介绍, 本文来介绍其中的 addr,header 和 log
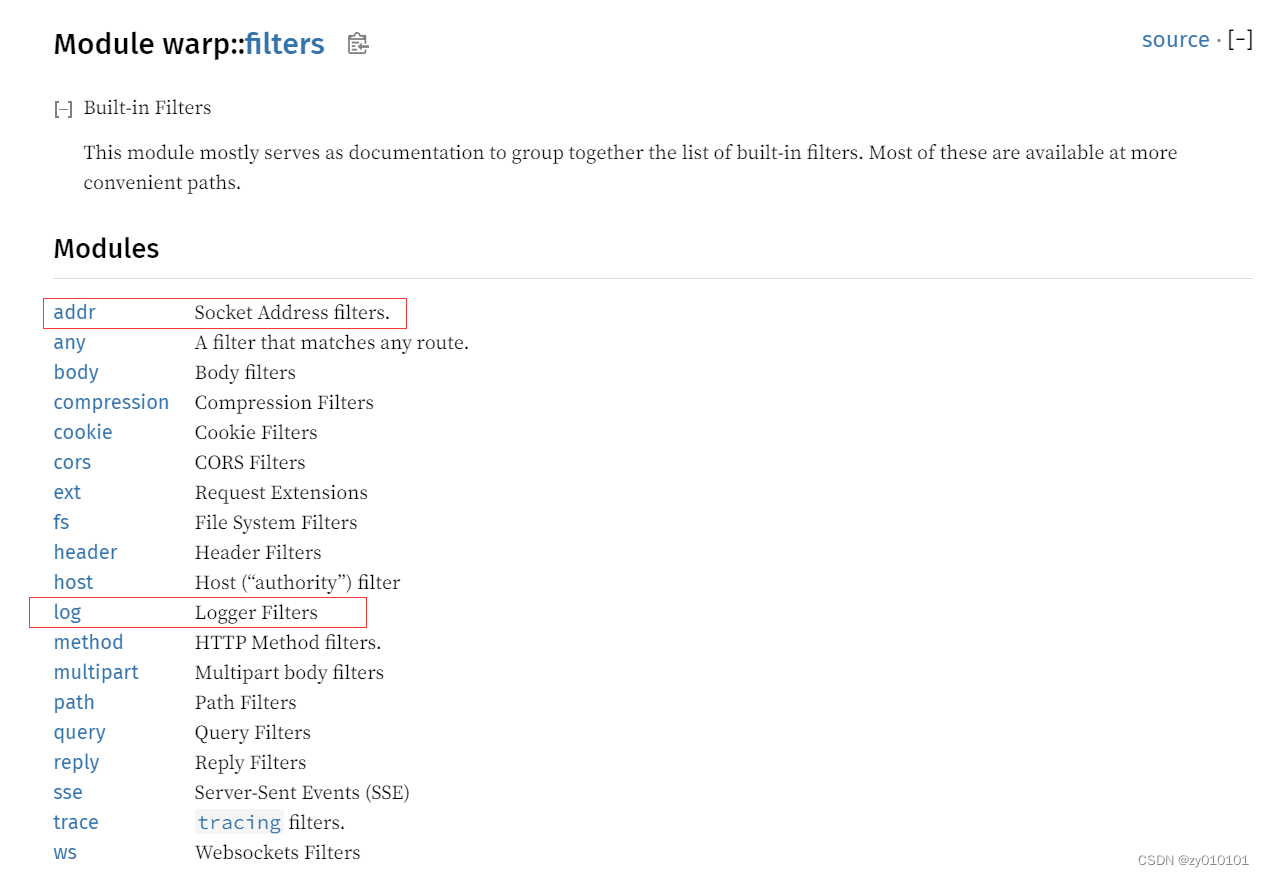
addr 模块
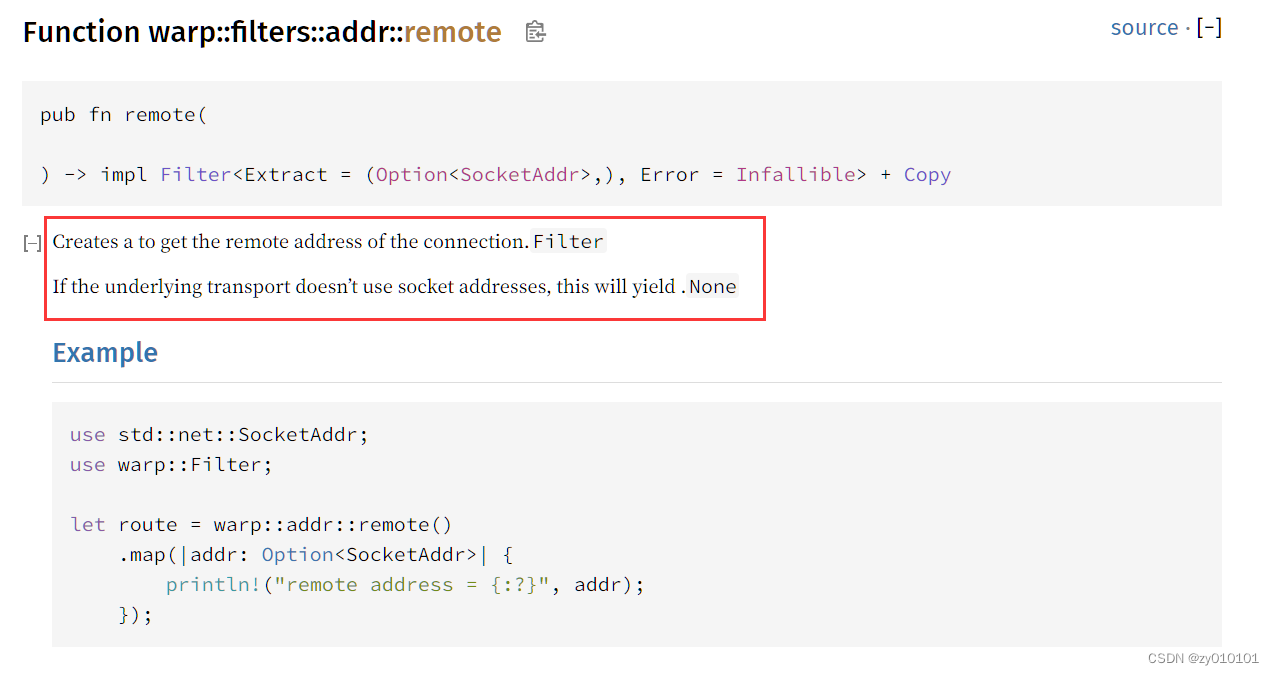
addr 模块非常简单,它是用来获取远程客户端的地址的。使用起来非常简单。文档中也只有一个 remote 方法。

文档中还给出了 remote 方法的示例。
我们来改造刚才的 hello world 程序,来获取远程访问地址。
use warp::Filter;

#[tokio::main]
async fn main() {
    // GET /hello/warp => 200 OK with body "Hello, warp!"
    let hello = warp::path!("hello" / String)
        .and(warp::addr::remote())
        .map(|name: String, addr: Option<std::net::SocketAddr>|
            {
                format!("Hello, {}!\nClient IP: {}\n", name, addr.unwrap().to_string())
            });

    warp::serve(hello)
        .run(([0, 0, 0, 0], 3030))      // 监听 0.0.0.0
        .await;
}
这次,我们在代码中使用 and 加上了 remote 方法,并传入闭包中。另外一点是我们更改了 web 的监听地址为 0.0.0.0,来获取所有 IP 的访问。
- 在本地使用 curl 访问

可以看到打印的访问地址是 127.0.0.1:42260 - 在远程使用 postman 访问

通过远程Windows上的 postman 来访问,可以看到显示的 IP 地址是 221.218.142.126:17184
header 模块
header 模块是与请求 HTTP 标头交互,可以帮助我们提取请求头中的参数。该模块的文档如下所示:
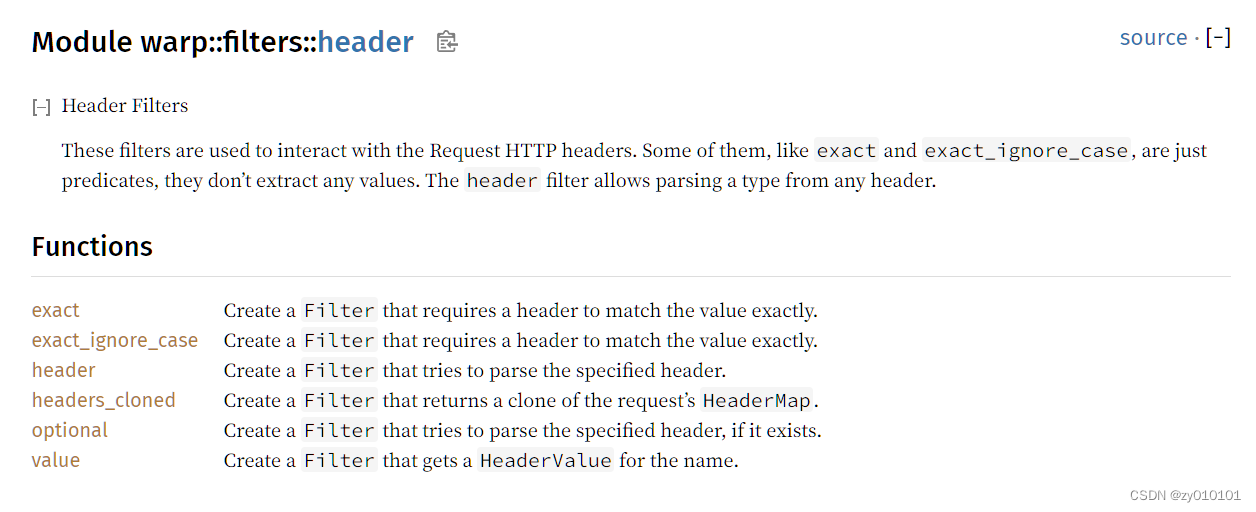
所具备的方法并不是很多。这里不对每个函数进行说明。需要使用相关方法的,请查看相关文档。放在这里介绍 header 模块是因为上面 addr 方式获取到的 IP 在用反向代理的情况下,是不正确的。例如在使用 Nginx 作为代理的时候,我们需要配置 X-Forwarded-For ,然后读取请求头中的 X-Forwarded-For 或者 X-Real-IP 来确定客户端的真实 IP。我们使用 header 模块来读取相关的请求头。
use warp::Filter;

#[tokio::main]
async fn main() {
    // GET /hello/warp => 200 OK with body "Hello, warp!"
    let hello = warp::path!("hello" / String)
        .and(warp::addr::remote())
        .and(warp::header("x-forwarded-for"))
        .and(warp::header("x-real-ip"))
        .map(|name: String, addr: Option<std::net::SocketAddr>, x_forward_for: String, x_real_ip: String|
            {
                format!("Hello, {}!\nClient IP: {}\nX-Forwarded-For: {}\nX-Real-IP: {}\n",
                    name, addr.unwrap().to_string(), x_forward_for, x_real_ip)
            })
        .with(log);

    warp::serve(hello)
        .run(([127, 0, 0, 1], 3030))      // 监听 127.0.0.1
        .await;
}
和刚才一样,我们分别使用 curl 和 远程 postman 来进行访问。这次,我们访问的端口是 Nginx 的端口 80; 而不是监听的端口3030。
- 本地 curl 访问

可以看到,x-forwarded-for 和 x-real-ip 都显示的是 127.0.0.1,并且通过 addr 模块取得的 client IP 也是 127.0.0.1(实际上 addr 模块取得的地址是反向代理所在的IP地址)。 - 远程 postman 访问
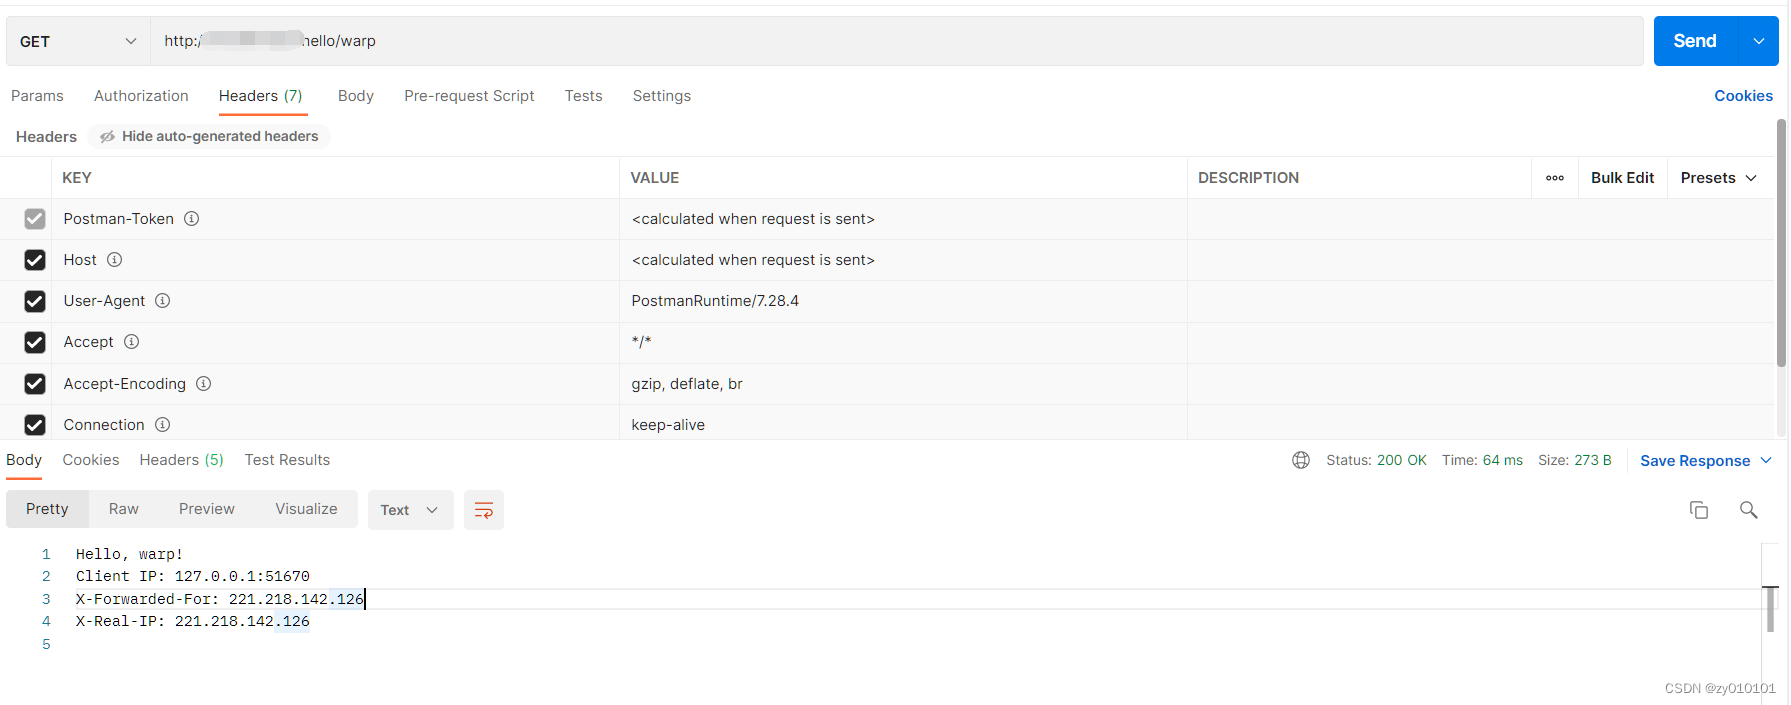
可以看到 x-forwarded-for 和 x-real-ip 都显示的是 221.218.142.126,获取到了客户端的真实IP,而addr 此时获取的是 Nginx 所在的IP。也就是本机。
获取请求头中所有的字段
使用 header 模块的 headers_cloned 方法可以获取请求头中所有的字段,例如:
use warp::{Filter, hyper::HeaderMap};

#[tokio::main]
async fn main() {
    // GET /hello/warp => 200 OK with body "Hello, warp!"
    let hello = warp::path!("hello" / String)
        .and(warp::addr::remote())
        .and(warp::header("x-forwarded-for"))
        .and(warp::header("x-real-ip"))
        .and(warp::header::headers_cloned())
        .map(|name: String, addr: Option<std::net::SocketAddr>, x_forward_for: String, x_real_ip: String, all_header: HeaderMap|
            {
                println!("{:?}", all_header);
                format!("Hello, {}!\nClient IP: {}\nX-Forwarded-For: {}\nX-Real-IP: {}\n",
                    name, addr.unwrap().to_string(), x_forward_for, x_real_ip)
            });

    warp::serve(hello)
        .run(([127, 0, 0, 1], 3030))      // 监听 127.0.0.1
        .await;
}
现在,我们使用 postman 来进行访问,增加一个自定义的 Token 字段到 header 中
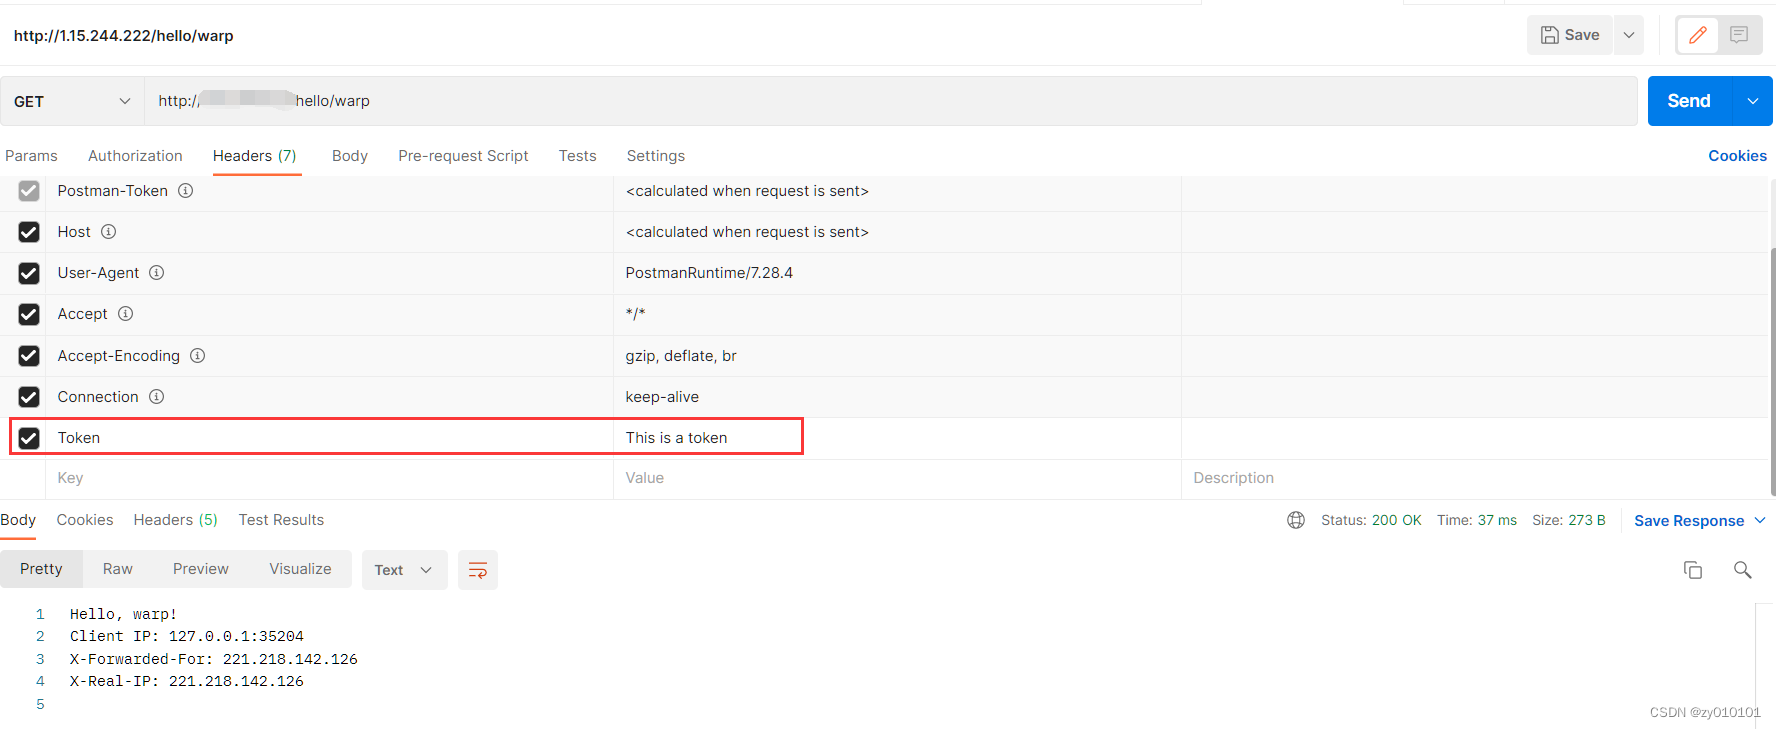
请求之后,我们来看一下控制台的输出结果。

log 模块
在第一篇文章的时候,我们引入了两个日志模块 log 和 pretty_env_logger 。现在是时候排上用场了。我们来配一下日志输出。
use std::env;
use warp::{Filter, hyper::HeaderMap};

#[tokio::main]
async fn main() {
	// 日志输出相关配置
    env::set_var("MYAPP_LOG", "INFO");
    pretty_env_logger::init_custom_env("MYAPP_LOG");
    let log = warp::log("MYAPP");

    // GET /hello/warp => 200 OK with body "Hello, warp!"
    let hello = warp::path!("hello" / String)
        .and(warp::addr::remote())
        .and(warp::header("x-forwarded-for"))
        .and(warp::header("x-real-ip"))
        .and(warp::header::headers_cloned())
        .map(|name: String, addr: Option<std::net::SocketAddr>, x_forward_for: String, x_real_ip: String, all_header: HeaderMap|
            {
                println!("{:?}", all_header);
                format!("Hello, {}!\nClient IP: {}\nX-Forwarded-For: {}\nX-Real-IP: {}\n",
                    name, addr.unwrap().to_string(), x_forward_for, x_real_ip)
            })
        .with(log);		// 加入日志配置

    warp::serve(hello)
        .run(([127, 0, 0, 1], 3030))       // 监听 127.0.0.1
        .await;
}
log 模块的文档也是非常简单,只拥有两个结构体和两个方法。
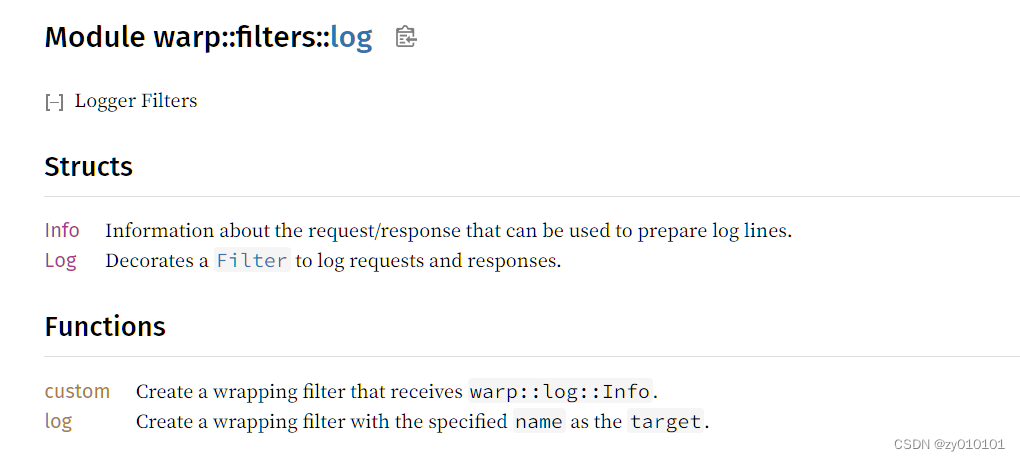
我们来访问一下,看看输出的日志是什么样?

这个日志输出还是相当nice的。我们刚才是使用默认的访问日志记录格式,并生成日志记录。当然了,你也可以使用 custom 方法来定制日志格式和输出。例如:
    let log = warp::log::custom(|info| {
        log::info!(
            target: "MYAPP_LOG",
            "{} {} {}",
            info.method(),
            info.path(),
            info.status(),
        );
    });
此时日志输出如下所示:

这就是我们定制化之后的输出。不过这还缺少了最重要的东西,那就是日期。因此一般我们会这样使用。
use std::env;
use warp::Filter;

#[tokio::main]
async fn main() {
    env::set_var("MYAPP_LOG", "INFO");
    // 初始化,默认带有时间,时间是带时区的
    pretty_env_logger::try_init_timed_custom_env("MYAPP_LOG").expect("logger init failed!");
    let log = warp::log("MYAPP_LOG");

    // GET /hello/warp => 200 OK with body "Hello, warp!"
    let hello = warp::path!("hello" / String)
        .and(warp::addr::remote())
        .and(warp::header("x-forwarded-for"))
        .and(warp::header("x-real-ip"))
        .map(|name: String, addr: Option<std::net::SocketAddr>, x_forward_for: String, x_real_ip: String|
            {
                format!("Hello, {}!\nClient IP: {}\nX-Forwarded-For: {}\nX-Real-IP: {}\n",
                    name, addr.unwrap().to_string(), x_forward_for, x_real_ip)
            })
        .with(log);		// 加上日志输出

    warp::serve(hello)
        .run(([127, 0, 0, 1], 3030))       // 监听 127.0.0.1
        .await;
}

可以看到带有时区的访问时间被输出了。pretty_env_logger 的文档中还提供了其他初始化的方式,我们可以通过查看它的文档来使用其他的初始化方式。

