1.官方说明地址:
集成到现有原生应用
2. 主要步骤说明
把 React Native 组件集成到 iOS 应用中有如下几个主要步骤:
- 配置好 React Native 依赖和项目结构。
- 了解你要集成的 React Native 组件。
- 使用 CocoaPods,把这些组件以依赖的形式加入到项目中。
- 创建 js 文件,编写 React Native 组件的 js 代码。
- 在应用中添加一个RCTRootView。这个RCTRootView正是用来承载你的 React Native 组件的容器。
- 启动React Native 的 Packager 服务,运行应用。 验证这部分组件是否正常工作。
3. 开发环境准备
如果还没有搭建React Native的环境,就查看官方文档的步骤,进行安装。
如果已经安装,就请忽略这个步骤。
4. 步骤详细说明
4.1 配置项目目录结构
首先创建一个空目录用于存放 React Native 项目,然后在其中创建一个
/ios子目录,把你现有的 iOS 项目拷贝到/ios子目录中
4.2 安装 JavaScript 依赖包
在项目根目录下创建一个名为
package.json的空文本文件,然后填入以下内容:
{
  "name": "ReactToIOS",  // 你项目的名字
  "version": "0.0.1",
  "private": true,
  "scripts": {
    "android": "react-native run-android",
    "ios": "react-native run-ios",
    "start": "react-native start",
    "test": "jest",
    "lint": "eslint ."
  },
  "dependencies": {
    "react": "17.0.2",
    "react-native": "0.68.2"
  },
  "devDependencies": {
    "@babel/core": "^7.22.5",
    "@babel/runtime": "^7.22.5",
    "@react-native-community/eslint-config": "^3.2.0",
    "babel-jest": "^29.5.0",
    "eslint": "^8.43.0",
    "jest": "^29.5.0",
    "metro-react-native-babel-preset": "^0.76.7",
    "react-test-renderer": "17.0.2"
  },
  "jest": {
    "preset": "react-native"
  }
}
打开一个
终端/命令提示行,进入到项目目录中(即包含有 package.json 文件的目录),然后运行下列命令来安装:
- 执行安装ReactNative命令行工具
npm install -g react-native-cli- 执行安装 React 和 React Native 模块
yarn add react-native
需要注意的是,官方有个提示了一个注意事项,如下:
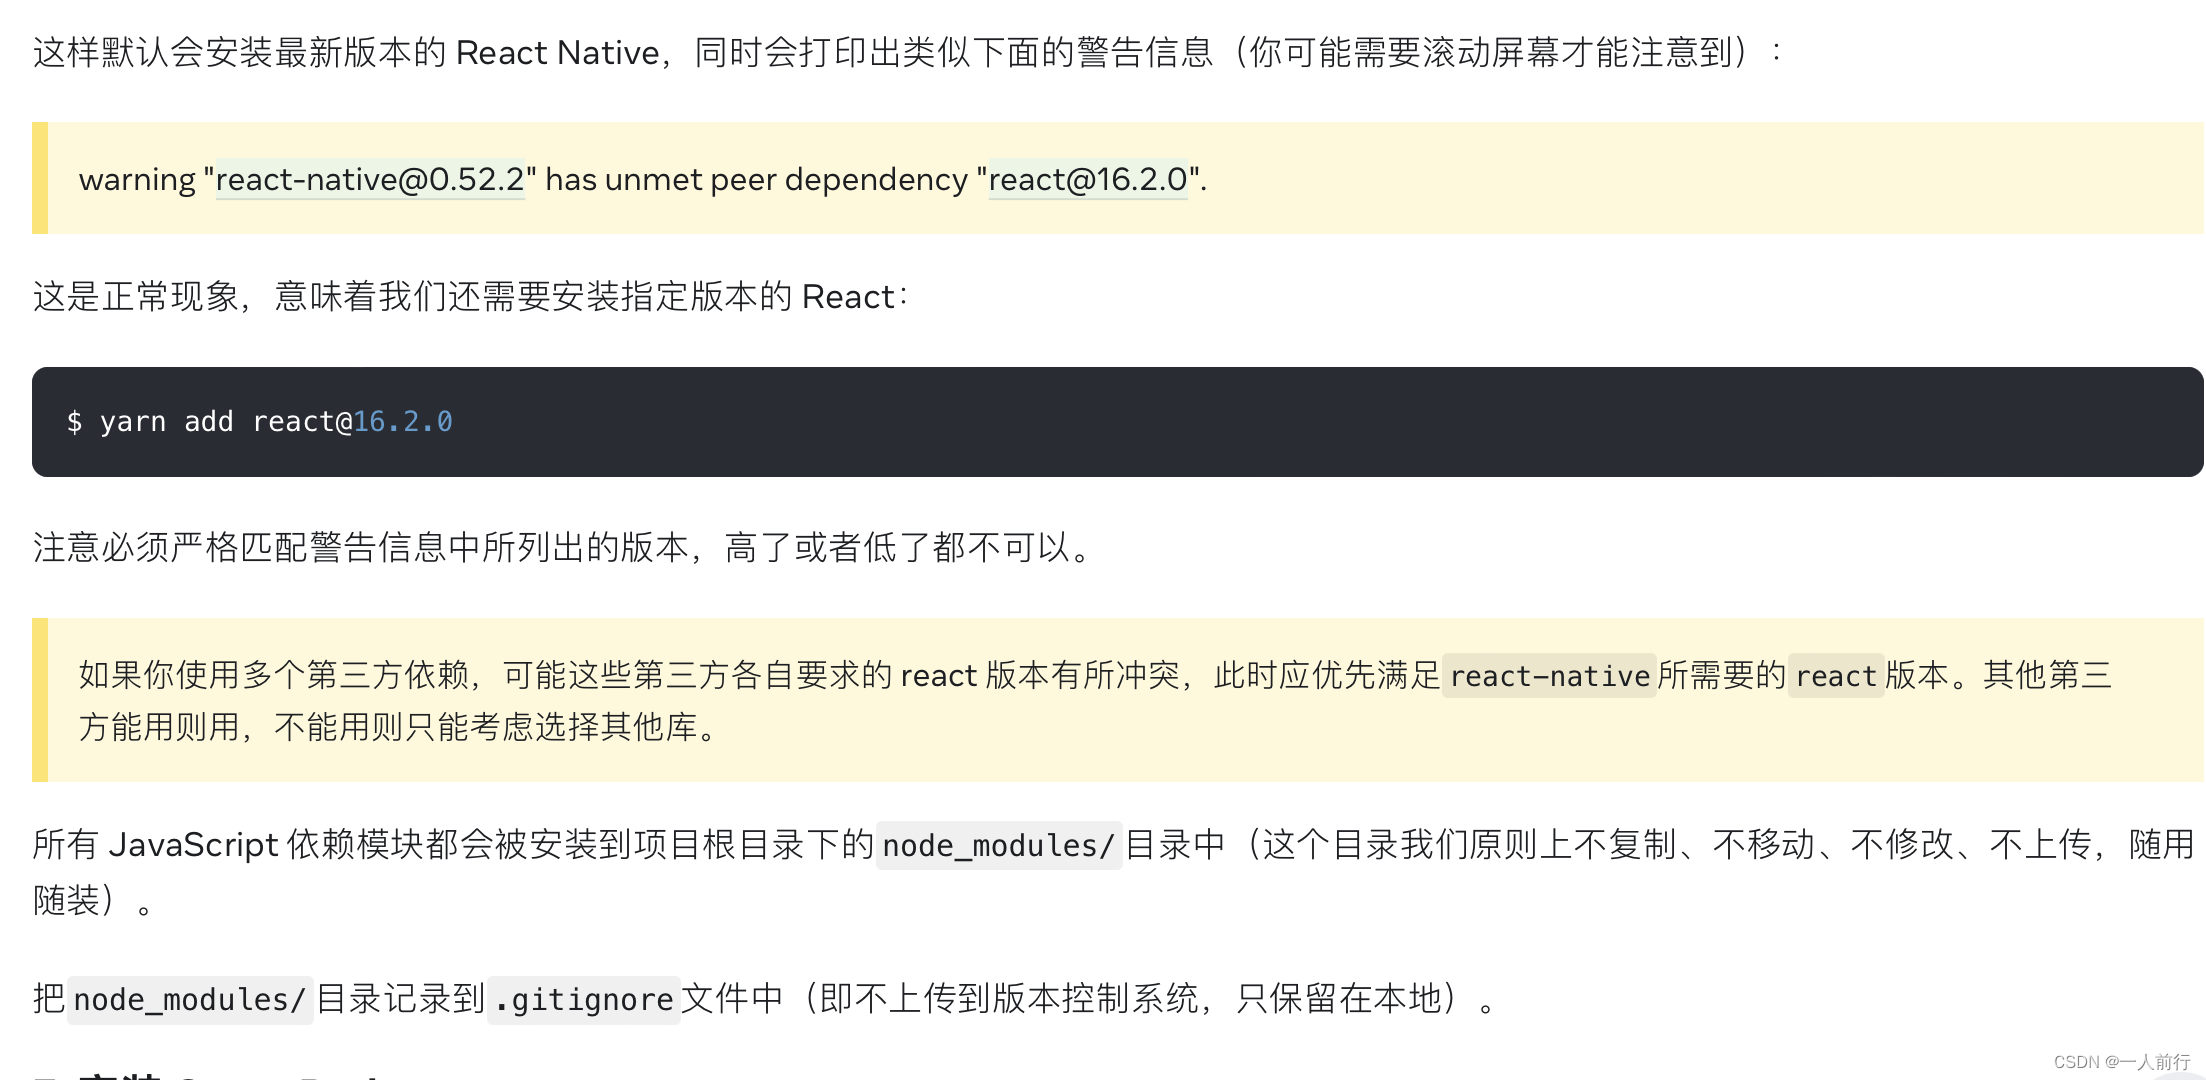
4.3 配置 CocoaPods 的依赖
- 创建
Podfile的最简单的方式就是在/ios子目录中使用 CocoaPods 的init命令:
pod init- 配置
Podfile文件
require_relative '../node_modules/react-native/scripts/react_native_pods'
require_relative '../node_modules/@react-native-community/cli-platform-ios/native_modules'

platform :ios, '13.0'
install! 'cocoapods', :deterministic_uuids => false

# test 需要替换成你自己的工程名字
target 'test' do
  config = use_native_modules!

  # Flags change depending on the env values.
  flags = get_default_flags()

  use_react_native!(
    :path => config[:reactNativePath],
    # to enable hermes on iOS, change `false` to `true` and then install pods
    :hermes_enabled => flags[:hermes_enabled],
    :fabric_enabled => flags[:fabric_enabled],
    # An absolute path to your application root.
    :app_path => "#{Pod::Config.instance.installation_root}/.."
  )

  # Pods for test

  # testTests 需要替换成你自己的工程Tests名字
  target 'testTests' do
    inherit! :complete
    # Pods for testing
  end

  use_flipper!()

  post_install do |installer|
    react_native_post_install(installer)
    __apply_Xcode_12_5_M1_post_install_workaround(installer)
  end

end
- 安装 React Native 的 pod 包
pod install
然后你应该可以看到类似下面的输出表示安装成功 (译注:同样由于众所周知的网络原因,pod install 的过程在国内非常不顺利,请自行配备稳定的代理软件。)
Analyzing dependencies
Fetching podspec for `React` from `../node_modules/react-native`
Downloading dependencies
Installing React (0.62.0)
Generating Pods project
Integrating client project
Sending stats
Pod installation complete! There are 3 dependencies from the Podfile and 1 total pod installed.
4.4 代码集成
4.4.1 创建一个 index.js 文件
首先在项目根目录下创建一个空的
index.js文件。
index.js是 React Native 应用在 iOS 上的入口文件。而且它是不可或缺的!它可以是个很简单的文件,简单到可以只包含一行require/import导入语句。本教程中为了简单示范,把全部的代码都写到了index.js里(当然实际开发中我们并不推荐这样做)。
4.4.2 在index.js中添加你自己的 React Native 代码
在index.js中添加你自己的组件。这里我们只是简单的添加一个
组件,然后用一个带有样式的组件把它包起来。
import React from 'react';
import {
  AppRegistry,
  StyleSheet,
  Text,
  View,
  Button,
  NativeModules
} from 'react-native';

class RNHighScores extends React.Component {
  render() {
    var contents = this.props['scores'].map((score) => (
      <Text key={score.name}>
        {score.name}:{score.value}
        {'\n'}
      </Text>
    ));
    return (
      <View style={styles.container}>
        <Text style={styles.highScoresTitle}>
          珠珠测试IOS调用reactView的视图
        </Text>
        <Text style={styles.scores}>{contents}</Text>
        <Button
          onPress={() => {
            const CalendarManager = NativeModules.CalendarManager;
            CalendarManager.addEvent(
             'Birthday Party',
              '4 Privet Drive, Surrey'
          );
          }}
         title="点我返回,并调用oc的方法!"
       />
      </View>
    );
  }
}

const styles = StyleSheet.create({
  container: {
    flex: 1,
    justifyContent: 'center',
    alignItems: 'center',
    backgroundColor: '#FFFFFF'
  },
  highScoresTitle: {
    fontSize: 20,
    textAlign: 'center',
    margin: 10
  },
  scores: {
    textAlign: 'center',
    color: '#333333',
    marginBottom: 5
  }
});

// Module name
AppRegistry.registerComponent('RNHighScores', () => RNHighScores);
4.4.3 在iOS项目添加交互的代码
现在我们将从菜单链接中添加一个事件处理程序。一个方法将被添加到你的应用程序的主ViewController中。这就是
RCTRootView发挥作用的地方。
- 在ViewController中导入
RCTRootView的头文件
#import <React/RCTRootView.h>- 在 ViewController 添加交互代码
#import "ViewController.h"
#import <AVFoundation/AVFoundation.h>
#import <react/RCTRootView.h>

@interface ViewController ()

@property (nonatomic, strong) UIButton *playButton; //播放按钮
@property (nonatomic, strong) UIViewController *reactVC;

@end

@implementation ViewController

- (void)viewDidLoad {
    [super viewDidLoad];

    self.playButton = [[UIButton alloc] initWithFrame:CGRectMake(100, 100, 200, 56)];
    [self.playButton setBackgroundColor:[UIColor blueColor]];
    [self.playButton setTitle:@"点击展示reactview" forState:UIControlStateNormal];
    [self.playButton addTarget:self action:@selector(showReactView) forControlEvents:UIControlEventTouchUpInside];
    [self.view addSubview:self.playButton];

    [self addNotification];

}

// iOS 调研react的页面
- (void)showReactView {
    NSLog(@"High Score Button Pressed");
    NSURL *jsCodeLocation = [NSURL URLWithString:@"http://localhost:8081/index.bundle?platform=ios"];

    NSDictionary *dic =  @{
        @"scores" : @[
          @{
            @"name" : @"zhuzhu",
            @"value": @"1"
           },
          @{
            @"name" : @"muyu",
            @"value": @"2"
          }
        ]
    };

    RCTRootView *rootView =  [[RCTRootView alloc] initWithBundleURL: jsCodeLocation
                                                         moduleName: @"RNHighScores"
                                                  initialProperties:dic
                                                      launchOptions: nil];
    self.reactVC = [[UIViewController alloc] init];
    self.reactVC.view = rootView;
    [self.navigationController pushViewController:self.reactVC animated:YES];
}

- (void)addNotification {
    [[NSNotificationCenter defaultCenter] addObserver:self selector:@selector(calendarNotification:) name:@"calendarNotification" object:nil];
}

// react 调用 iOS的方法
- (void)calendarNotification:(NSNotification *)noti {
    [self.navigationController popViewControllerAnimated:YES];

    NSString *message = [NSString stringWithFormat:@"rn调用oc的弹框, 内容是: name:%@, location = %@", noti.object[@"name"], noti.object[@"location"]];
    UIAlertController *alertControl = [UIAlertController alertControllerWithTitle:@"交互" message:message preferredStyle:UIAlertControllerStyleAlert];

    UIAlertAction * cancelAction = [UIAlertAction actionWithTitle:@"取消" style:UIAlertActionStyleCancel handler:nil];
    [alertControl addAction:cancelAction];

    [self presentViewController:alertControl animated:YES completion:nil];
}
上述的代码中,还需要在iOS项目中,添加一个CalendarManager(可以随便取名字)类:
---------------------------------.h

#import <Foundation/Foundation.h>
#import <React/RCTBridgeModule.h>

NS_ASSUME_NONNULL_BEGIN

@interface CalendarManager : NSObject <RCTBridgeModule>

@end


---------------------------------.m

#import "CalendarManager.h"
#import <React/RCTLog.h>

@implementation CalendarManager

// To export a module named CalendarManager
RCT_EXPORT_MODULE();

RCT_EXPORT_METHOD(addEvent:(NSString *)name location:(NSString *)location)
{
  RCTLogInfo(@"Pretending to create an event %@ at %@", name, location);

    dispatch_async(dispatch_get_main_queue(), ^{
        NSDictionary *dic = @{@"name":name, @"location":location};
        [[NSNotificationCenter defaultCenter] postNotificationName:@"calendarNotification" object:dic];
    });

}

@end
4.4 设置info.plist, 添加 App Transport Security 例外
Apple 现在默认会阻止读取不安全的 HTTP 链接。所以我们需要把本地运行的 Metro 服务添加到
Info.plist的例外中,以便能正常访问 Metro 服务:
<key>NSAppTransportSecurity</key>
<dict>
	<key>NSAllowsArbitraryLoads</key>
	<true/>
	<key>NSExceptionDomains</key>
	<dict>
		<key>localhost</key>
		<dict>
			<key>NSTemporaryExceptionAllowsInsecureHTTPLoads</key>
			<true/>
		</dict>
		<key>NSExceptionAllowsInsecureHTTPLoads</key>
		<true/>
		<key>NSIncludesSubdomains</key>
		<true/>
	</dict>
</dict>
4.5 开启服务
回到项目的根目录下,执行命令,开启服务:
yarn start
4.6 在xcode执行代码
打开xcode,如果按住 command + R 执行项目。
5. 测试过程中,遇到的问题
5.1 pod install报CocoaPods could not find compatible versions for pod "RCT-Folly
问题:RN版本升级后,pod install报CocoaPods could not find compatible versions for pod “RCT-Folly”
解决方式:pod update RCT-Folly --no-repo-update
参考文档:RN版本升级后,pod install报CocoaPods could not find compatible versions for pod “RCT-Folly”
5.2 finished with error [-1004] Error Domain=NSURLErrorDomain Code=-1004 "Could not connect to the server.”
问题:finished with error [-1004] Error Domain=NSURLErrorDomain Code=-1004 “Could not connect to the server.” UserInfo={_kCFStreamErrorCodeKey=61, NSUnderlyingError=0x600001e3c600 {Error Domain=kCFErrorDomainCFNetwork Code=-1004 “(null)” UserInfo={_NSURLErrorNW
解决方式:在info.plist 文件中添加对应的key
5.3 No metro config found in /xxx/xxx/xx.
问题:No metro config found in /Users/mac/Desktop/Learn/LearnReactive/ReactToIOS.
解决方式:在根目录下,执行安装ReactNative命令行工具
npm install -g react-native-cli
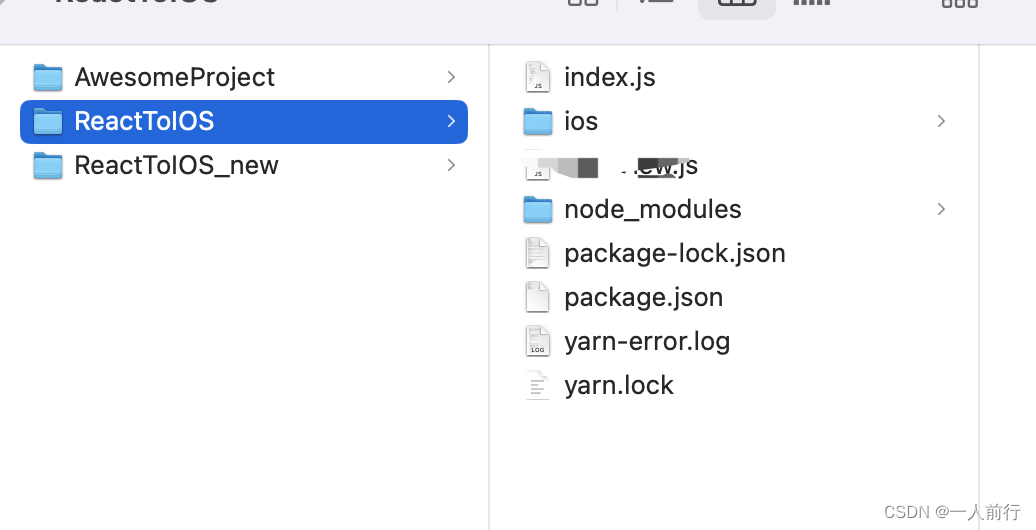
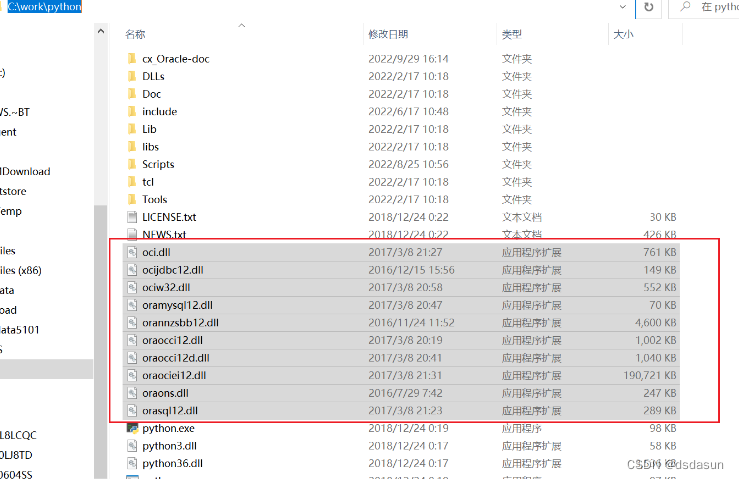
6. 最后文件的目录是这样的
