如何将C/C++代码转成webassembly_omage的博客-CSDN博客学习如何将C/C++代码转成webassemblyhttps://blog.csdn.net/omage/article/details/128163526?spm=1001.2014.3001.5501 上篇笔者分享了在window环境下如何将C/C++代码编译成webassembly,当中用了非常简单的C代码做了示例,然后在按照官网的一篇指南进行实践时,发现在window环境下编译有很多C代码的文件时不太方便,示例当中的命令也只能适用于linux环境。
Compiling an Existing C Module to WebAssembly - WebAssembly | MDNA core use-case for WebAssembly is to take the existing ecosystem of C libraries and allow developers to use them on the web.![]() https://developer.mozilla.org/en-US/docs/WebAssembly/existing_C_to_wasm
https://developer.mozilla.org/en-US/docs/WebAssembly/existing_C_to_wasm
为此,笔者干脆使用win10下的Linux子系统作为环境来实践下如何在linux环境编译。那如何在win10下安装Linux子系统的文章网上一大把,我就不赘述了。
注:笔者Linux子系统安装的是Debian
配置国内镜像
进入linux子系统
wsl
安装CA证书工具包,后面切换到国内镜像用的到
sudo apt-get update
sudo apt-get install ca-certificates
备份/etc/apt/sources.list文件
修改/etc/apt/sources.list文件,内容如下
deb https://mirrors.tencent.com/debian/ bullseye main non-free contrib
deb-src https://mirrors.tencent.com/debian/ bullseye main non-free contrib
deb https://mirrors.tencent.com/debian-security/ bullseye-security main
deb-src https://mirrors.tencent.com/debian-security/ bullseye-security main
deb https://mirrors.tencent.com/debian/ bullseye-updates main non-free contrib
deb-src https://mirrors.tencent.com/debian/ bullseye-updates main non-free contrib
deb https://mirrors.tencent.com/debian/ bullseye-backports main non-free contrib
deb-src https://mirrors.tencent.com/debian/ bullseye-backports main non-free contrib
安装Emscripten SDK (简称emsdk)
安装前先安装git和python3
sudo apt-get install git
sudo apt-get install python3
克隆emsdk
git clone https://gitee.com/openeuler-graphics/emsdk.git
安装
git checkout main

./emsdk install latest

./emsdk activate latest

source ./emsdk_env.sh
验证安装是否成功
emcc -v
如出现如下信息表示安装成功了
emcc (Emscripten gcc/clang-like replacement + linker emulating GNU ld) 3.1.22 (a9981ae2a7dc3c45f833d0b2202f739d87ac05c8)
clang version 16.0.0 (https://github.com/llvm/llvm-project 8491d01cc385d08b8b4f5dd097239ea0009ddc63)
Target: wasm32-unknown-emscripten
Thread model: posix
InstalledDir: /home/ouyang/data/emsdk/upstream/bin
编译一个已有的C代码库
(上面示例用的是libwebp代码)
git clone https://github.com/webmproject/libwebp在libwebp目录下新建一个webp.c文件
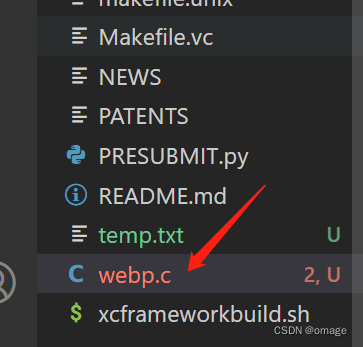
内容如下
#include "emscripten.h"
#include "src/webp/encode.h"

EMSCRIPTEN_KEEPALIVE
int version() {
  return WebPGetEncoderVersion();
}
进入代码目录,运行
mkdir -p target
emcc -s EXPORTED_RUNTIME_METHODS='["cwrap"]' -I . webp.c ./src/{dec,dsp,demux,enc,mux,utils}/*.c -o target/mylib.js
注:这个 -I参数很奇怪,在emcc帮助和文档里查不到,从实践情况看应该是指设定代码编译的根目录,会影响你的代码文件里的引用路径。
上述命令编译成功后,会在target目录生成mylib.js、mylib.wasm文件。
然后我们在写一个简单的mylib.html文件,内容如下
<!doctype html>
<html lang="en-us">
<body>

<script src="./mylib.js"></script>
<script>
  Module.onRuntimeInitialized = async () => {
    const api = {
      version: Module.cwrap("version", "number", []),
    };
    console.log(api.version());
  };
</script>
</body>
</html>
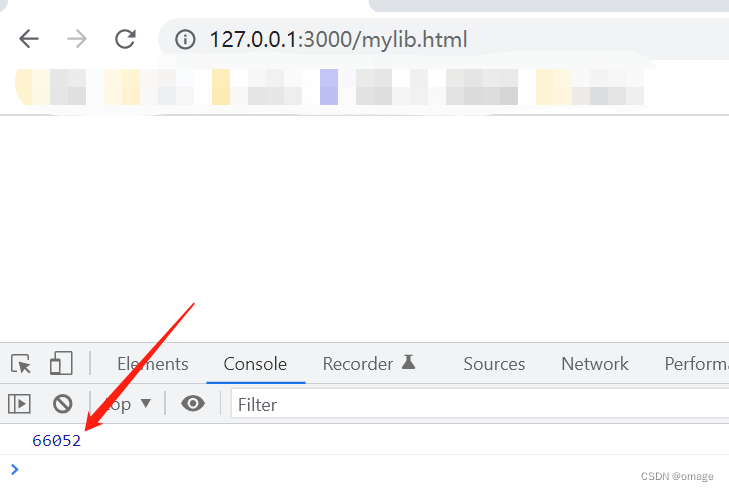
将这三个文件部署到您的web服务上,笔者使用nodejs + koa的方式来做web服务,具体代码可参考如何将C/C++代码转成webassembly_omage的博客-CSDN博客
在浏览器输入地址: http://127.0.0.1:3000/mylib.html
