文章目录
- 一、MyBatis-Plus
- 二、将MyBatis-Plus框架整合到SpringBoot
- 1.导依赖
- 2.在启动类上开扫描
- 3.在application.yml中配关于数据库的连接
- 4.在idea中安装MyBatisX插件
- 5.在idea中连上MySQL
- 6.测试查询所有
- 3.完善增删改查功能
- 4.逻辑删除
- 5.自动填充
一、MyBatis-Plus
1.为什么有了MyBatis,还要使用MyBatis-Plus?
MyBatis: 对持久层封装的框架,只需要写接口和SQL语句。
MyBatis-Plus: 大多数持久层的开发量都是单表的增删改查,过于重复和疲劳。它增强了单表的增删改查,我们不再需要定义接口,不再需要定义持久层的映射文件,不再需要写SQL语句。
2.官方文档链接: https://baomidou.com/
二、将MyBatis-Plus框架整合到SpringBoot
1.导依赖
        <dependency>
            <groupId>mysql</groupId>
            <artifactId>mysql-connector-java</artifactId>
            <version>8.0.19</version>
        </dependency>
        <dependency>
            <groupId>com.baomidou</groupId>
            <artifactId>mybatis-plus-boot-starter</artifactId>
            <version>3.5.1</version>
        </dependency>
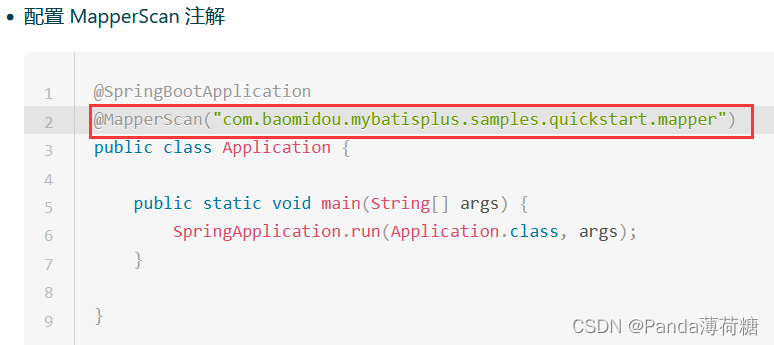
2.在启动类上开扫描
到[快速入门----->配置]复制并修改为自己的持久层完整包路径:mapper–>Copy Reference
](https://img-blog.csdnimg.cn/674849a6d505481cab62935a1ac2b447.png)
@MapperScan("com.baomidou.mybatisplus.samples.quickstart.mapper")
3.在application.yml中配关于数据库的连接
注意:一定要顶格写,否则会出现层次关系错误导致项目无法启动!
(其中,xxx为数据库名称,用户名和密码根据自己的改)
server:
  port: 8080
spring:
  datasource:
    driver-class-name: com.mysql.cj.jdbc.Driver
    url: jdbc:mysql://127.0.0.1:3306/xxx?useSSL=false&useUnicode=true&characterEncoding=UTF-8&serverTimezone=Asia/Shanghai
    username: root
    password: 123456

mybatis-plus:
  configuration:
    log-impl: org.apache.ibatis.logging.stdout.StdOutImpl  #sql日志打印
4.在idea中安装MyBatisX插件
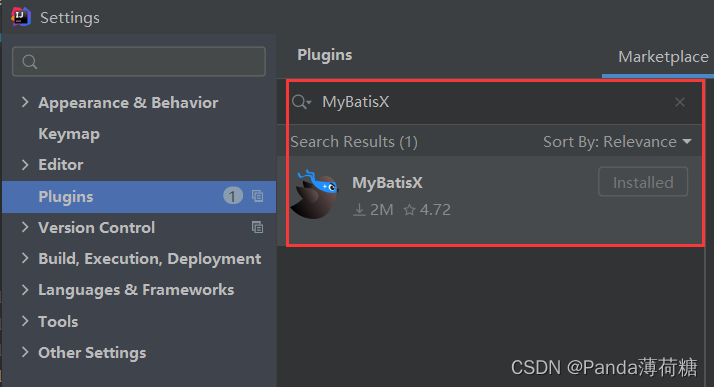
5.在idea中连上MySQL
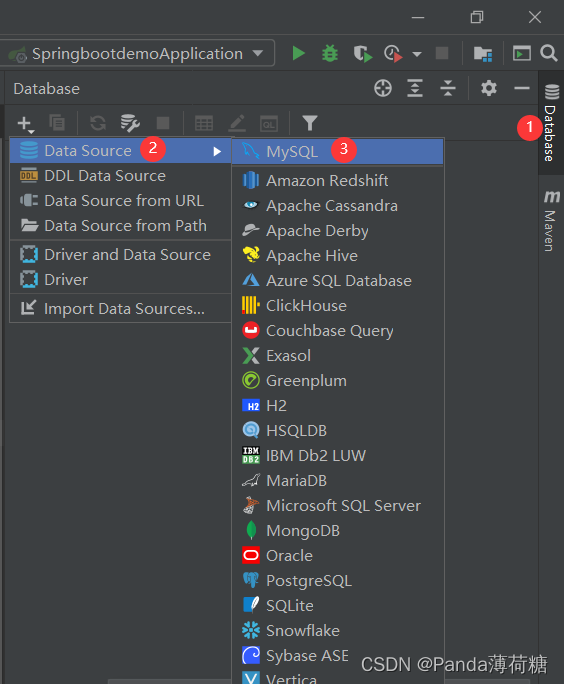
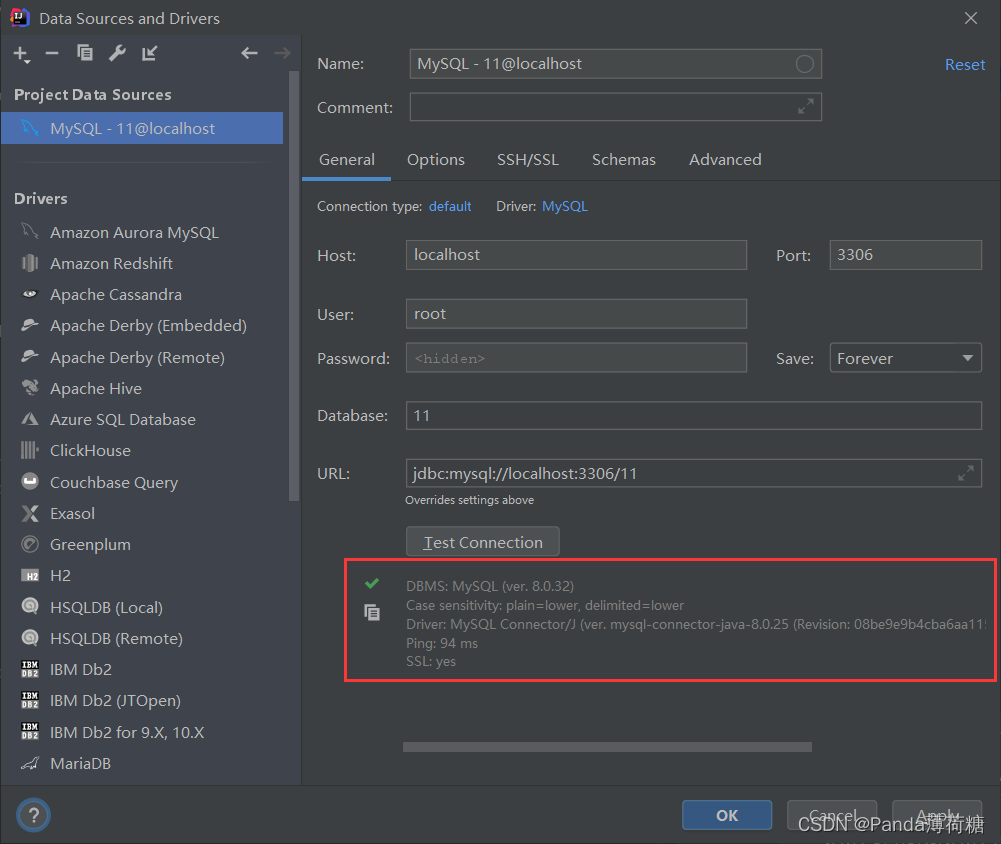
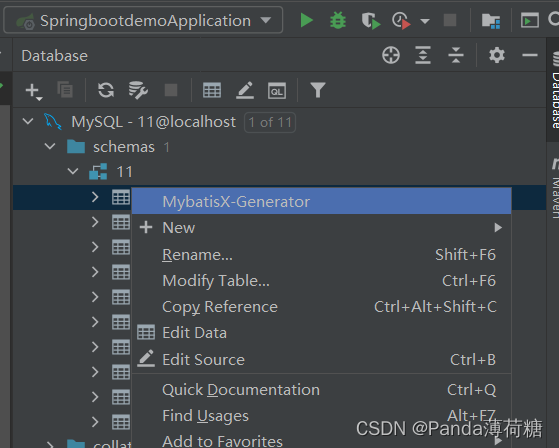
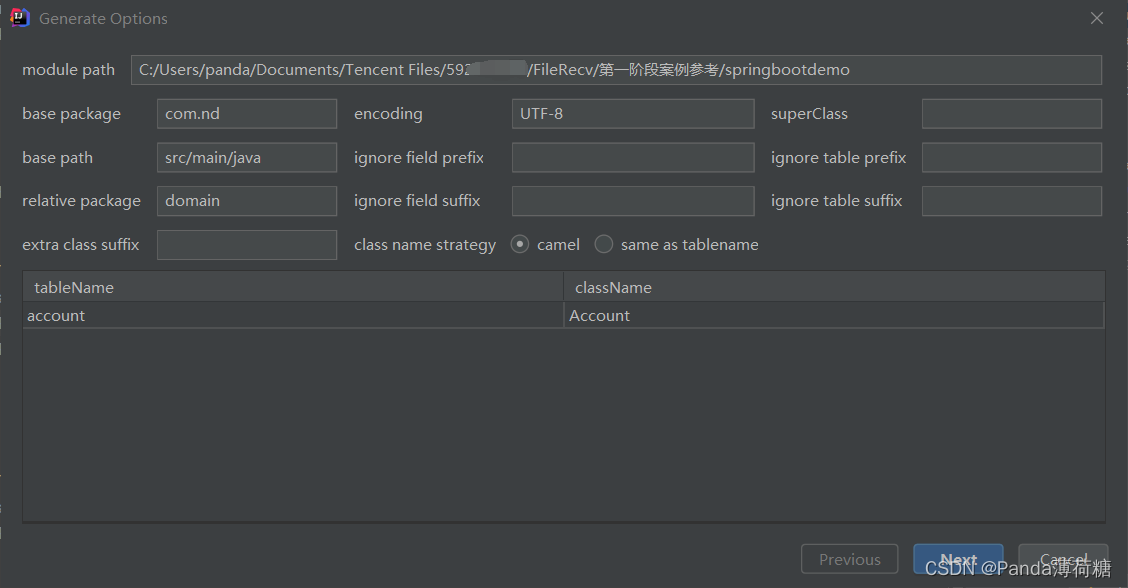
自动生成:
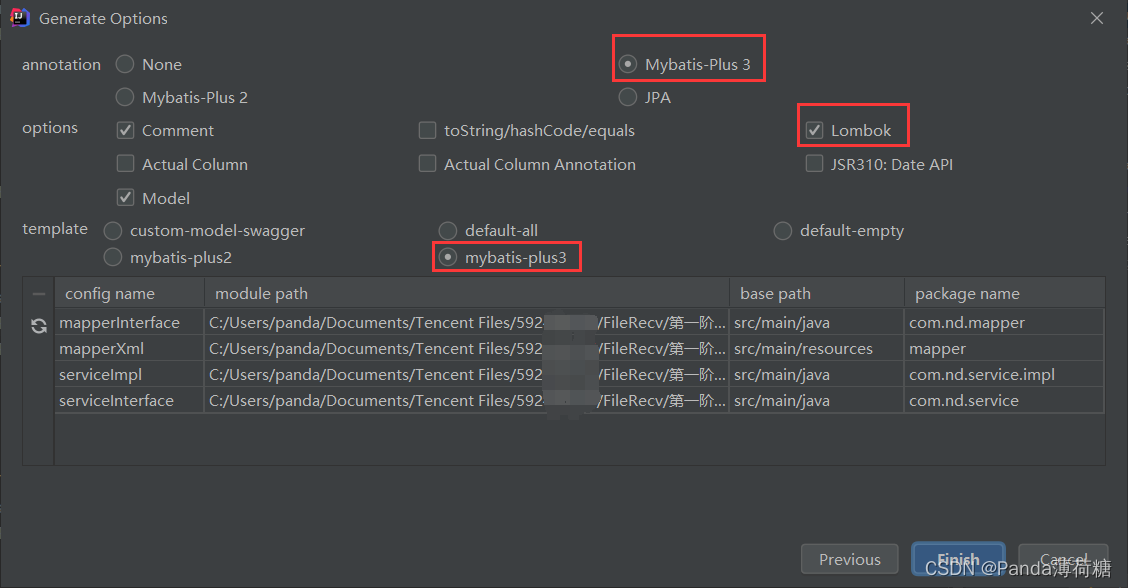
1.实体类
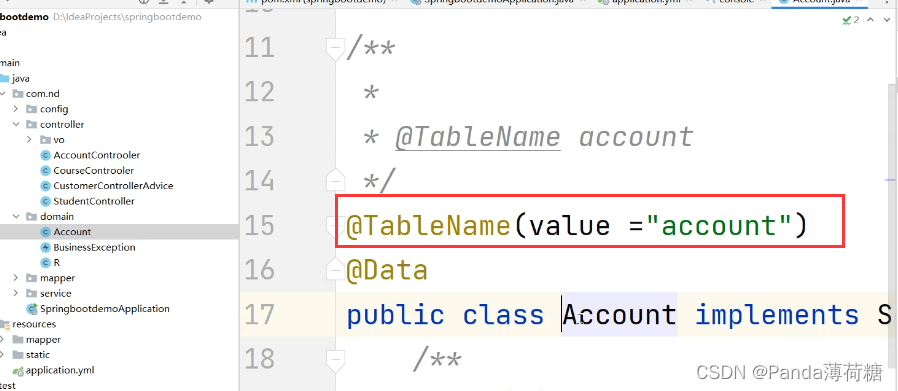
2.主键的配置

3.持久层接口

4.服务层

5.服务层的实现类

6.生成resultMap,指定实体类Account和表Account的对应关系

6.测试查询所有
1.要调用服务层对象,就先注入

2.调用服务层对象

3.服务层的接口

4.生成实现类
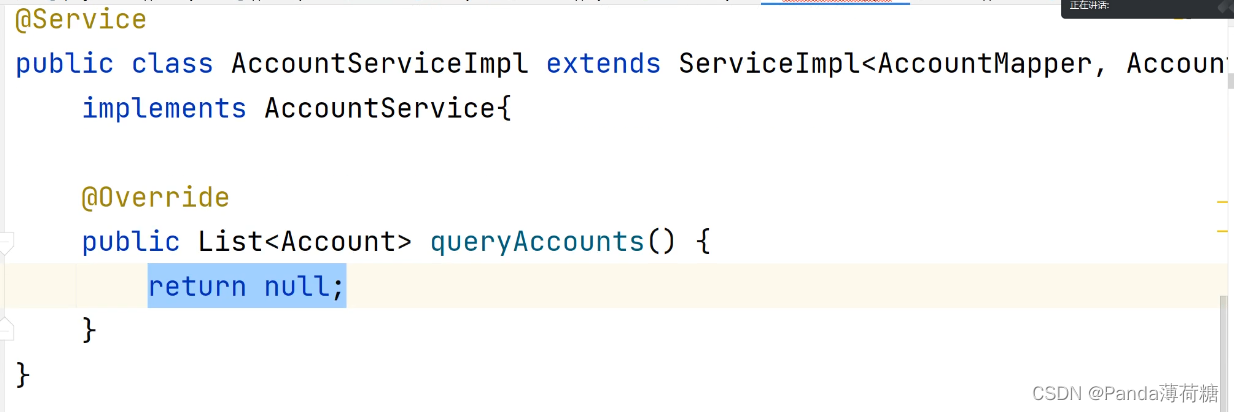
5.在服务层需要持久层对象
报错:
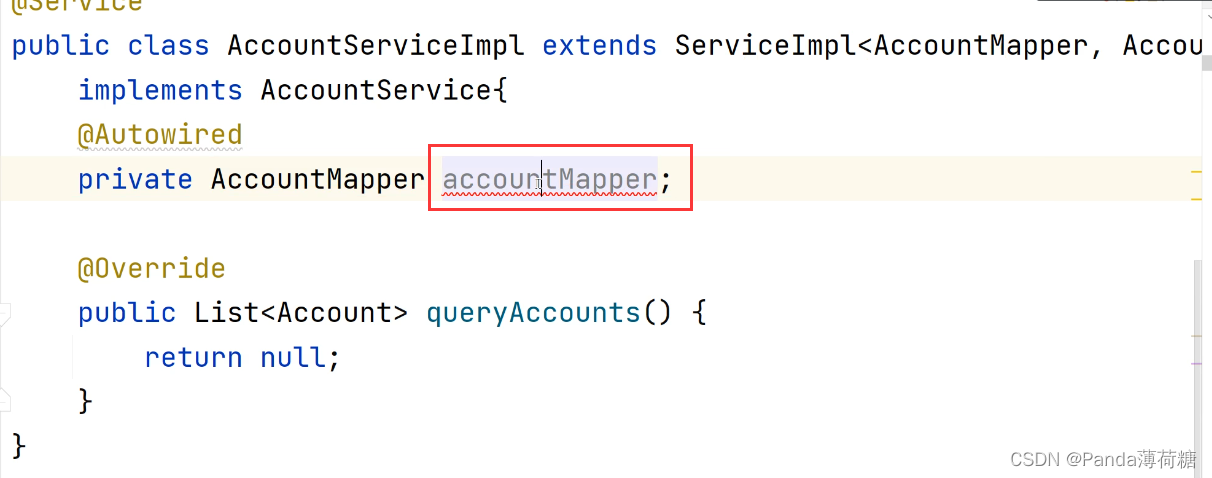
处理方法一:

处理方法二:
在接口上注入
+

6.找文档[CRUD接口–>Mapper CRUD接口]![]](https://img-blog.csdnimg.cn/c72aa740aa8e48388e558866825c38e3.png)
@Override
    public List<Account> queryAccounts() {
        List<Account> accounts = accountMapper.selectList(null);
        return accounts;
    }
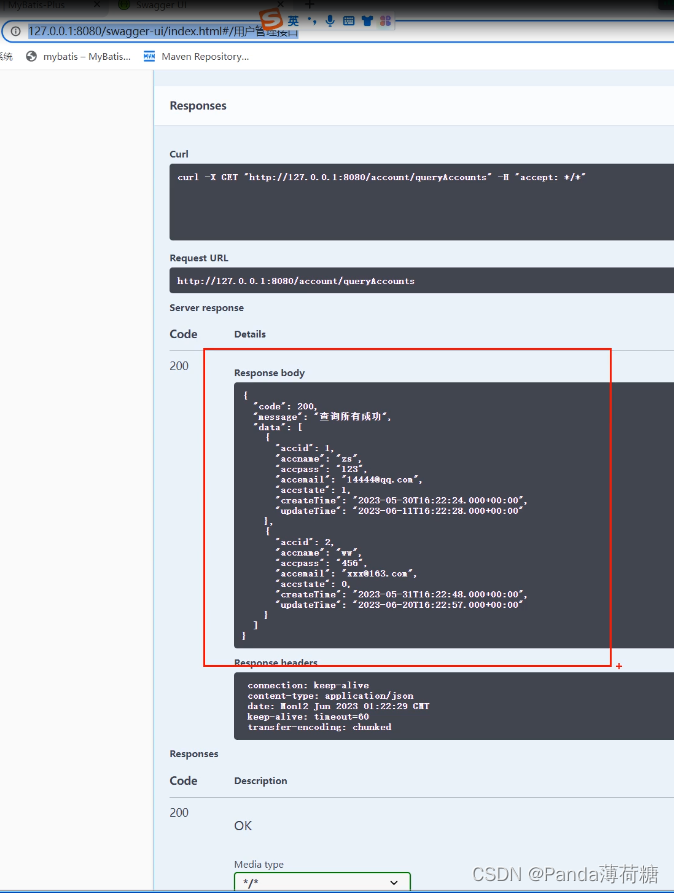
7.加注解,用Swagger测试

3.完善增删改查功能
1.查询:
AccountServiceImpl:
@Override
    public Account login(Account account) {
        //构造查询条件
        LambdaQueryWrapper<Account> wrapper = new LambdaQueryWrapper<>();
        wrapper.eq(Account::getAccname,account.getAccname());
        wrapper.eq(Account::getAccpass,account.getAccpass());
        Account acc = accountMapper.selectOne(wrapper);
        return acc;
    }


AccountController:
    @GetMapping("/queryAccounts")
    @ApiOperation("列表显示")
    public R queryAccounts(){
        List<Account> accounts =accountService.queryAccounts();
        R r=new R(200,"查询所有成功",accounts);
        return r;
    }
2.增:
AccountServiceImpl:
@Override
    public void saveAccount(Account account) throws BusinessException {
        //判断账号是否重复
        LambdaQueryWrapper<Account> wrapper = new LambdaQueryWrapper();
        wrapper.eq(Account::getAccname,account.getAccname());
        Long count = accountMapper.selectCount(wrapper);
        if(count > 0){
            throw new BusinessException("账号已存在,添加失败");
        }
        //判断邮箱是否重复
        wrapper = new LambdaQueryWrapper();
        wrapper.eq(Account::getAccemail,account.getAccemail());
        count = accountMapper.selectCount(wrapper);
        if(count > 0){
            throw new BusinessException("邮箱已存在,添加失败");
        }
        accountMapper.insert(account);
    }


AccountController:
 @ApiOperation("添加用户信息")
    @PostMapping("/saveAccount")
    public R saveAccount(@Valid  @RequestBody SaveAccountVO accountVO) throws BusinessException {
        Account account = new Account();
        BeanUtils.copyProperties(accountVO,account);
        accountService.saveAccount(account);
        R r=new R(200,"添加成功",null);
        return r;
    }
3.改
在增的基础上,加上判断不等于自己,ne
AccountServiceImpl:
@Override
    public void updateAccount(Account account) throws BusinessException {
        //判断账号是否重复
        LambdaQueryWrapper<Account> wrapper = new LambdaQueryWrapper();
        wrapper.eq(Account::getAccname,account.getAccname());
        wrapper.ne(Account::getAccid,account.getAccid());

        Long count = accountMapper.selectCount(wrapper);
        if(count > 0){
            throw new BusinessException("账号已存在,修改失败");
        }
        //判断邮箱是否重复
        wrapper = new LambdaQueryWrapper();
        wrapper.eq(Account::getAccemail,account.getAccemail());
        wrapper.ne(Account::getAccid,account.getAccid());
        count = accountMapper.selectCount(wrapper);
        if(count > 0){
            throw new BusinessException("邮箱已存在,修改失败");
        }
        accountMapper.updateById(account);
    }


AccountController:
@PutMapping("/updateAccount")
    @ApiOperation("修改用户信息")
    public R abc(@RequestBody  AbcVO vo) throws BusinessException {
        Account account = new Account();
        BeanUtils.copyProperties(vo,account);
        accountService.updateAccount(account);
        R r=new R(200,"修改成功",null);
        return r;
    }
4.删除
AccountServiceImpl:
@Override
    public void deleteAccount(Integer accid) {
        accountMapper.deleteById(accid);
    }


AccountController:
@DeleteMapping("/deleteAccount/{accid}")
    @ApiOperation("根据id删除")
    public R deleteAccount(@PathVariable Integer accid){
        accountService.deleteAccount(accid);
        R r=new R(200,"删除成功",null);
        return r;
    }
4.逻辑删除
表中的数据仍存在,只是状态由0变为1(默认下)。
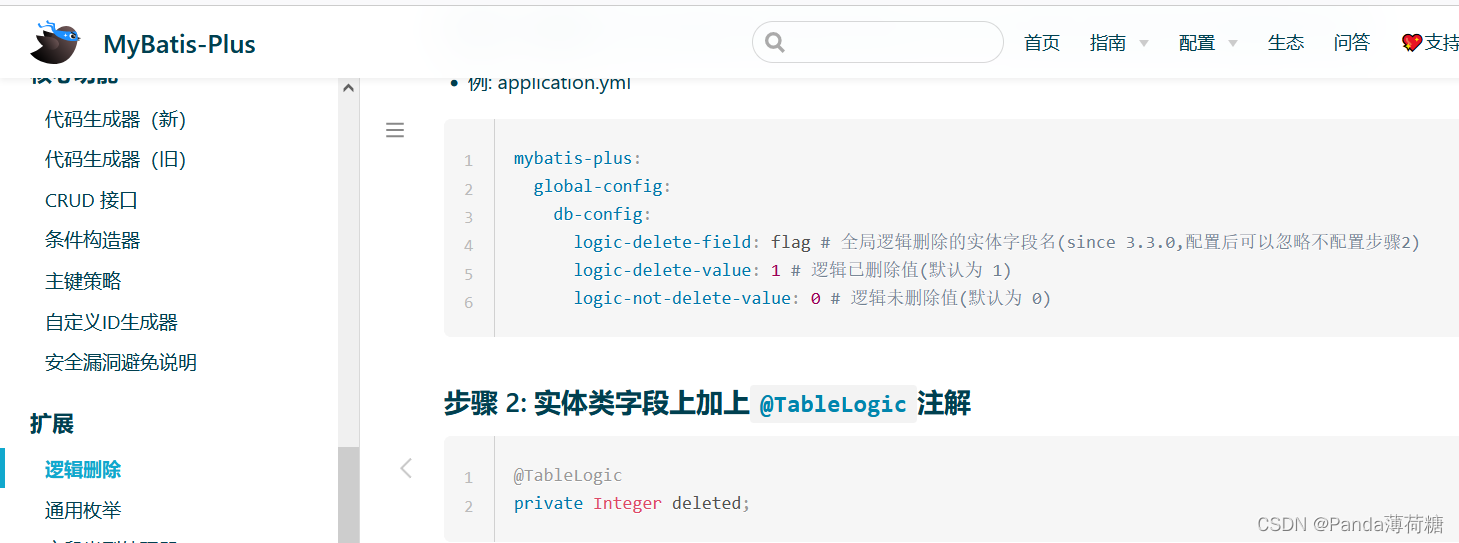
在实体类字段上加上@TableLogic注解

实际上发生的是修改请求,不是删除请求。
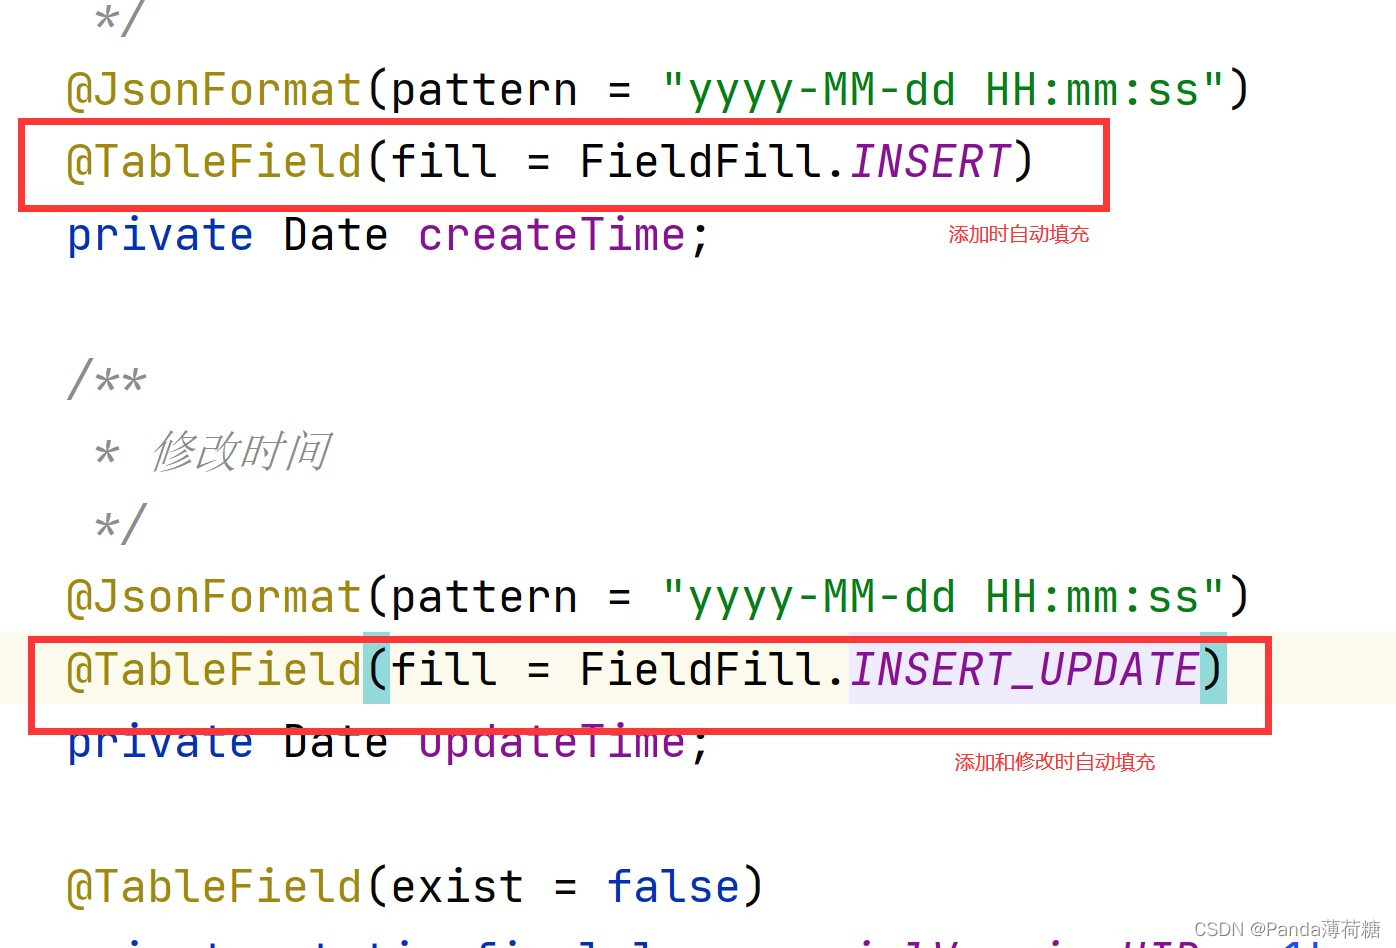
5.自动填充
