如果是初次搭建Spring Boot+WebSocket项目,不需要太复杂,只需要快速上手,那么你搜到的大部分文章可能都不适合你,我的这篇文章以最精简的方式搭建一个可以运行并通信的Spring Boot+WebSocket的Demo项目,有了根基之后再进行复杂化就不是难事了。
第一步:搭建一个Spring Boot项目
搭建Spring Boot项目都会吧,下面展示pom.xml文件中重要的依赖。
<parent>
    <groupId>org.springframework.boot</groupId>
    <artifactId>spring-boot-starter-parent</artifactId>
    <version>2.2.6.RELEASE</version>
    <relativePath/>
</parent>

<dependencies>
    <dependency>
        <groupId>org.springframework.boot</groupId>
        <artifactId>spring-boot-starter-websocket</artifactId>
    </dependency>
</dependencies>
第二步:WebSocket配置类
import org.springframework.context.annotation.Bean;
import org.springframework.context.annotation.Configuration;
import org.springframework.web.socket.server.standard.ServerEndpointExporter;

@Configuration
public class WebSocketConfig {
    @Bean
    public ServerEndpointExporter serverEndpointExporter() {
        return new ServerEndpointExporter();
    }
}
第三步:WebSocket通信服务
import org.apache.tomcat.websocket.WsSession;
import org.springframework.stereotype.Service;

import javax.websocket.*;
import javax.websocket.server.PathParam;
import javax.websocket.server.ServerEndpoint;
import java.io.IOException;
import java.util.Map;
import java.util.concurrent.ConcurrentHashMap;

@Service
@ServerEndpoint("/myws/{username}")
public class WebSocketServer {
    private static Map<String,WsSession> sessions = new ConcurrentHashMap<>();

    @OnOpen
    public void onOpen(Session session, @PathParam("username") String username){
        System.out.println("有新的连接进来了:"+username);
        sessions.put(username,(WsSession) session);
    }

    @OnMessage
    public void onMessage(Session session, @PathParam("username") String username,String msg){
        System.out.println(username+":发送消息");
        for (WsSession wsSession : sessions.values()) {
            if(wsSession.isOpen()){
                try {
                    wsSession.getBasicRemote().sendText(msg);
                } catch (IOException e) {
                    e.printStackTrace();
                }
            }
        }
    }
    @OnClose
    public void onClose(Session session, @PathParam("username") String username){
        System.out.println(username+":关闭连接");
    }
    @OnError
    public void onError(Session session,@PathParam("username") String username,Throwable throwable){
        System.out.println("发生错误");
        throwable.printStackTrace();
    }
}
第四步:前端页面
<!DOCTYPE html>
<html lang="en">
<head>
    <meta charset="UTF-8">
    <title>Title</title>
</head>
<body>
<input type="text" id="username" placeholder="你的用户名">
<button id="connect">连接</button>
<input type="text" id="msg" placeholder="要发送的消息">
<button id="send">发送消息</button>
<script>
    var socket;
    document.getElementById("connect").onclick = function () {
        if (typeof (WebSocket) == "undefined") {
            console.log("遗憾:您的浏览器不支持WebSocket");
        } else {
            console.log("恭喜:您的浏览器支持WebSocket");
            //ws对应http、wss对应https。
            socket = new WebSocket("ws://localhost:8182/myws/"+document.getElementById("username").value);
            socket.onopen = function() {
                console.log("socket已打开");
            };
            socket.onmessage = function(msg) {
                console.log(msg.data);
            };
            socket.onclose = function() {
                console.log("socket已关闭");
            };
            socket.onerror = function() {
                alert("socket发生了错误");
            }
            //窗口关闭时,关闭连接
            window.unload=function() {
                socket.close();
            };
        }
    }
    document.getElementById("send").onclick = function () {
        socket.send(document.getElementById("msg").value);
    }
</script>
</body>
</html>
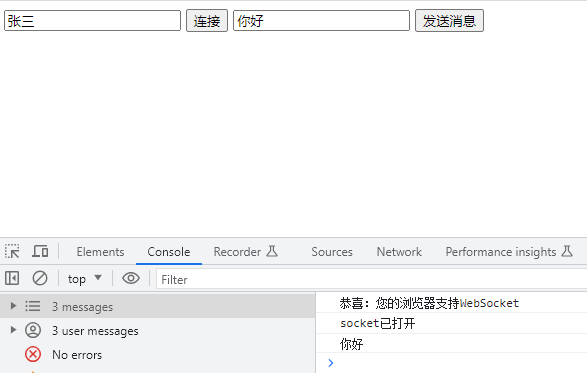
第五步:运行测试
