概述
在本文中,我们将看到两个没有多线程的 Python 代码示例,用于从摄像头读取视频帧。我们将看到使用/不使用多线程获得的 FPS 的差异。
什么是多线程?
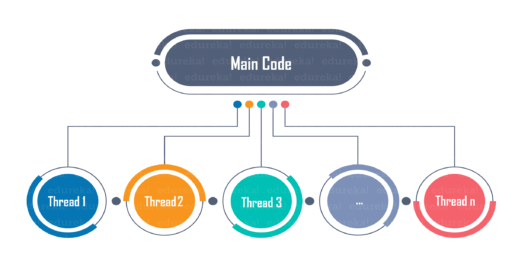
线程是进程中的一个执行单元。多线程是指通过在线程之间快速切换对 CPU 的控制(称为上下文切换)来并发执行多个线程。在我们的示例中,我们将看到多线程通过提高 FPS(每秒帧数)实现更快的实时视频处理。
Python中的线程基础
以下代码片段显示了如何使用python 中的threading模块创建线程:
# importing the threading module
import threading

# importing the time module
import time

# Function to print "Hello", however, the function sleeps
# for 2 seconds at the 11th iteration
def print_hello():
  for i in range(20):
    if i == 10:
      time.sleep(2)
    print("Hello")

# Function to print numbers till a given number
def print_numbers(num):
  for i in range(num+1):
    print(i)

# Creating the threads. Target is set to the name of the
# function that neeeds to be executed inside the thread and
# args are the arguments to be supplied to the function that

# needs to be executed.
print("Greetings from the main thread.")
thread1 = threading.Thread(target = print_hello, args = ())
thread2 = threading.Thread(target = print_numbers, args = (10,))

# Starting the two threads
thread1.start()
thread2.start()
print("It's the main thread again!")
让我们通过跟踪代码的执行来尝试理解输出:
主线程执行。打印“Greetings from the main thread”,创建
thread1和thread2并启动线程。发生上下文切换,开始执行
thread1。在前十次迭代之后,
thread1进入睡眠状态,thread2开始执行,在下一次上下文切换之前完成。现在,主线程获得了 CPU 的控制权并打印出“It’s the main thread again!”
另一个上下文切换发生,
thread2恢复执行并完成。由于主线程没有更多指令要执行,因此程序终止。
使用thread.join()
如果需要阻塞主线程,直到thread1和thread2完成执行,该怎么办?
thread.join()会派上用场,因为它会阻塞调用线程,直到调用其 join() 方法的线程终止:
# importing the threading module
import threading

# importing the time module
import time
# Function to print "Hello", however, the function sleeps

# for 2 seconds at the 11th iteration
def print_hello():
  for i in range(20):
    if i == 10:
      time.sleep(2)
    print("Hello")

# Function to print numbers till a given number
def print_numbers(num):
  for i in range(num+1):
    print(i)

# Creating the threads. Target is set to the name of the
# function that neeeds to be executed inside the thread and
# args are the arguments to be supplied to the function that
# needs to be executed.
print("Greetings from the main thread.")
thread1 = threading.Thread(target = print_hello, args = ())
thread2 = threading.Thread(target = print_numbers, args = (10,))

# Starting the two threads
thread1.start()
thread2.start()
thread1.join()
thread2.join()
print("It's the main thread again!")
print("Threads 1 and 2 have finished executing.")
原因多线程有助于更快的处理
视频处理代码分为两部分:从摄像头读取下一个可用帧并对帧进行视频处理,例如运行深度学习模型进行人脸识别等。
读取下一帧并在没有多线程的程序中按顺序进行处理。程序等待下一帧可用,然后再对其进行必要的处理。读取帧所需的时间主要与请求、等待和将下一个视频帧从相机传输到内存所需的时间有关。对视频帧进行计算所花费的时间,无论是在 CPU 还是 GPU 上,占据了视频处理所花费的大部分时间。
在具有多线程的程序中,读取下一帧并处理它不需要是顺序的。当一个线程执行读取下一帧的任务时,主线程可以使用 CPU 或 GPU 来处理最后读取的帧。这样,通过重叠两个任务,可以减少读取和处理帧的总时间。
OpenCV 代码——没有多线程
# importing required libraries
import cv2
import time

# opening video capture stream
vcap = cv2.VideoCapture(0)
if vcap.isOpened() is False :
    print("[Exiting]: Error accessing webcam stream.")
    exit(0)
fps_input_stream = int(vcap.get(5))
print("FPS of webcam hardware/input stream: {}".format(fps_input_stream))
grabbed, frame = vcap.read() # reading single frame for initialization/ hardware warm-up

# processing frames in input stream
num_frames_processed = 0
start = time.time()
while True :
    grabbed, frame = vcap.read()
    if grabbed is False :
        print('[Exiting] No more frames to read')
        break

# adding a delay for simulating time taken for processing a frame
    delay = 0.03 # delay value in seconds. so, delay=1 is equivalent to 1 second
    time.sleep(delay)
    num_frames_processed += 1
cv2.imshow('frame' , frame)
    key = cv2.waitKey(1)
    if key == ord('q'):
        break
end = time.time()

# printing time elapsed and fps
elapsed = end-start
fps = num_frames_processed/elapsed
print("FPS: {} , Elapsed Time: {} , Frames Processed: {}".format(fps, elapsed, num_frames_processed))

# releasing input stream , closing all windows
vcap.release()
cv2.destroyAllWindows()
OpenCV 代码——多线程
# importing required libraries
import cv2
import time
from threading import Thread # library for implementing multi-threaded processing

# defining a helper class for implementing multi-threaded processing
class WebcamStream :
    def __init__(self, stream_id=0):
        self.stream_id = stream_id   # default is 0 for primary camera

        # opening video capture stream
        self.vcap      = cv2.VideoCapture(self.stream_id)
        if self.vcap.isOpened() is False :
            print("[Exiting]: Error accessing webcam stream.")
            exit(0)
        fps_input_stream = int(self.vcap.get(5))
        print("FPS of webcam hardware/input stream: {}".format(fps_input_stream))

        # reading a single frame from vcap stream for initializing
        self.grabbed , self.frame = self.vcap.read()
        if self.grabbed is False :
            print('[Exiting] No more frames to read')
            exit(0)

# self.stopped is set to False when frames are being read from self.vcap stream
        self.stopped = True

# reference to the thread for reading next available frame from input stream
        self.t = Thread(target=self.update, args=())
        self.t.daemon = True # daemon threads keep running in the background while the program is executing

    # method for starting the thread for grabbing next available frame in input stream
    def start(self):
        self.stopped = False
        self.t.start()

# method for reading next frame
    def update(self):
        while True :
            if self.stopped is True :
                break
            self.grabbed , self.frame = self.vcap.read()
            if self.grabbed is False :
                print('[Exiting] No more frames to read')
                self.stopped = True
                break
        self.vcap.release()

# method for returning latest read frame
    def read(self):
        return self.frame

# method called to stop reading frames
    def stop(self):
        self.stopped = True

# initializing and starting multi-threaded webcam capture input stream
webcam_stream = WebcamStream(stream_id=0) #  stream_id = 0 is for primary camera
webcam_stream.start()

# processing frames in input stream
num_frames_processed = 0
start = time.time()
while True :
    if webcam_stream.stopped is True :
        break
    else :
        frame = webcam_stream.read()

# adding a delay for simulating time taken for processing a frame
    delay = 0.03 # delay value in seconds. so, delay=1 is equivalent to 1 second
    time.sleep(delay)
    num_frames_processed += 1
cv2.imshow('frame' , frame)
    key = cv2.waitKey(1)
    if key == ord('q'):
        break
end = time.time()
webcam_stream.stop() # stop the webcam stream

# printing time elapsed and fps
elapsed = end-start
fps = num_frames_processed/elapsed
print("FPS: {} , Elapsed Time: {} , Frames Processed: {}".format(fps, elapsed, num_frames_processed))

# closing all windows
cv2.destroyAllWindows()
下载所有代码
https://github.com/SihabSahariar/Multi-threading-OpenCV-
资源
https://stackoverflow.com/questions/55099413/python-opencv-streaming-from-camera-multithreading-timestamps
https://stackoverflow.com/questions/55828451/video-streaming-from-ip-camera-in-python-using-opencv-cv2-videocapture
https://stackoverflow.com/questions/58592291/how-to-capture-multiple-camera-streams-with-opencv
https://stackoverflow.com/questions/58293187/opencv-real-time-streaming-video-capture-is-slow-how-to-drop-frames-or-get-sync
https://stackoverflow.com/questions/55141315/storing-rtsp-stream-as-video-file-with-opencv-videowriter
https://stackoverflow.com/questions/29317262/opencv-video-saving-in-python/71624807#71624807
https://stackoverflow.com/questions/72120491/python-opencv-multiprocessing-cv2-videocapture-mp4
参考
https://github.com/PyImageSearch/imutils/tree/master/imutils/video
https://www.pyimagesearch.com/2015/12/21/increasing-webcam-fps-with-python-and-opencv/
https://forum.opencv.org/t/videocapture-opens-video-sources-by-multi-thread/8045
☆ END ☆
如果看到这里,说明你喜欢这篇文章,请转发、点赞。微信搜索「uncle_pn」,欢迎添加小编微信「 woshicver」,每日朋友圈更新一篇高质量博文。
↓扫描二维码添加小编↓


![[附源码]Python计算机毕业设计SSM教学团队管理系统(程序+LW)](https://img-blog.csdnimg.cn/1547dbbae0c54bcb8987a247f04fe261.png)


![[附源码]计算机毕业设计网上书城网站Springboot程序](https://img-blog.csdnimg.cn/3a552765766c4a679c0863015ece118d.png)
