工程需要,最近在编一组Windows上的动态链接库给Python调用。之前做过Linux下C++动态库的编译,并提供给Python调用,Windows下的编译跟Linux还是有些差距,因此花了一点时间跑通,在这里记录一下。
为了完整对比,先后测试了Windows上静态库、动态库的编译和调用。简洁起见,本篇先记录Windows上C++静态库、动态库的编译,以及两种库在Windows上使用C++程序进行调用,后续再单独写一篇用Python调用Windows DLL的介绍。
1. 静态库的编译和使用
1.1 静态库的编译
首先创建Visual Studio静态库项目,我用的Visual Studio 2022,创建界面如下:
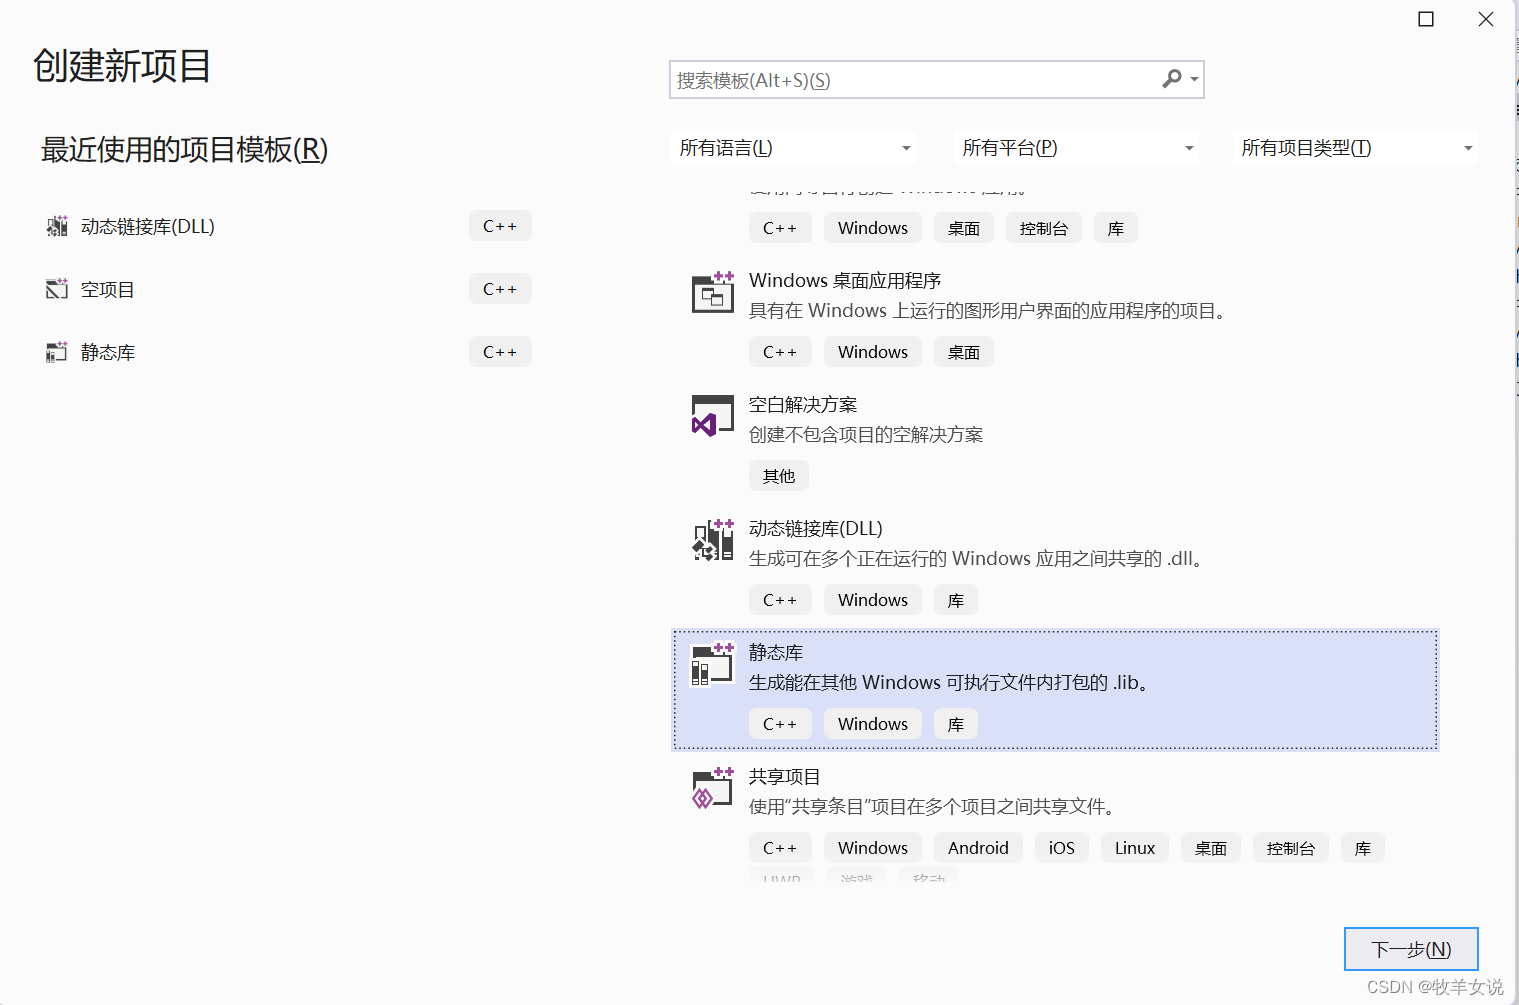
选择“静态库”,下一步,填写项目名称,项目位置,然后创建,如下图所示。
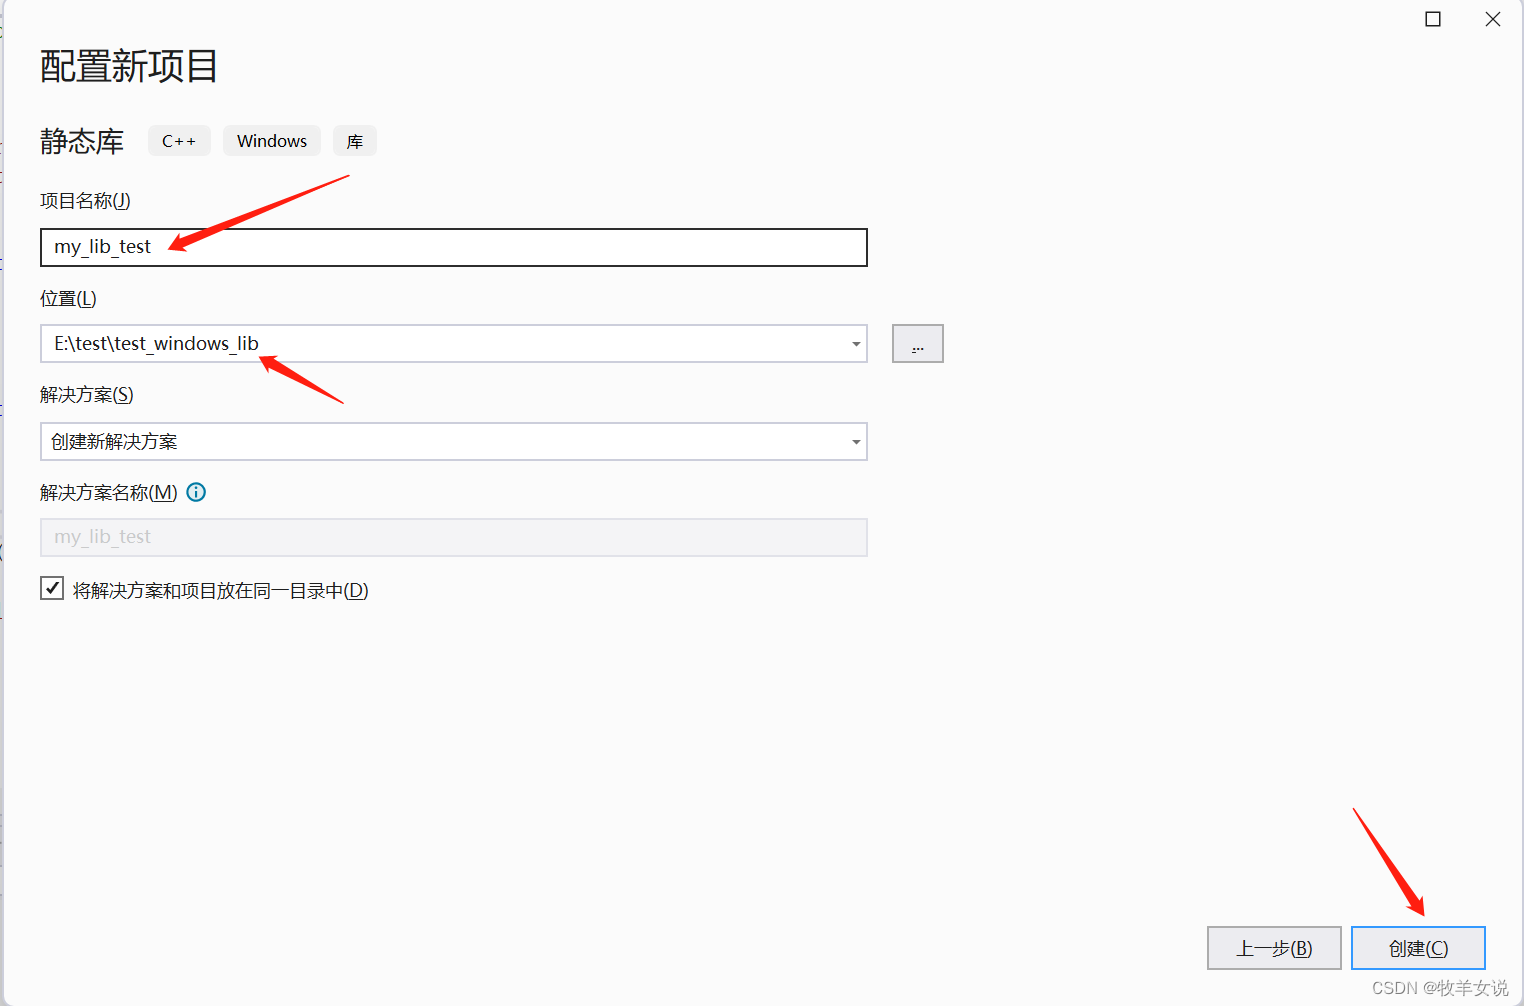 创建完成后,为我们要编译的静态库添加头文件和cpp主体文件。我的demo头文件如下:
#pragma once

#ifndef __MY_LIB_TEST_H__
#define __MY_LIB_TEST_H__

#include <iostream>

using namespace std;

int add(int x, int y);
int sub(int x, int y);
void print_result(int result);

#endif
对应的cpp文件如下:
// my_lib_test.cpp : 定义静态库的函数。
//

#include "pch.h"
#include "framework.h"
#include "my_lib_test.h"


int add(int x, int y)
{
	return x + y;
}

int sub(int x, int y)
{
	return x - y;
}

void print_result(int result)
{
	cout << "Result is " << result << endl;
}
编译成功后,在当前项目的x64/Release目录下,我们可以看到生成的lib文件:
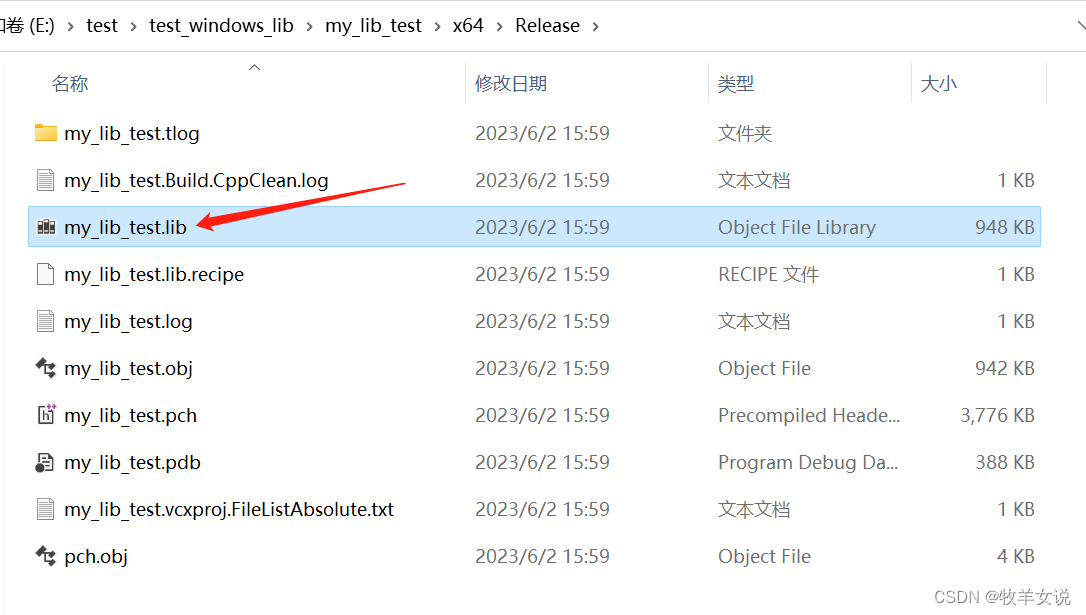
ps:我在工程中设置的是Release模式,也可以设置Debug,在不同模式下生成的库,在调用时也需要使用相应的模式。
1.2 静态库的调用
静态库的调用可以有两种方式。
第一种方式,通过#pragma comment(lib, "xxx.lib")来加载所需要的静态库。
这种方式相对简单,只需要在代码中指定要加载的静态库名称,在引用外部库比较少时相对方便一些;缺点是需要改代码并重新编译。
新建空项目,并在其中添加测试代码,test_call_lib.cpp:
#include <iostream>
#include "my_lib_test.h"

// The first method to call lib
#pragma comment(lib, "my_lib_test.lib")

int main()
{
	int sum = add(10, 20);
	int diff = sub(300, 100);

	print_result(sum);
	print_result(diff);

	return 0;
}
将在1.1步骤中生成的静态库my_lib_test.lib和它的头文件my_lib_test.h拷贝到新工程目录下,
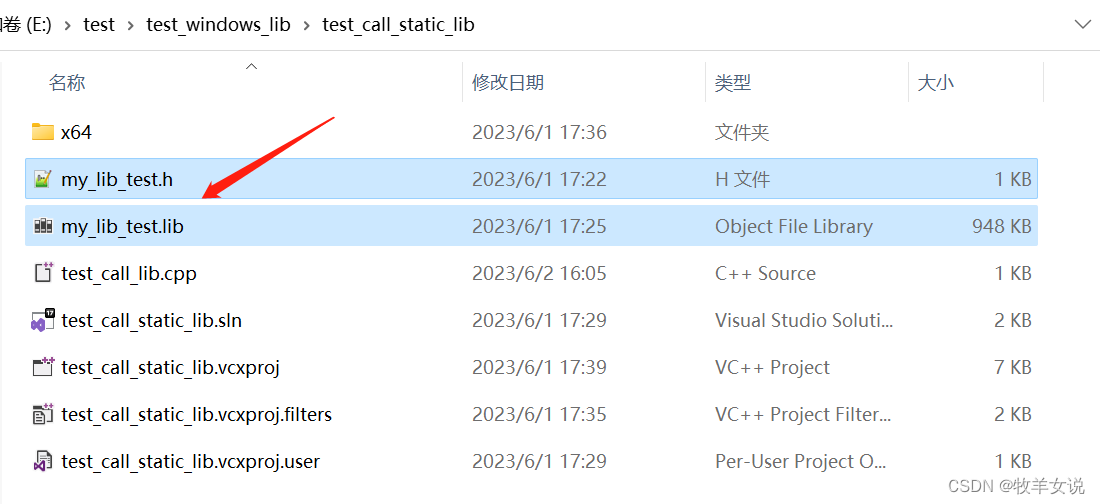
编译通过后,执行结果如下:

第二种方式:在工程属性中指定头文件和库文件。
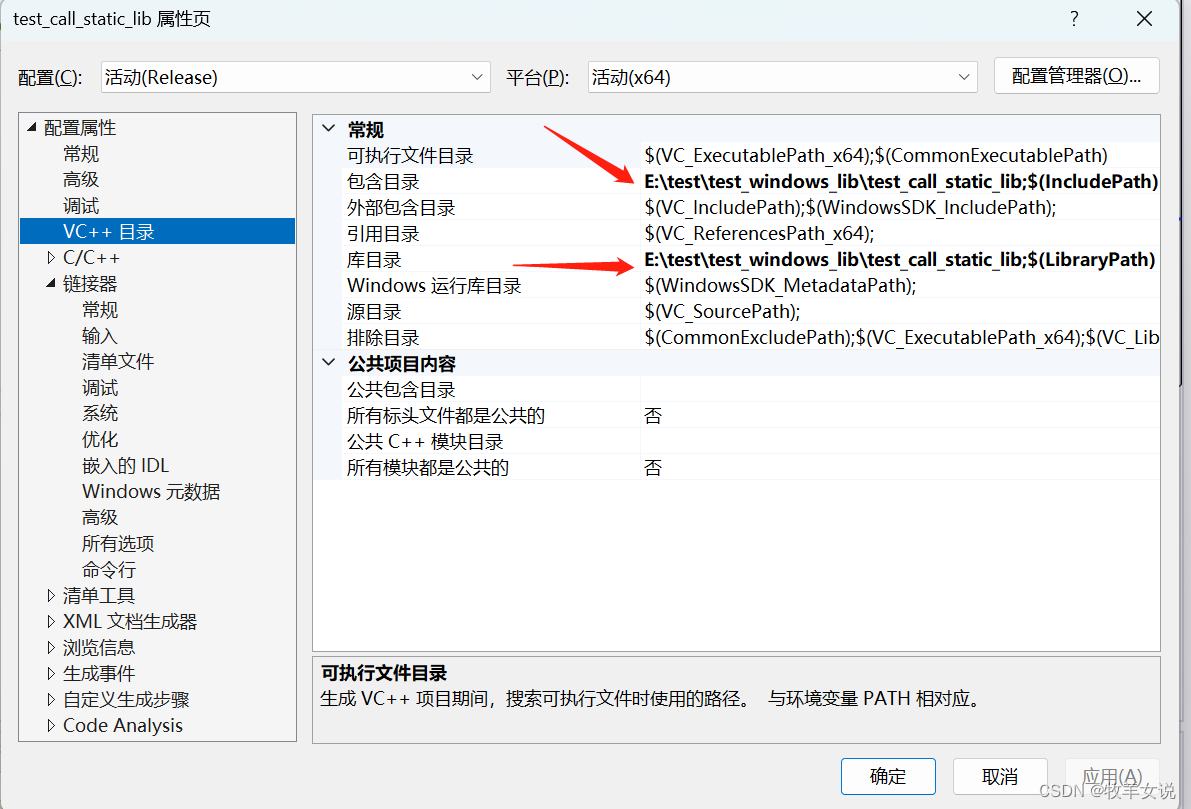
该方式不使用#pragma comment(lib, "xxx.lib"),二是直接在工程属性中指定依赖的头文件、库文件,设置方式如下:
在属性页“VC++目录”中,设置“包含目录”和“库目录”,由于我们已经把头文件和库文件拷贝到当前工程目录下,所以这里直接设置成当前工程目录即可。
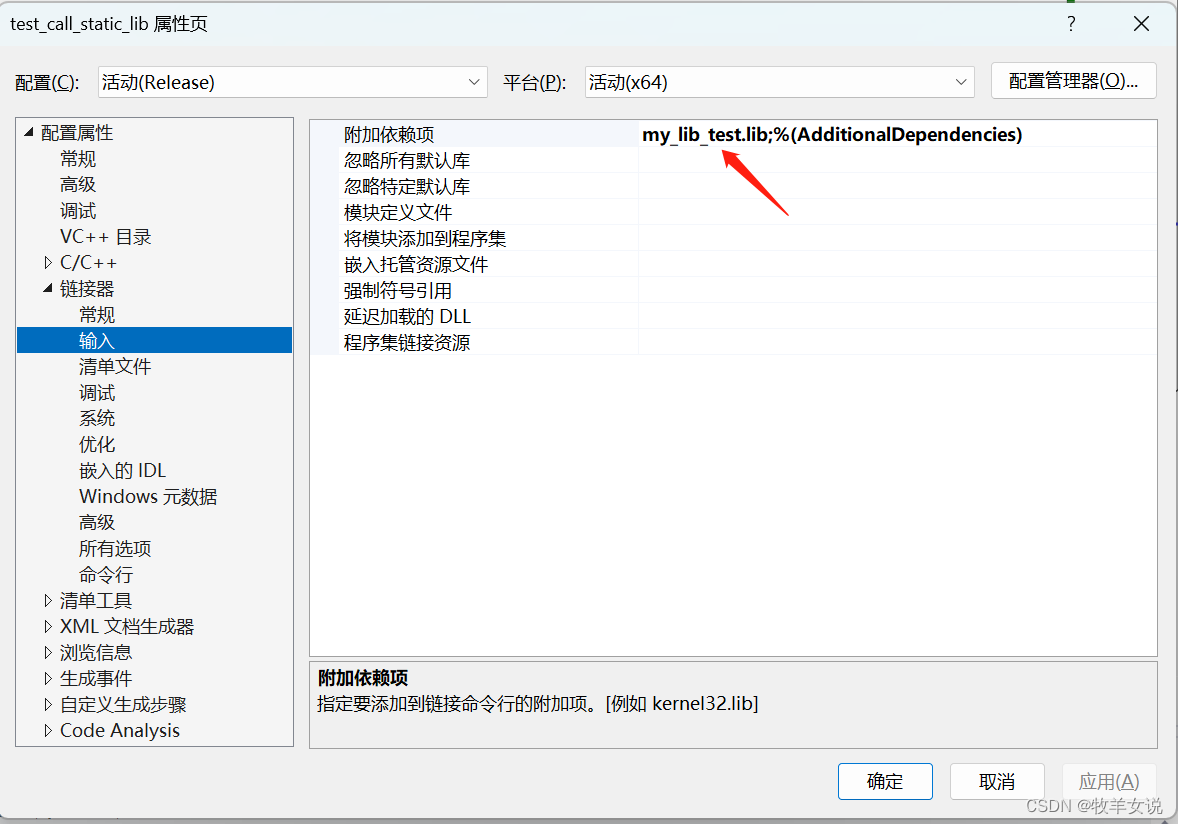
接下来,在属性页的“链接器”—>“输入”—>“附加依赖项”设置需要调用的lib库文件:
设置完成后,正常编写代码,编译执行即可。本人的调用代码如下,与第一种方式相比,少了#pragma comment(lib, "xxx.lib")语句。
#include <iostream>
#include "my_lib_test.h"

int main()
{
	int sum = add(10, 20);
	int diff = sub(300, 100);

	print_result(sum);
	print_result(diff);

	return 0;
}
2. 动态库的编译和使用
动态库相较于静态库的优势是,可以在程序运行时,调用到相应的库函数的时候,才会加载动态库,而不是像静态库那样在编译阶段就将库加载到程序中。由于不需要预先加载,使用动态库可以使得编译出来的可执行文件不至于过大。
2.1 动态库的编译
动态库的编译有两种方式,第一种是通过模块描述文件.def文件进行动态库的生成;第二种是通过__declspec(dllexport) 的方式。
1. 使用模块定义文件.def生成DLL
与静态库编译类似,我们首先需要建立一个动态链接库工程:
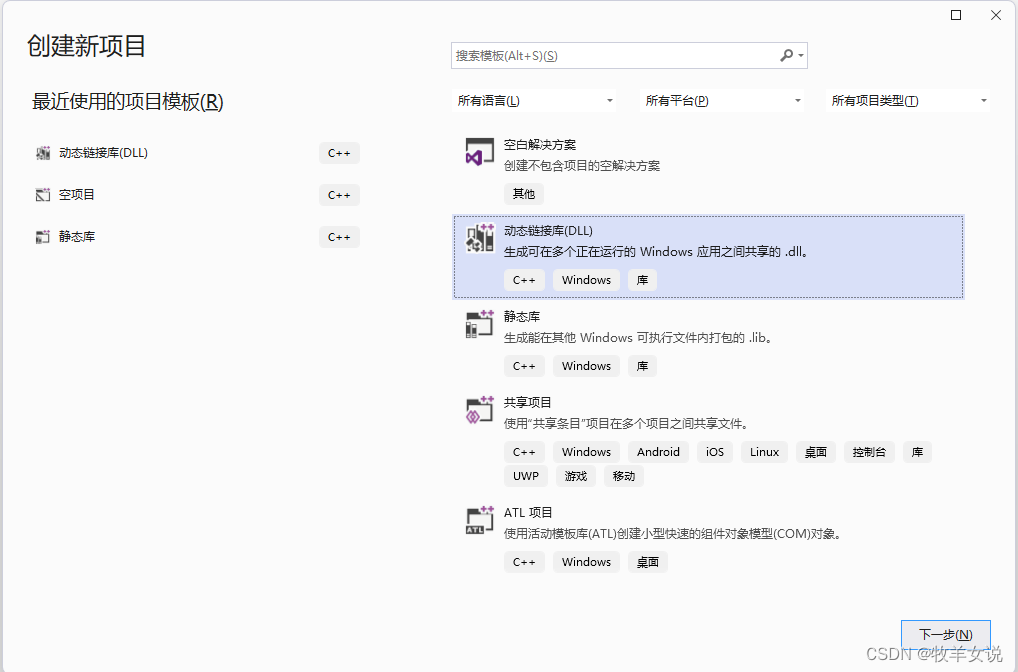
为该工程命名,并指定它的位置:
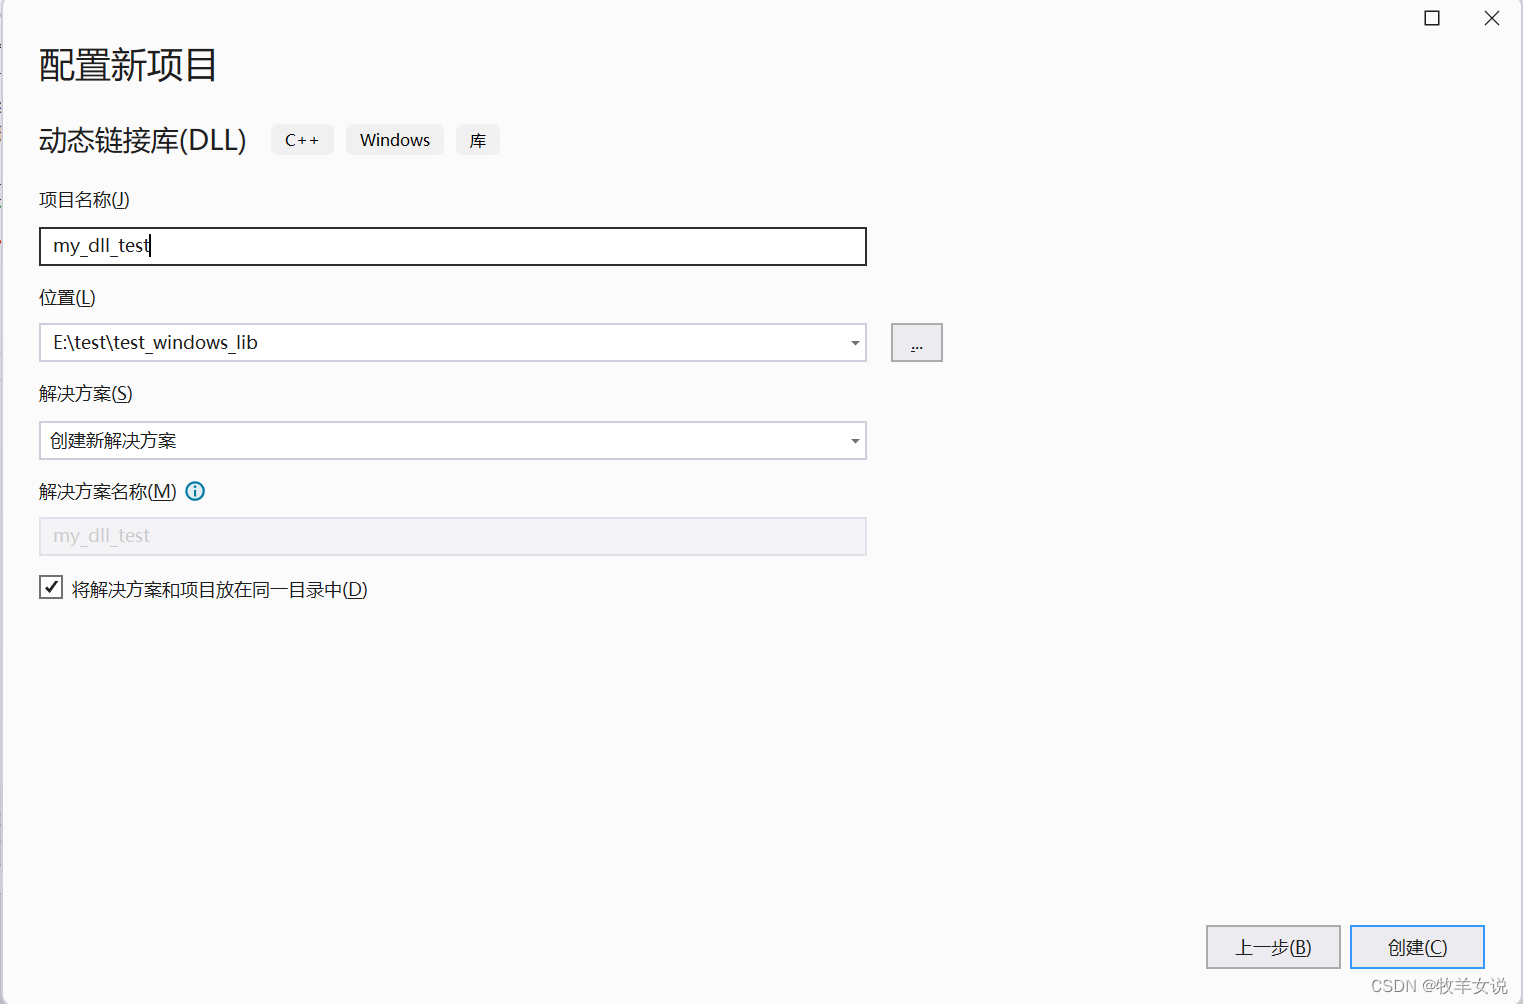
创建完成,添加代码代码。
头文件my_dll_test.h:
#pragma once
#ifndef _DLL_TEST_H_
#define _DLL_TEST_H_

#include <iostream>


void hello_world();
int add(int x, int y);
int sub(int x, int y);
void print_result(int x);

#endif
cpp文件my_dll_test.cpp:
#include "pch.h"
#include "framework.h"
#include "my_dll_test.h"

void hello_world()
{
	std::cout << "Hello world!" << std::endl;
}

int add(int x, int y)
{
	return x + y;
}

int sub(int x, int y)
{
	return x - y;
}

void print_result(int x)
{
	std::cout << "The result is " << x << std::endl;
}
接着,我们还需要再添加一个描述模块定义的.def文件,my_dll_test.def:
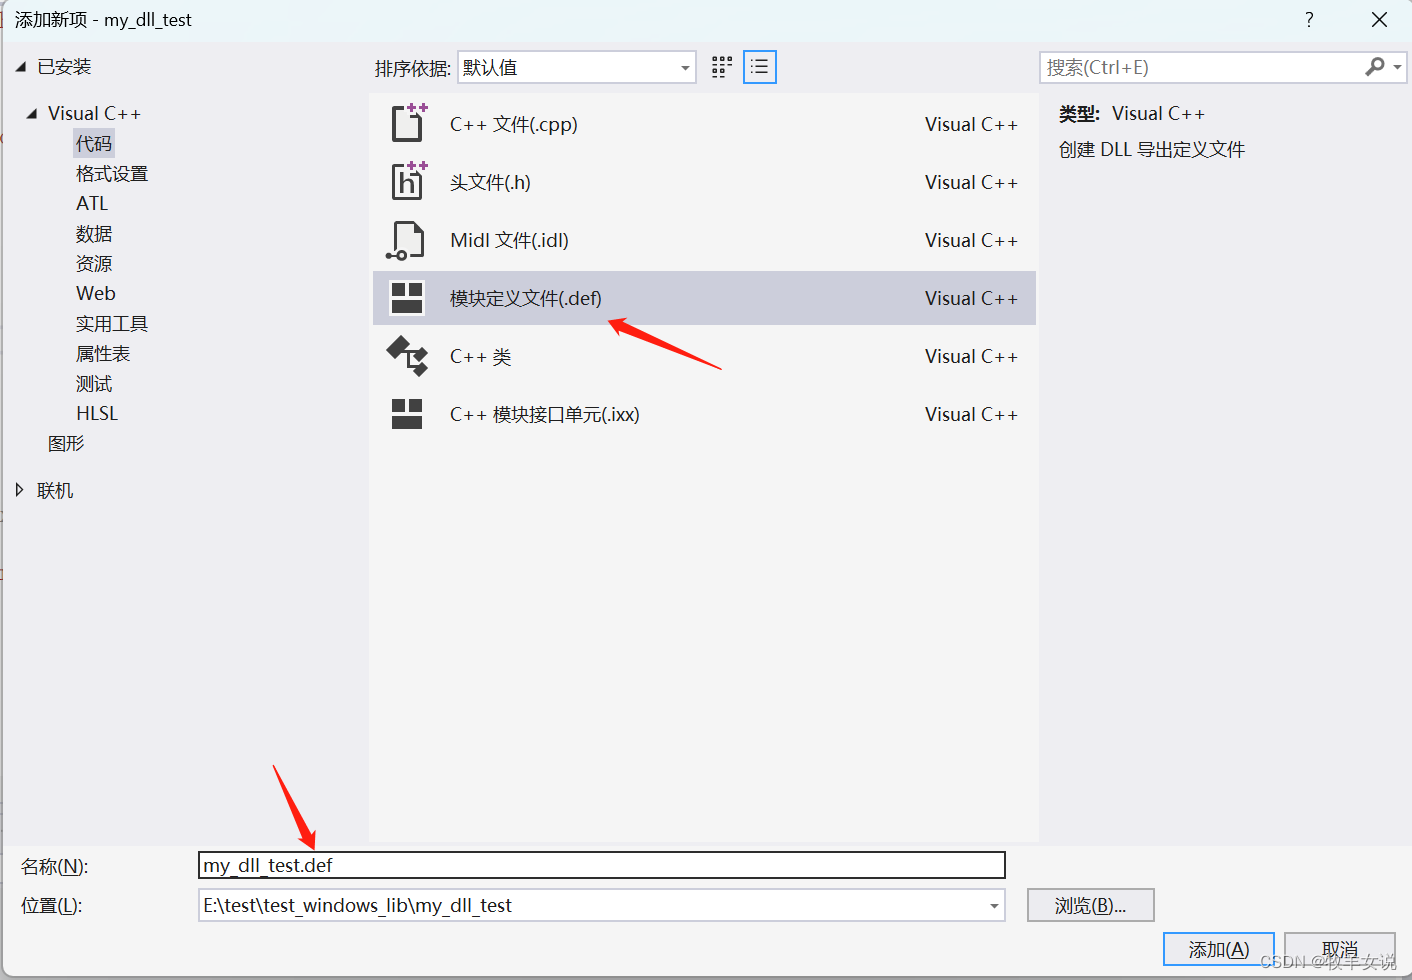
内容如下:
LIBRARY my_dll_test

EXPORTS
hello_world @1
add @2
sub @3
print_result @4
设置完成后,可以看到在工程属性—>“链接器”—>“输入”—>“模块定义文件”中,会自动出现我们刚才创建的my_dll_test.def文件:

编译工程,通过后,在工程目录x64/debug下面,会看到生成的dll文件和lib文件。(在工程编译时直接使用的Debug选项,也可以选择Release选项)
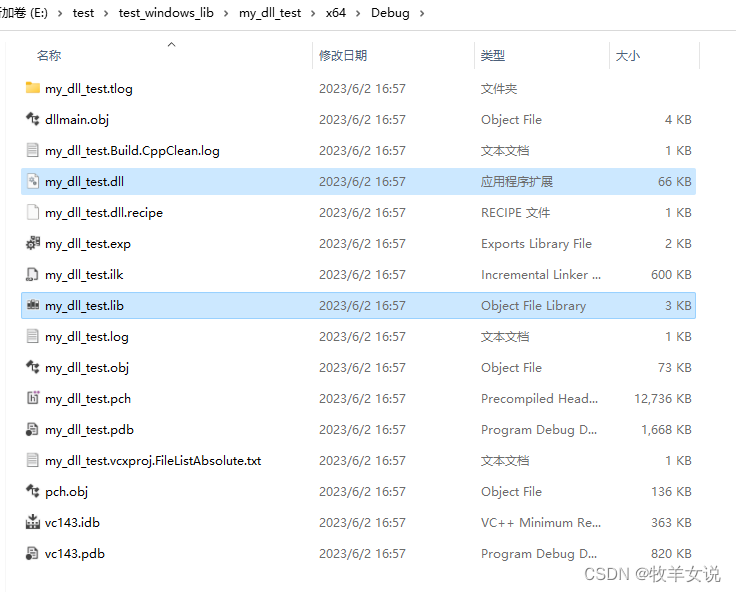
2. 使用__declspec(dllexport)方式生成DLL
除了使用模块定义文件的方式,还可以通过在代码中添加__declspec(dllexport)的方式来生成动态链接库。这种方式由于需要改动代码,只适合Windows开发,在代码需要跨平台时不是很方便,因此不推荐。这里简单说明一下用法。
在创建完动态链接库工程之后,添加cpp代码:
/*注意此处头文件包含顺序,iostream不能在pch.h之前,
否则会出现报错C2039 "cout"不是"std"的成员 */
#include "pch.h"
#include <iostream>


extern "C" __declspec(dllexport)
void hello_world()
{
	std::cout << "Hello world!" << std::endl;
}

extern "C" __declspec(dllexport)
int add(int x, int y)
{
	return x + y;
}

extern "C" __declspec(dllexport)
int sub(int x, int y)
{
	return x - y;
}

extern "C" __declspec(dllexport)
void print_result(int x)
{
	std::cout << "The result is " << x << std::endl;
}
代码添加完成后,直接编译即可。
2.2 动态库的调用
如果是使用.def文件生成的DLL库,调用方式有两种:隐式调用和显式调用。
1. 隐式调用
将.dll、.lib、.h文件拷贝到调用库文件的工程目录下,通过在调用代码中包含库的头文件、并通过#pragma comment(lib,"xxx.lib")加载动态链接库中的信息(注意,此处与静态库的调用不一样),实现对动态库DLL的调用,示例代码如下:
#include <iostream>
#include "my_dll_test.h"

#pragma comment(lib,"my_dll_test.lib")

using namespace std;

int main()
{
	hello_world();
	int sum = add(5, 10);
	int diff = sub(5, 10);
	print_result(sum);
	print_result(diff);

	return 0;
}
2. 显式调用
显式调用是借助Windows库的LoadLibrary来显式地加载DLL库,这种方式不需要注册.lib文件,且只在需要的地方加载DLL库即可。代价是代码略显复杂。
// explicit call
#include <iostream>
#include <windows.h>

int main()
{
	HINSTANCE hInst;
	hInst = LoadLibrary(L"my_dll_test.dll");

	// Test library function hello_world()
	typedef void(*Hello)();//函数指针
	Hello hello_world= (Hello)GetProcAddress(hInst, "hello_world");//从dll中加载函数进来
	hello_world();//运行函数

	// Test library function add()
	typedef int(*Add)(int, int);//函数指针
	Add add = (Add)GetProcAddress(hInst, "add");//从dll中加载函数进来
	int sum = add(100, 200);
	std::cout << "sum = " << sum << std::endl;

	// Test library function sub()
	typedef int(*Substract)(int, int);//函数指针
	Substract sub = (Substract)GetProcAddress(hInst, "sub");//从dll中加载函数进来
	int diff = sub(100, 200);
	std::cout << "diff = " << diff << std::endl;

	// Test library function print_result()
	typedef void(*PrintResult)(int);//函数指针
	PrintResult print_result = (PrintResult)GetProcAddress(hInst, "print_result");
	print_result(sum);
	print_result(diff);

	FreeLibrary(hInst);       //LoadLibrary后要记得FreeLibrary

	return 0;
}
3. __declspec(dllimport)调用
如果是__declspec(dllexport)方式生成的dll,需要使用对应的__declspec(dllimport)来导入动态库函数并调用。示例代码如下:
#include <iostream>

#pragma comment(lib,"my_dll_test.lib")

extern "C" __declspec(dllimport) void hello_world();
extern "C" __declspec(dllimport) int add(int x, int y);
extern "C" __declspec(dllimport) int sub(int x, int y);
extern "C" __declspec(dllimport) void print_result(int x);

using namespace std;

int main()
{
	hello_world();
	int sum = add(5, 10);
	int diff = sub(5, 10);
	print_result(sum);
	print_result(diff);

	return 0;
}
