Nginx 目录信息
图 为 windows 版本的。
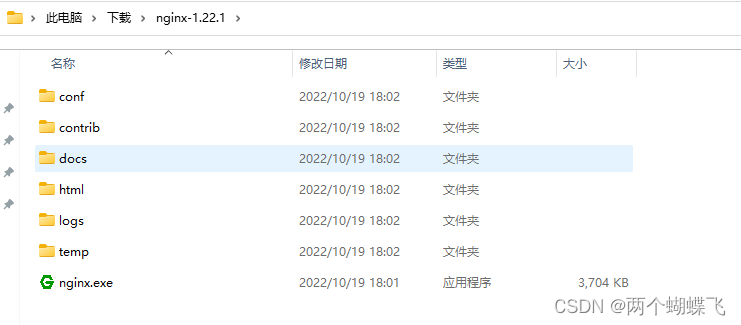
进入Nginx的主目录我们可以看到这些文件夹
client_body_temp conf fastcgi_temp html logs proxy_temp sbin scgi_temp uwsgi_temp
其中这几个文件夹在刚安装后是没有的,主要用来存放运行过程中的临时文件
client_body_temp fastcgi_temp proxy_temp scgi_temp
目录信息:
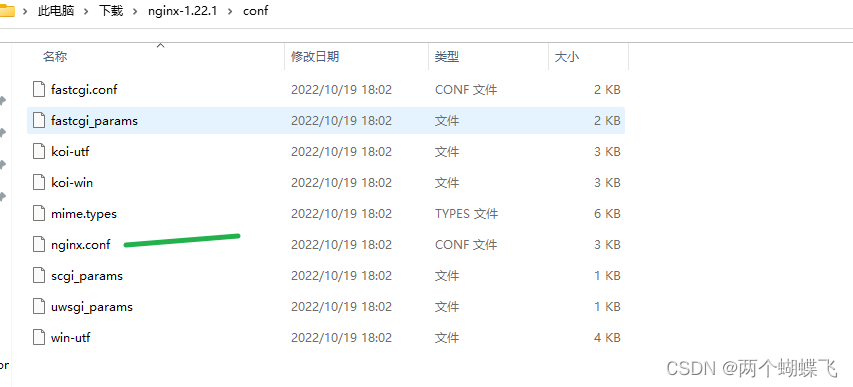
conf
用来存放配置文件相关 , 主要关注 nginx.conf
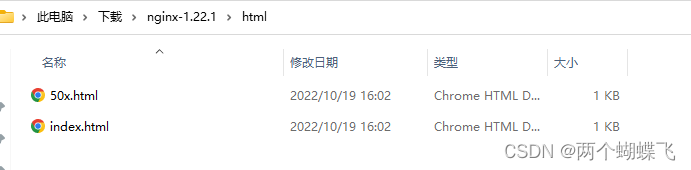
html
用来存放静态文件的默认目录 html、css等
sbin
nginx的主程序
logs
存放日志信息
nginx.conf 默认配置
#user nobody;
worker_processes 1;
#error_log logs/error.log;
#error_log logs/error.log notice;
#error_log logs/error.log info;
#pid logs/nginx.pid;
events {
worker_connections 1024;
}
http {
include mime.types;
default_type application/octet-stream;
#log_format main '$remote_addr - $remote_user [$time_local] "$request" '
# '$status $body_bytes_sent "$http_referer" '
# '"$http_user_agent" "$http_x_forwarded_for"';
#access_log logs/access.log main;
sendfile on;
#tcp_nopush on;
#keepalive_timeout 0;
keepalive_timeout 65;
#gzip on;
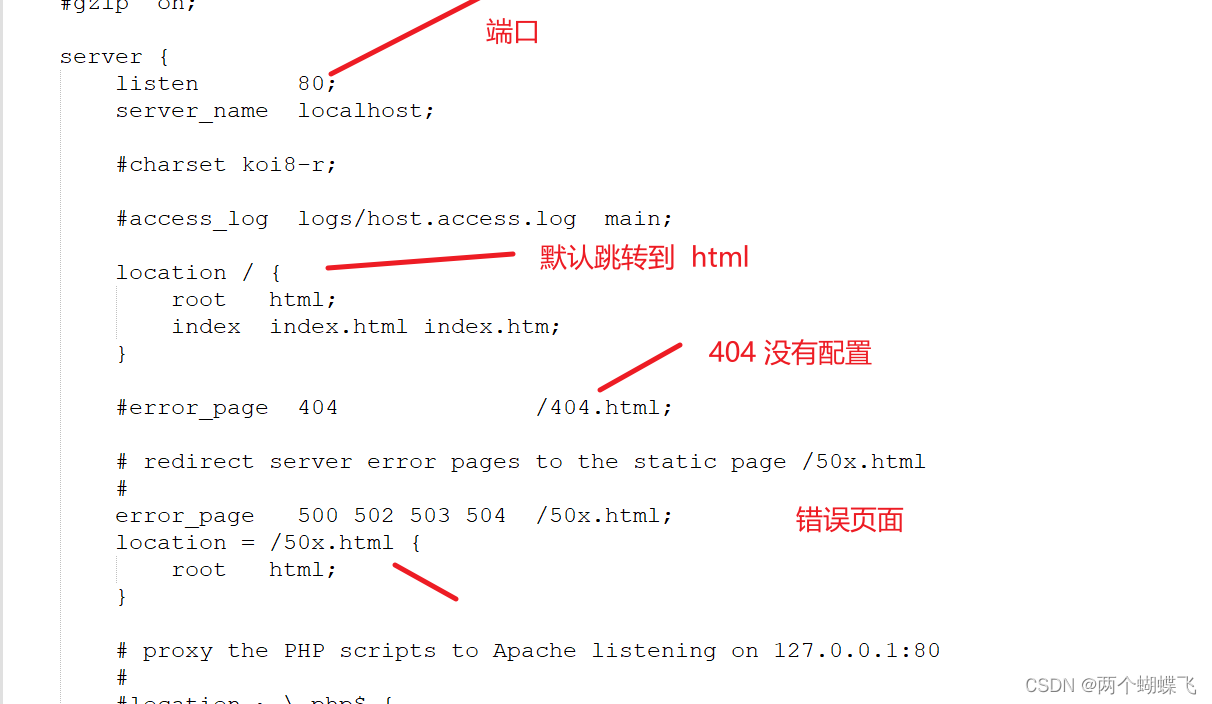
server {
listen 80;
server_name localhost;
#charset koi8-r;
#access_log logs/host.access.log main;
location / {
root html;
index index.html index.htm;
}
#error_page 404 /404.html;
# redirect server error pages to the static page /50x.html
#
error_page 500 502 503 504 /50x.html;
location = /50x.html {
root html;
}
# proxy the PHP scripts to Apache listening on 127.0.0.1:80
#
#location ~ \.php$ {
# proxy_pass http://127.0.0.1;
#}
# pass the PHP scripts to FastCGI server listening on 127.0.0.1:9000
#
#location ~ \.php$ {
# root html;
# fastcgi_pass 127.0.0.1:9000;
# fastcgi_index index.php;
# fastcgi_param SCRIPT_FILENAME /scripts$fastcgi_script_name;
# include fastcgi_params;
#}
# deny access to .htaccess files, if Apache's document root
# concurs with nginx's one
#
#location ~ /\.ht {
# deny all;
#}
}
# another virtual host using mix of IP-, name-, and port-based configuration
#
#server {
# listen 8000;
# listen somename:8080;
# server_name somename alias another.alias;
# location / {
# root html;
# index index.html index.htm;
# }
#}
# HTTPS server
#
#server {
# listen 443 ssl;
# server_name localhost;
# ssl_certificate cert.pem;
# ssl_certificate_key cert.key;
# ssl_session_cache shared:SSL:1m;
# ssl_session_timeout 5m;
# ssl_ciphers HIGH:!aNULL:!MD5;
# ssl_prefer_server_ciphers on;
# location / {
# root html;
# index index.html index.htm;
# }
#}
}
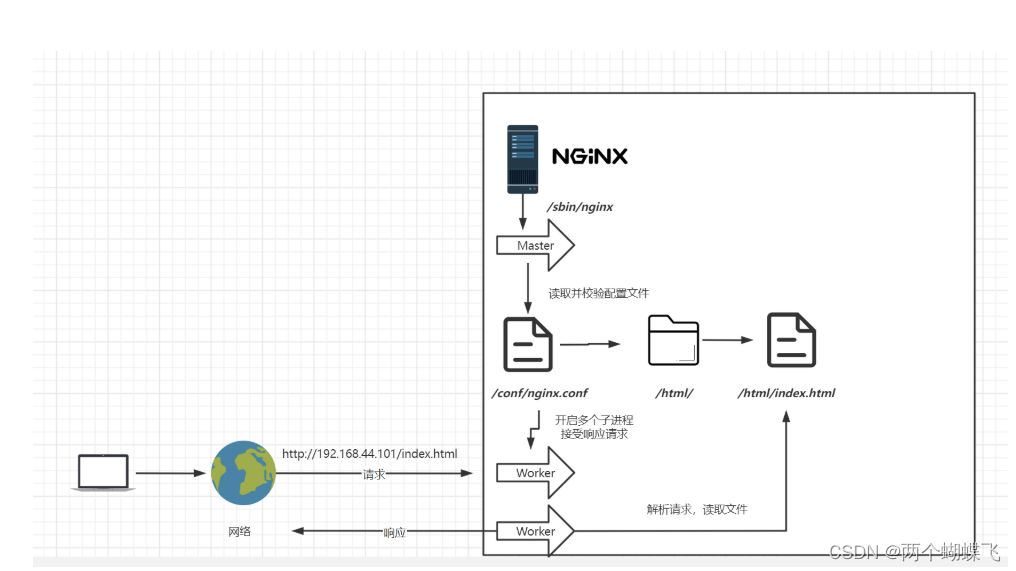
基本运行原理
Nginx 配置使用
配置语法
nginx.conf 结构图可以这样概括:
main        # 全局配置,对全局生效
├── events  # 配置影响 Nginx 服务器或与用户的网络连接
├── http    # 配置代理,缓存,日志定义等绝大多数功能和第三方模块的配置
│   ├── upstream # 配置后端服务器具体地址,负载均衡配置不可或缺的部分
│   ├── server   # 配置虚拟主机的相关参数,一个 http 块中可以有多个 server 块
│   ├── server
│   │   ├── location  # server 块可以包含多个 location 块,location 指令用于匹配 uri
│   │   ├── location
│   │   └── ...
│   └── ...
└── ...
一个 Nginx 配置文件的结构就像 nginx.conf 显示的那样,配置文件的语法规则:
配置文件由指令与指令块构成;
每条指令以 ; 分号结尾,指令与参数间以空格符号分隔;
指令块以 {} 大括号将多条指令组织在一起;
include 语句允许组合多个配置文件以提升可维护性;
使用 # 符号添加注释,提高可读性;
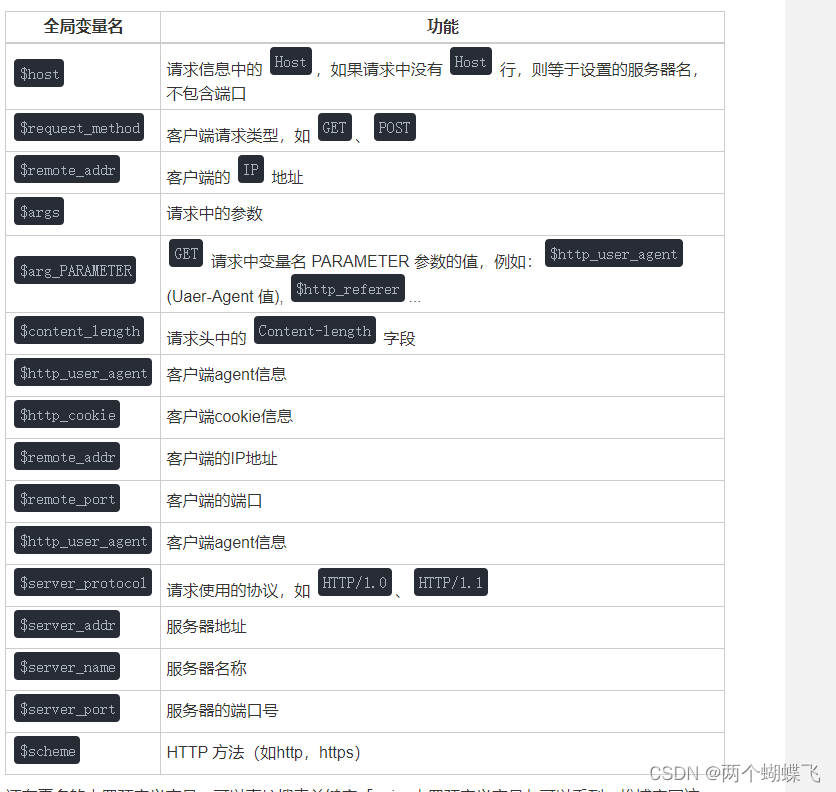
使用 $ 符号使用变量;
部分指令的参数支持正则表达式;
Nginx 的典型配置:
user  nginx;                        # 运行用户,默认即是nginx,可以不进行设置
worker_processes  1;                # Nginx 进程数,一般设置为和 CPU 核数一样
error_log  /var/log/nginx/error.log warn;   # Nginx 的错误日志存放目录
pid        /var/run/nginx.pid;      # Nginx 服务启动时的 pid 存放位置

events {
    use epoll;     # 使用epoll的I/O模型(如果你不知道Nginx该使用哪种轮询方法,会自动选择一个最适合你操作系统的)
    worker_connections 1024;   # 每个进程允许最大并发数
}

http {   # 配置使用最频繁的部分,代理、缓存、日志定义等绝大多数功能和第三方模块的配置都在这里设置
    # 设置日志模式
    log_format  main  '$remote_addr - $remote_user [$time_local] "$request" '
                      '$status $body_bytes_sent "$http_referer" '
                      '"$http_user_agent" "$http_x_forwarded_for"';

    access_log  /var/log/nginx/access.log  main;   # Nginx访问日志存放位置

    sendfile            on;   # 开启高效传输模式
    tcp_nopush          on;   # 减少网络报文段的数量
    tcp_nodelay         on;
    keepalive_timeout   65;   # 保持连接的时间,也叫超时时间,单位秒
    types_hash_max_size 2048;

    include             /etc/nginx/mime.types;      # 文件扩展名与类型映射表
    default_type        application/octet-stream;   # 默认文件类型

    include /etc/nginx/conf.d/*.conf;   # 加载子配置项

    server {
    	listen       80;       # 配置监听的端口
    	server_name  localhost;    # 配置的域名

    	location / {
    		root   /usr/share/nginx/html;  # 网站根目录
    		index  index.html index.htm;   # 默认首页文件
    		deny 172.168.22.11;   # 禁止访问的ip地址,可以为all
    		allow 172.168.33.44; # 允许访问的ip地址,可以为all
    	}

    	error_page 500 502 503 504 /50x.html;  # 默认50x对应的访问页面
    	error_page 400 404 error.html;   # 同上
    }
}
参考链接: https://www.nginx.org.cn/article/detail/545
html 404 配置
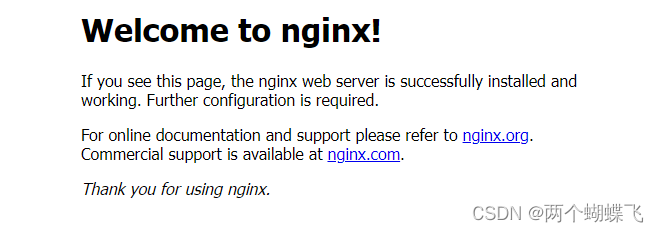
html 目录下 默认有 index.html 和 50x.html 页面
输入网址: http://localhost/
添加 404 页面
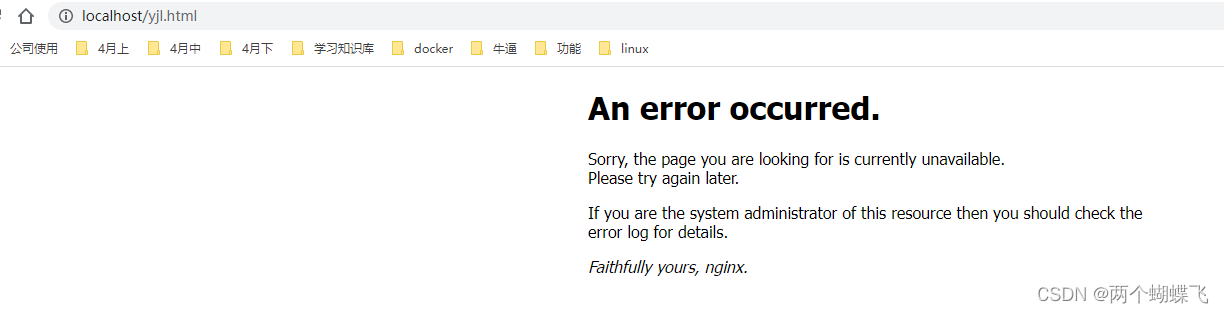
输入一个不存在的网址: http://localhost/yjl.html


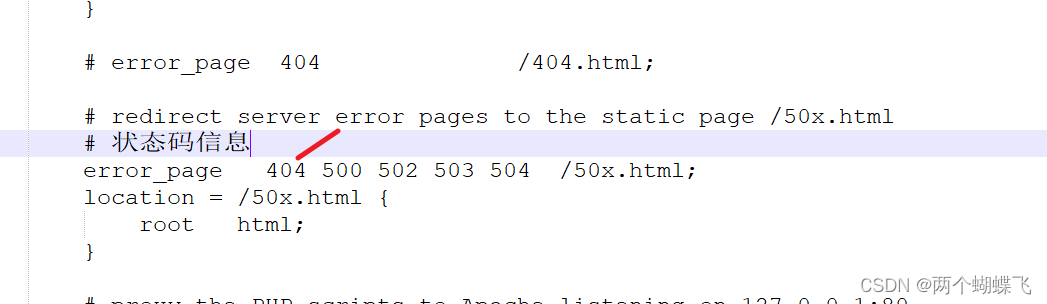
将 #error_page 404 /404.html; 放开 , 并且在 html 页面 编写一个 404.html 信息
再访问网址: http://localhost/yjl.html

404 跳转到 50x.html
404 跳转到首页
  location / {
            root   html;
            index  index.html index.htm;
			# 试图访问某个文件, 如果在 就使用原文件,如果不在,就用  /index.html
			try_files $uri $uri/ /index.html;
        }
再访问网址: http://localhost/yjl.html , 跳转到 index.html 页面

html 页面配置
往 html 页面里面放置一个 js 项目 Stock_Page, 那么访问时可以:
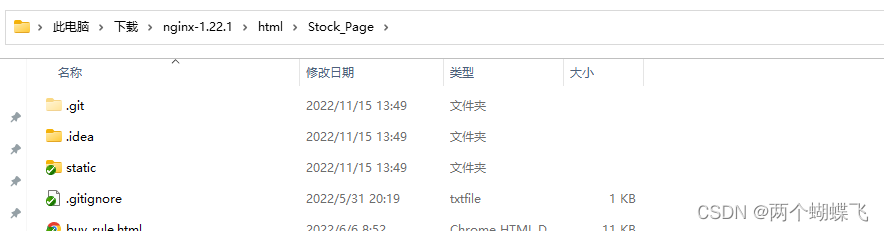
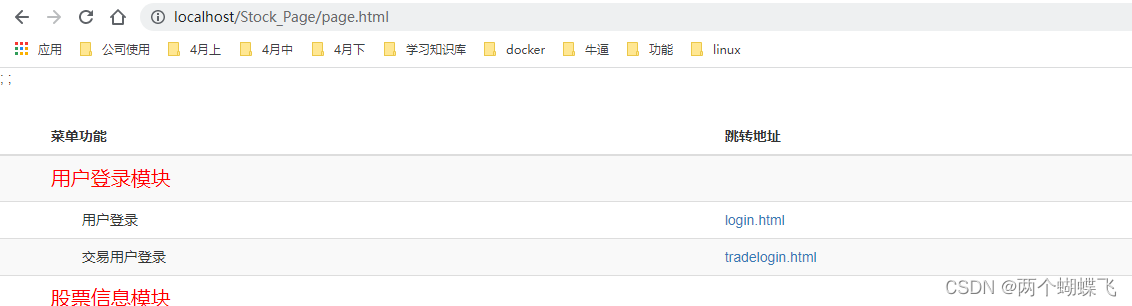
http://localhost/Stock_Page/page.html
root 配置静态资源
上面是将 Stock_Page 项目放置在 html 目录下, 实际应用中,一般都是将 项目 单独放置, 不放置在 html 下。 进行动态的配置。
Stock_Page 放置在 目录 : C:\Users\20481\Downloads\nginx-1.22.1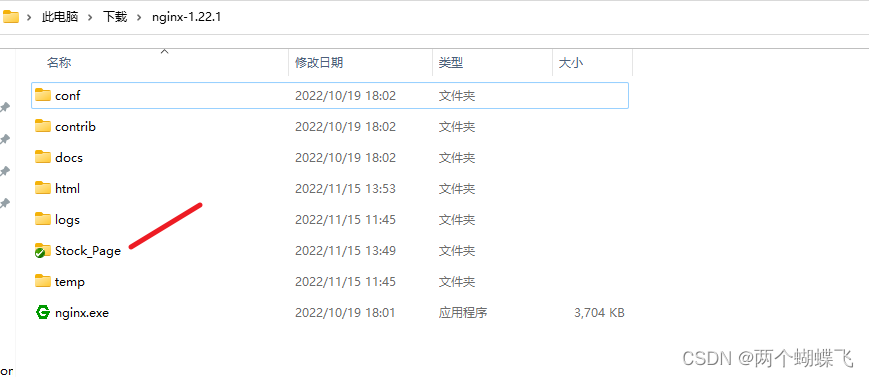
    	location /Stock_Page {
			root C:\\Users\\20481\\Downloads\\nginx-1.22.1;
			index page.html page.htm;
		}
        location / {
            root   html;
            index  index.html index.htm;
			# 试图访问某个文件, 如果在 就使用原文件,如果不在,就用  /index.html
			try_files $uri $uri/ /index.html;
        }
输入 网址 : http://localhost/Stock_Page/page.html 可以查看页面
使用 root 时, 是 location /访问地址 , 对应的 就是 文件夹名, 这两个要一一对应。
alias 配置静态资源
location /Stock_Page {
			root C:\\Users\\20481\\Downloads\\nginx-1.22.1;
			index page.html page.htm;
		}
		location /Stock {
			alias C:\\Users\\20481\\Downloads\\nginx-1.22.1\\Stock_Page;
			index page.html page.htm;
		}
        location / {
            root   html;
            index  index.html index.htm;
			# 试图访问某个文件, 如果在 就使用原文件,如果不在,就用  /index.html
			try_files $uri $uri/ /index.html;
        }
使用 alias 时 , location /网址 只是一个引入, alias 会找真实的地址路径。
http://localhost/Stock/page.html
即可以访问信息。
root 和 alias 的区别:
root用来设置根目录,而alias在接受请求的时候在路径上不会加上location
1)alias指定的目录是准确的,即location匹配访问的path目录下的文件直接是在alias目录下查找的;
2)root指定 的目录是location匹配访问的path目录的上一级目录,这个path目录一定要是真实存在root指定目录下的;
3)使用 alias标签的目录块中不能使用rewrite的break(具体原因不明);
另外,alias指定的目录后面必须要加上"/“符 号!!
4)alias虚拟目录配置中,location匹配的path目录如果后面不带”/“,
那么访问的url地址中这个path目录后 面加不加”/“不影响访问,访问时它会自动加上”/“;
但是如果location匹配的path目录后面加上”/“,那么访问的url地 址中这个path目录必须要加上”/“,
访问时它不会自动加上”/“。如果不加上”/“,访问就会失败!
5)root目录配置 中,location匹配的path目录后面带不带”/",都不会影响访问。
配置静态资源
location ~ ^/(images|js|css|flash|media|static)/ {
    root C:\\Users\\20481\\Downloads\\nginx-1.22.1\\staticFile;
    #过期30天,静态文件不怎么更新,过期可以设大一点,如果频繁更新,则可以设置得小一点。
    expires 30d;
}
配置动态反向代理
location /StockApi {
    # 把 /stock 路径下的请求转发给真正的后端服务器
    rewrite  ^/(.*)$ /$1 break;
    proxy_pass http://127.0.0.1:8088$request_uri;
    fastcgi_buffers 8 128k;
    send_timeout 60;
    client_max_body_size     100m;
}
这样,访问 /StockApi/user/1 /StockApi/stock/002415
就可以访问到对应的后端接口请求信息。
location 配置规则
使用一个location 使用正则 location 前缀
/ 通用匹配,任何请求都会匹配到。
= 精准匹配,不是以指定模式开头
~ 正则匹配,区分大小写
~* 正则匹配,不区分大小写
^~ 非正则匹配,匹配以指定模式开头的location
location匹配顺序:
多个正则location直接按书写顺序匹配,成功后就不会继续往后面匹配
普通(非正则)location会一直往下,直到找到匹配度最高的(最大前缀匹配)
当普通location与正则location同时存在,如果正则匹配成功,则不会再执行普通匹配
所有类型location存在时,“=”匹配 > “^~”匹配 > 正则匹配 > 普通(最大前缀匹配)
配置负载均衡
	upstream myproxy{
		server localhost:8088;
		server 127.0.0.1:8088;
	}
    server {
        listen       80;
        server_name  localhost;

        #charset koi8-r;

        #access_log  logs/host.access.log  main;


		location /StockApi {
			# 把 /stock 路径下的请求转发给真正的后端服务器
			rewrite  ^/(.*)$ /$1 break;
			proxy_pass http://myproxy$request_uri;
			fastcgi_buffers 8 128k;
			send_timeout 60;
			client_max_body_size     100m;
		}
}
负载均衡配置权重
	upstream myproxy{
		server localhost:8088 weight = 10 down;
		server 127.0.0.1:8088 weight = 1;
		server 192.168.100.54:8088 weight = backup;
	}
down:表示当前的server暂时不参与负载
weight:默认为1.weight越大,负载的权重就越大。
backup: 其它所有的非backup机器down或者忙的时候,请求backup机器。
upstream myproxy{
		server localhost:8088 weight = 10 down;
		server 127.0.0.1:8088 weight = 10 max_fails=5 fail_timeout=10s;
		server 127.0.0.1:8088 weight = 10 max_fails=5 fail_timeout=10s;
		server 192.168.100.54:8088 weight = backup;
	}
参考链接: https://blog.csdn.net/LL845876425/article/details/97621365
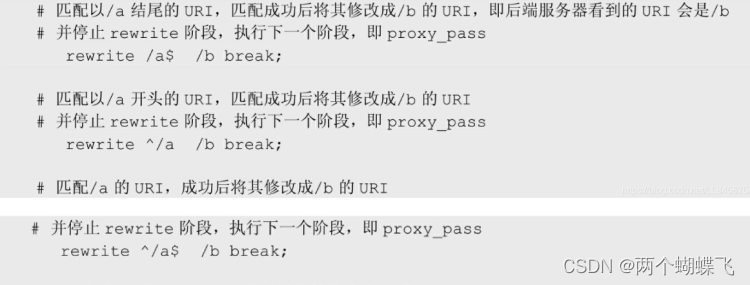
rewrite 使用
rewrite语法格式及参数语法:
rewrite是实现URL重写的关键指令,根据regex (正则表达式)部分内容, 重定向到replacement,结尾是flag标记。
rewrite [flag];
关键字 正则 替代内容 flag标记
关键字:其中关键字error_log不能改变
正则:perl兼容正则表达式语句进行规则匹配
替代内容:将正则匹配的内容替换成replacement
flag标记:rewrite支持的flag标记
rewrite参数的标签段位置:
server,location,if
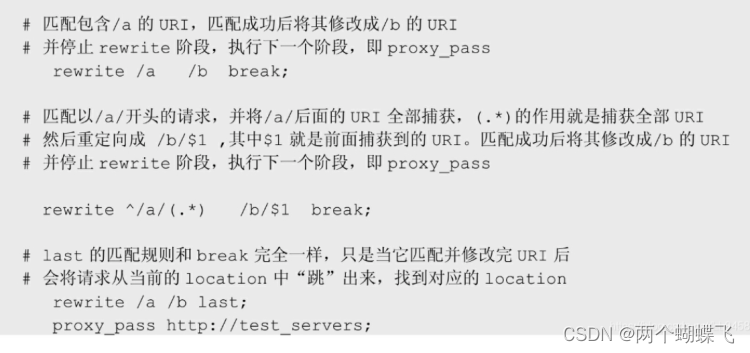
flag标记说明:
last #本条规则匹配完成后,继续向下匹配新的location URI规则
break #本条规则匹配完成即终止,不再匹配后面的任何规则
redirect #返回302临时重定向,浏览器地址会显示跳转后的URL地址
permanent #返回301永久重定向,浏览器地址栏会显示跳转后的URL地址
实例
rewrite ^/([0-9]+).html$ /index.jsp?pageNum=$1 break;
$1 表示正则匹配符合的 第一个值。
如 请求信息匹配, 后端接口请求:
  location /StockApi {
                # 把 /stock 路径下的请求转发给真正的后端服务器
                rewrite  ^/(.*)$ /$1 break;
                proxy_pass http://127.0.0.1:8088$request_uri;
                fastcgi_buffers 8 128k;
                send_timeout 60;
                client_max_body_size     100m;
        }
/StockApi 后面所有的信息, 当成一个参数 /$1
参考链接: https://blog.csdn.net/LL845876425/article/details/100999186
域名跳转
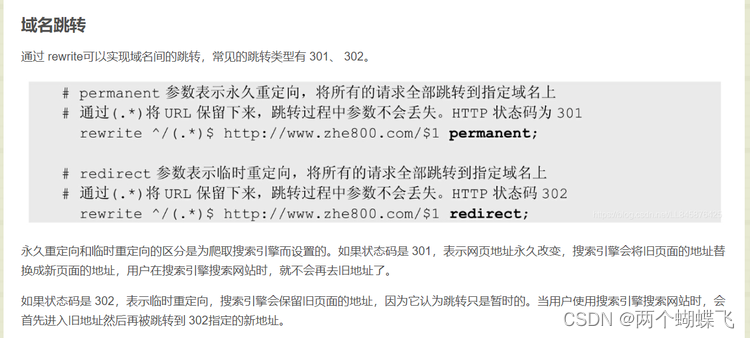
rewrite ^/(.*) http://www.yueshushu.top/$1 permanent;


rewrite ^/(.*) http://www.yueshushu.top/$1 redirect;
post 请求方法跳转
return 307 http://www.yueshushu.top/$request_uri;

return 308 http://www.yueshushu.top/$request_uri;
try_files 匹配规则
寻找某个路径, 如果存在,则使用原路径, 如果不存在,则使用新的路径。
如 html 404 配置中, 如果路径不存在,则跳转到首页
try_files $uri $uri/ /index.html;
如果不存在,则 找默认的图片
try_files $uri $uri/ /images/logo.jpg;
配置 html 带不带均可以访问
如访问路径 , 有一个路径 /dev/md5.html, 希望访问 /dev/md5 可以请求到, /dev/md5.html 也可以请求到
可以这么配置
try_files $uri $uri/ $uri.html u r i . p h p uri.php uri.phpis_args$query_string;
location /dev {
        try_files $uri $uri/ $uri.html $uri.php$is_args$query_string;
        root /etc/nginx;
            index index.html index.htm;
        }
防盗链配置
访问 : https://www.yueshushu.top/logo.jpg
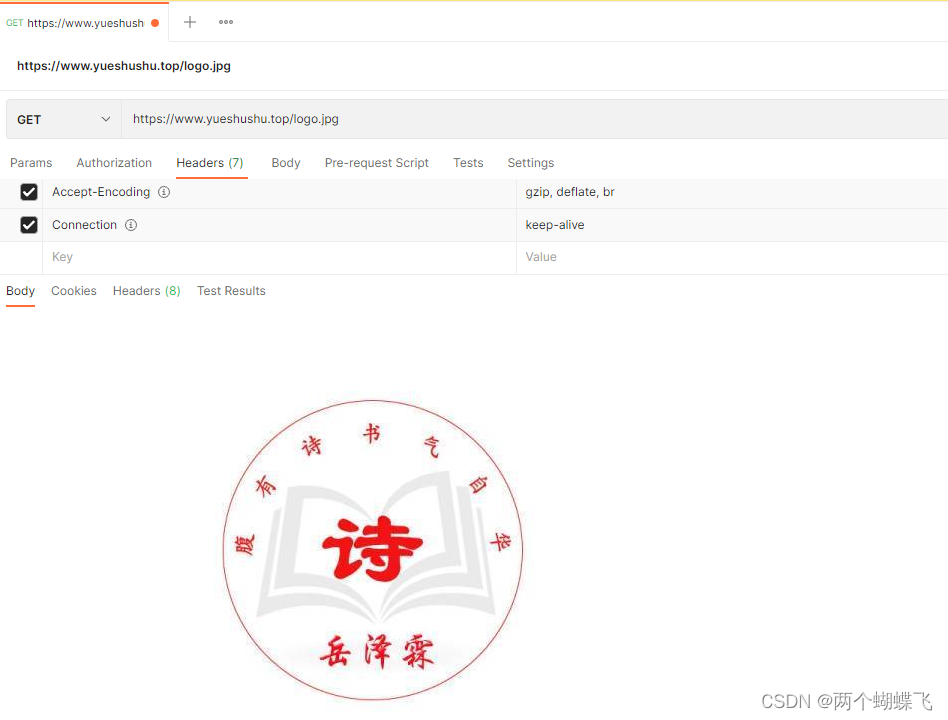
请求头不携带任何信息都可以访问
valid_referers none | blocked | server_names | strings …;
none, 检测 Referer 头域不存在的情况。
blocked,检测 Referer 头域的值被防火墙或者代理服务器删除或伪装的情况。这种情况该头域的值不以 “http://” 或 “https://” 开头。
server_names ,设置一个或多个 URL ,检测 Referer 头域的值是否是这些 URL 中的某一个。
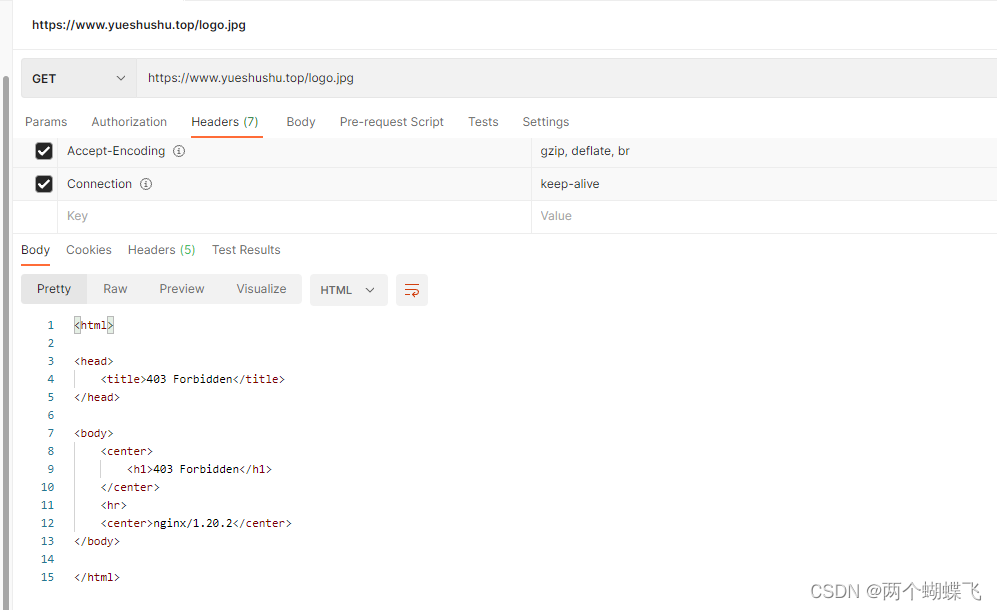
            	valid_referers *.yueshushu.top www.yueshushu.top *.baidu.com *.google.com;
                if ($invalid_referer) {
                        return 403;
                }
只允许 这几个访问: *.yueshushu.top www.yueshushu.top *.baidu.com *.google.com;
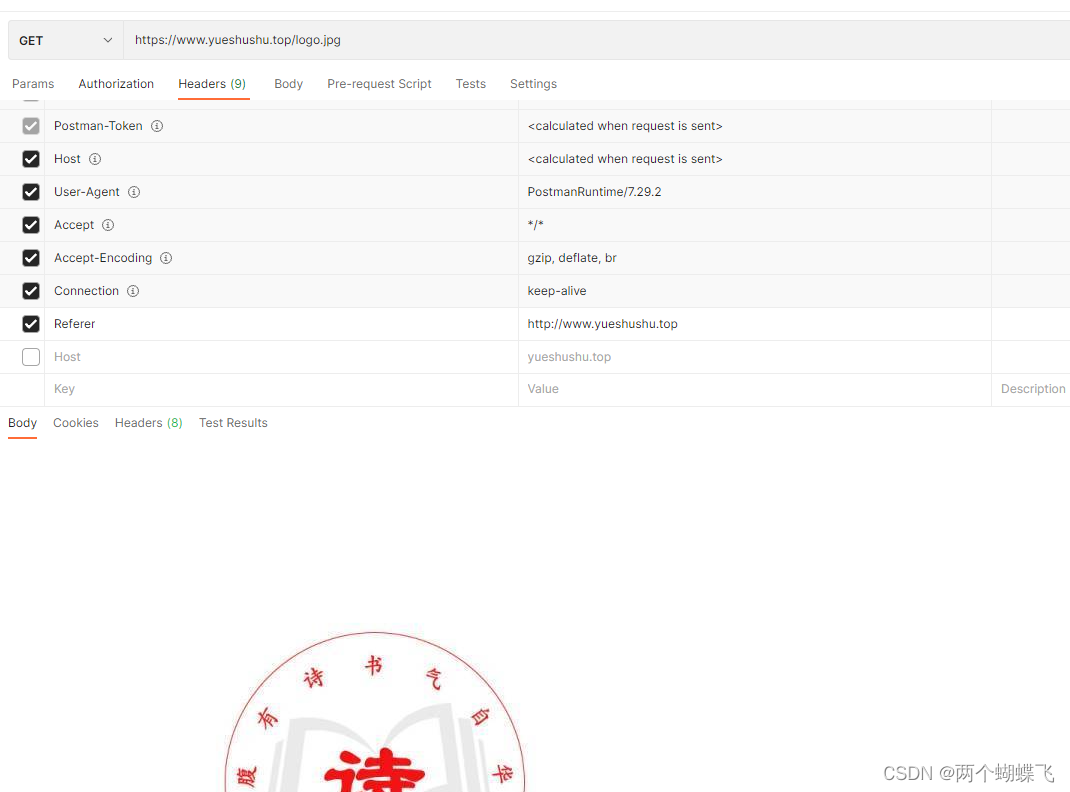
注意, Referer 时, 请求值 要加上协议。
location / {
                root html;
                index  index.html index.htm;
                valid_referers *.yueshushu.top www.yueshushu.top *.baidu.com *.google.com;
                if ($invalid_referer) {
                        return 403;
                }
                try_files $uri $uri/ /index.html;
        }
再次请求时:
配置 https 443 端口访问
免费申请一个证书, 下载 nginx 版本的
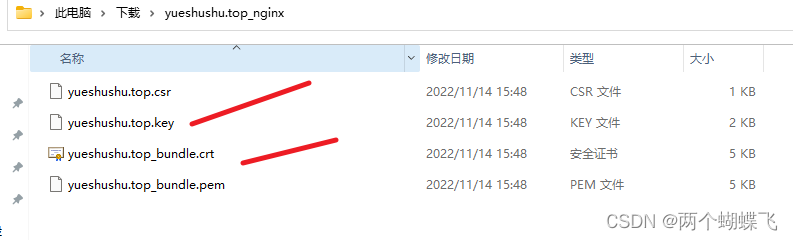
使用到 域名.key 域名_bundle.crt 两个证书
上传到 /etc/nginx/ssl/Nginx 目录下
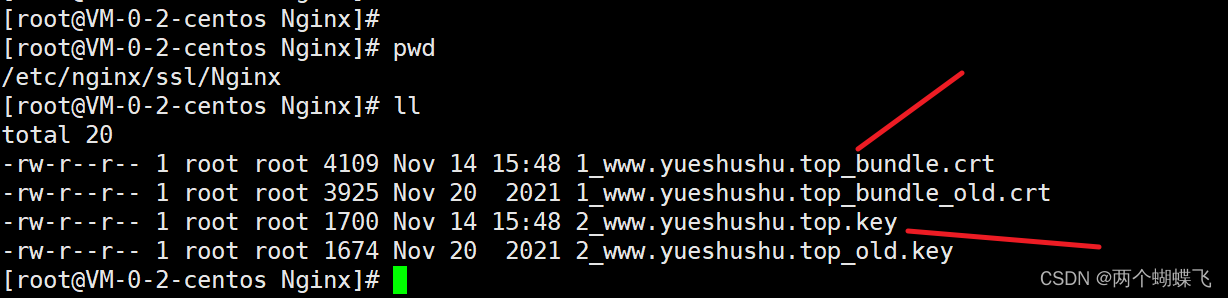
进行配置:
	server {
		listen       443 ssl;
		server_name  www.yueshushu.top;
		ssl_certificate   /etc/nginx/ssl/Nginx/1_www.yueshushu.top_bundle.crt;
		ssl_certificate_key  /etc/nginx/ssl/Nginx/2_www.yueshushu.top.key;

    	# 其它的配置信息
}
如此即可.
配置 https 和 http 均可以访问
访问 http 时,会跳转到 https 协议地址
# 将Http请求转化成Https请求
server {
  listen 80;
  server_name www.yueshushu.top;
  rewrite ^/(.*) https://$server_name$request_uri? permanent;
}
配置多个虚拟服务器
在实际业务中, 常常 有多个 前端项目, 每个项目可能存在多个分支, 可这些分支拥有着相同的请求路径, 如 都是 /StockApi , 这个时候,在同一个 server 下配置就不好了。 更不应该 复制多个 nginx ,每一个 nginx 跑一个项目。
实际上,对 单个 nginx 可以配置多个虚拟服务器, 拥有着不同的端口号, 这样就可以给不同的项目使用了。
端口号 listen 和 前端 路径 不同 alias
server {
		listen       8027;
		server_name  localhost;

        #charset koi8-r;

        #access_log  logs/host.access.log  main;


		location /StockApi {
			# 把 /stock 路径下的请求转发给真正的后端服务器
			rewrite  ^/(.*)$ /$1 break;
			proxy_pass http://myproxy$request_uri;
			fastcgi_buffers 8 128k;
			send_timeout 60;
			client_max_body_size     100m;
		}

		location ~ ^/(images|js|css|flash|media|static)/ {
			root C:\\Users\\20481\\Downloads\\nginx-1.22.1\\staticFile;
			#过期30天,静态文件不怎么更新,过期可以设大一点,如果频繁更新,则可以设置得小一点。
			expires 30d;
		}
		location /Stock {
			alias C:\\Users\\20481\\Downloads\\nginx-1.22.1\\Stock_Page;
			index page.html page.htm;
		}
        location / {
            root   html;
            index  index.html index.htm;
			# 试图访问某个文件, 如果在 就使用原文件,如果不在,就用  /index.html
			try_files $uri $uri/ /index.html;
        }
    }

	server {
		listen       8081;
		server_name  localhost;

        #charset koi8-r;

        #access_log  logs/host.access.log  main;


		location /StockApi {
			# 把 /stock 路径下的请求转发给真正的后端服务器
			rewrite  ^/(.*)$ /$1 break;
			proxy_pass http://myproxy$request_uri;
			fastcgi_buffers 8 128k;
			send_timeout 60;
			client_max_body_size     100m;
		}

		location ~ ^/(images|js|css|flash|media|static)/ {
			root C:\\Users\\20481\\Downloads\\nginx-1.22.1\\staticFile;
			#过期30天,静态文件不怎么更新,过期可以设大一点,如果频繁更新,则可以设置得小一点。
			expires 30d;
		}
		location /Stock {
			alias C:\\Users\\20481\\Downloads\\nginx-1.22.1\\CainiaoStock_Page;
			index page.html page.htm;
		}
        location / {
            root   html;
            index  index.html index.htm;
			# 试图访问某个文件, 如果在 就使用原文件,如果不在,就用  /index.html
			try_files $uri $uri/ /index.html;
        }
    }
	server {
		listen       8082;
		server_name  localhost;

        #charset koi8-r;

        #access_log  logs/host.access.log  main;


		location /StockApi {
			# 把 /stock 路径下的请求转发给真正的后端服务器
			rewrite  ^/(.*)$ /$1 break;
			proxy_pass http://myproxy$request_uri;
			fastcgi_buffers 8 128k;
			send_timeout 60;
			client_max_body_size     100m;
		}

		location ~ ^/(images|js|css|flash|media|static)/ {
			root C:\\Users\\20481\\Downloads\\nginx-1.22.1\\staticFile;
			#过期30天,静态文件不怎么更新,过期可以设大一点,如果频繁更新,则可以设置得小一点。
			expires 30d;
		}
		location /Stock {
			alias C:\\Users\\20481\\Downloads\\nginx-1.22.1\\yjlStock_Page;
			index page.html page.htm;
		}
        location / {
            root   html;
            index  index.html index.htm;
			# 试图访问某个文件, 如果在 就使用原文件,如果不在,就用  /index.html
			try_files $uri $uri/ /index.html;
        }
    }
servername匹配规则 我们需要注意的是servername匹配分先后顺序,
写在前面的匹配上就不会继续往下匹配了。
完整匹配 我们可以在同一servername中匹配多个域名 server_name vod.mmban.com www1.mmban.com;
通配符匹配 server_name *.mmban.com
通配符结束匹配 server_name vod.*;
正则匹配 server_name ~1+.mmban.com$;
跨域 cors 配置
在浏览器上当前访问的网站向另一个网站发送请求获取数据的过程就是跨域请求。
跨域是浏览器的同源策略决定的,是一个重要的浏览器安全策略,用于限制一个 origin 的文档或者它加载的脚本与另一个源的资源进行交互,它能够帮助阻隔恶意文档,减少可能被攻击的媒介,可以使用 CORS 配置解除这个限制。
关于跨域网上已经有很多解释,这里就不啰嗦,也可以直接看 MDN 的 <浏览器的同源策略> 文档进一步了解,这里就列举几个同源和不同元的例子,相信程序员都能看得懂。
# 同源的例子
http://example.com/app1/index.html  # 只是路径不同
http://example.com/app2/index.html

http://Example.com:80  # 只是大小写差异
http://example.com

# 不同源的例子
http://example.com/app1   # 协议不同
https://example.com/app2

http://example.com        # host 不同
http://www.example.com
http://myapp.example.com

http://example.com        # 端口不同
http://example.com:8080
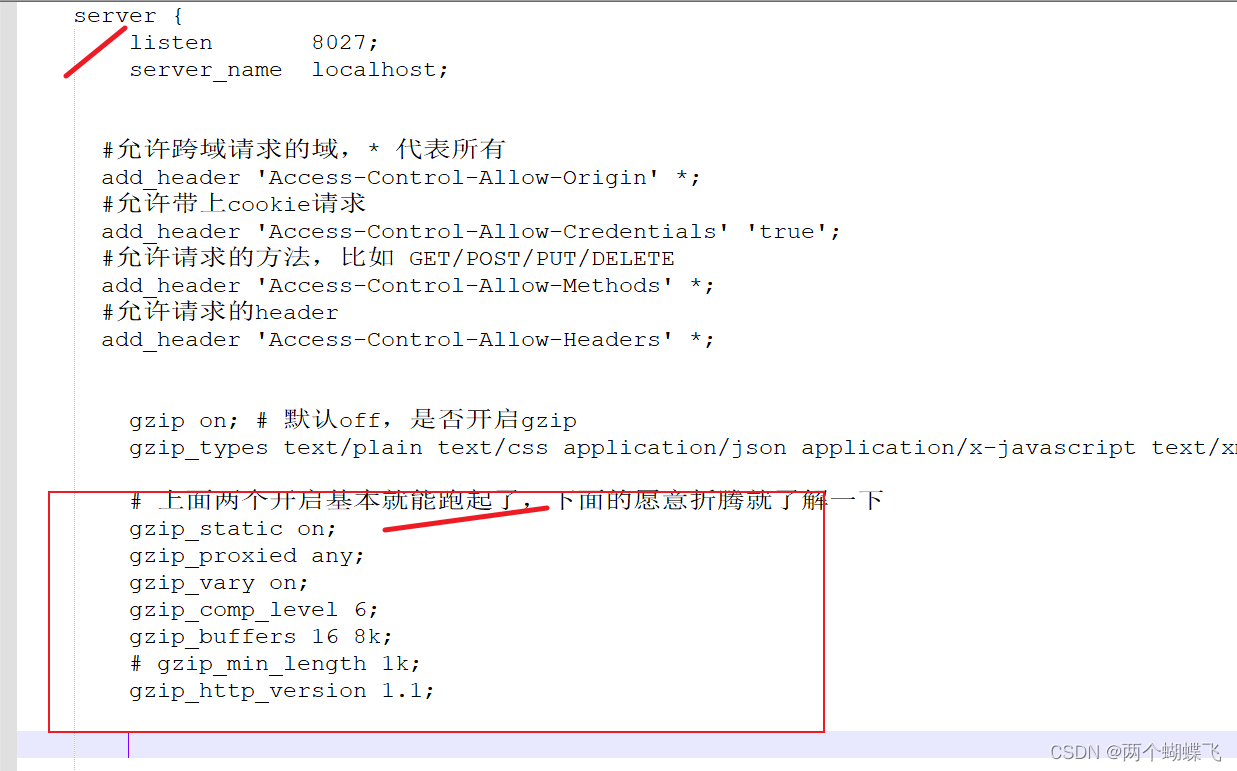
配置跨域:
	server {
		listen       8027;
		server_name  localhost;


	  #允许跨域请求的域,* 代表所有
      add_header 'Access-Control-Allow-Origin' *;
      #允许带上cookie请求
      add_header 'Access-Control-Allow-Credentials' 'true';
      #允许请求的方法,比如 GET/POST/PUT/DELETE
      add_header 'Access-Control-Allow-Methods' *;
      #允许请求的header
      add_header 'Access-Control-Allow-Headers' *;

      # 省略配置 location

}
参考链接: https://blog.csdn.net/qq_38011415/article/details/107095403
配置 真实的 IP 和端口
nginx 转发之后,后端获取的 IP地址等信息,是 nginx 所在服务器的 IP地址, 并不是 客户请求时的 IP地址。
    		proxy_set_header Host $host:$server_port;
            proxy_set_header X-Real-IP $remote_addr;
            proxy_set_header X-Real-PORT $remote_port;
            proxy_set_header X-Forwarded-For $proxy_add_x_forwarded_for;
在具体的 location 下
	location /StockApi {
			# 把 /stock 路径下的请求转发给真正的后端服务器
			proxy_set_header Host $host:$server_port;
            proxy_set_header X-Real-IP $remote_addr;
            proxy_set_header X-Real-PORT $remote_port;
            proxy_set_header X-Forwarded-For $proxy_add_x_forwarded_for;

			rewrite  ^/(.*)$ /$1 break;
			proxy_pass http://myproxy$request_uri;
			fastcgi_buffers 8 128k;
			send_timeout 60;
			client_max_body_size     100m;
		}
配置成功。
配置开启 gzip
gzip on; # 默认off,是否开启gzip
gzip_types text/plain text/css application/json application/x-javascript text/xml application/xml application/xml+rss text/javascript;

# 上面两个开启基本就能跑起了,下面的愿意折腾就了解一下
gzip_static on;
gzip_proxied any;
gzip_vary on;
gzip_comp_level 6;
gzip_buffers 16 8k;
# gzip_min_length 1k;
gzip_http_version 1.1;
0-9 ↩︎