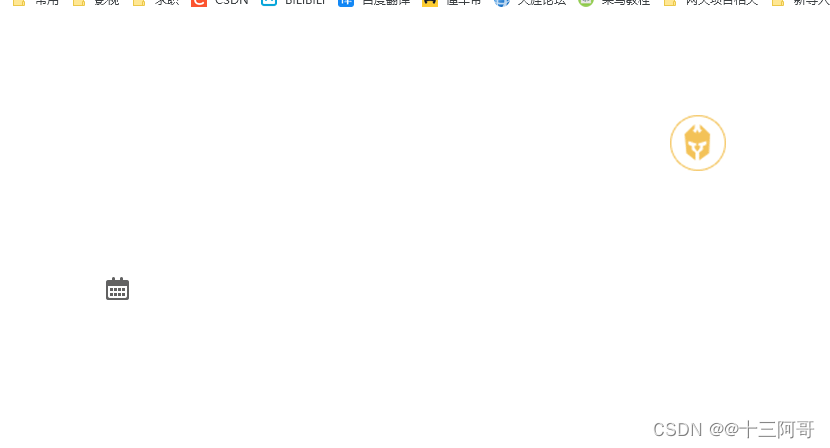
1. 精灵图
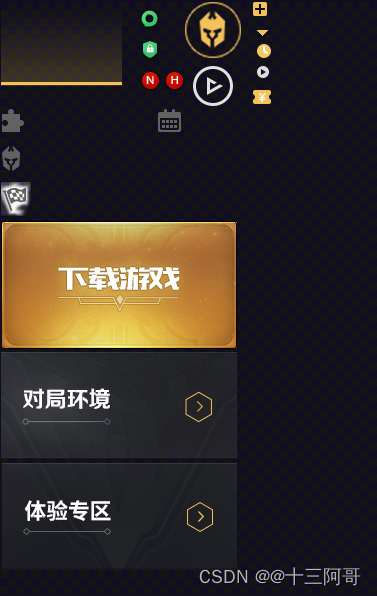
index.png
分析图
<!DOCTYPE html>
<html lang="en">

<head>
    <meta charset="UTF-8">
    <meta name="viewport" content="width=device-width, initial-scale=1.0">
    <title>Document</title>
    <style>
        .box1 {
            width: 60px;
            height: 60px;
            background: url("./index.png") no-repeat -182px 0;
            margin: 100px auto;
        }

        .box2 {
            margin: 100px;
            width: 25px;
            height: 25px;
            background: url("./index.png") no-repeat;
            background-position: -156px -105px;
        }
    </style>
</head>

<body>
    <!--
        为了有效减少服务器接收和发送请求的次数,提高页面的加载速度,出现了CSS精灵技术(CSS雪碧图)!
        核心原理:将网页中的一些小背景图像整合到一张大图中,这样服务器只需要一次请求就可以了!
        使用:
            1. 精灵技术主要针对于背景图片使用,就是把多个小背景图片整合到一张大图中去;
            2. 移动背景图片的位置, 此时可以借助background-position来实现;
            3. 使用精灵图的时候需要精确测量,每个小背景图片的大小和位置;
            4. 移动的距离就是这个目标图片的x和y坐标, 注意网页中的坐标有所不同;
     -->

     <!--
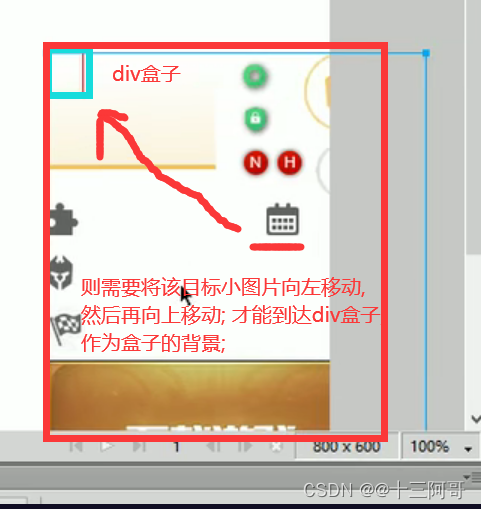
            默认图片的左上角是贴在box盒子的左上角, 此时比如我们需要整图片的某个小图片,
            那就计算距离即可, 以目标图片为核心, 将其朝着box盒子移动, 然后这个所用动的二维坐标就是background-position的两个值;
      -->
    <div class="box1"></div>
    <div class="box2"></div>
</body>

</html>
2. 字体图标
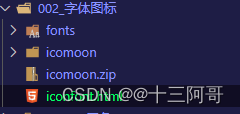
<!DOCTYPE html>
<html lang="en">
<head>
<meta charset="UTF-8">
<meta name="viewport" content="width=device-width, initial-scale=1.0">
<title>Document</title>
<style>
@font-face {
font-family: 'icomoon';
src: url('fonts/icomoon.eot?ldtv90');
src: url('fonts/icomoon.eot?ldtv90#iefix') format('embedded-opentype'),
url('fonts/icomoon.ttf?ldtv90') format('truetype'),
url('fonts/icomoon.woff?ldtv90') format('woff'),
url('fonts/icomoon.svg?ldtv90#icomoon') format('svg');
font-weight: normal;
font-style: normal;
font-display: block;
}
span {
font-family: 'icomoon';
font-size: 100px;
color: green;
}
</style>
</head>
<body>
<!--
字体图标库:
1. icomoon字体库 http://icomoon.io
2. 阿里iconfont字体库 http://www.iconfont.cn/
-->
<!--
使用场景:主要用于显示网页中通用,常用的一些小图标。
精灵图缺点:
1.图片文件比较大;
2.图片本身放大或缩小会失真;
3.一旦图片制作完成,后期想要更换则是非常麻烦。
===>为此,引入了一种技术,就是字体图标技术; 展示的是图标,本质却是字体!
字体图标优点:
1.轻量级,一旦字体加载,图标就会马上渲染出来,减少了服务器请求;
2.灵活性:本质其实是字体,可以随意的改变字体颜色,产生阴影,透明效果,旋转等;
3.兼容性:几乎支持所有的浏览器,请放心大胆的使用;
notice:字体图标不能替代精灵技术,只是对工作中图标部分技术的提升和优化!
总结:
1.如果遇到一些结构和样式比较简单的小图标,就用字体图标;
2.如果遇到一些结构和样式复杂的图片,就用精灵图解决!
-->
<!--
使用步骤:
1. 将解压后的fonts文件(/icomoon/fonts)复制一份到与.html同级的目录下;
2. 然后将style.css(/icomoon/style.css)文件中的部分内容进行复制后贴到style标签中去;
3. 打开解压后的html(/icomoon/demo.html)文件,复制图标后面的小方框放置需要显示的标签内;
4. 为标签添加类选择器,指定font-family属性!
-->
<!--
还可以继续在已经下载的字体图标的基础之上继续追加新的字体图标,
打开http://icomoon.io网页, 导入已下载的.json文件, 然后如法炮制即可;
-->
<span></span>
<span></span>
<span></span>
<span style="color: red"></span>
</body>
</html>
3. css三角
3.1 三角制作
<!DOCTYPE html>
<html lang="en">
<head>
    <meta charset="UTF-8">
    <meta name="viewport" content="width=device-width, initial-scale=1.0">
    <title>Document</title>
    <style>
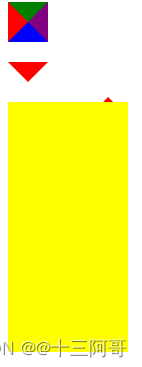
        /*
            box盒子只是指定了4个边框, 并没有指定width 和 height, 此时给这4个边框分别着以不同的颜色,
            发现这4个边框分别是4个三角形了;
        */
        .box {
            width: 0;
            height: 0;
            border-top: 20px solid green;
            border-left: 20px solid red;
            border-bottom: 20px solid blue;
            border-right: 20px solid purple;
        }
        .box1 {
            width: 0;
            height: 0;
            border: 20px solid transparent;
            border-top-color: red;
            margin-top: 20px;

            /* 以下两句是为了照顾兼容性而写的 */
            line-height: 0;
            font-size: 0;
        }
    </style>
</head>
<body>
    <div class="box"></div>
    <div class="box1"></div>
</body>
</html>

3.2 京东三角
<!DOCTYPE html>
<html lang="en">

<head>
    <meta charset="UTF-8">
    <meta http-equiv="X-UA-Compatible" content="IE=edge">
    <meta name="viewport" content="width=device-width, initial-scale=1.0">
    <title>Document</title>
    <style>
        .box1 {
            width: 0;
            height: 0;
            border-top: 20px solid green;
            border-left: 20px solid red;
            border-bottom: 20px solid blue;
            border-right: 20px solid purple;
        }

        .box2 {
            width: 0;
            height: 0;
            border: 20px solid transparent;
            border-top-color: red;
            margin-top: 20px;
            line-height: 0;
            font-size: 0;
        }

        .jd {
            position: relative;
            height: 250px;
            width: 120px;
            background-color: yellow;
        }

        .jd span {
            position: absolute;
            right: 15px;
            top: -10px;
            width: 0;
            height: 0;
            border: 5px solid transparent;
            border-bottom-color: red;
            /* 为了照顾兼容性 */
            line-height: 0;
            font-size: 0;
        }
    </style>
</head>

<body>
    <div class="box1"></div>
    <div class="box2"></div>
    <div class="jd">
        <span></span>
    </div>
</body>

</html>
4. css-input系列
4.1 cursor
<!DOCTYPE html>
<html lang="en">

<head>
    <meta charset="UTF-8">
    <meta name="viewport" content="width=device-width, initial-scale=1.0">
    <title>Document</title>
    <style>
        span {
            display: block;
        }
    </style>
</head>

<body>
    <!--
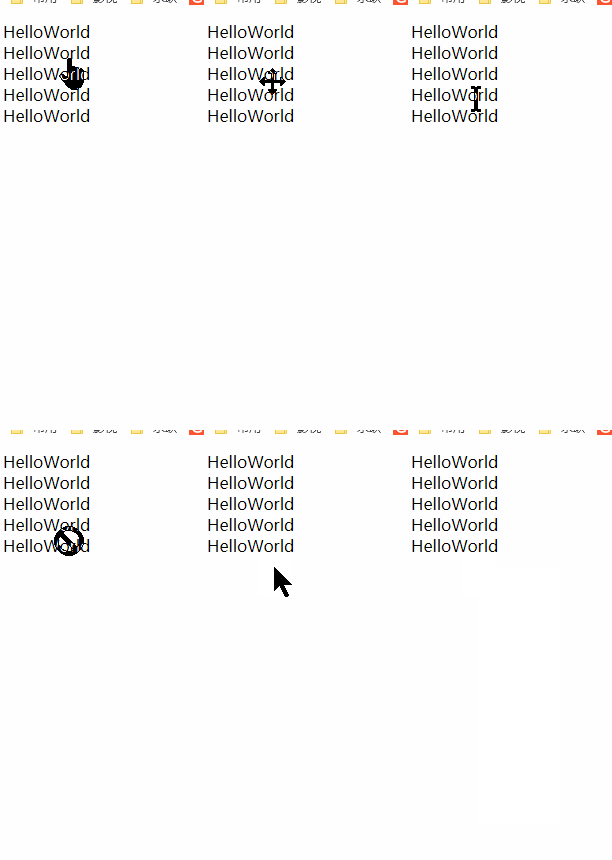
        鼠标样式:
        cursor: default|pointer|move|text|not-allowed;
    -->
    <span style="cursor: default;">HelloWorld</span>
    <span style="cursor: pointer;">HelloWorld</span>
    <span style="cursor: move;">HelloWorld</span>
    <span style="cursor: text;">HelloWorld</span>
    <span style="cursor: not-allowed;">HelloWorld</span>
</body>

</html>
4.2 outline
<!DOCTYPE html>
<html lang="en">

<head>
    <meta charset="UTF-8">
    <meta name="viewport" content="width=device-width, initial-scale=1.0">
    <title>Document</title>
    <style>
        /*1. 去掉text输入时产生的边框 */
        input,
        textarea {
            outline: none;
        }

        /*2. 去掉文本域右下角的放缩功能 */
        textarea {
            resize: none;
        }
    </style>
</head>

<body>
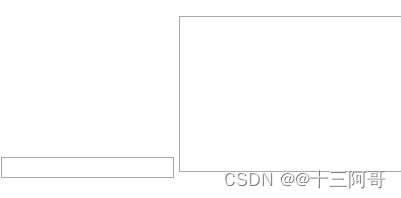
    <!--
        轮廓线:outline, 当输入框获得焦点时, 会产生高亮边框效果;
     -->
    <input type="text">
    <textarea name="" id="" cols="30" rows="10"></textarea>
</body>

</html>
5. vertical-align属性
5.1 vertical-align
<!DOCTYPE html>
<html lang="en">

<head>
    <meta charset="UTF-8">
    <meta name="viewport" content="width=device-width, initial-scale=1.0">
    <title>Document</title>
    <style>
        /* 1. 让图片和文字垂直居中对齐 */
        img {
            vertical-align: middle;  /* baseline/top/bottom */
        }

        /* 2. 让文本域和文字底部底部对齐 */
        textarea {
            vertical-align: bottom;
        }
    </style>
</head>

<body>
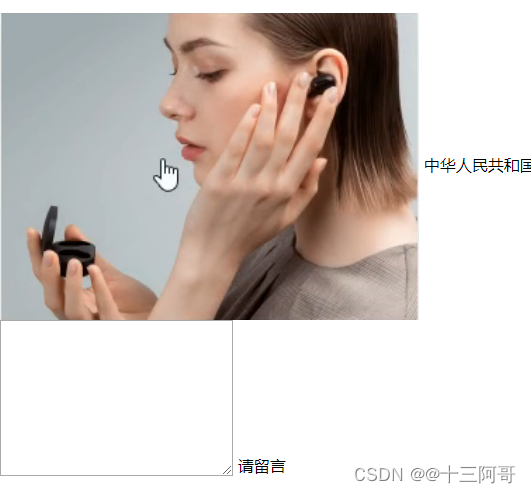
    <!--
        vertical-align: baseline(基线) | top(顶线) | middle(中线) | bottom(底线);
        经常用于设置图片或表单(行内块元素)和文字垂直对齐;
        官方解释:用于设置一个元素的垂直对齐方式,但是它只针对于行内元素 或者 行内块元素有效;
     -->

    <img src="../../images/person.png" alt=""> 中华人民共和国
    <br>
    <textarea name="" id="" cols="30" rows="10"></textarea> 请留言
</body>

</html>
5.2 图片底部留白问题
<!DOCTYPE html>
<html lang="en">

<head>
    <meta charset="UTF-8">
    <meta name="viewport" content="width=device-width, initial-scale=1.0">
    <title>Document</title>
    <style>
        div {
            border: 2px solid red;
        }
        /* 解决方案: */
        img {
            /* vertical-align: middle; */
            /* display: block; */
        }
    </style>
</head>

<body>
    <!--
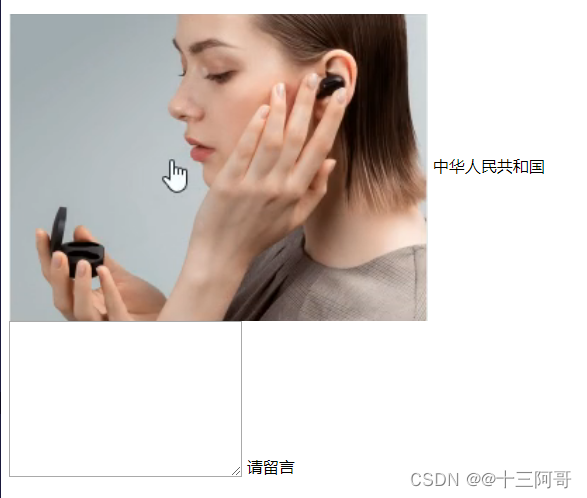
        解决图片底部存在默认空白缝隙问题:
            1. 问题: 图片底侧会默认有一个空白缝隙,原因是行内块元素会和文字的基线(base-line)对齐。
            2. 解决:
                (1)给图片添加 vertical-align: midlle | top | bottom (只要不是基线对齐就可以);
                (2)把图片转换为 display: block;
     -->
    <div>
        <img src="../../images/image.png" alt="">
    </div>
</body>

</html>
6. 文字溢出
6.1 单行文本溢出显示省略号
<!DOCTYPE html>
<html lang="en">
<head>
    <meta charset="UTF-8">
    <meta name="viewport" content="width=device-width, initial-scale=1.0">
    <title>Document</title>
    <style>
        div {
            width: 150px;
            height: 80px;
            background-color: red;
            margin: 100px auto;
            white-space: nowrap;        /* 强制一行显示(不换行)  */
            overflow: hidden;           /* 隐藏溢出的部分 */
            text-overflow: ellipsis;    /* 用省略号代替溢出的部分 */
        }
    </style>
</head>
<body>
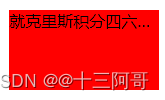
    <!--
        单行文本溢出显示省略号的三大条件:
            1.强制一行显示;
            2.隐藏溢出部分;
            3.用省略号代替溢出的部分;
    -->
    <div>就克里斯积分四六级发顺丰水电费是</div>
</body>
</html>
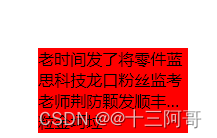
6.2 多行文本溢出显示省略号
<!DOCTYPE html>
<html lang="en">

<head>
    <meta charset="UTF-8">
    <meta http-equiv="X-UA-Compatible" content="IE=edge">
    <meta name="viewport" content="width=device-width, initial-scale=1.0">
    <title>Document</title>
    <style>
        div {
            width: 150px;
            height: 85px;
            background-color: red;
            margin: 100px auto;
            overflow: hidden;                   /* 隐藏溢出的部分 */
            text-overflow: ellipsis;            /* 用省略号代替溢出的部分 */
            display: -webkit-box;               /* 弹性伸缩盒子模型显示 */
            -webkit-line-clamp: 3;              /* 限制在一个块元素显示的文本的行数 */
            -webkit-box-orient: vertical;       /* 设置或检索伸缩盒对象的子元素的排列方式 */
        }
    </style>
</head>

<body>
    <!--
        多行文本溢出显示省略号, 有较大兼容性问题, 适合于webKit浏览器或移动端(移动端绝大部分是webkit内核);
     -->
     <div>老时间发了将零件蓝思科技龙口粉丝监考老师荆防颗发顺丰是粒金坷垃</div>
</body>

</html>
7. 常见布局技巧
7.1 margin负值的应用1
<!DOCTYPE html>
<html lang="en">
<head>
    <meta charset="UTF-8">
    <meta http-equiv="X-UA-Compatible" content="IE=edge">
    <meta name="viewport" content="width=device-width, initial-scale=1.0">
    <title>Document</title>
    <style>
        ul li {
            float: left;
            list-style: none;
            width: 150px;
            height: 200px;
            border: 1px solid red;
            margin-left: -1px;
        }
        ul li:hover {
            border: 1px solid orange;
        }
    </style>
</head>
<body>
    <ul>
        <li>1</li>
        <li>2</li>
        <li>3</li>
        <li>4</li>
        <li>5</li>
    </ul>
</body>
</html>

7.2 margin负值的应用2
<!DOCTYPE html>
<html lang="en">
<head>
    <meta charset="UTF-8">
    <meta http-equiv="X-UA-Compatible" content="IE=edge">
    <meta name="viewport" content="width=device-width, initial-scale=1.0">
    <title>Document</title>
    <style>
        #ul1 li {
            float: left;
            list-style: none;
            width: 150px;
            height: 200px;
            border: 1px solid red;
            margin-left: -1px;
        }
        /* 法一:如果盒子没有定位, 则鼠标悬浮时添加相对定位即可; */
        /* 因为相对定位会压住其他标准流, 还有浮动的盒子;  */
        #ul1 li:hover {
            position: relative;
            border: 2px solid orange;
        }


        /******************************************************************************************/
        #ul2 li {
            position: relative;
            float: left;
            list-style: none;
            width: 150px;
            height: 200px;
            border: 1px solid blue;
            margin-left: -1px;
        }
        /* 法二: 如果li都有定位, 则用z-index来提高级别; */
        #ul2 li:hover {
            border: 2px solid purple;
            z-index: 1;
        }
    </style>
</head>
<body>
    <!--
        1. 每个盒子margin往左移动1px, 将正好压住相邻盒子边框;
        2. 鼠标经过某个盒子的时候, 提高当前盒子的层级即可(如果没有定位, 则加相对定位(保留位置); 如有定位, 则加z-index;)
     -->
    <ul id="ul1">
        <li>1</li>
        <li>2</li>
        <li>3</li>
        <li>4</li>
        <li>5</li>
    </ul>


    <!-- <ul id="ul2">
        <li>6</li>
        <li>7</li>
        <li>8</li>
        <li>9</li>
        <li>10</li>
    </ul> -->
</body>
</html>

7.3 文字围绕浮动元素
<!DOCTYPE html>
<html lang="en">

<head>
    <meta charset="UTF-8">
    <meta http-equiv="X-UA-Compatible" content="IE=edge">
    <meta name="viewport" content="width=device-width, initial-scale=1.0">
    <title>Document</title>
    <style>
        * {
            margin: 0;
        }
        .box {
            width: 300px;
            height: 70px;
            background-color: pink;
            margin: 0 auto;
            padding: 5px;
        }
        .pic {
            float: left;
            width: 120px;
            height: 60px;
            margin-right: 5px;
        }
        .pic img {
            width: 100%;
        }
    </style>
</head>

<body>
    <div class="box">
        <div class="pic">
            <img src="./img.png" alt="">
        </div>
        <p>分解式冷风机克里斯积分恐龙时代荆防颗粒就是顿开浪费的抗了</p>
    </div>
    <!--
        实际上就是p的宽度默认和box一样宽,
        然后给左侧的pic盒子添加一个浮动即可, 因为浮动不会压住下面标准流盒子里面的文字(图片); (见05_定位/005_定位的拓展/03_...)
     -->
</body>
</html>

7.4 行内块的巧妙应用
<!DOCTYPE html>
<html lang="en">
<head>
<meta charset="UTF-8">
<meta http-equiv="X-UA-Compatible" content="IE=edge">
<meta name="viewport" content="width=device-width, initial-scale=1.0">
<title>Document</title>
<style>
* {
margin: 0;
padding: 0;
}
.box {
text-align: center; /* 此时父盒子里的所有行内元素和行内块元素都会水平居中 */
}
.box a {
display: inline-block;
width: 36px;
height: 36px;
background-color: #f7f7f7;
border: 1px solid #ccc;
text-align: center;
line-height: 36px;
color: #333;
text-decoration: none;
font-size: 14px;
}
.box .prev,
.box .next {
width: 85px;
}
.box .current,
.box .elp {
background-color: #fff;
border: none;
}
.box input {
height: 36px;
width: 45px;
border: 1px solid #ccc;
outline: none;
}
.box button {
width: 60px;
height: 36px;
background-color: #fff;
border: 1px solid #ccc;
}
</style>
</head>
<body>
<div class="box">
<a href="#" class="prev"><<上一页</a>
<a href="#" class="current">2</a>
<a href="#">3</a>
<a href="#">4</a>
<a href="#">5</a>
<a href="#">6</a>
<a href="#" class="elp">...</a>
<a href="#" class="next">>>下一页</a>
到第
<input type="text">
页
<button>确定</button>
</div>
</body>
</html>

7.5 CSS三角强化
<!DOCTYPE html>
<html lang="en">

<head>
    <meta charset="UTF-8">
    <meta http-equiv="X-UA-Compatible" content="IE=edge">
    <meta name="viewport" content="width=device-width, initial-scale=1.0">
    <title>Document</title>
    <style>
        .box {
            width: 0;
            height: 0;
            border-top: 100px solid transparent;
            border-right: 50px solid red;
            border-bottom: 0 solid blue;
            border-left: 0 solid purple;
        }
        .price {
            width: 160px;
            height: 24px;
            border: 1px solid red;
            margin: 0 auto ;
            line-height: 24px;
        }
        .left {
            position: relative;
            float: left;
            width: 90px;
            height: 100%;
            background-color: red;
            text-align: center;
            color: #fff;
            margin-right: 8px;
            font-weight: 700;
        }
        .left i {
            position: absolute;
            right: 0;
            top: 0;
            width: 0;
            height: 0;
            border-color: transparent #fff transparent transparent;
            border-style: solid;
            border-width: 24px 10px 0 0;
        }
        .right {
            font-size:  12px;
            color: gray;
            text-decoration: line-through;
        }
    </style>
</head>

<body>
    <div class="box"></div>
    <div class="price">
        <span class="left">
            $1650
            <i></i>
        </span>
        <span class="right">$5650</span>
    </div>
</body>

</html>


