Springboot集成
搞springboot的那群人 不喜欢造轮子,就喜欢搞各种集成。
首先创建一个springboot项目:
之前我们在方法中 创建工厂类配置, 现在直接在application.yml 中配置即可:
spring:
  rabbitmq:
    host: **********
    username: guest
    password: guest
    virtual-host: /
    port: 5672
生产者
然后我们就加一个config配置类 来配置一下:
@Configuration
public class RabbitMQConfig {
    public static final String EXCHANGE_NAME = "boot_topic_exchange";
    public static final String QUEUE_NAME = "boot_queue";

    @Bean("bootExchange")
    public Exchange bootExchange(){
    //这里确定工作模式 我们以topic模式为例子
        return ExchangeBuilder.topicExchange(EXCHANGE_NAME).durable(true).build();
    }

    @Bean("bootQueue")
    public Queue bootQueue(){
        return QueueBuilder.durable(QUEUE_NAME).build();
    }

    @Bean
    public Binding bindQueueExchange(@Qualifier("bootQueue") Queue queue,@Qualifier("bootExchange") Exchange exchange){
       return BindingBuilder.bind(queue).to(exchange).with("boot.#").noargs();
    }

}
这样就完成了配置, 相比于 RabbitMQ养成记 3.4.5 中的那种原始配置:
这种配置的优点就是 将对象 交给spring管理 ,不需要我们自己new了
然后配置完成 我们可以写代码了:
@SpringBootTest
@RunWith(SpringRunner.class)
public class ProducerTest {

    @Autowired
    private RabbitTemplate rabbitTemplate;

    @Test
    public void testSend(){
        rabbitTemplate.convertAndSend(RabbitMQConfig.EXCHANGE_NAME,"boot.maru","boot mq hello");
    }
}
很方便对吧 对比之前上一篇里面 我们写的那一堆。
跑一下:
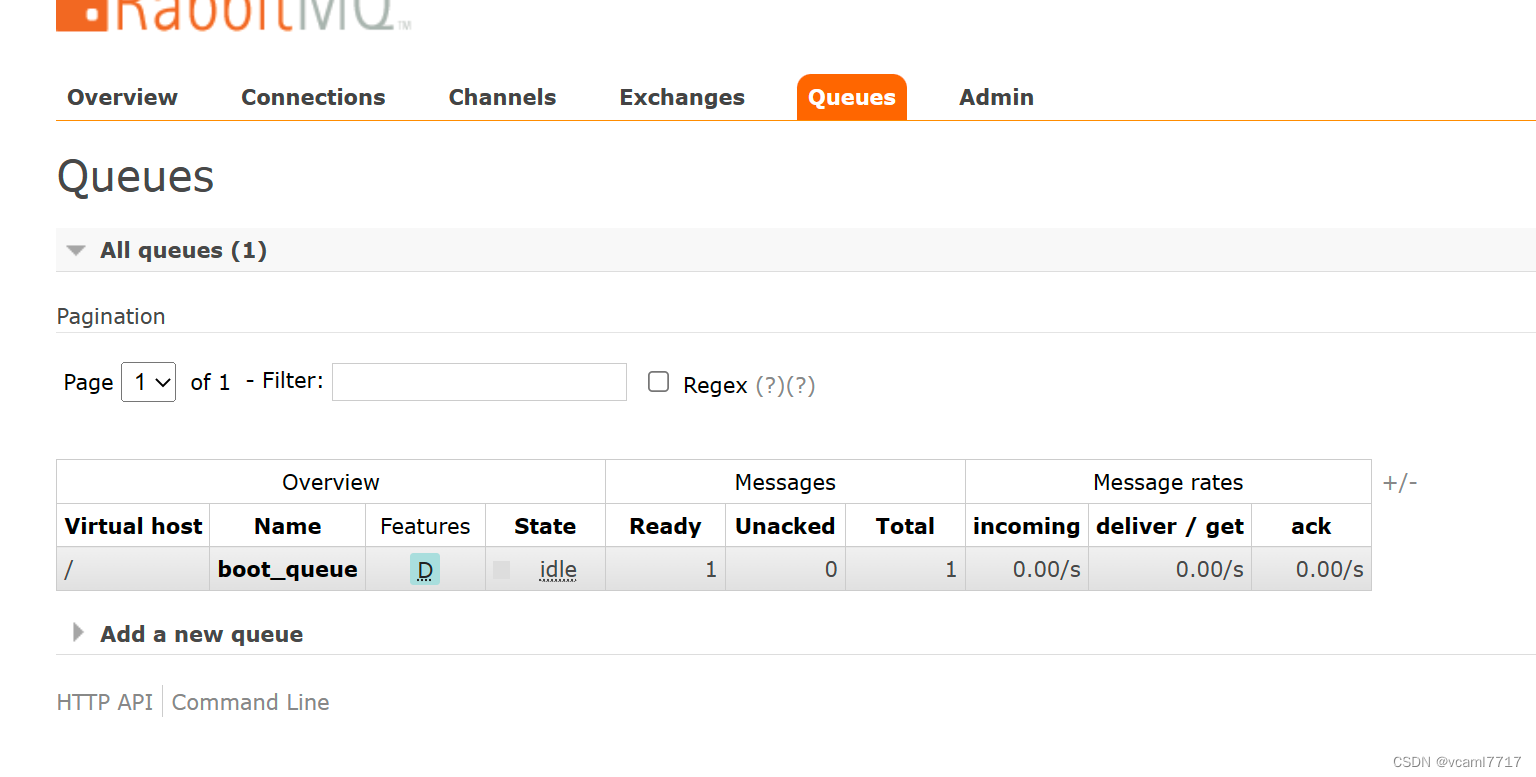
消息发过去了 且创建了这样一个队列。
我们发出去的消息是:boot mq hello
消费者
我们编写一个监听者,队列名称和刚才的队列名称相同:
@Component
public class RabbitMQListener {

    @RabbitListener(queues = "boot_queue")
    public void ListenerQueue(Message message){
        System.out.println("监听消息:"+message);
    }

}
然后启动springboot 让他处于监听状态:
来了!
org.vcaml.ConsunmerApplication           : Started ConsunmerApplication in 0.58 seconds (JVM running for 1.078)
监听消息:(Body:'boot mq hello'
MessageProperties [headers={}, contentType=text/plain, contentEncoding=UTF-8, contentLength=0, receivedDeliveryMode=PERSISTENT, priority=0, redelivered=false, receivedExchange=boot_topic_exchange, receivedRoutingKey=boot.maru, deliveryTag=1, consumerTag=amq.ctag-u6bROUMNM7nRlWkrhlAT-w, consumerQueue=boot_queue])

