1. 基本定义
MDN 关于scorllIntoView的介绍
Element接口的scrollIntoView()方法会滚动元素的父容器,使被调用scrollIntoView()的元素对用户可见。
scrollIntoView()scrollIntoView(alignToTop)scrollIntoView(scrollIntoViewOptions)
1. alignToTop 可选
alignToTop可选
一个布尔值:
如果为true,元素的顶端将和其所在滚动区的可视区域的顶端对齐。相应的scrollIntoViewOptions: {block: "start", inline: "nearest"}。这是这个参数的默认值。
如果为false,元素的底端将和其所在滚动区的可视区域的底端对齐。相应的scrollIntoViewOptions: {block: "end", inline: "nearest"}。
2. scrollIntoViewOptions 可选
一个包含下列属性的对象:
behavior可选
定义动画过渡效果,auto 或 smooth 之一。默认为auto。
block可选
定义垂直方向的对齐,start、center、end 或 nearest 之一。默认为start。
inline可选
定义水平方向的对齐,start、center、end 或 nearest 之一。默认为nearest。
例子
const element = document.getElementById("box");

element.scrollIntoView();
element.scrollIntoView(false);
element.scrollIntoView({ block: "end" });
element.scrollIntoView({ behavior: "smooth", block: "end", inline: "nearest" });

2. 使用
常用到的点击顶部导航滚动到对应的区域。
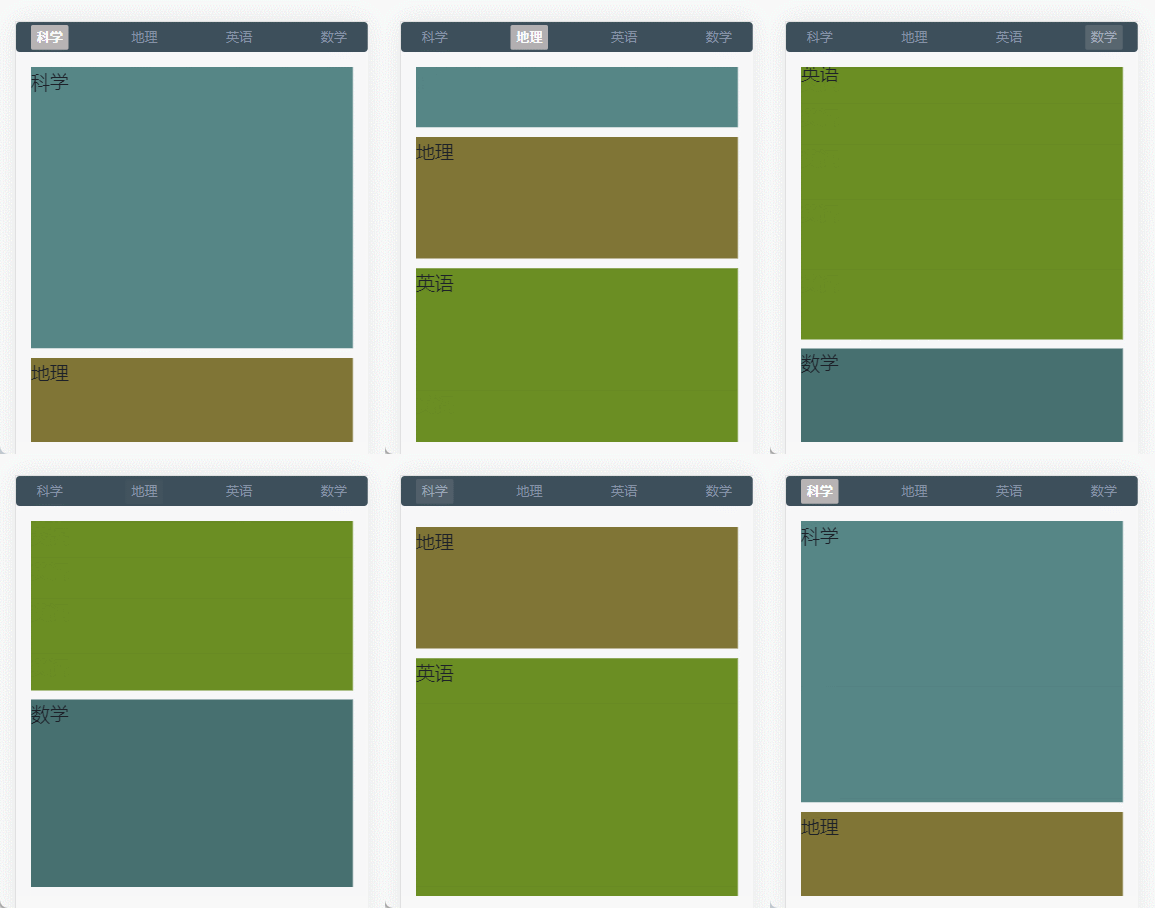
- 使用的时候外层元素不要使用
margin-top、否则整个区域都会向上滚动。可以使用padding代替。 - 内容区域设置固定高度。
height: 400px;overflow-y: scroll;
<template>
  <div class="index-page">
    <scroll-intoview></scroll-intoview>
  </div>
</template>

<script setup>
import scrollIntoview from '@/components/common/scrollIntoview.vue'
</script>
2.1. vue3
scrollIntoview.vue
<template>
  <div class="scroll-into-view-page">
    <div class="tab-nav-list">
      <div class="list-item btn-active" :class="tabActive === index ? 'act':''" v-for="(item, index) in tabList"
           @click="changeTab(item,index)">{{ item.title }}
      </div>
    </div>
    <div class="tab-content">
      <div class="item" :ref="el=>tabListRef[index] = el" v-for="(item, index) in tabList">{{ item.title }}</div>
    </div>
  </div>
</template>

<script setup>
import {reactive, ref} from "vue"

const tabList = reactive([
  {title: '科学'},
  {title: '地理'},
  {title: '英语'},
  {title: '数学'}
])
const tabActive = ref(0)
const tabListRef = ref([])

const changeTab = (item, index) => {
  if(tabActive.value === index) return
  tabActive.value = index
  tabListRef.value[index].scrollIntoView({behavior: 'smooth', block: 'start'})
}
</script>
<style lang="less" scoped>
.scroll-into-view-page {
  font-size: 12px;
  color: #1D2129;
  z-index: 2;
  background: #f7f7f8;
  //margin-top: 20px;

  .tab-nav-list {
    border-radius: 4px;
    display: flex;
    align-items: center;
    justify-content: space-between;
    padding: 0 16px;
    height: 32px;
    background: #3d4f5b;
    font-size: 14px;

    .list-item {
      color: #8592A6;
      padding: 2px 6px;
      border-radius: 2px;

      &.act {
        transition: all ease .3s;
        color: #FFFFFF;
        background: #b7b3b4;
        font-weight: bold;
      }
    }
  }

  .tab-content {
    padding: 0 16px;
    margin-top: 16px;
    font-size: 20px;
    height: 400px;
    overflow-y: scroll;

    .item {
      margin-bottom: 10px;

      &:first-child {
        height: 300px;
        background: #568686;
      }

      &:nth-child(2) {
        height: 130px;
        background: #807536;
      }

      &:nth-child(3) {
        height: 300px;
        background: olivedrab;
      }

      &:last-child {
        height: 200px;
        background: #477070;
      }
    }

  }
}
</style>
2.2. vue2
vue2中使用、主要就是获取dom元素方法改变下即可
<div class="item" v-for="(item, index) in tabList">{{ item.title }}</div>
<script>
export default {
  data() {
    return {
      tabList: [
         {title: '科学'},
         {title: '地理'},
         {title: '英语'},
         {title: '数学'}],
      tabActive: 0,
      tabListRef: []
    }
  },
  mounted() {
    this.getDomElements()
  },
  methods: {
    getDomElements() {
      this.$nextTick(()=> {
        let el = document.getElementsByClassName('tab-content')[0]
        this.tabListRef = el.children
      })
    },
    changeTab(item, index) {
      if(this.tabActive === index) return
      this.tabActive = index
      this.tabListRef[index].scrollIntoView({behavior: 'smooth', block: 'start'})
    }
  }
}
</script>

