以前学习前端的时候,对于多张图片的布局一般使用瀑布流布局(CSS总结——瀑布流布局_css 瀑布流_黑白程序员的博客-CSDN博客),然后再通过懒加载(如何实现图片懒加载,预加载!! - 简书)加载图片。但如果是在图片数量有限的情况下,无法得到整齐的布局。同时,鄙人也觉得桌面端向下滚动浏览图片实为不合理。所以在这篇文章中,我采用了横向滚动的方法,并将每一行图片使用QHeaderView布局图片,使得每一行图片都可以独立地进行滚动,以解决我们在上面提到的第一个问题。
不足:
1. 并没有实现所有行的滚动控制,只实现了单行,可以考虑额外添加一个滚动条。
2. 没有实现图片的懒加载。
3. 没有实现对图片的更多操作。
4. 不能移动查看图片窗口。
5. 只使用了最基础的知识,实现了最简单的功能,需要进一步改进。
最终实现的效果如下:

浏览单张图片(双击图片)如下:
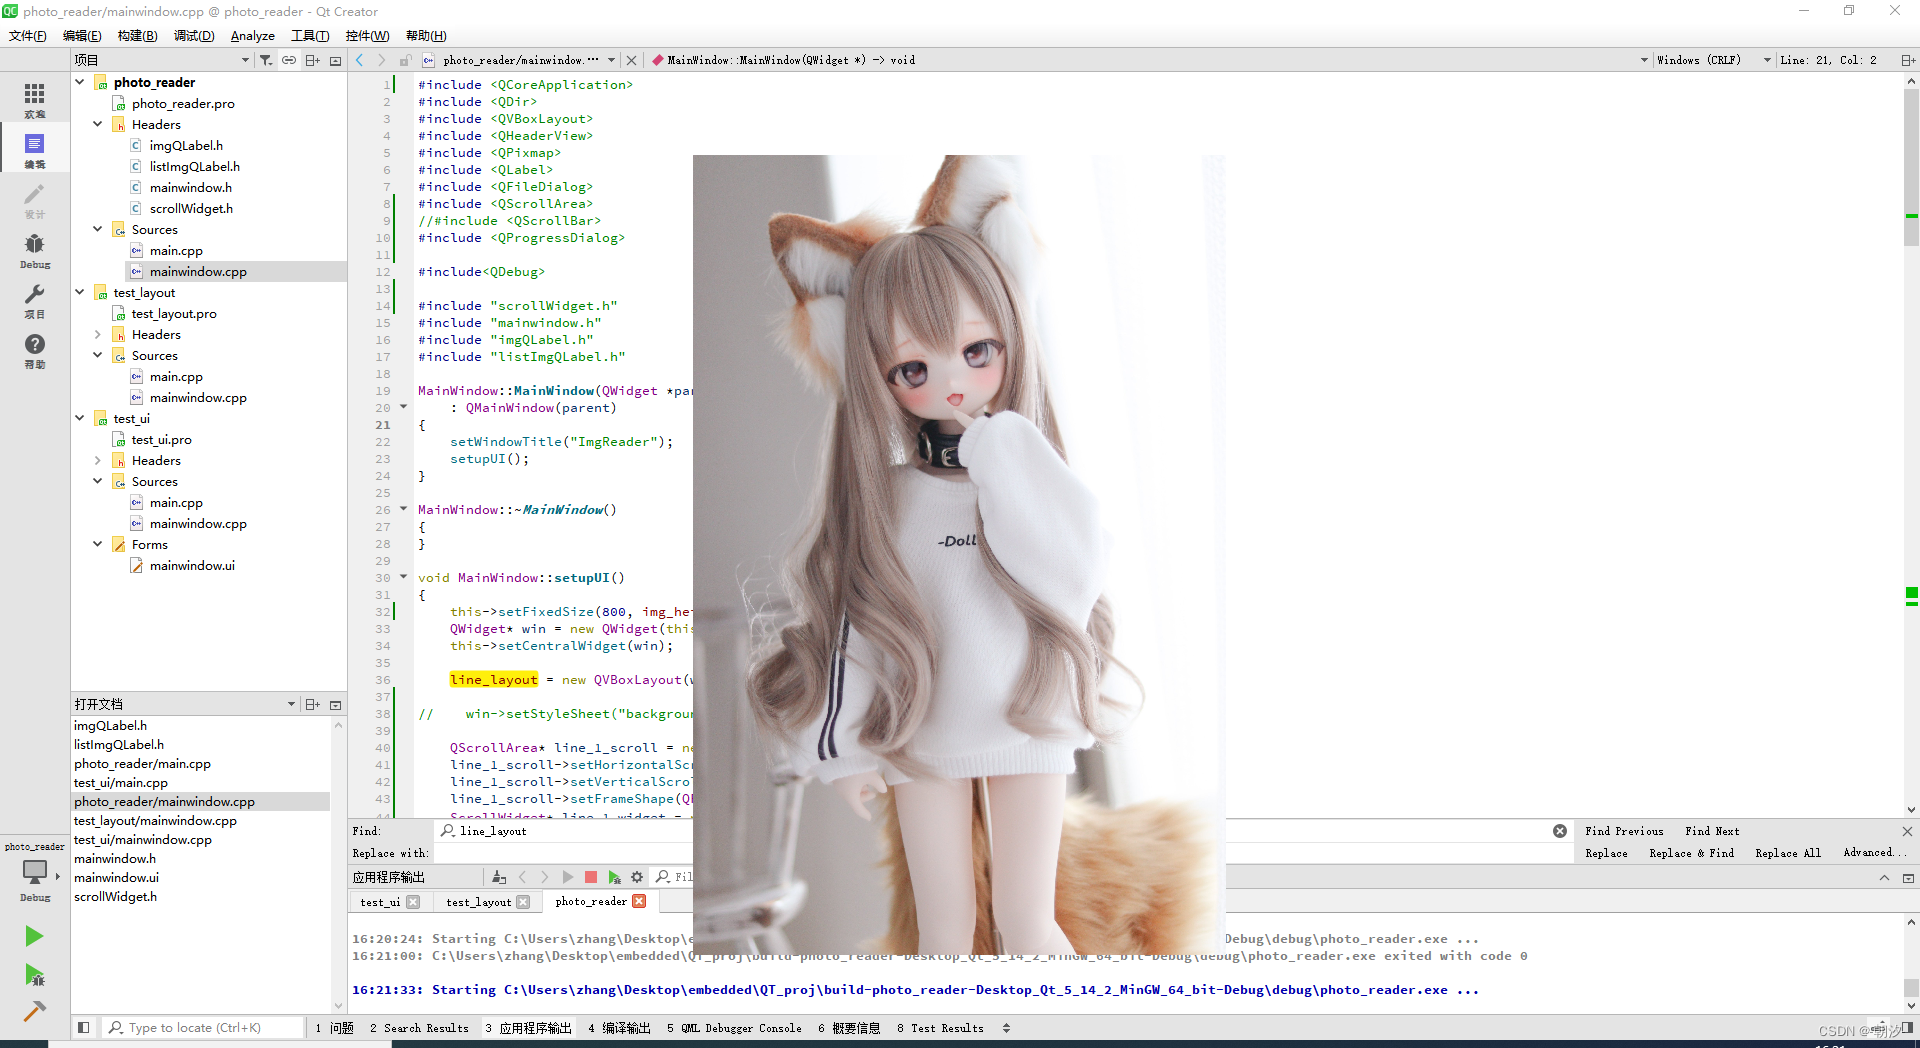
单击返回图片浏览窗口
具体代码如下:
imgQLabel.h
#ifndef IMGLABEL_H
#define IMGLABEL_H

#include <QLabel>
#include <QMouseEvent>
#include <QWheelEvent>
#include <cmath>

class ImgLabel : public QLabel
{
    Q_OBJECT

public:
    explicit ImgLabel(QWidget* parent = nullptr, Qt::WindowFlags f = Qt::WindowFlags()) : QLabel(parent, f) {}

    void setImage(QPixmap pixmap)
    {
        _pixmap = pixmap;
    }

signals:
    void clicked();

protected:
    void mousePressEvent(QMouseEvent* event) override
    {
        /* QMouseEvent是Qt图形用户界面框架的一部分,它包含有关鼠标事件的信息,
         * 例如按下或释放的按钮、鼠标的位置、移动距离等。通过在类中重写mousePressEvent()函数
         * 并使用QMouseEvent获取有关鼠标单击的信息,我们可以创建自定义的可单击QLabel。*/

        if (event->button() == Qt::LeftButton)
        {
            emit clicked();
        }
        QLabel::mousePressEvent(event);
    };

//    void wheelEvent(QWheelEvent* event)
//    {
//        // 根据鼠标滚轮的滚动距离计算缩放因子
//        int numDegrees = event->delta() / 8;
//        double numSteps = numDegrees / 15.0;
//        double scalingFactor = std::pow(1.15, numSteps);

//        // 调整缩放因子,使得图片不会过大或过小
//        _scale_factor *= scalingFactor;
//        _scale_factor = std::max(0.1, std::min(_scale_factor, 2.0));

//        // 缩放图片并更新标签大小
//        QPixmap pixmap = _pixmap.scaled(_pixmap.width() * _scale_factor, _pixmap.height() * _scale_factor);
//        setPixmap(pixmap);
//        adjustSize();

//        // 接受滚轮事件
//        event->accept();
//    };


private:
    double _scale_factor=1.0;
    QPixmap _pixmap;
};


#endif // IMGLABEL_H
listImgQLabel.h
#ifndef LISTIMGLABEL_H
#define LISTIMGLABEL_H

#include <QLabel>
#include <QMouseEvent>
#include <QWheelEvent>

#include <cmath>

class ListImgLabel : public QLabel
{
    Q_OBJECT

public:
    explicit ListImgLabel(QWidget* parent = nullptr) : QLabel(parent) {}

signals:
    void doubleClicked();

protected:
    void mouseDoubleClickEvent(QMouseEvent* event) override
    {
        if (event->type() == QEvent::MouseButtonDblClick)
        {
            if (event->button() == Qt::LeftButton)
            {
                emit doubleClicked();
            }
        }
        QLabel::mouseDoubleClickEvent(event);
    }
};


#endif // LISTIMGLABEL_H
scrollWidget.h
#ifndef SCROLLWIDGET_H
#define SCROLLWIDGET_H

#include <QWidget>
#include <QWheelEvent>

class ScrollWidget : public QWidget
{
public:
    ScrollWidget(QWidget* parent = nullptr) : QWidget(parent) { }
    void setScrollWidget(QWidget* parent = nullptr) {
        if (parent != nullptr)
        {
            parent_widget = parent;
            QString type_name = typeid (parent).name();
//            qDebug() << parent << " " << type_name << endl;
        }
    }

    void scroll_widget(int scroll_num, QWheelEvent* event=nullptr)
    {
        parent_widget_width = parent_widget->width();
        widget_width = this->width();

        if (parent_widget_width >= widget_width)
        {
            event->accept();
            return;
        }

//        qDebug() << scrolled_x << " " << scroll_step * scroll_num << "  " << scroll_num << endl;

        if (scroll_num > 0)
        {
            if(scrolled_x - scroll_step * scroll_num < 0)
            {
                if(scrolled_x > 0)
                {
                    scroll(scrolled_x, 0);
                    scrolled_x = 0;
                }
                if(event != nullptr)
                    event->accept();
                return;
            }

            scroll(scroll_step * scroll_num, 0);
            scrolled_x -= scroll_step * scroll_num;
        }
        else
        {
            scroll_num = -scroll_num;
            if((scrolled_x + scroll_step * scroll_num) > (widget_width - parent_widget_width))
            {
                if ((widget_width - parent_widget_width) - scrolled_x > 0)
                {
                    scroll(-(widget_width - parent_widget_width - scrolled_x), 0);
                    scrolled_x = widget_width - parent_widget_width;
                }
                if(event != nullptr)
                    event->accept();
                return;
            }
            scroll(-scroll_step * scroll_num, 0);
            scrolled_x += scroll_step * scroll_num;
        }

    }

protected:
    void wheelEvent(QWheelEvent* event) override
    {
        if(event->angleDelta().y() > 0)
            scroll_widget(1);
        else
            scroll_widget(-1);
        event->accept();
    }
public:
    int scrolled_x = 0;
    int scroll_step = 22;
    int widget_width = 0;
    int parent_widget_width = 0;
private:
    QWidget* parent_widget;
};


#endif // SCROLLWIDGET_H
main.cpp
#include "mainwindow.h"

#include <QApplication>
#include <qdesktopwidget.h>

int main(int argc, char *argv[])
{
    QApplication a(argc, argv);
    MainWindow w;

    /*窗口居中对齐*/
    QDesktopWidget *desktop = QApplication::desktop();
    w.move((desktop->width() - w.frameGeometry().width())/ 2, (desktop->height() - w.frameGeometry().height()) /2);

    w.show();
    return a.exec();
}
mainwindow.h
#ifndef MAINWINDOW_H
#define MAINWINDOW_H

#include <QMainWindow>
#include <QHBoxLayout>
#include <QVBoxLayout>
#include <QSpacerItem>


class MainWindow : public QMainWindow
{
    Q_OBJECT

public:
    MainWindow(QWidget *parent = nullptr);
    ~MainWindow();

private:
    void setupUI();
    void setupLineUI();
    void readImages(const QString& directory);
    void displayImage(const QString& path, double scale_factor);
    void onLabelClicked();

    QVBoxLayout *line_layout;
    QHBoxLayout *line_1;
    QHBoxLayout *line_2;
    QHBoxLayout *line_3;

    QSpacerItem* spacer_line_1;
    QSpacerItem* spacer_line_2;
    QSpacerItem* spacer_line_3;

    int img_height = 140;

};
#endif // MAINWINDOW_H
mainwindow.cpp
#include <QCoreApplication>
#include <QDir>
#include <QVBoxLayout>
#include <QHeaderView>
#include <QPixmap>
#include <QLabel>
#include <QFileDialog>
#include <QScrollArea>
//#include <QScrollBar>
#include <QProgressDialog>

#include<QDebug>

#include "scrollWidget.h"
#include "mainwindow.h"
#include "imgQLabel.h"
#include "listImgQLabel.h"

MainWindow::MainWindow(QWidget *parent)
    : QMainWindow(parent)
{
    setWindowTitle("ImgReader");
    setupUI();
}

MainWindow::~MainWindow()
{
}

void MainWindow::setupUI()
{
    this->setFixedSize(800, img_height*3);
    QWidget* win = new QWidget(this);
    this->setCentralWidget(win);

    line_layout = new QVBoxLayout(win);

//    win->setStyleSheet("background-color: blue;");

    QScrollArea* line_1_scroll = new QScrollArea(win);
    line_1_scroll->setHorizontalScrollBarPolicy(Qt::ScrollBarAlwaysOff);
    line_1_scroll->setVerticalScrollBarPolicy(Qt::ScrollBarAlwaysOff);
    line_1_scroll->setFrameShape(QFrame::NoFrame); // 去除frame边框
    ScrollWidget* line_1_widget = new ScrollWidget;

    QScrollArea* line_2_scroll = new QScrollArea(win);
    line_2_scroll->setHorizontalScrollBarPolicy(Qt::ScrollBarAlwaysOff);
    line_2_scroll->setVerticalScrollBarPolicy(Qt::ScrollBarAlwaysOff);
    line_2_scroll->setFrameShape(QFrame::NoFrame);
    ScrollWidget* line_2_widget = new ScrollWidget;

    QScrollArea* line_3_scroll = new QScrollArea(win);
    line_3_scroll->setHorizontalScrollBarPolicy(Qt::ScrollBarAlwaysOff);
    line_3_scroll->setVerticalScrollBarPolicy(Qt::ScrollBarAlwaysOff);
    line_3_scroll->setFrameShape(QFrame::NoFrame);
    ScrollWidget* line_3_widget = new ScrollWidget;

    line_1 = new QHBoxLayout();
    line_1->setContentsMargins(0,0,0,0); // setContentsMargins()设置布局的内容边距,依次为左,上,右,下
    line_2 = new QHBoxLayout();
    line_2->setContentsMargins(0,0,0,0);
    line_3 = new QHBoxLayout();
    line_3->setContentsMargins(0,0,0,0);

    QString imgPath = "imgs";   // 图片文件夹路径
    QDir dir(imgPath);

    // 检查文件夹是否存在
    if (!dir.exists()) {
        QString newPath = QFileDialog::getExistingDirectory(this, "选择文件夹", QDir::homePath());
        // 检查该文件夹是否存在(如果用户没有选择则 newPath 会为空字符串)
        if (!newPath.isEmpty() && dir.mkpath(newPath)) {
            dir.setPath(newPath);
        } else {
            qWarning("没有选择文件夹");
            return;
        }
    }
    QStringList nameFilter;
    nameFilter << "*.jpg" << "*.png" << "*.bmp";  // 图片类型过滤器
    QFileInfoList fileList = dir.entryInfoList(nameFilter);

    /*图片读取进度对话框*/
    QProgressDialog dialog(nullptr, nullptr, 0, fileList.size(), this);
    dialog.setFixedSize(420, 50);
    dialog.setWindowTitle(tr("正在从文件夹读取图片"));
    dialog.setWindowModality((Qt::WindowModal));
    dialog.show();

    // 显示图片和调整大小
    for (int i = 0; i < fileList.size(); i++) {
        QPixmap pixmap;
        pixmap.load(fileList[i].absoluteFilePath());
        pixmap = pixmap.scaledToHeight(img_height, Qt::FastTransformation);

        ListImgLabel* img_label = new ListImgLabel();
        img_label->setPixmap(pixmap);

        // 设置 QLabel 的 user data
        QVariant data;
        QString img_path = fileList[i].absoluteFilePath();
        data.setValue(img_path);
        img_label->setProperty("img_path", data);

        if (i % 3 == 0) {
            line_1->addWidget(img_label);
        } else if (i % 3 == 1) {
            line_2->addWidget(img_label);
        } else {
            line_3->addWidget(img_label);
        }

        connect(img_label, &ListImgLabel::doubleClicked, [this, img_path](){
//            qDebug() << img_path << endl;
            displayImage(img_path, 1.0);
        });

        dialog.setValue(i);
        QCoreApplication::processEvents(); // 避免界面冻结
        if(dialog.wasCanceled()) break;
    }
    dialog.close();

    line_1_widget->setLayout(line_1);
    line_2_widget->setLayout(line_2);
    line_3_widget->setLayout(line_3);

    line_1_scroll->setWidget(line_1_widget);
    line_2_scroll->setWidget(line_2_widget);
    line_3_scroll->setWidget(line_3_widget);

    line_1_widget->setScrollWidget(line_1_scroll);
    line_2_widget->setScrollWidget(line_2_scroll);
    line_3_widget->setScrollWidget(line_3_scroll);

    line_layout->addWidget(line_1_scroll);
    line_layout->addWidget(line_2_scroll);
    line_layout->addWidget(line_3_scroll);

    win->setLayout(line_layout);
}

void MainWindow::displayImage(const QString &path, double scale_factor=1.0)
{
    QPixmap pixmap(path);
    if (pixmap.isNull()) {
        qWarning("无法加载图片");
        return;
    }

    int img_width = static_cast<int>(pixmap.width() * scale_factor);
    int img_height = static_cast<int>(pixmap.height() * scale_factor);

    ImgLabel* label = new ImgLabel(this,Qt::Window | Qt::FramelessWindowHint); // 无边框窗口
    if(img_height > 800 || img_width > 800)
    {
        if(img_height > img_width)
        {
            img_width = static_cast<int>(800 * img_width / img_height);
            img_height = 800;
        }
        else
        {
            img_height = static_cast<int>(800 * img_height / img_width);
            img_width = 800;
        }
    }
    label->setPixmap(pixmap.scaled(img_width, img_height, Qt::KeepAspectRatio));

    label->setImage(pixmap);
    label->setAlignment(Qt::AlignCenter);
    label->resize(img_width, img_height);
    label->show();

    // 关闭显示窗口时删除QLabel对象
    connect(this, &MainWindow::destroyed, [=](){
        delete label;
    });

    // 点击返回按钮时关闭并返回至主窗口
    connect(label, &ImgLabel::clicked, [=](){
        label->close();
        this->show();
    });


    // 隐藏主窗口,显示图像
    this->hide();
}
资源下载地址:https://download.csdn.net/download/weixin_40679158/87785638
![[MTK7621] dhcp.script 脚本分析](https://img-blog.csdnimg.cn/d10b6023df794f1a88b554dcb7da42ea.png)
