概述
将主要从三个部分对源码进行解读。
- 数据层面,dataloader 和 数据增强
- 网络模型,模型细节和逻辑
- 模型训练,训练策略等
数据源解读
utils 中有,在train.py中能跳到该函数。
train.py中
# Trainloader 创建dataloader就是我们一开始讲的部分
    dataloader, dataset = create_dataloader(train_path, imgsz, batch_size, gs, opt,
                                            hyp=hyp, augment=True, cache=opt.cache_images, rect=opt.rect,
                                            rank=rank, world_size=opt.world_size, workers=opt.workers)
- utils 文件夹下,datasets.py 里面包含了加载各种类型数据的函数。
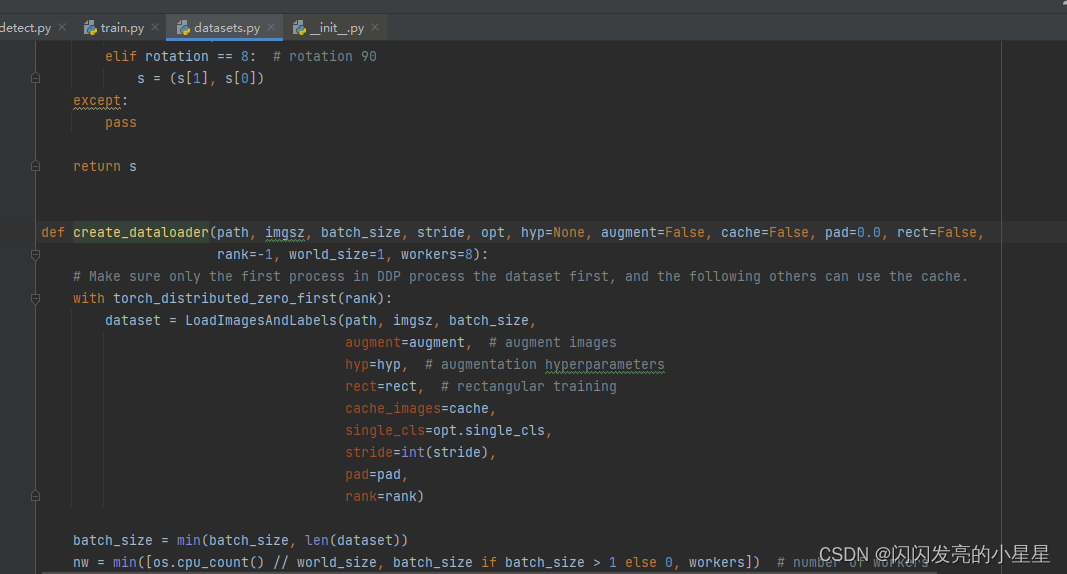
图像数据源配置
batch
加载数据标签
datasets.py中:
class LoadImagesAndLabels(Dataset):  # for training/testing
    def __init__(self, path, img_size=640, batch_size=16, augment=False, hyp=None, rect=False, image_weights=False,
                 cache_images=False, single_cls=False, stride=32, pad=0.0, rank=-1):
        try:
            f = []  # image files
            for p in path if isinstance(path, list) else [path]: #win和linux有点区别 所以这里面代码稍微处理的内容多了点
                p = str(Path(p))  # os-agnostic
                parent = str(Path(p).parent) + os.sep
                if os.path.isfile(p):  # file
                    with open(p, 'r') as t:
                        t = t.read().splitlines()
                        f += [x.replace('./', parent) if x.startswith('./') else x for x in t]  # local to global path
                elif os.path.isdir(p):  # folder
                    f += glob.iglob(p + os.sep + '*.*')
                else:
                    raise Exception('%s does not exist' % p)
            self.img_files = sorted(
                [x.replace('/', os.sep) for x in f if os.path.splitext(x)[-1].lower() in img_formats])
        except Exception as e:
            raise Exception('Error loading data from %s: %s\nSee %s' % (path, e, help_url))

        n = len(self.img_files)
        assert n > 0, 'No images found in %s. See %s' % (path, help_url)
        bi = np.floor(np.arange(n) / batch_size).astype(np.int)  # batch index #batch索引
        nb = bi[-1] + 1  # number of batches #一个epoch有多少个batch

        self.n = n  # number of images
        self.batch = bi  # batch index of image
        self.img_size = img_size
        self.augment = augment
        self.hyp = hyp
        self.image_weights = image_weights
        self.rect = False if image_weights else rect
        self.mosaic = self.augment and not self.rect  # load 4 images at a time into a mosaic (only during training)
        self.mosaic_border = [-img_size // 2, -img_size // 2] #限定范围
        self.stride = stride#下采样总值

        # Define labels
        sa, sb = os.sep + 'images' + os.sep, os.sep + 'labels' + os.sep  # /images/, /labels/ substrings
        self.label_files = [x.replace(sa, sb, 1).replace(os.path.splitext(x)[-1], '.txt') for x in self.img_files]

        # Check cache #可以设置缓存,再训练就不用一个个读了
        cache_path = str(Path(self.label_files[0]).parent) + '.cache'  # cached labels
        if os.path.isfile(cache_path):
            cache = torch.load(cache_path)  # load
            if cache['hash'] != get_hash(self.label_files + self.img_files):  # dataset changed
                cache = self.cache_labels(cache_path)  # re-cache
        else:
            cache = self.cache_labels(cache_path)  # cache

        # Get labels
        labels, shapes = zip(*[cache[x] for x in self.img_files])
        self.shapes = np.array(shapes, dtype=np.float64)
        self.labels = list(labels)

        # Rectangular Training  https://github.com/ultralytics/yolov3/issues/232
        if self.rect: #矩形
            # Sort by aspect ratio
            s = self.shapes  # wh
            ar = s[:, 1] / s[:, 0]  # aspect ratio
            irect = ar.argsort()
            self.img_files = [self.img_files[i] for i in irect]
            self.label_files = [self.label_files[i] for i in irect]
            self.labels = [self.labels[i] for i in irect]
            self.shapes = s[irect]  # wh
            ar = ar[irect]

            # Set training image shapes
            shapes = [[1, 1]] * nb
            for i in range(nb):
                ari = ar[bi == i]
                mini, maxi = ari.min(), ari.max()
                if maxi < 1:
                    shapes[i] = [maxi, 1]
                elif mini > 1:
                    shapes[i] = [1, 1 / mini]

            self.batch_shapes = np.ceil(np.array(shapes) * img_size / stride + pad).astype(np.int) * stride

        # Cache labels
        create_datasubset, extract_bounding_boxes, labels_loaded = False, False, False
        nm, nf, ne, ns, nd = 0, 0, 0, 0, 0  # number missing, found, empty, datasubset, duplicate
        pbar = enumerate(self.label_files)
        if rank in [-1, 0]:
            pbar = tqdm(pbar)
        for i, file in pbar:
            l = self.labels[i]  # label
            if l is not None and l.shape[0]:
                assert l.shape[1] == 5, '> 5 label columns: %s' % file #5列是否都有
                assert (l >= 0).all(), 'negative labels: %s' % file #标签值是否大于0
                assert (l[:, 1:] <= 1).all(), 'non-normalized or out of bounds coordinate labels: %s' % file #归一化
                if np.unique(l, axis=0).shape[0] < l.shape[0]:  # duplicate rows 计算重复的
                    nd += 1  # print('WARNING: duplicate rows in %s' % self.label_files[i])  # duplicate rows
                if single_cls:
                    l[:, 0] = 0  # force dataset into single-class mode 单个类别,设置其类别为0
                self.labels[i] = l
                nf += 1  # file found

                # Create subdataset (a smaller dataset)
                if create_datasubset and ns < 1E4:
                    if ns == 0:
                        create_folder(path='./datasubset')
                        os.makedirs('./datasubset/images')
                    exclude_classes = 43
                    if exclude_classes not in l[:, 0]:
                        ns += 1
                        # shutil.copy(src=self.img_files[i], dst='./datasubset/images/')  # copy image
                        with open('./datasubset/images.txt', 'a') as f:
                            f.write(self.img_files[i] + '\n')

                # Extract object detection boxes for a second stage classifier 把那个坐标框里面的数据截出来,看你任务需要
                if extract_bounding_boxes:
                    p = Path(self.img_files[i])
                    img = cv2.imread(str(p))
                    h, w = img.shape[:2]
                    for j, x in enumerate(l):
                        f = '%s%sclassifier%s%g_%g_%s' % (p.parent.parent, os.sep, os.sep, x[0], j, p.name)
                        if not os.path.exists(Path(f).parent):
                            os.makedirs(Path(f).parent)  # make new output folder

                        b = x[1:] * [w, h, w, h]  # box
                        b[2:] = b[2:].max()  # rectangle to square
                        b[2:] = b[2:] * 1.3 + 30  # pad
                        b = xywh2xyxy(b.reshape(-1, 4)).ravel().astype(np.int)

                        b[[0, 2]] = np.clip(b[[0, 2]], 0, w)  # clip boxes outside of image
                        b[[1, 3]] = np.clip(b[[1, 3]], 0, h)
                        assert cv2.imwrite(f, img[b[1]:b[3], b[0]:b[2]]), 'Failure extracting classifier boxes'
            else:
                ne += 1  # print('empty labels for image %s' % self.img_files[i])  # file empty
                # os.system("rm '%s' '%s'" % (self.img_files[i], self.label_files[i]))  # remove

            if rank in [-1, 0]:
                pbar.desc = 'Scanning labels %s (%g found, %g missing, %g empty, %g duplicate, for %g images)' % (
                    cache_path, nf, nm, ne, nd, n)
        if nf == 0:
            s = 'WARNING: No labels found in %s. See %s' % (os.path.dirname(file) + os.sep, help_url)
            print(s)
            assert not augment, '%s. Can not train without labels.' % s

        # Cache images into memory for faster training (WARNING: large datasets may exceed system RAM)
        self.imgs = [None] * n
        if cache_images:
            gb = 0  # Gigabytes of cached images
            pbar = tqdm(range(len(self.img_files)), desc='Caching images')
            self.img_hw0, self.img_hw = [None] * n, [None] * n
            for i in pbar:  # max 10k images
                self.imgs[i], self.img_hw0[i], self.img_hw[i] = load_image(self, i)  # img, hw_original, hw_resized
                gb += self.imgs[i].nbytes
                pbar.desc = 'Caching images (%.1fGB)' % (gb / 1E9)

    def cache_labels(self, path='labels.cache'):
        # Cache dataset labels, check images and read shapes
        x = {}  # dict
        pbar = tqdm(zip(self.img_files, self.label_files), desc='Scanning images', total=len(self.img_files))
        for (img, label) in pbar:
            try:
                l = []
                image = Image.open(img)
                image.verify()  # PIL verify
                # _ = io.imread(img)  # skimage verify (from skimage import io)
                shape = exif_size(image)  # image size
                assert (shape[0] > 9) & (shape[1] > 9), 'image size <10 pixels'
                if os.path.isfile(label):
                    with open(label, 'r') as f:
                        l = np.array([x.split() for x in f.read().splitlines()], dtype=np.float32)  # labels
                if len(l) == 0:
                    l = np.zeros((0, 5), dtype=np.float32)
                x[img] = [l, shape]
            except Exception as e:
                x[img] = [None, None]
                print('WARNING: %s: %s' % (img, e))

        x['hash'] = get_hash(self.label_files + self.img_files)
        torch.save(x, path)  # save for next time
        return x
- 1.cache 具有缓存功能,可以设置缓存,再训练就不用一个个读了
-
- extract_bounding_boxes, 如果要把框里的内容提取出来做后续的处理,则将该参数设置为True。
create_datasubset, extract_bounding_boxes, labels_loaded = False, False, False # 如有要将信息暴露或者提取出来的,可以在这边修改成True
-
- nm, nf, ne, ns, nd = 0, 0, 0, 0, 0 # number missing, found, empty, datasubset, duplicate # 如有需要,提取这些变量
- 如:

Mosaic 数据增强
上面介绍了如何取数据(dataloader),接下来介绍对取出来的数据如何进行增强。
datasts.py中:
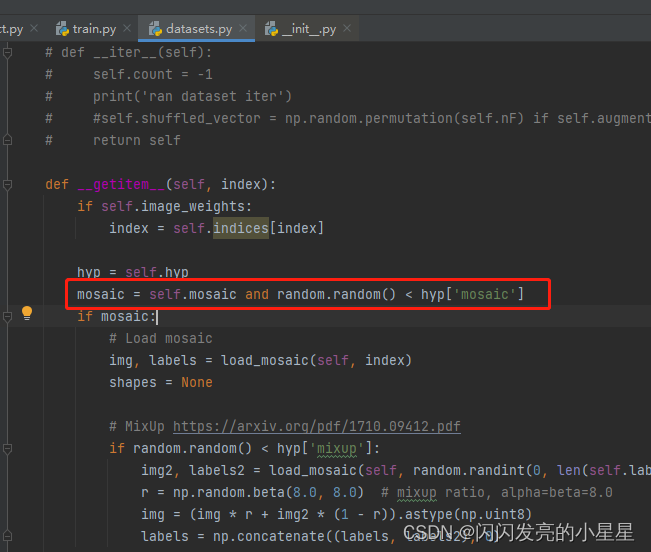
数据四合一
def load_mosaic(self, index):
    # loads images in a mosaic

    labels4 = []  # 将4张图合成为1张
    s = self.img_size
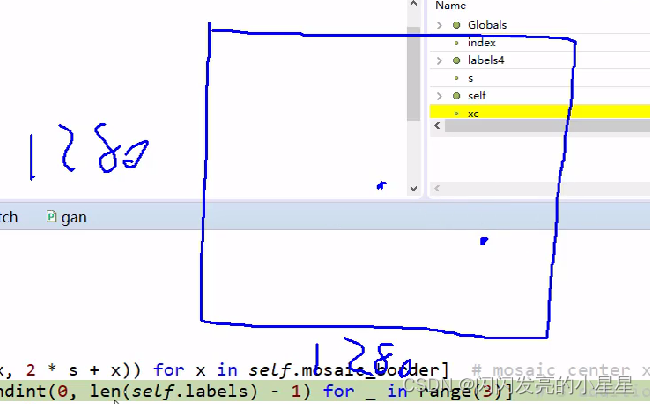
    yc, xc = [int(random.uniform(-x, 2 * s + x)) for x in self.mosaic_border]  # mosaic center x, y 随机设置合成的一张大图的中心 ,函数中的x为负数? 如x=-320,s=640,则中心点的范围是 320,2*640-320
    indices = [index] + [random.randint(0, len(self.labels) - 1) for _ in range(3)]  # 3 additional image indices 随机再选3个图像
    for i, index in enumerate(indices):
        # Load image
        img, _, (h, w) = load_image(self, index)

        # place img in img4
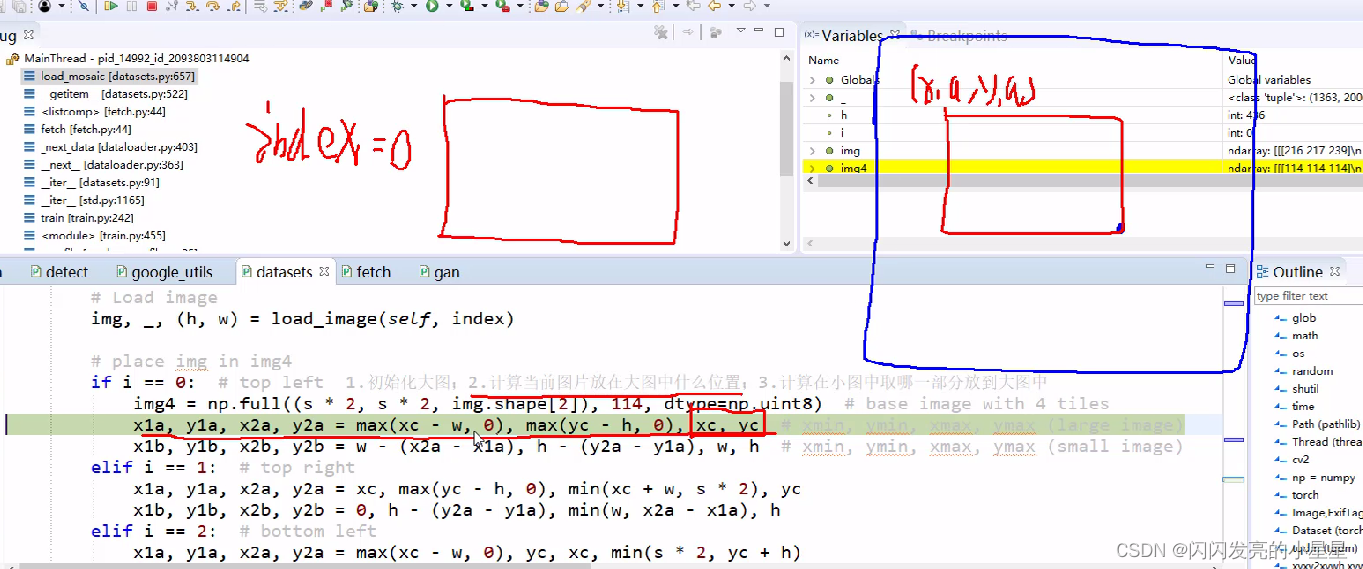
        if i == 0:  # top left  1.初始化大图;2.计算当前图片放在大图中什么位置;3.计算在小图中取哪一部分放到大图中
            img4 = np.full((s * 2, s * 2, img.shape[2]), 114, dtype=np.uint8)  # base image with 4 tiles
            x1a, y1a, x2a, y2a = max(xc - w, 0), max(yc - h, 0), xc, yc  # xmin, ymin, xmax, ymax (large image)
            x1b, y1b, x2b, y2b = w - (x2a - x1a), h - (y2a - y1a), w, h  # xmin, ymin, xmax, ymax (small image)
        elif i == 1:  # top right
            x1a, y1a, x2a, y2a = xc, max(yc - h, 0), min(xc + w, s * 2), yc
            x1b, y1b, x2b, y2b = 0, h - (y2a - y1a), min(w, x2a - x1a), h
        elif i == 2:  # bottom left
            x1a, y1a, x2a, y2a = max(xc - w, 0), yc, xc, min(s * 2, yc + h)
            x1b, y1b, x2b, y2b = w - (x2a - x1a), 0, w, min(y2a - y1a, h)
        elif i == 3:  # bottom right
            x1a, y1a, x2a, y2a = xc, yc, min(xc + w, s * 2), min(s * 2, yc + h)
            x1b, y1b, x2b, y2b = 0, 0, min(w, x2a - x1a), min(y2a - y1a, h)
        #1.截图小图中的部分放到大图中 2.由于小图可能填充不满,所以还需要计算差异值,因为一会要更新坐标框标签
        img4[y1a:y2a, x1a:x2a] = img[y1b:y2b, x1b:x2b]  # img4[ymin:ymax, xmin:xmax]
        padw = x1a - x1b
        padh = y1a - y1b

        # Labels 标签值要重新计算,因为现在都放到大图中了
        x = self.labels[index]
        labels = x.copy()
        if x.size > 0:  # Normalized xywh to pixel xyxy format
            labels[:, 1] = w * (x[:, 1] - x[:, 3] / 2) + padw
            labels[:, 2] = h * (x[:, 2] - x[:, 4] / 2) + padh
            labels[:, 3] = w * (x[:, 1] + x[:, 3] / 2) + padw
            labels[:, 4] = h * (x[:, 2] + x[:, 4] / 2) + padh
        labels4.append(labels)

    # Concat/clip labels 坐标计算完之后可能越界,调整坐标值,让他们都在大图中
    if len(labels4):
        labels4 = np.concatenate(labels4, 0)
        np.clip(labels4[:, 1:], 0, 2 * s, out=labels4[:, 1:])  # use with random_perspective
        # img4, labels4 = replicate(img4, labels4)  # replicate

    # Augment 对整合的大图再进行随机旋转、平移、缩放、裁剪
    img4, labels4 = random_perspective(img4, labels4,
                                       degrees=self.hyp['degrees'],
                                       translate=self.hyp['translate'],
                                       scale=self.hyp['scale'],
                                       shear=self.hyp['shear'],
                                       perspective=self.hyp['perspective'],
                                       border=self.mosaic_border)  # border to remove

    return img4, labels4
- 1.拼接4张图片,合成一张大图,大图的中心点随机,如:
-
- a.初始化大图;b.计算当前图片放在大图中什么位置;c.计算在小图中取哪一部分放到大图中
img4 = np.full((s * 2, s * 2, img.shape[2]), 114, dtype=np.uint8) # base image with 4 tiles
-
- 各个小图在大图中的位置
x1a, y1a, x2a, y2a = max(xc - w, 0), max(yc - h, 0), xc, yc # xmin, ymin, xmax, ymax (large image)
-
- 将4个小图合成一个大图后,再对大图进行旋转、平移、反转等数据增强操作。
getitem构建batch
batch =16的话,getitem会执行16次,对每个图进行一次预处理,主要是mosaic 数据增强。
    def __getitem__(self, index):
        if self.image_weights:
            index = self.indices[index]

        hyp = self.hyp
        mosaic = self.mosaic and random.random() < hyp['mosaic']
        if mosaic:
            # Load mosaic
            img, labels = load_mosaic(self, index)
            shapes = None

            # MixUp https://arxiv.org/pdf/1710.09412.pdf
            if random.random() < hyp['mixup']:
                img2, labels2 = load_mosaic(self, random.randint(0, len(self.labels) - 1))
                r = np.random.beta(8.0, 8.0)  # mixup ratio, alpha=beta=8.0
                img = (img * r + img2 * (1 - r)).astype(np.uint8)
                labels = np.concatenate((labels, labels2), 0)

        else:
            # Load image
            img, (h0, w0), (h, w) = load_image(self, index)

            # Letterbox
            shape = self.batch_shapes[self.batch[index]] if self.rect else self.img_size  # final letterboxed shape
            img, ratio, pad = letterbox(img, shape, auto=False, scaleup=self.augment)
            shapes = (h0, w0), ((h / h0, w / w0), pad)  # for COCO mAP rescaling

            # Load labels
            labels = []
            x = self.labels[index]
            if x.size > 0:
                # Normalized xywh to pixel xyxy format
                labels = x.copy()
                labels[:, 1] = ratio[0] * w * (x[:, 1] - x[:, 3] / 2) + pad[0]  # pad width
                labels[:, 2] = ratio[1] * h * (x[:, 2] - x[:, 4] / 2) + pad[1]  # pad height
                labels[:, 3] = ratio[0] * w * (x[:, 1] + x[:, 3] / 2) + pad[0]
                labels[:, 4] = ratio[1] * h * (x[:, 2] + x[:, 4] / 2) + pad[1]

        if self.augment:
            # Augment imagespace
            if not mosaic: #这个之前在mosaic方法最后做过了
                img, labels = random_perspective(img, labels,
                                                 degrees=hyp['degrees'],
                                                 translate=hyp['translate'],
                                                 scale=hyp['scale'],
                                                 shear=hyp['shear'],
                                                 perspective=hyp['perspective'])

            # Augment colorspace h:色调 s:饱和度 V:亮度
            augment_hsv(img, hgain=hyp['hsv_h'], sgain=hyp['hsv_s'], vgain=hyp['hsv_v'])

            # Apply cutouts
            # if random.random() < 0.9:
            #     labels = cutout(img, labels)

        nL = len(labels)  # number of labels
        if nL: #1.调整标签格式 2.归一化标签取值范围
            labels[:, 1:5] = xyxy2xywh(labels[:, 1:5])  # convert xyxy to xywh
            labels[:, [2, 4]] /= img.shape[0]  # normalized height 0-1
            labels[:, [1, 3]] /= img.shape[1]  # normalized width 0-1

        if self.augment:#要不要做翻转操作
            # flip up-down
            if random.random() < hyp['flipud']:
                img = np.flipud(img)
                if nL:
                    labels[:, 2] = 1 - labels[:, 2]

            # flip left-right
            if random.random() < hyp['fliplr']:
                img = np.fliplr(img)
                if nL:
                    labels[:, 1] = 1 - labels[:, 1]

        labels_out = torch.zeros((nL, 6))
        if nL:
            labels_out[:, 1:] = torch.from_numpy(labels)

        # Convert
        img = img[:, :, ::-1].transpose(2, 0, 1)  # BGR to RGB, to 3x416x416 要满足pytorch的格式
        img = np.ascontiguousarray(img)

        return torch.from_numpy(img), labels_out, self.img_files[index], shapes
网络架构图可视化安装工具
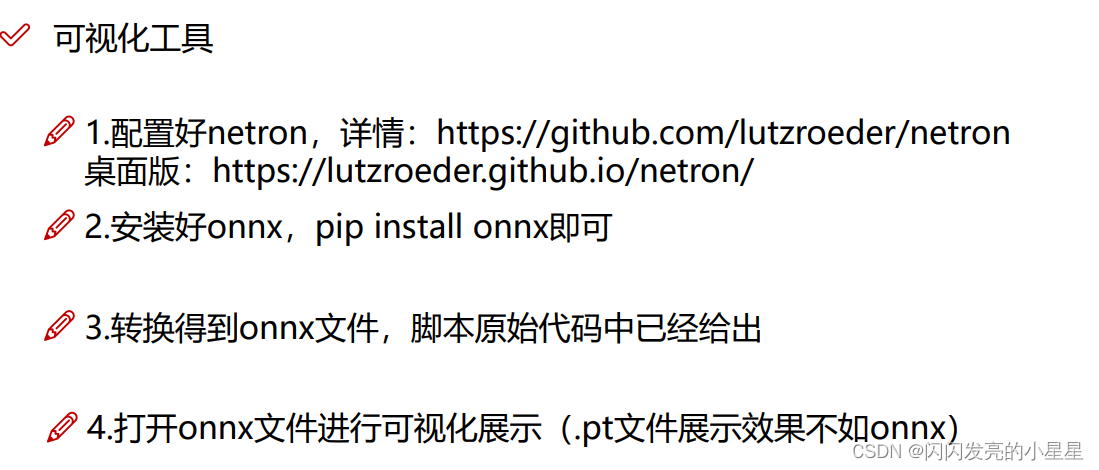
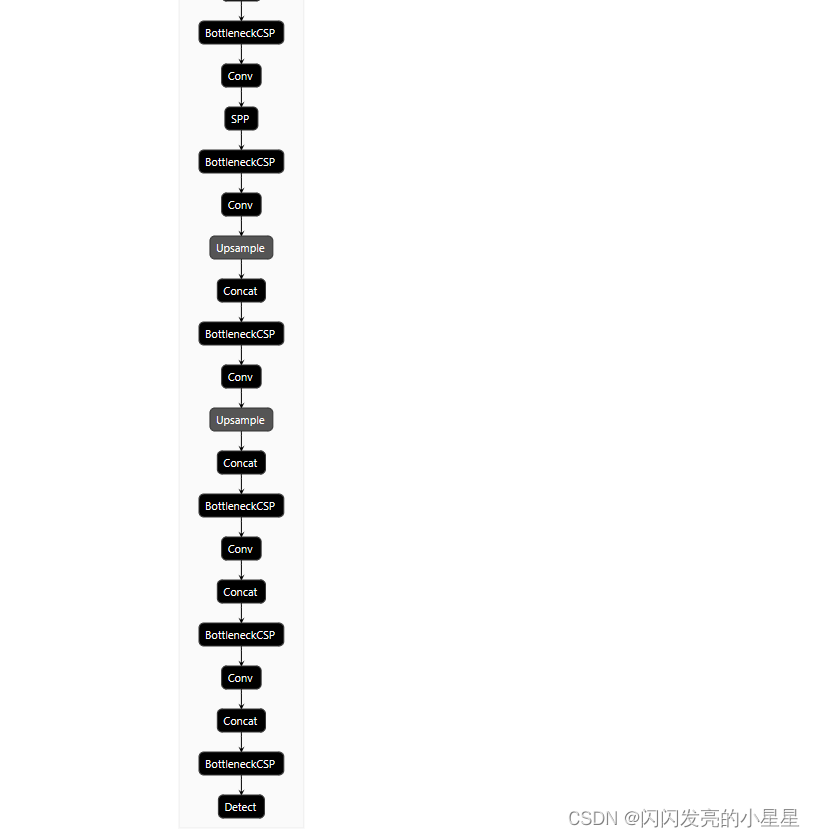
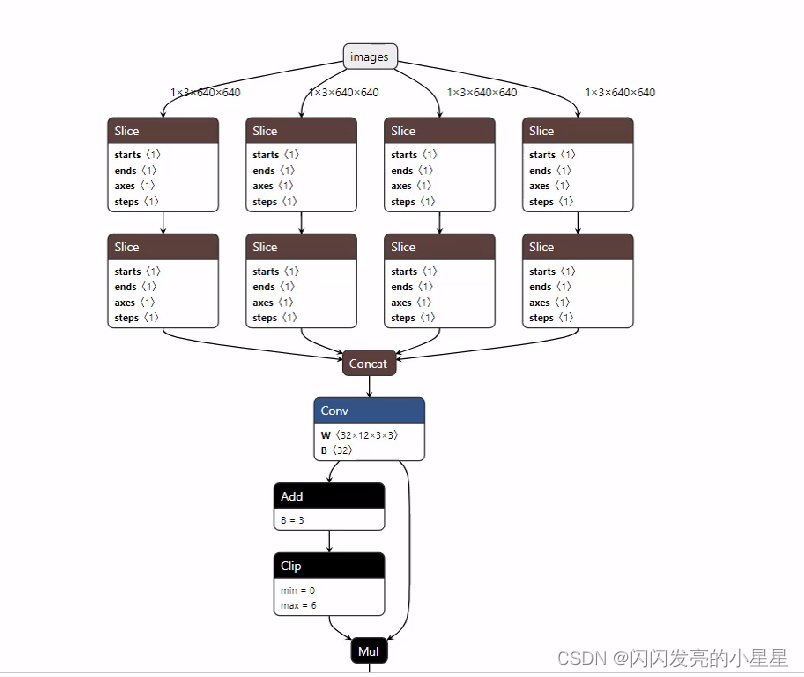
如使用netron网页版,对于pt格式的模型不友好,显示不出各个网络之间的关系,如下图所示。 最好将pt 格式转换成onnx格式。先安装onnx, 然后转换得到onnx文件。 该步在原始代码中已给出(models 文件夹中有个export.py)
pt:
onnx:
V5 网络配置文件解读
models 文件夹中保存有各种类型的模型
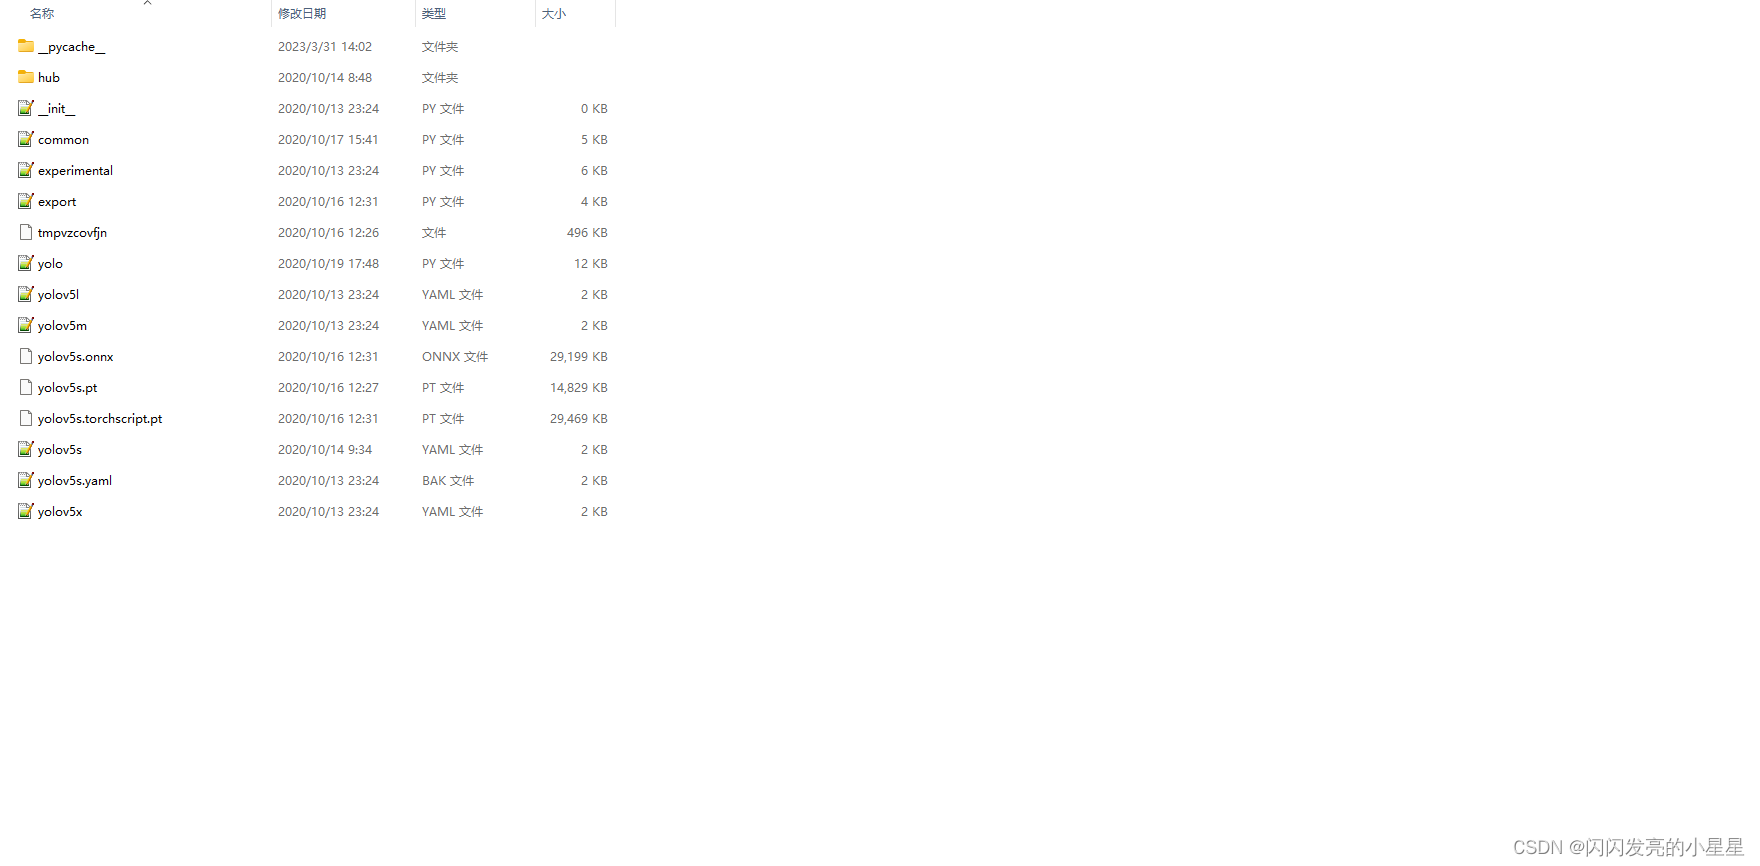
如:yolov5s.yaml:
# parameters
nc: 2  # number of classes
depth_multiple: 0.33  # model depth multiple 模型深度,及比如后面设置网络有9层,但实际只用9*0.33=3个
width_multiple: 0.50  # layer channel multiple 调整卷积核的个数,如设计[64,3],实际用64*0.5 =32 个卷积核

# anchors
anchors:
  - [10,13, 16,30, 33,23]  # P3/8
  - [30,61, 62,45, 59,119]  # P4/16
  - [116,90, 156,198, 373,326]  # P5/32

# YOLOv5 backbone 特征提取模块
backbone:
  # [from, number, module, args] -1代表输入上一层的输出,number代表重复次数,Focus:网络类型,[64,3],卷积核的个数和channel 通道数
  [[-1, 1, Focus, [64, 3]],  # 0-P1/2
   [-1, 1, Conv, [128, 3, 2]],  # 1-P2/4
   [-1, 3, BottleneckCSP, [128]], # 3 代表重复3次,跟上面的depth_width联系的话,其实最终只做了,3*0.33=1次.
   [-1, 1, Conv, [256, 3, 2]],  # 3-P3/8
   [-1, 9, BottleneckCSP, [256]],  # 9代表重复9次,跟上面的depth_width联系的话,其实最终只做了,9*0.33=3次.
   [-1, 1, Conv, [512, 3, 2]],  # 5-P4/16
   [-1, 9, BottleneckCSP, [512]],
   [-1, 1, Conv, [1024, 3, 2]],  # 7-P5/32
   [-1, 1, SPP, [1024, [5, 9, 13]]],
   [-1, 3, BottleneckCSP, [1024, False]],  # 9
  ]

# YOLOv5 head 输出
head:
  [[-1, 1, Conv, [512, 1, 1]],
   [-1, 1, nn.Upsample, [None, 2, 'nearest']],
   [[-1, 6], 1, Concat, [1]],  # cat backbone P4
   [-1, 3, BottleneckCSP, [512, False]],  # 13

   [-1, 1, Conv, [256, 1, 1]],
   [-1, 1, nn.Upsample, [None, 2, 'nearest']],
   [[-1, 4], 1, Concat, [1]],  # cat backbone P3
   [-1, 3, BottleneckCSP, [256, False]],  # 17 (P3/8-small)

   [-1, 1, Conv, [256, 3, 2]],
   [[-1, 14], 1, Concat, [1]],  # cat head P4
   [-1, 3, BottleneckCSP, [512, False]],  # 20 (P4/16-medium)

   [-1, 1, Conv, [512, 3, 2]],
   [[-1, 10], 1, Concat, [1]],  # cat head P5
   [-1, 3, BottleneckCSP, [1024, False]],  # 23 (P5/32-large)

   [[17, 20, 23], 1, Detect, [nc, anchors]],  # Detect(P3, P4, P5)
  ]
Focus 模块
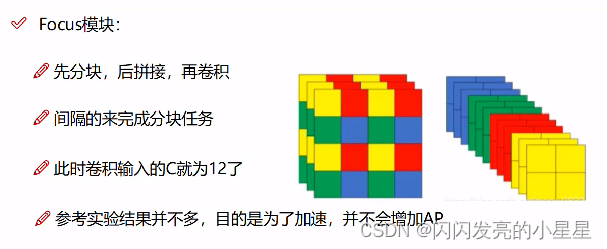
分块:跳着分。比如一张图上的 红色、黄、蓝、绿,跳着分,然后拼接形成12个通道,形成2212
超参数解读
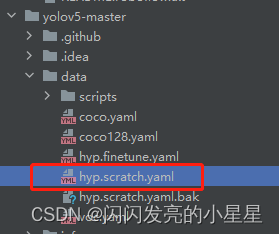
这个文件里有初始化的配置参数,一般不用改。
# Hyperparameters for COCO training from scratch
# python train.py --batch 40 --cfg yolov5m.yaml --weights '' --data coco.yaml --img 640 --epochs 300
# See tutorials for hyperparameter evolution https://github.com/ultralytics/yolov5#tutorials


lr0: 0.01  # initial learning rate (SGD=1E-2, Adam=1E-3)
lrf: 0.2  # final OneCycleLR learning rate (lr0 * lrf) 余弦退火,使用余弦函数动态降低学习率
momentum: 0.937  # SGD momentum/Adam beta1
weight_decay: 0.0005  # optimizer weight decay 5e-4 权重衰减,加入正则之后权重就不会变化剧烈
warmup_epochs: 3.0  # warmup epochs (fractions ok)
warmup_momentum: 0.8  # warmup initial momentum
warmup_bias_lr: 0.1  # warmup initial bias lr
box: 0.05  # box loss gain
cls: 0.5  # cls loss gain
cls_pw: 1.0  # cls BCELoss positive_weight
obj: 1.0  # obj loss gain (scale with pixels)
obj_pw: 1.0  # obj BCELoss positive_weight
iou_t: 0.20  # IoU training threshold
anchor_t: 4.0  # anchor-multiple threshold
# anchors: 0  # anchors per output grid (0 to ignore)
fl_gamma: 0.0  # focal loss gamma (efficientDet default gamma=1.5)
hsv_h: 0.015  # image HSV-Hue augmentation (fraction)
hsv_s: 0.7  # image HSV-Saturation augmentation (fraction)
hsv_v: 0.4  # image HSV-Value augmentation (fraction)
degrees: 0.0  # image rotation (+/- deg)
translate: 0.1  # image translation (+/- fraction)
scale: 0.5  # image scale (+/- gain)
shear: 0.0  # image shear (+/- deg)
perspective: 0.0  # image perspective (+/- fraction), range 0-0.001
flipud: 0.0  # image flip up-down (probability)
fliplr: 0.5  # image flip left-right (probability)
mosaic: 1.0  # image mosaic (probability)
mixup: 0.0  # image mixup (probability)
命令行参数
从入门到放弃 over 。
直接使用,可以进行训练,但是读懂模型,目前先暂搁置吧。。。。。

