官网示例: Add an animated icon to the map | Mapbox GL JS
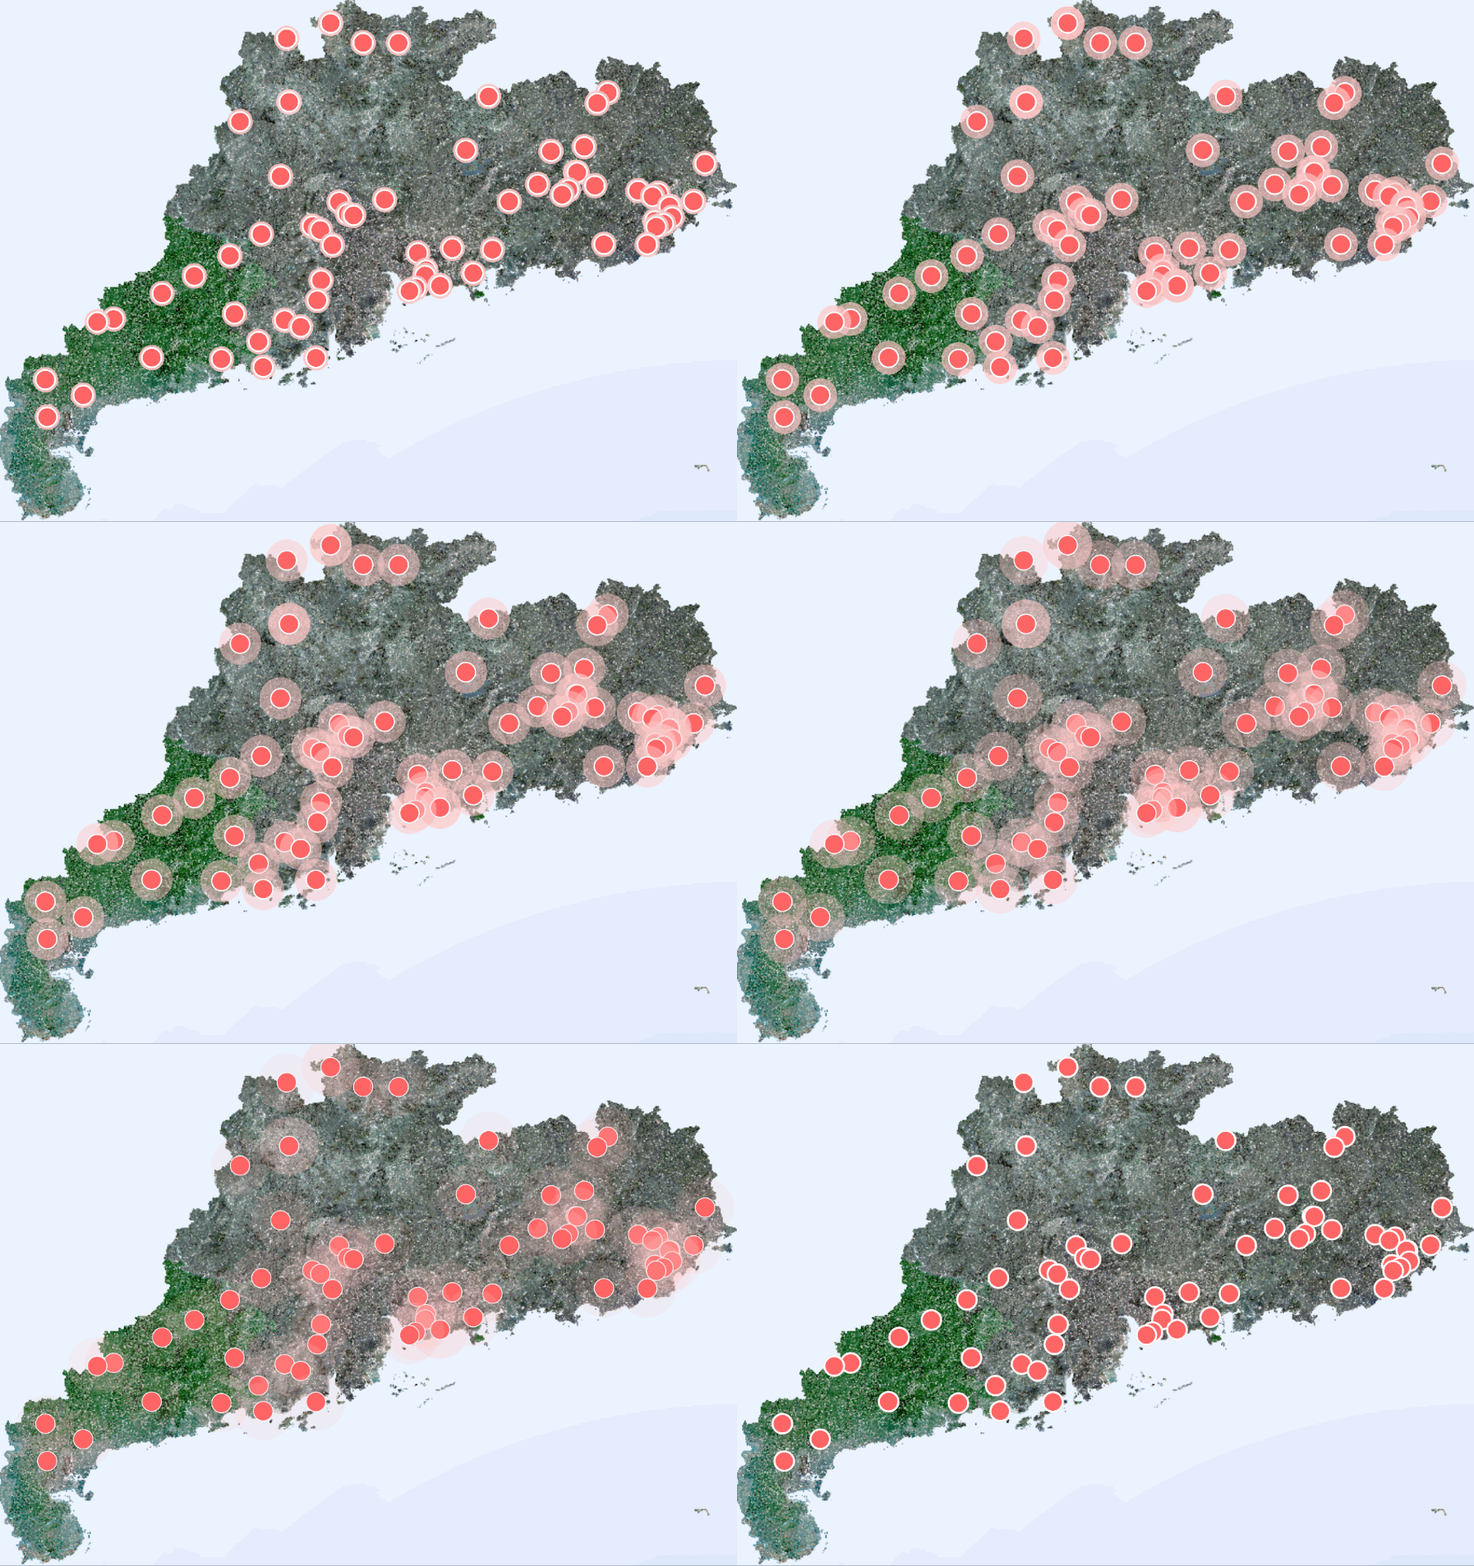
实现
示例数据
const sampleData = {
  "type": "FeatureCollection",
  "features": [
    {
      "type": "Feature",
      "properties": {},
      "geometry": {
        "coordinates": [
          112.58261709330202,
          22.76596784315703
        ],
        "type": "Point"
      }
    },
    {
      "type": "Feature",
      "properties": {},
      "geometry": {
        "coordinates": [
          113.59425670069453,
          23.67775776441485
        ],
        "type": "Point"
      }
    },
    {
      "type": "Feature",
      "properties": {},
      "geometry": {
        "coordinates": [
          114.37244101407515,
          23.249455907195042
        ],
        "type": "Point"
      }
    }
  ]
}
主要内容
// !引入地图对象 const map = new mapboxgl.Map({{...}) 的那个
import map from "../creatMap.js";

export class AnimatedPoint {
  constructor() {
    const size = 200;
    const pulsingDot = {
      width: size,
      height: size,
      data: new Uint8Array(size * size * 4),

      // When the layer is added to the map,
      // get the rendering context for the map canvas.
      onAdd: function () {
        const canvas = document.createElement('canvas');
        canvas.width = this.width;
        canvas.height = this.height;
        this.context = canvas.getContext('2d');
      },

      // Call once before every frame where the icon will be used.
      render: function () {
        const duration = 1000;
        const t = (performance.now() % duration) / duration;

        const radius = (size / 2) * 0.3;
        const outerRadius = (size / 2) * 0.7 * t + radius;
        const context = this.context;

        // Draw the outer circle.
        context.clearRect(0, 0, this.width, this.height);
        context.beginPath();
        context.arc(
          this.width / 2,
          this.height / 2,
          outerRadius,
          0,
          Math.PI * 2
        );
        context.fillStyle = `rgba(255, 200, 200, ${1 - t})`;
        context.fill();

        // Draw the inner circle.
        context.beginPath();
        context.arc(
          this.width / 2,
          this.height / 2,
          radius,
          0,
          Math.PI * 2
        );
        context.fillStyle = 'rgba(255, 100, 100, 1)';
        context.strokeStyle = 'white';
        context.lineWidth = 2 + 4 * (1 - t);
        context.fill();
        context.stroke();

        // Update this image's data with data from the canvas.
        this.data = context.getImageData(
          0,
          0,
          this.width,
          this.height
        ).data;

        // Continuously repaint the map, resulting
        // in the smooth animation of the dot.
        map.triggerRepaint();

        // Return `true` to let the map know that the image was updated.
        return true;
      }
    };
    map.addImage('pulsing-dot', pulsingDot, { pixelRatio: 1 });
  }

  // 绘制点
  drawPoint(features) {
    // 如果已经存在名为animatedPoint的数据源了,就更新数据
    // 否则就新建一个数据源和图层
    if (map.getSource('animatedPoint')) {
      map.getSource('animatedPoint').setData({
        type: "FeatureCollection",
        features: features,
      });
    } else {
      map.addSource('animatedPoint', {
        type: "geojson",
        data: features
      })
      map.addLayer({
        'id': 'animatedPoint', //图层ID
        'type': 'symbol', //图层类型
        'source': 'animatedPoint', //数据源
        layout: {
          'icon-image': 'pulsing-dot',
          'icon-anchor': 'center',
        },
      })
    }
  }

  // 移除点图层
  clearPoint() {
    if (map.getSource('animatedPoint')) {
      map.removeLayer('animatedPoint')
      map.removeSource('animatedPoint')
    }
  }
}
调用
// 引入
import { AnimatedPoint } from './AnimatedPoint'

// 声明
window.animatedPoint = new AnimatedPoint()

// 绘制示例数据
window.animatedPoint.drawPoint(sampleData)

// 移除示例数据的图层
window.animatedPoint.clearPoint()
说明
核心对象介绍
这个功能的核心是const pulsingDot = {...}这一端,pulsingDot这个对象表示了一个动态的脉冲点,它包括以下属性和方法:
width和height:分别表示脉冲点的宽度和高度。data:表示以一维数组形式存储的像素数据,用于渲染动画效果。onAdd:用于添加脉冲点到地图中的方法,会创建一个 canvas 元素,并设置其尺寸与该对象的width和height属性相同。render:用于在 canvas 上渲染动态脉冲点的方法。在方法内部,首先计算了当前时间相对于一个周期总时间的进度百分比t。接下来根据t来计算脉冲点的大小、颜色和边框等样式,并使用 canvas API 在画布上绘制出脉冲点的效果。最后将结果复制到该对象的data属性中,并通知地图进行重新绘制。
这个动态脉冲点的效果是通过定时调用render方法来实现的。每次调用此方法时,都会重新计算并绘制脉冲点的效果,并更新其中的像素数据(this.data)。在地图中加入此对象后,它会自动调用它的onAdd方法来初始化 canvas 并完成一些其他的设置。
最后的最后使用 map.triggerRepaint() 使地图视图进行重绘。
onAdd
onAdd 是 Mapbox GL JS API 中的一个函数,它是在将自定义地图元素添加到地图中时执行的回调函数。当您使用 map.addControl, map.addSource, 或者 map.addLayer 等方法将自定义的图层、控件或源加入到地图中时,Mapbox GL JS 会自动调用该元素的 onAdd() 函数进行一些初始化设置。

