目录
- 书山有路勤为径,学海无涯苦作舟
- 1.Binding
- 1.Binding的源和路径
- 1.1 把控件作为Binding源与Binding标记扩展
- 1.2 控制Binding的方向及数据更新
- 1.3 没有“Path”的Binding
- 1.4通过Binding的RelativeSource属性指定Source
- 1.5把ObjectDataProvider对象指定为Source
书山有路勤为径,学海无涯苦作舟
最近在看《深入浅出WPF》一书,简单记录下学习笔记
1.Binding
在WPF中,Binding更注重于表达它是一种桥梁一样的关联关系。如果把Binding比作数据的桥梁,那么他的两端分别是Binding的源(Source)和目标(Target),数据从哪里来哪里就是源,Binding是架在中间的桥梁,Binding目标就是数据要往哪里去(即把桥架向哪里)。因此,一般情况下,Binding源是逻辑层的对象,Binding目标是UI层的控件对象,这样,数据源就会源源不断地通过Binding送往UI层、被UI层展现,也就完成了数据驱动UI的过程。
1.Binding的源和路径
Binding的源也就是数据的源头,Binding对源的要求并不苛刻——只要它是一个对象,并且通过属性公开自己的数据,它就可以作为Binding的源。
1.1 把控件作为Binding源与Binding标记扩展
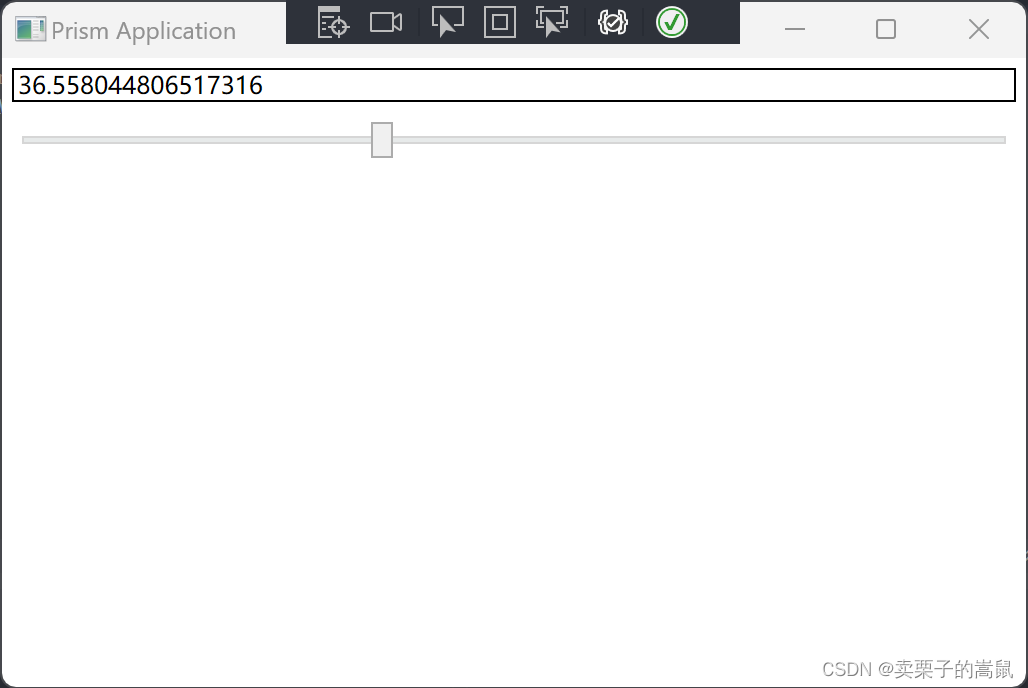
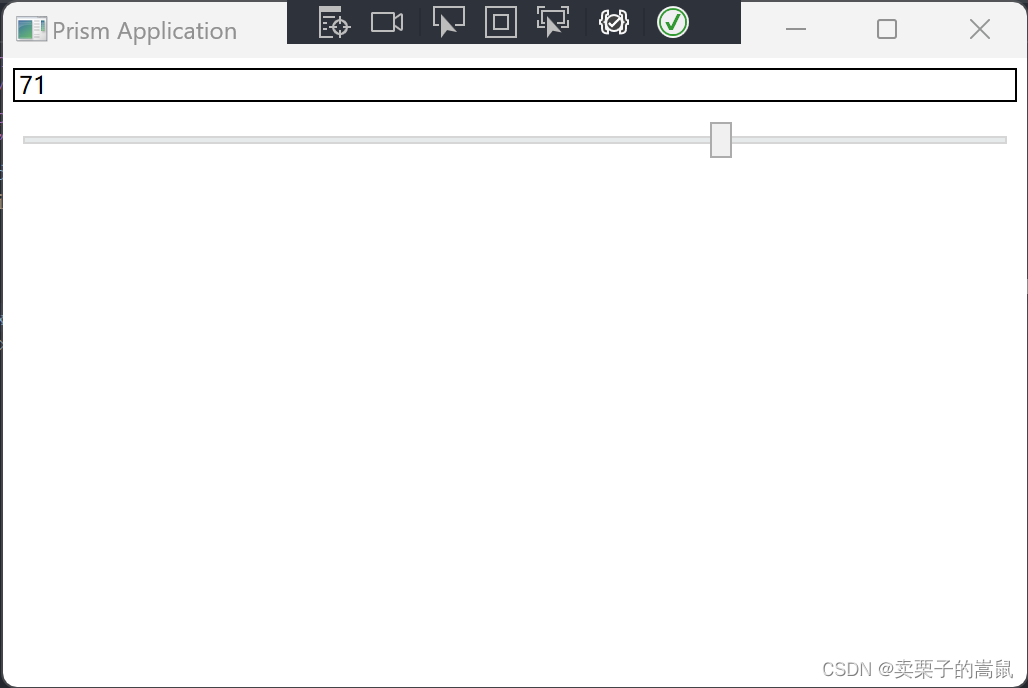
大多数情况下Binding的源是逻辑层的对象,但是有时候为了让UI元素产生一些关联也会使用Binding在控件间建立关联。如下代码是把一个TextBox的Text属性关联在了Slider的Value属性上,
<Window x:Class="BlankApp2.Views.MainWindow"
        xmlns="http://schemas.microsoft.com/winfx/2006/xaml/presentation"
        xmlns:x="http://schemas.microsoft.com/winfx/2006/xaml"
        xmlns:prism="http://prismlibrary.com/"
        prism:ViewModelLocator.AutoWireViewModel="True"
        Title="{Binding Title}" Height="350" Width="525" >
    <Grid>
        <StackPanel>
            <TextBox x:Name="textBox1" Text="{Binding ElementName=Slider1,Path=Value}" BorderBrush="Black" Margin="5"/>
            <Slider x:Name="Slider1" Maximum="100" Minimum="0" Margin="5"/>
        </StackPanel>
    </Grid>
</Window>
运行效果如图:
1.2 控制Binding的方向及数据更新
Binding在源和目标之间架起了沟通的桥梁,默认情况下数据既能通过Binding送达目标,也能够从目标返回源(收集用户对数据的修改)。有时候只需要将数据展示给用户、不允许用户修改,这个时候可以把Binding模式更改为从源向目标的单向沟通。Binding还可以支持从目标向源的单向沟通以及在Binding关系确立时读取一次数据,这个还需要根据实际情况去选择。
- 控制Binding数据流向的属性是Mode,它的类型是BindingMode枚举,它的值有:
- TwoWay
- OneWay
- OnTime
- OneWayToSource
- Defalut
注意:Default的值是指Binding的模式会根据目标的实际情况来确定,比如若是可编辑的(如TextBox的Text属性),Defalut就会采用双向模式;若是只读的(如TextBox的Text属性)就会采用单向模式。
- UpdateSourceTrigger属性,即改变源的数据所采用的触发方式,它有以下几种值:
- Default
- Explicit
- LostFocus(当目标的值发生改变并且失去焦点后,就立刻触发源的值也改变)
- PropertyChanged(当目标的值发生改变时,就立刻触发源的值也改变)
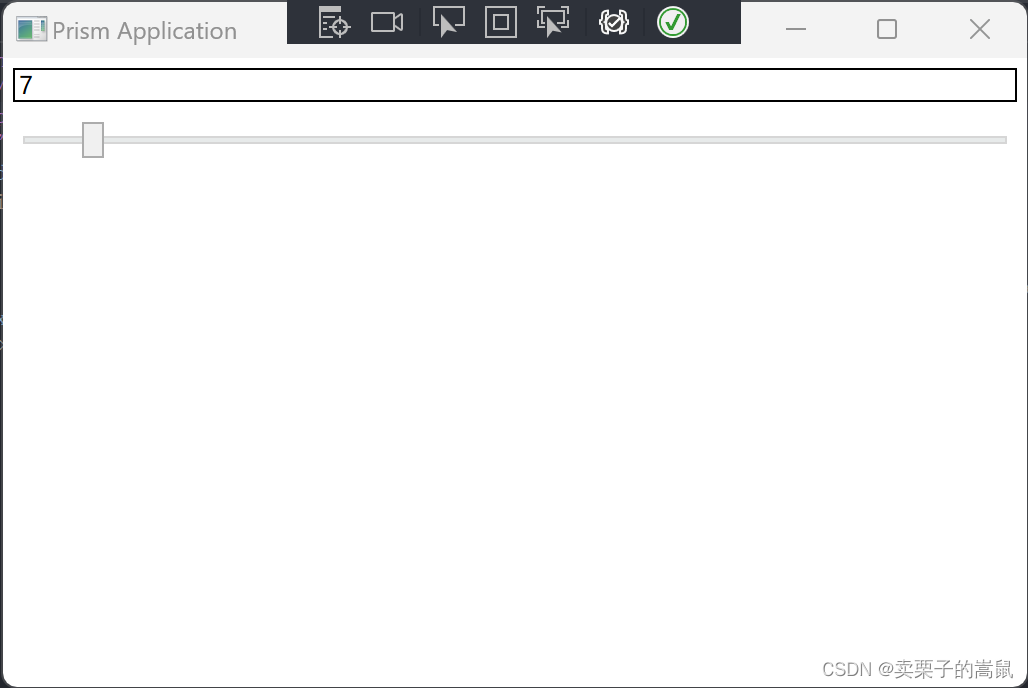
例子1:
<Window x:Class="BlankApp2.Views.MainWindow"
        xmlns="http://schemas.microsoft.com/winfx/2006/xaml/presentation"
        xmlns:x="http://schemas.microsoft.com/winfx/2006/xaml"
        xmlns:prism="http://prismlibrary.com/"
        prism:ViewModelLocator.AutoWireViewModel="True"
        Title="{Binding Title}" Height="350" Width="525" >
    <Grid>
        <StackPanel>
            <TextBox x:Name="textBox1" Text="{Binding ElementName=Slider1,Path=Value,UpdateSourceTrigger=PropertyChanged}" BorderBrush="Black" Margin="5"/>
            <Slider x:Name="Slider1" Maximum="100" Minimum="0" Margin="5"/>
        </StackPanel>
    </Grid>
</Window>
当在输入框中输入任意一个值时,Slider的值都会立马也跟着改变,
例子2:
<Window x:Class="BlankApp2.Views.MainWindow"
        xmlns="http://schemas.microsoft.com/winfx/2006/xaml/presentation"
        xmlns:x="http://schemas.microsoft.com/winfx/2006/xaml"
        xmlns:prism="http://prismlibrary.com/"
        prism:ViewModelLocator.AutoWireViewModel="True"
        Title="{Binding Title}" Height="350" Width="525" >
    <Grid>
        <StackPanel>
            <TextBox x:Name="textBox1" Text="{Binding ElementName=Slider1,Path=Value,UpdateSourceTrigger=LostFocus}" BorderBrush="Black" Margin="5"/>
            <Slider x:Name="Slider1" Maximum="100" Minimum="0" Margin="5"/>
        </StackPanel>
    </Grid>
</Window>
当在TextBox中输入一个数值,并且按下Tab键使其失去焦点时,Slider的值才会发生改变,
1.3 没有“Path”的Binding
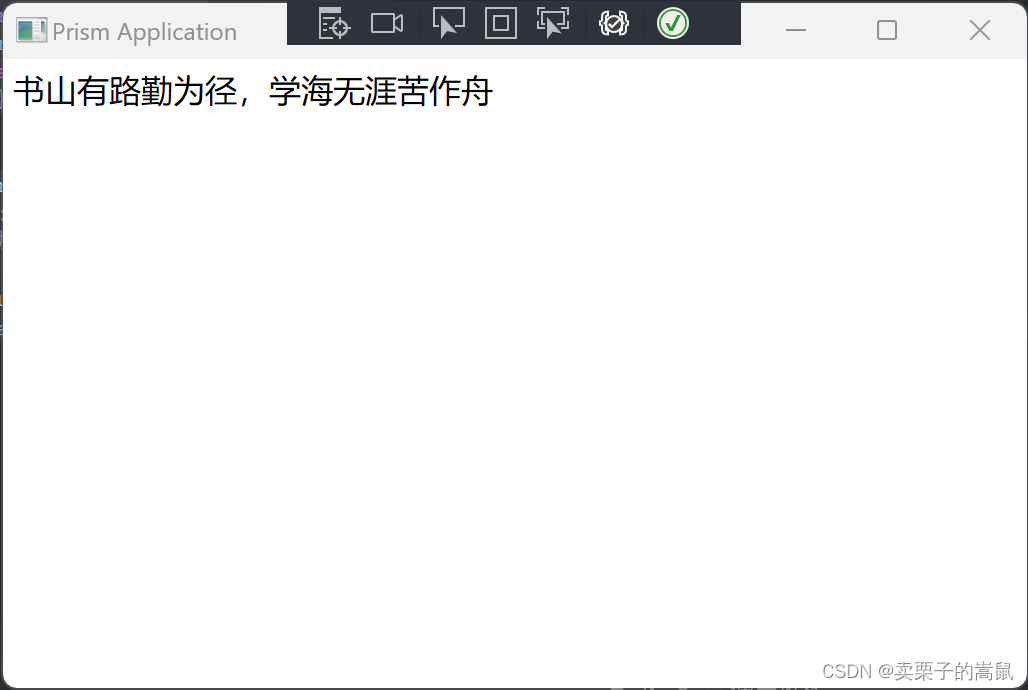
有时候会在代码中看到一些Path是一个“.”或者干脆没有Path的Binding,着实让人摸不着头脑。这其实是一种比较特殊的情况——Binding源本身就是数据且不需要Path来指明,比如典型的string、int类型的数据,他们本身就是数据,因此我们无法指出通过它的哪个属性来访问这个数据,只需要将Path的值设置为“.”就可以了,比如以下代码举例:
<Window x:Class="BlankApp2.Views.MainWindow"
        xmlns="http://schemas.microsoft.com/winfx/2006/xaml/presentation"
        xmlns:x="http://schemas.microsoft.com/winfx/2006/xaml"
        xmlns:prism="http://prismlibrary.com/"
        prism:ViewModelLocator.AutoWireViewModel="True"
        xmlns:sys="clr-namespace:System;assembly=mscorlib"
        Title="{Binding Title}" Height="350" Width="525" >
    <Grid>
        <StackPanel>
            <StackPanel.Resources>
                <sys:String x:Key="myString">
                    书山有路勤为径,学海无涯苦作舟
                </sys:String>
            </StackPanel.Resources>
            <TextBlock TextWrapping="Wrap" Text="{Binding Path=.,Source={StaticResource myString}}" FontSize="16" Margin="5"/>
            <!--<TextBlock TextWrapping="Wrap" Text="{Binding .,Source={StaticResource myString}}" FontSize="16" Margin="5"/>-->
        </StackPanel>
    </Grid>
</Window>
也可以简写成:
<TextBlock TextWrapping="Wrap" Text="{Binding .,Source={StaticResource myString}}" FontSize="16" Margin="5"/>
运行效果如图:
1.4通过Binding的RelativeSource属性指定Source
当控件需要关注自己的、自己的容器的或者自己内部元素的某个值就需要使用这种方法。这种方法的意思是指当前元素和绑定源的位置关系。
常见的3种关系用法:
- 第一种关系:Self
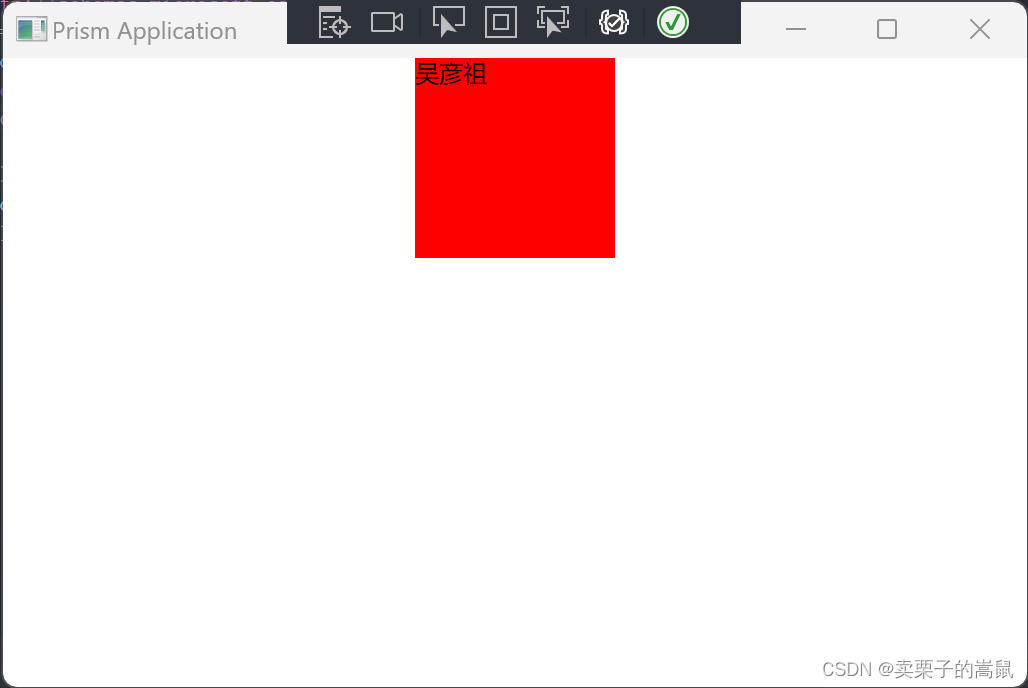
比如有一个TextBlock,如果想让TextBlock的width和height相同,通过设置属性Height=“{Binding RelativeSource={RelativeSource Mode=Self},Path=Width}” 就可以实现。
<Window x:Class="BlankApp2.Views.MainWindow"
        xmlns="http://schemas.microsoft.com/winfx/2006/xaml/presentation"
        xmlns:x="http://schemas.microsoft.com/winfx/2006/xaml"
        xmlns:prism="http://prismlibrary.com/"
        prism:ViewModelLocator.AutoWireViewModel="True"
        xmlns:sys="clr-namespace:System;assembly=mscorlib"
        Title="{Binding Title}" Height="350" Width="525" >
    <Grid>
        <StackPanel>
            <TextBlock Text="吴彦祖" Background="Red" TextWrapping="Wrap" Width="100" Height="{Binding RelativeSource={RelativeSource Mode=Self},Path=Width}"/>
        </StackPanel>
    </Grid>
</Window>
- 第二种关系:TemplatedParent
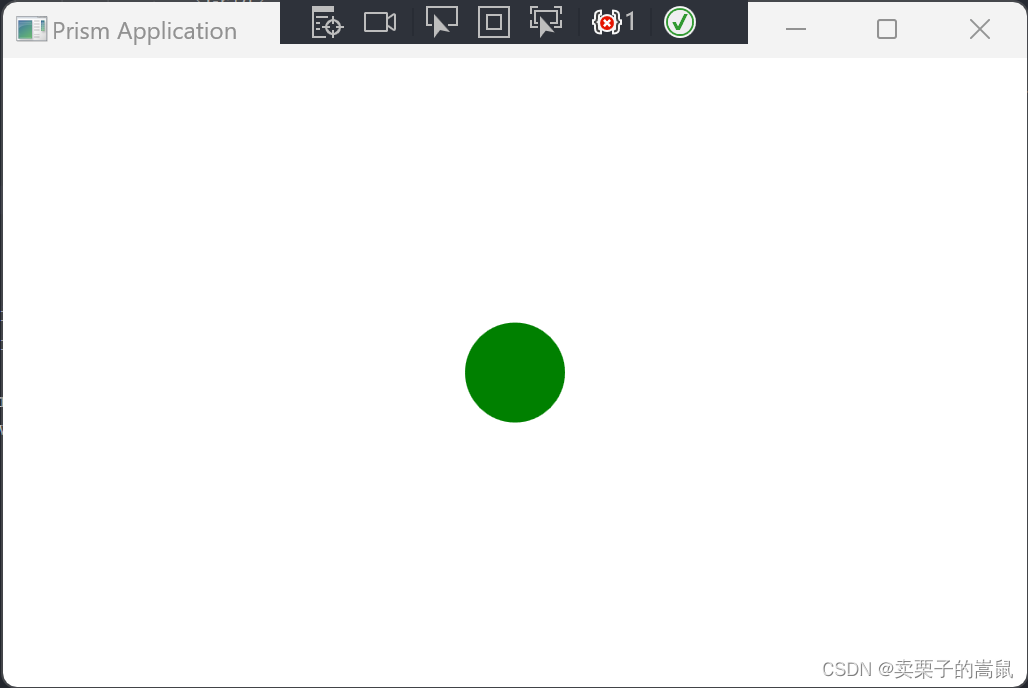
例如为一个Button写一个样式,修改Button为椭圆型。同时需要椭圆的背景色和Button的背景色相同。
<Window x:Class="BlankApp2.Views.MainWindow"
        xmlns="http://schemas.microsoft.com/winfx/2006/xaml/presentation"
        xmlns:x="http://schemas.microsoft.com/winfx/2006/xaml"
        xmlns:prism="http://prismlibrary.com/"
        prism:ViewModelLocator.AutoWireViewModel="True"
        xmlns:sys="clr-namespace:System;assembly=mscorlib"
        Title="{Binding Title}" Height="350" Width="525" >
    <Window.Resources>
        <Style x:Key="ButtonStyle01" TargetType="Button">
            <Setter Property="Background" Value="Green"/>
            <Setter Property="Template">
                <Setter.Value>
                    <ControlTemplate TargetType="Button">
                        <Grid>
                            <Ellipse>
                                <Ellipse.Fill>
                                    <SolidColorBrush Color="{Binding RelativeSource={RelativeSource Mode=TemplatedParent},Path=Background.Color}"/>
                                </Ellipse.Fill>
                            </Ellipse>
                        </Grid>
                    </ControlTemplate>
                </Setter.Value>
            </Setter>
        </Style>
    </Window.Resources>
    <Grid>
        <Button Width="50" Height="50" Style="{StaticResource ButtonStyle01}"/>
    </Grid>
</Window>
运行效果如下:
- 第三种关系:AncestorType
指定绑定源为某个父元素。
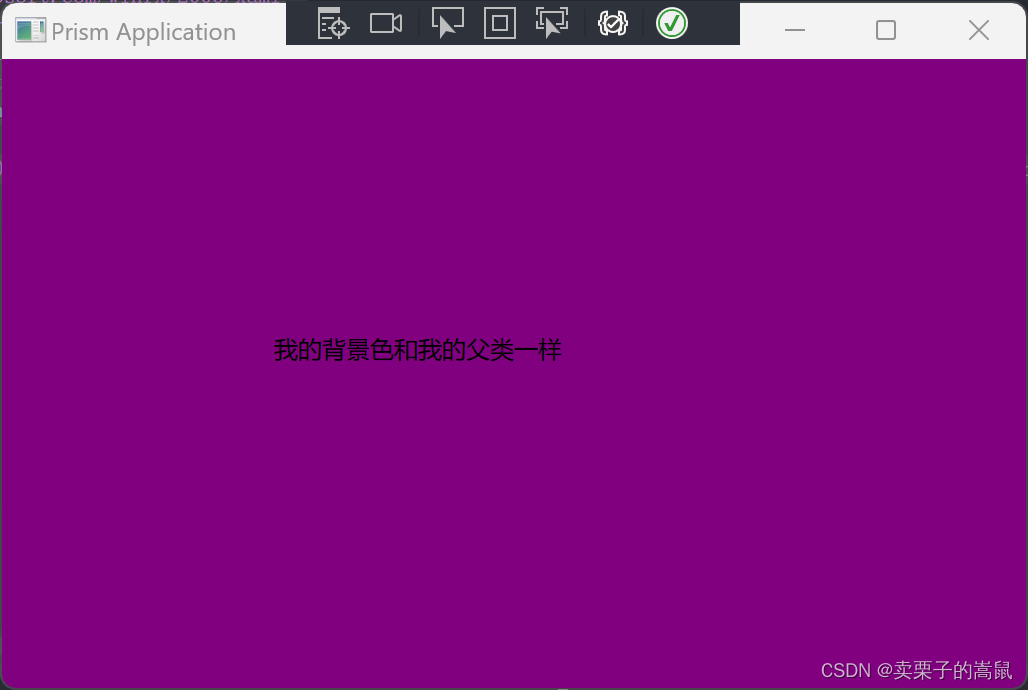
下面这个例子中Label的背景色将绑定至Grid的背景色。
<Window x:Class="BlankApp2.Views.MainWindow"
        xmlns="http://schemas.microsoft.com/winfx/2006/xaml/presentation"
        xmlns:x="http://schemas.microsoft.com/winfx/2006/xaml"
        xmlns:prism="http://prismlibrary.com/"
        prism:ViewModelLocator.AutoWireViewModel="True"
        xmlns:sys="clr-namespace:System;assembly=mscorlib"
        Title="{Binding Title}" Height="350" Width="525" >
    <Grid Background="Purple">
        <Label Width="250" Height="50" Content="我的背景色和我的父类一样" Background = "{Binding RelativeSource={RelativeSource AncestorType={x:Type Grid}}, Path=Background.Color}"/>
    </Grid>
</Window>
