文章目录
- 👹 关于作者
- 前言
- 环境准备
- 目录结构
- dockerfile制作镜像
- yum 脚本
- Dockerfile-mariadb 镜像
- Dockerfile-service 镜像
- docker compose 编排
- K8s部署
- svc
- deploy
- ✊ 最后

👹 关于作者
大家好,我是秋意零。
😈 CSDN作者主页
- 😎 博客主页
👿 简介
- 👻 普通本科生在读
- 在校期间参与众多计算机相关比赛,如:🌟 “省赛”、“国赛”,斩获多项奖项荣誉证书
- 🔥 各个平台,秋意临 账号创作者
- 🔥 云社区 创建者
点赞、收藏+关注下次不迷路!
欢迎加入云社区
前言
今天给各位带来一个出色网站、博客系统 WordPress,不过不使用 Docker Hub 提供的 WordPress Docker镜像,我们使用 Dockerfile 自己制作,实现 LNMP WordPress 运行环境,并将 WordPress 部署再其基础之上
为什么不使用 Docker Hub 提供的 WordPress 镜像部署呢?
环境准备
- Linux 7.5
- docker v23.0.1
- docker compose v2.17.0
- WordPress v6.2
注意:这里的环境是博主使用环境,不限于此
新手小白教程
Centos7.5安装教程
Docker安装教程
Docker-Compose安装教程
目录结构
[root@master01 ~]# tree docker
docker
├── db.sh   #数据库启动、配置脚本
├── default.conf  #nginx配置文件,配置支持 php
├── docker-compose.yaml  # compose 文件
├── Dockerfile-mariadb  # maraidb dockerfile文件
├── Dockerfile-service  # nginx+php+wordpress dockerfile文件
├── wordpress-6.2-zh_CN.zip  # wordpress安装包
├── wp-config.php  # wordpress配置文件,这里主要配置数据库部分
└── yum.sh  #yum源配置脚本

0 directories, 8 files
dockerfile制作镜像
yum 脚本
yum脚本是两个 dockerfile 文件公用的脚本,因为这里都是使用 yum 安装的服务
# 清除默认yum
rm -rf /etc/yum.repos.d/*

# 阿里云 centos7 yum
curl -o /etc/yum.repos.d/CentOS-Base.repo https://mirrors.aliyun.com/repo/Centos-7.repo

#nginx yum
cat  > /etc/yum.repos.d/nginx.repo << EOF
[nginx]
name=nginx
baseurl=https://nginx.org/packages/centos/7/x86_64/
gpgcheck=0
enabled=1
EOF

#mariadb yum
cat > /etc/yum.repos.d/mariadb.repo <<EOF
[mariadb]
name=mariadb
baseurl=https://mirrors.tuna.tsinghua.edu.cn/mariadb/mariadb-10.5.19/yum/centos/7/x86_64/
gpgcheck=0
enabled=1
EOF

#php yum
yum -y install epel-release
rpm -ivh http://rpms.famillecollet.com/enterprise/remi-release-7.rpm
Dockerfile-mariadb 镜像
yum.sh、db.sh 是 Dockerfile-mariadb 构建镜像时所需要的文件
db.sh 启动配置脚本
db.sh 是数据库启动、设置密码、创建数据库以及授权的脚本
cat > db.sh << EOF
#!/bin/bash
mysql_install_db --user=root
mysqld_safe --user=root &
sleep 3
mysqladmin -u root password '000000'
mysql -uroot -p000000 -e "create database wordpress;"
mysql -uroot -p000000 -e "grant all on wordpress.* to root@localhost identified by '000000';"
mysql -uroot -p000000 -e "grant all on wordpress.* to root@'%' identified by '000000';"
EOF
Dockerfile-mariadb
cat > Dockerfile-mariadb << EOF
FROM centos:centos7.9.2009
MAINTAINER qyl
COPY yum.sh /opt/
COPY db.sh /opt
RUN sh /opt/yum.sh && yum clean all
RUN yum install -y mariadb-server
RUN sh /opt/db.sh
EXPOSE 3306
CMD ["mysqld_safe","--user=root"]
EOF
构建镜像
docker build -t wp-mariadb:v1 -f Dockerfile-mariadb .
Dockerfile-service 镜像
yum.sh、default.conf 、wp-config.php 是 Dockerfile-service 构建镜像时所需要的文件
default.conf
这是配置 nginx 能代理 php 网页的配置
cat  > default.conf << EOF
server {
    listen       80;
    server_name  localhost;
    location / {
        root   /usr/share/nginx/html;
        index  index.php index.html index.htm; #修改部分
    }
    error_page   500 502 503 504  /50x.html;
    location = /50x.html {
        root   /usr/share/nginx/html;
    }
    location ~ \.php$ {
        root           /usr/share/nginx/html;  #修改部分
        fastcgi_pass   127.0.0.1:9000;
        fastcgi_index  index.php;
        fastcgi_param  SCRIPT_FILENAME  $document_root$fastcgi_script_name; #修改部分
        include        fastcgi_params;
    }
}
EOF
wp-config.php
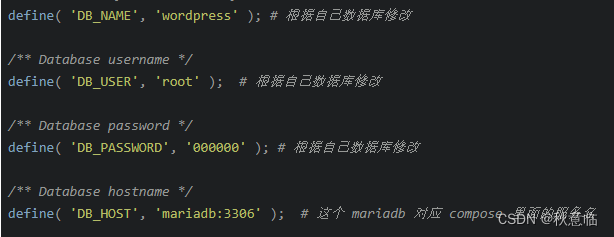
在安装 wordpress 时 wordpress 配置文件无法自动写入时,使用这种方式手动写入(主要配置数据库部分)
注意:数据库部分的配置
cat > wp-config.php << EOF
<?php
/**
 * The base configuration for WordPress
 *
 * The wp-config.php creation script uses this file during the installation.
 * You don't have to use the web site, you can copy this file to "wp-config.php"
 * and fill in the values.
 *
 * This file contains the following configurations:
 *
 * * Database settings
 * * Secret keys
 * * Database table prefix
 * * ABSPATH
 *
 * @link https://wordpress.org/documentation/article/editing-wp-config-php/
 *
 * @package WordPress
 */

// ** Database settings - You can get this info from your web host ** //
/** The name of the database for WordPress */
define( 'DB_NAME', 'wordpress' ); # 根据自己数据库修改

/** Database username */
define( 'DB_USER', 'root' );  # 根据自己数据库修改

/** Database password */
define( 'DB_PASSWORD', '000000' ); # 根据自己数据库修改

/** Database hostname */
define( 'DB_HOST', 'mariadb:3306' );  # 这个 mariadb 对应 compose 里面的服务名

/** Database charset to use in creating database tables. */
define( 'DB_CHARSET', 'utf8' );

/** The database collate type. Don't change this if in doubt. */
define( 'DB_COLLATE', '' );

/**#@+
 * Authentication unique keys and salts.
 *
 * Change these to different unique phrases! You can generate these using
 * the {@link https://api.wordpress.org/secret-key/1.1/salt/ WordPress.org secret-key service}.
 *
 * You can change these at any point in time to invalidate all existing cookies.
 * This will force all users to have to log in again.
 *
 * @since 2.6.0
 */
define( 'AUTH_KEY',         'put your unique phrase here' );
define( 'SECURE_AUTH_KEY',  'put your unique phrase here' );
define( 'LOGGED_IN_KEY',    'put your unique phrase here' );
define( 'NONCE_KEY',        'put your unique phrase here' );
define( 'AUTH_SALT',        'put your unique phrase here' );
define( 'SECURE_AUTH_SALT', 'put your unique phrase here' );
define( 'LOGGED_IN_SALT',   'put your unique phrase here' );
define( 'NONCE_SALT',       'put your unique phrase here' );

/**#@-*/

/**
 * WordPress database table prefix.
 *
 * You can have multiple installations in one database if you give each
 * a unique prefix. Only numbers, letters, and underscores please!
 */
$table_prefix = 'wp_';

/**
 * For developers: WordPress debugging mode.
 *
 * Change this to true to enable the display of notices during development.
 * It is strongly recommended that plugin and theme developers use WP_DEBUG
 * in their development environments.
 *
 * For information on other constants that can be used for debugging,
 * visit the documentation.
 *
 * @link https://wordpress.org/documentation/article/debugging-in-wordpress/
 */
define( 'WP_DEBUG', false );

/* Add any custom values between this line and the "stop editing" line. */


/* That's all, stop editing! Happy publishing. */

/** Absolute path to the WordPress directory. */
if ( ! defined( 'ABSPATH' ) ) {
        define( 'ABSPATH', __DIR__ . '/' );
}

/** Sets up WordPress vars and included files. */
require_once ABSPATH . 'wp-settings.php';
EOF
Dockerfile-service
cat > Dockerfile-service << EOF
FROM centos:centos7.9.2009
MAINTAINER qyl
WORKDIR /opt

COPY wordpress-6.2-zh_CN.zip ./
COPY yum.sh /opt/
RUN sh /opt/yum.sh
RUN yum clean all &&\
    yum install -y nginx unzip  &&\
    unzip ./wordpress-6.2-zh_CN.zip

# 安装php7.4环境
RUN yum install -y php74-php-devel php74-php php74-php-cli php74-php-common php74-php-gd php74-php-ldap php74-php-mbstring php74-php-mcrypt php74-php-pdo php74-php-mysqlnd  php74-php-fpm php74-php-opcache php74-php-pecl-redis php74-php-pecl-mongodb php74-php-fpm

#修改 php-fpm 的用户和组为nginx
RUN sed -i 's/^user\ =\ apache/user\ =\ nginx/g' /etc/opt/remi/php74/php-fpm.d/www.conf && \
    sed -i 's/^group\ =\ apache/group\ =\ nginx/g' /etc/opt/remi/php74/php-fpm.d/www.conf &&\
    php74 -v

RUN rm -rf /usr/share/nginx/html/* &&\
    cp -rf ./wordpress/* /usr/share/nginx/html/

COPY default.conf /etc/nginx/conf.d/default.conf
COPY wp-config.php /usr/share/nginx/html/
EXPOSE 80

# 为了进入特权模式,所要运行的环境
CMD /usr/sbin/init
EOF
构建镜像
docker build -t wp-service:v1 -f Dockerfile-service .
docker compose 编排
使用上述构建的镜像编排容器
cat > docker-compose.yaml << EOF
version: '3'
services:
  mariadb:
    image: wp-mariadb:v1
    container_name: db
    ports:
    - 3306:3306
  wordpress:
    image: wp-service:v1
    container_name: wordpress
    privileged: true # 开启容器特权模式
    ports:
    - 80:80
    links:
    - mariadb  # 服务名
    depends_on:
    - mariadb
EOF
compose 启动容器
[root@master01 docker]# docker compose up -d
[+] Running 3/3
 ✔ Network docker_default  Created                                                                                    0.1s
 ✔ Container db            Started                                                                                    0.6s
 ✔ Container wordpress     Started                                                                                    1.3s


[root@master01 docker]# docker compose ps
NAME                IMAGE               COMMAND                  SERVICE             CREATED              STATUS              PORTS
db                  wp-mariadb:v1       "mysqld_safe --user=…"   mariadb             About a minute ago   Up About a minute   0.0.0.0:3306->3306/tcp, :::3306->3306/tcp
wordpress           wp:v1               "/bin/sh -c /usr/sbi…"   wordpress           About a minute ago   Up About a minute   0.0.0.0:80->80/tcp, :::80->80/tcp
进入 wordpress 容器启动 php-fpm、nginx
因为这里使用的 yum 源安装的(其他方式也可以),没有php-fpm二进制命令启动 php-fpm 服务,而使用 systemctl 启动服务需要权限,也就是 compose 里面的
privileged: true字段和 Dockerfile-service 里面的CMD /usr/sbin/init,这样就能保证在容器使用systemctl启动服务了
docker exec -it wordpress bash
systemctl restart php74-php-fpm
systemctl restart nginx
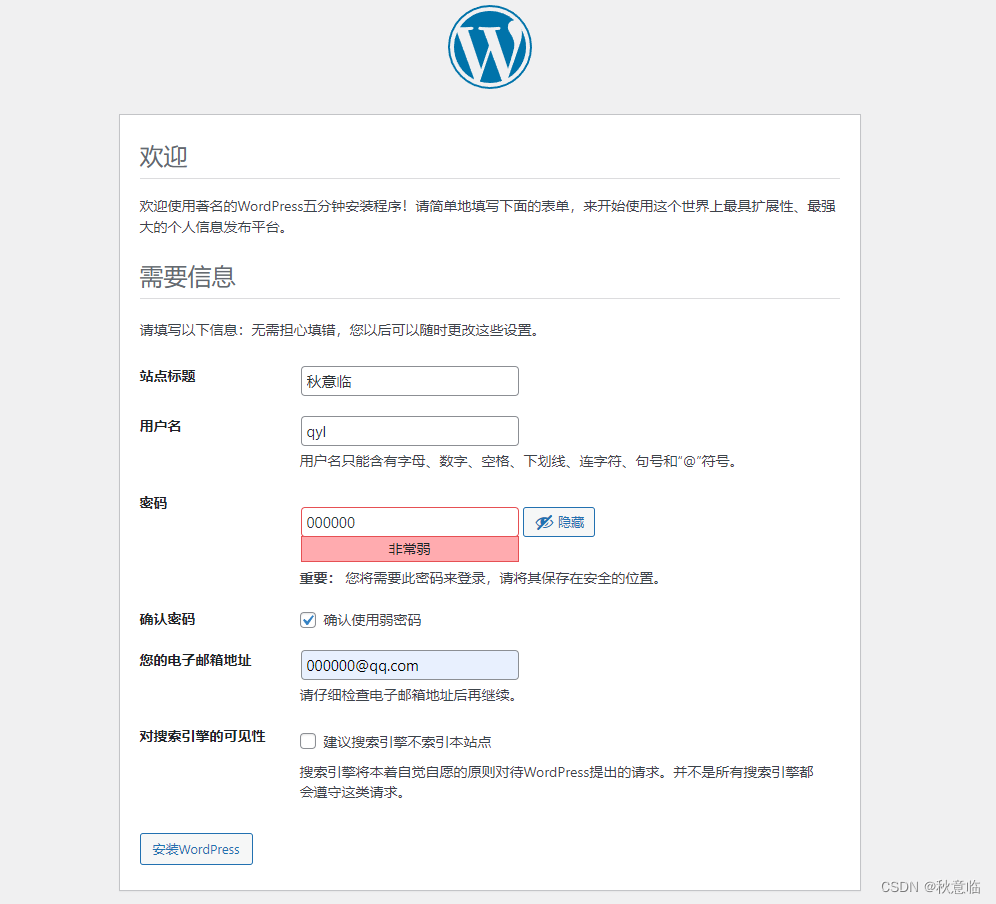
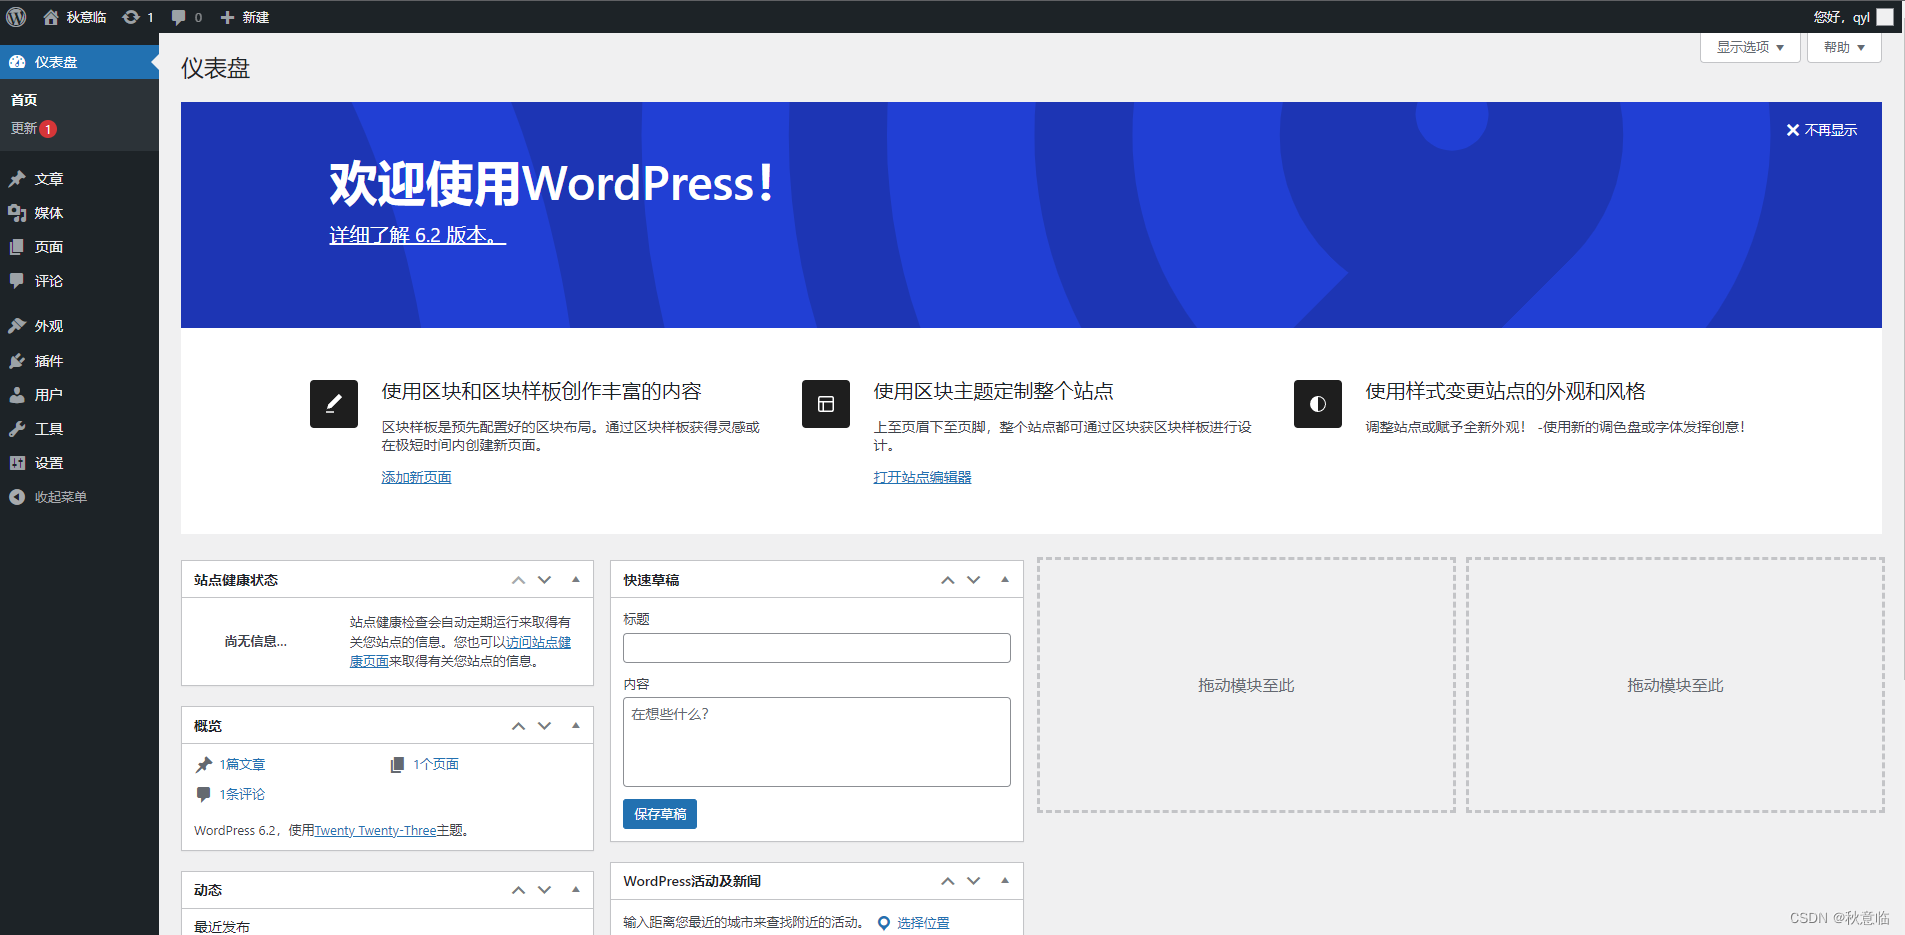
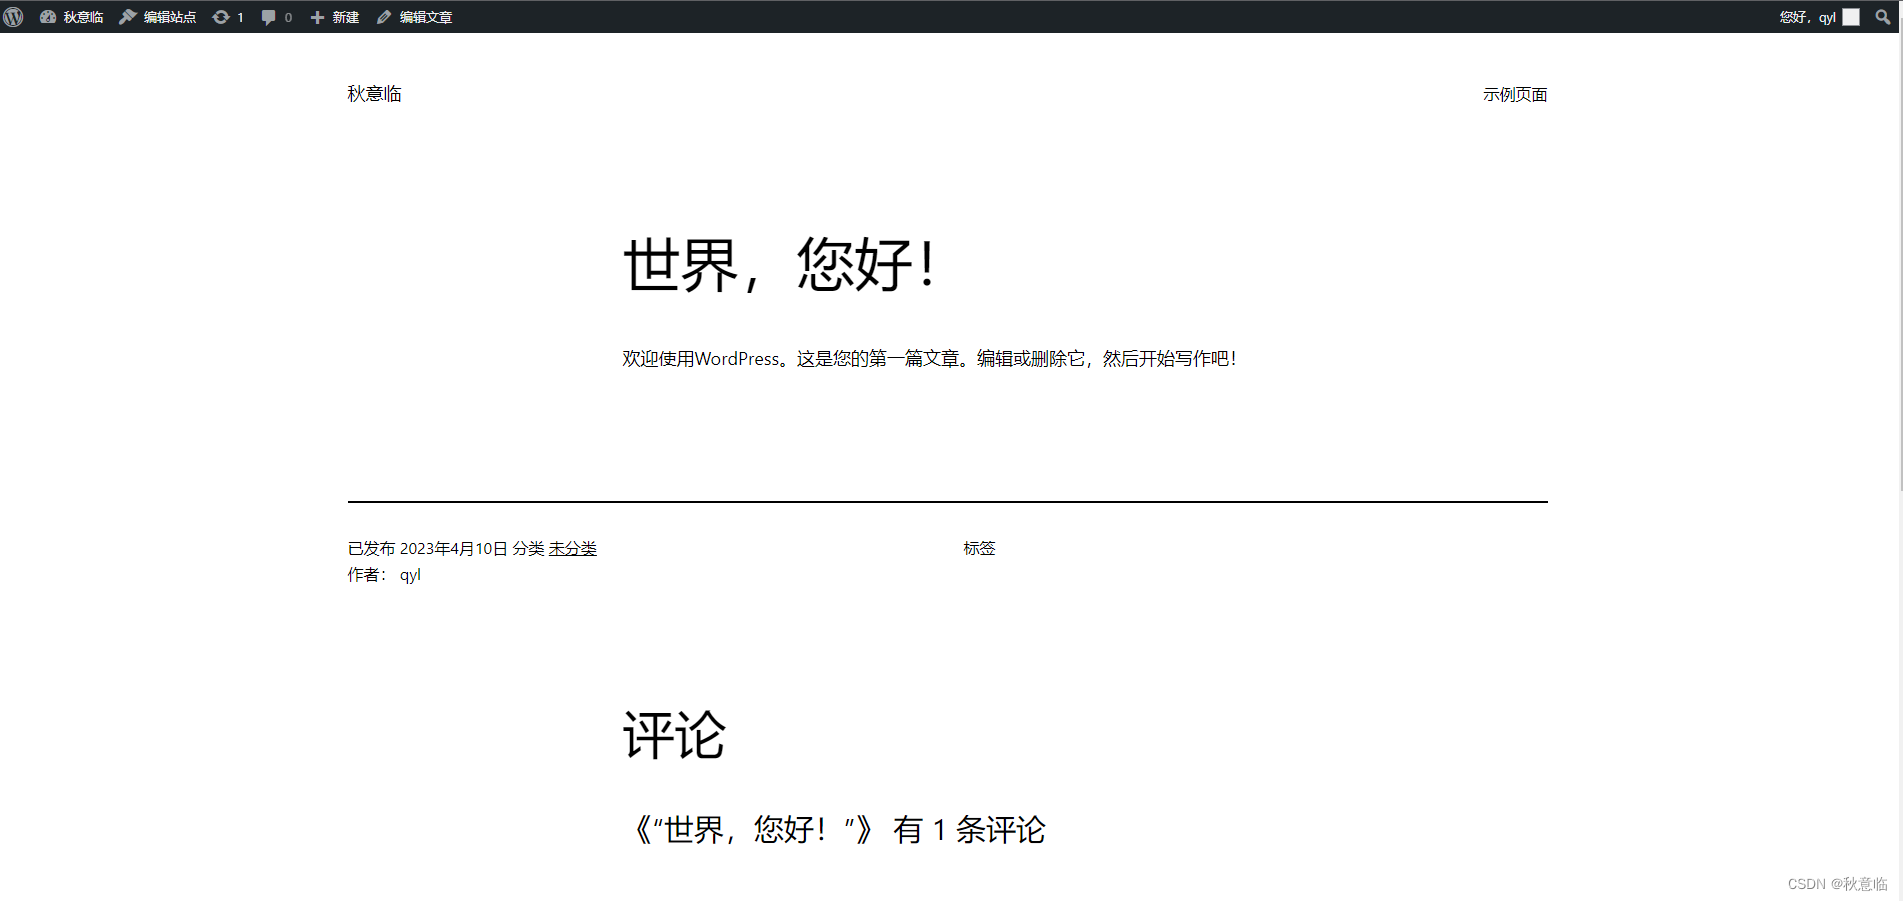
浏览器访问 80 端口,安装 wordpress
K8s部署
svc
使用 svc 暴露服务
[root@master01 wordpress]# cat service.yaml
apiVersion: v1
kind: Service
metadata:
  labels:
    app: mariadb
  name: mariadb
spec:
  clusterIP: None
  selector:
    app: mariadb
  type: ClusterIP
  ports:
  - port: 3306

---
apiVersion: v1
kind: Service
metadata:
  name: wordpress
  labels:
    app: wordpress
spec:
  ports:
    - port: 80
  selector:
    app: wordpress
  type: NodePort
deploy
包含 mariadb 和 wordpress 服务
[root@master01 wordpress]# cat deploy.yaml
apiVersion: apps/v1
kind: Deployment
metadata:
  labels:
    app: mariadb
  name: mariadb
spec:
  replicas: 1
  selector:
    matchLabels:
      app: mariadb
  template:
    metadata:
      labels:
        app: mariadb
    spec:
      containers:
      - image: wp-mariadb:v1
        name: mariadb
---
apiVersion: apps/v1
kind: Deployment
metadata:
  labels:
    app: wordpress
  name: wordpress
spec:
  replicas: 1
  selector:
    matchLabels:
      app: wordpress
  template:
    metadata:
      labels:
        app: wordpress
    spec:
      containers:
      - image: wp-service:v1
        name: wordpress
        securityContext:
          privileged: true
进入WordPress pod 启动 php-fpm、nginx 服务
[root@master01 wordpress]# kubectl get pod
NAME                         READY   STATUS        RESTARTS      AGE
mariadb-5cd9b8655d-cq8nd     1/1     Running       0             4s
wordpress-744964c4cb-sk47g   1/1     Running       0             4s
[root@master01 wordpress]# kubectl exec -it pod/wordpress-744964c4cb-sk47g -- bash
[root@wordpress-744964c4cb-sk47g opt]# systemctl restart php74-php-fpm
[root@wordpress-744964c4cb-sk47g opt]# systemctl restart nginx
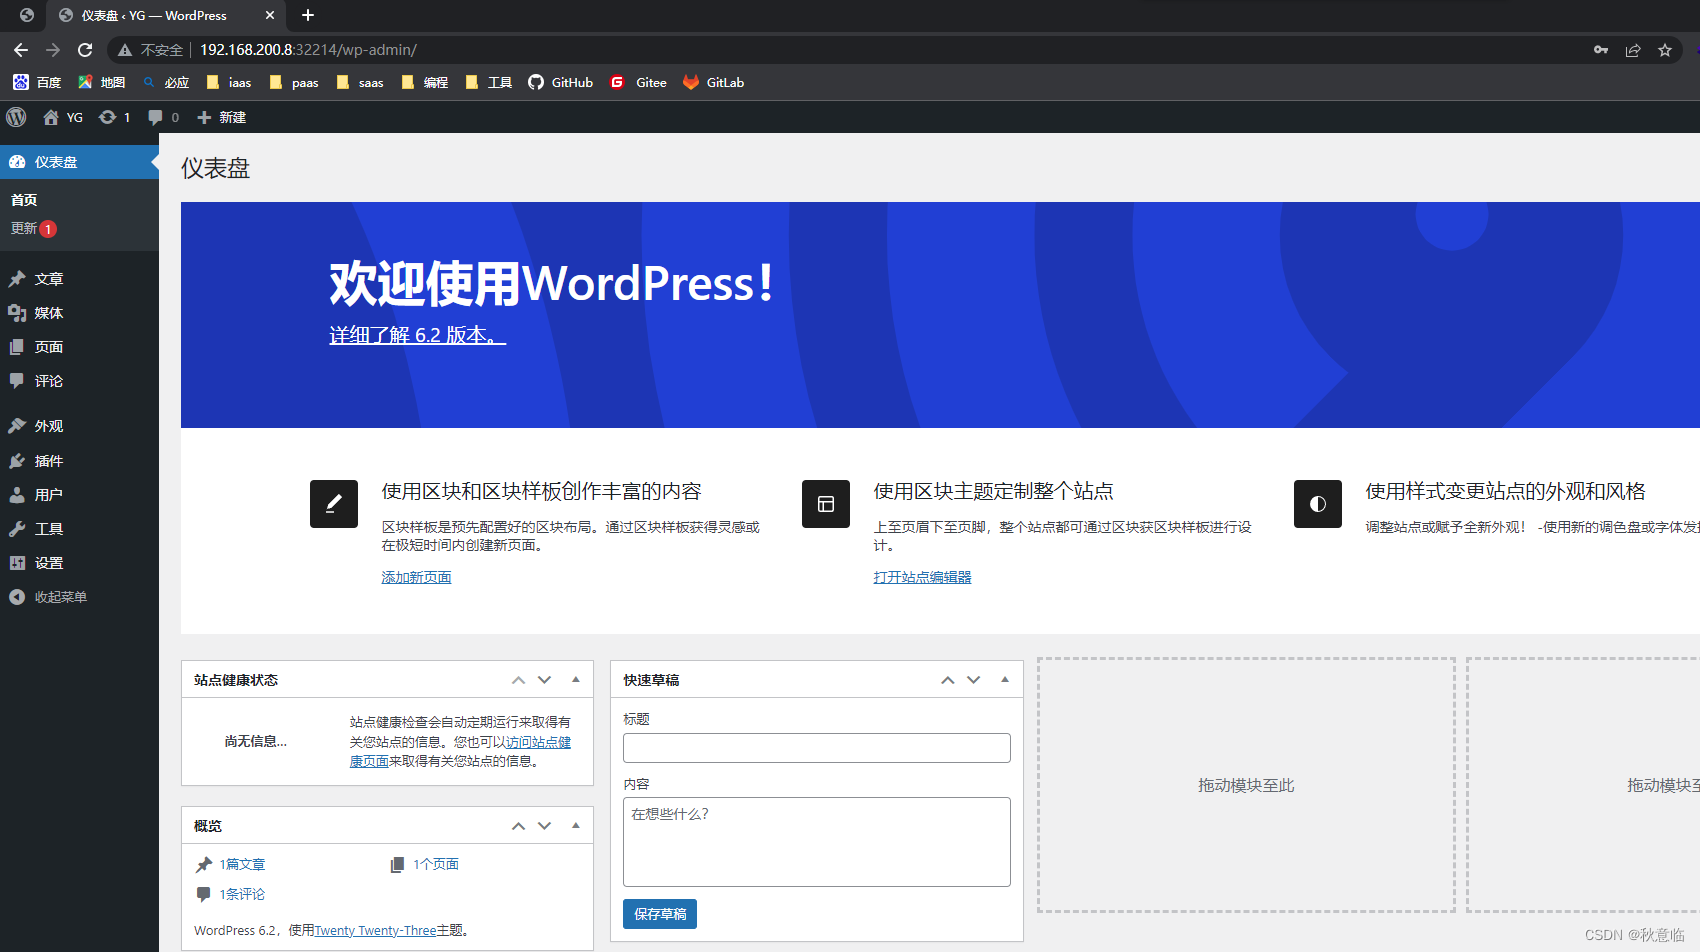
浏览器访问
[root@master01 wordpress]# kubectl get svc
NAME         TYPE        CLUSTER-IP      EXTERNAL-IP   PORT(S)        AGE
kubernetes   ClusterIP   10.96.0.1       <none>        443/TCP        21d
mariadb      ClusterIP   None            <none>        3306/TCP       10h
wordpress    NodePort    10.97.150.148   <none>        80:32214/TCP   10h
✊ 最后
👏 我是秋意临,欢迎大家一键三连、加入云社区
👋 我们下期再见(⊙o⊙)!!!

