前提条件
安装并配置好Android Studio
Android Studio Electric Eel | 2022.1.1 Patch 2
Build #AI-221.6008.13.2211.9619390, built on February 17, 2023
Runtime version: 11.0.15+0-b2043.56-9505619 amd64
VM: OpenJDK 64-Bit Server VM by JetBrains s.r.o.
Windows 11 10.0
GC: G1 Young Generation, G1 Old Generation
Memory: 1280M
Cores: 6
Registry:
external.system.auto.import.disabled=true
ide.text.editor.with.preview.show.floating.toolbar=false
ide.balloon.shadow.size=0
Non-Bundled Plugins:
com.intuit.intellij.makefile (1.0.15)
com.github.setial (4.0.2)
com.alayouni.ansiHighlight (1.2.4)
GsonOrXmlFormat (2.0)
GLSL (1.19)
com.mistamek.drawablepreview.drawable-preview (1.1.5)
com.layernet.plugin.adbwifi (1.0.5)
com.likfe.ideaplugin.eventbus3 (2020.0.2)
gradle-wrapper.properties
#Tue Apr 25 13:34:44 CST 2023
distributionBase=GRADLE_USER_HOME
distributionUrl=https\://services.gradle.org/distributions/gradle-7.4-bin.zip
distributionPath=wrapper/dists
zipStorePath=wrapper/dists
zipStoreBase=GRADLE_USER_HOME
build.gradle(:Project)
// Top-level build file where you can add configuration options common to all sub-projects/modules.
plugins {
    id 'com.android.application' version '7.3.1' apply false
    id 'com.android.library' version '7.3.1' apply false
    id 'org.jetbrains.kotlin.android' version '1.7.20' apply false
}
setting.gradle
pluginManagement {
    repositories {
        google()
        mavenCentral()
        gradlePluginPortal()
        maven { url 'https://jitpack.io' }
    }
}
dependencyResolutionManagement {
    repositoriesMode.set(RepositoriesMode.FAIL_ON_PROJECT_REPOS)
    repositories {
        google()
        mavenCentral()
        gradlePluginPortal()
        maven { url 'https://jitpack.io' }
    }
}
rootProject.name = "logindemo"
include ':app'
build.gralde(:app)
plugins {
    id 'com.android.application'
    id 'org.jetbrains.kotlin.android'
}

android {
    namespace 'com.example.logindemo'
    compileSdk 33

    defaultConfig {
        applicationId "com.example.logindemo"
        minSdk 26
        targetSdk 33
        versionCode 1
        versionName "1.0"

        testInstrumentationRunner "androidx.test.runner.AndroidJUnitRunner"
    }

    buildTypes {
        release {
            minifyEnabled false
            proguardFiles getDefaultProguardFile('proguard-android-optimize.txt'), 'proguard-rules.pro'
        }
    }
    compileOptions {
        sourceCompatibility JavaVersion.VERSION_11
        targetCompatibility JavaVersion.VERSION_11
    }
    kotlinOptions {
        jvmTarget = '1.8'
    }
}

dependencies {

    implementation 'androidx.core:core-ktx:1.7.0'
    implementation 'androidx.appcompat:appcompat:1.6.1'
    implementation 'com.google.android.material:material:1.8.0'
    implementation 'androidx.constraintlayout:constraintlayout:2.1.4'
    testImplementation 'junit:junit:4.13.2'
    androidTestImplementation 'androidx.test.ext:junit:1.1.3'
    androidTestImplementation 'androidx.test.espresso:espresso-core:3.4.0'

    // 沉浸式状态栏 https://github.com/gyf-dev/ImmersionBar
    api 'com.gyf.immersionbar:immersionbar:3.0.0'
    api 'com.gyf.immersionbar:immersionbar-components:3.0.0' // fragment快速实现(可选)
    api 'com.gyf.immersionbar:immersionbar-ktx:3.0.0' // kotlin扩展(可选)
}
对Kotlin语言有基本了解
内容在前一篇博客中写了基础配置,如果本篇内容看不懂,可以先去上一篇。
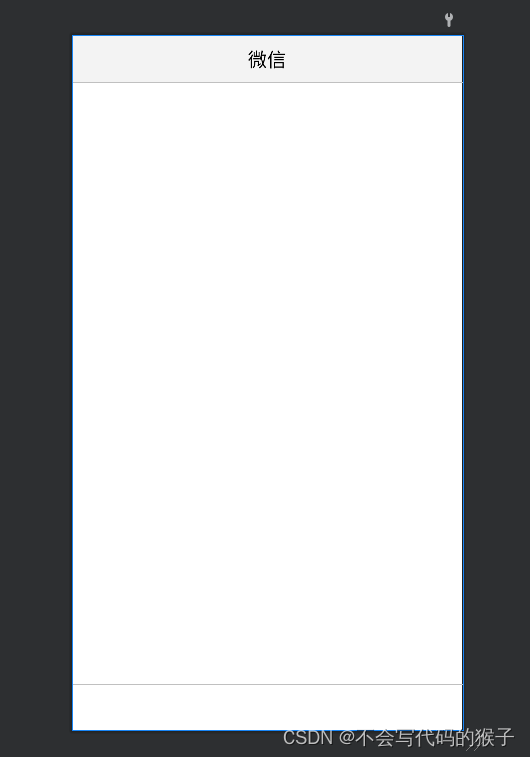
增加title
<?xml version="1.0" encoding="utf-8"?>
<androidx.constraintlayout.widget.ConstraintLayout xmlns:android="http://schemas.android.com/apk/res/android"
    xmlns:app="http://schemas.android.com/apk/res-auto"
    xmlns:tools="http://schemas.android.com/tools"
    android:layout_width="match_parent"
    android:layout_height="match_parent"
    android:fitsSystemWindows="true"
    tools:context=".MainActivity">

    <TextView
        android:id="@+id/titleTv"
        android:layout_width="match_parent"
        android:layout_height="50dp"
        android:text="微信"
        android:textColor="#000000"
        android:textSize="20sp"
        android:gravity="center"
        android:background="@color/title"
        app:layout_constraintTop_toTopOf="parent"/>

    <com.google.android.material.tabs.TabLayout
        android:id="@+id/tabLayout"
        android:layout_width="match_parent"
        android:layout_height="wrap_content"
        app:layout_constraintBottom_toBottomOf="parent"
        app:tabIndicatorColor="@color/teal_200"
        app:tabSelectedTextColor="@color/teal_200"
        app:tabTextColor="@color/black" />

    <androidx.viewpager.widget.ViewPager
        android:id="@+id/viewPager"
        android:layout_width="match_parent"
        android:layout_height="0dp"
        app:layout_constraintTop_toBottomOf="@+id/titleTv"
        app:layout_constraintBottom_toTopOf="@+id/tabLayout"/>

</androidx.constraintlayout.widget.ConstraintLayout>
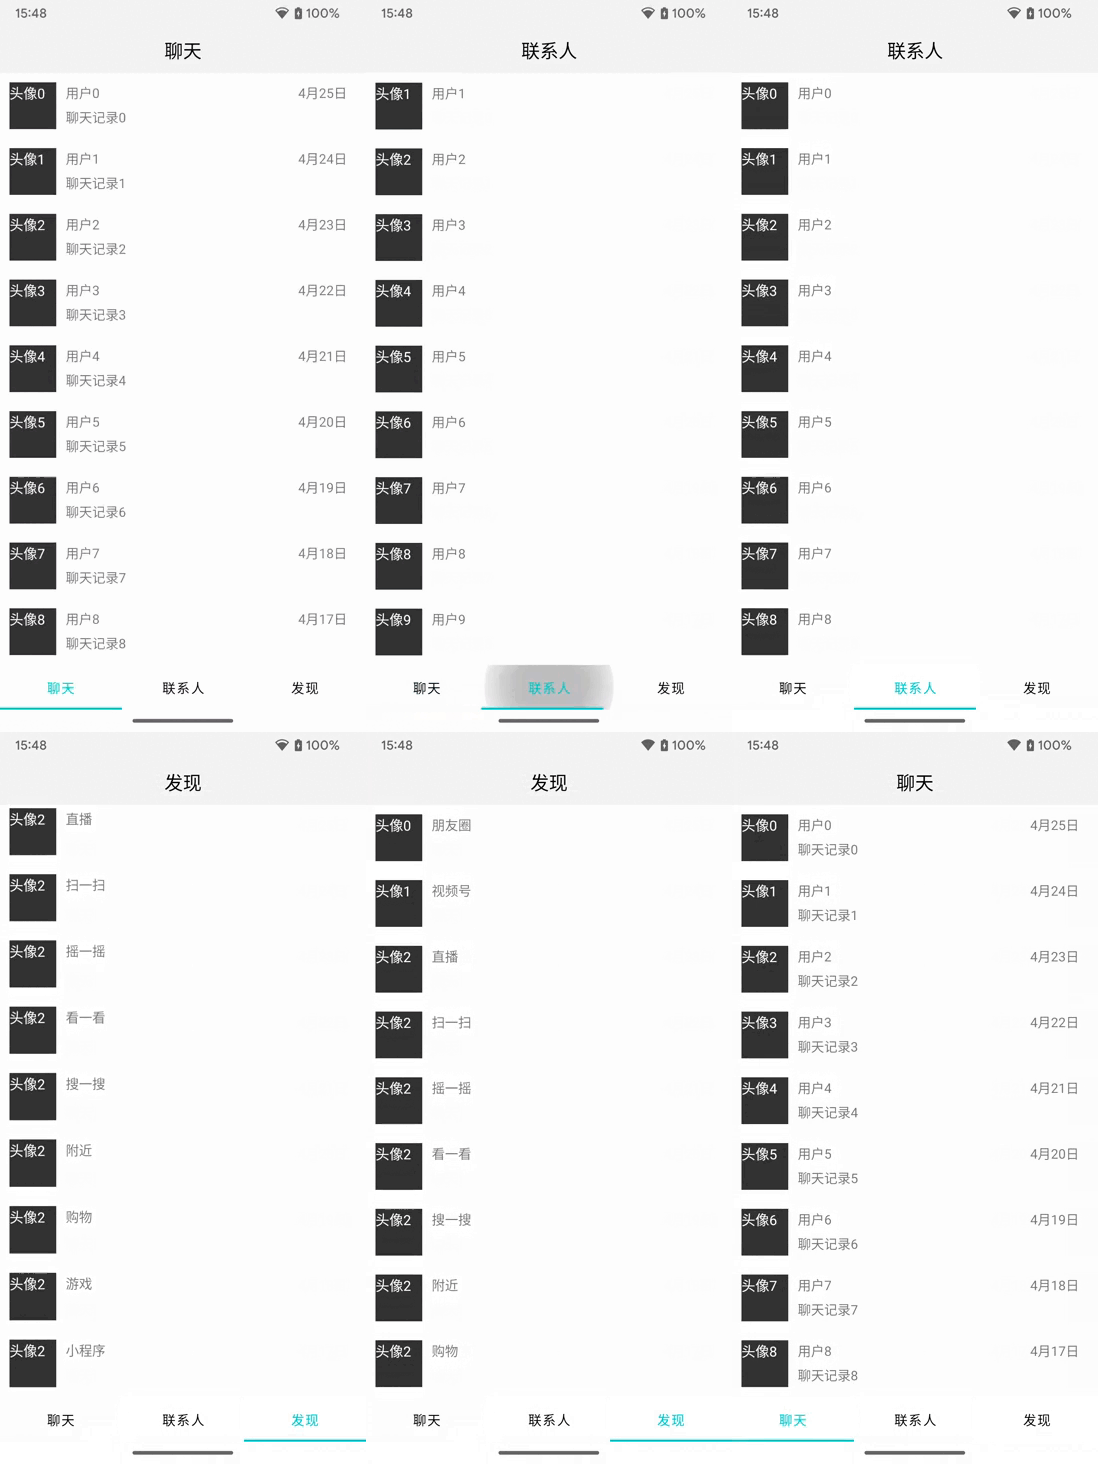
增加了title之后,在切换fragment时,需要对应的title文字变化
package com.example.logindemo

import android.os.Bundle
import android.widget.TextView
import androidx.appcompat.app.AppCompatActivity
import androidx.fragment.app.Fragment
import androidx.fragment.app.FragmentPagerAdapter
import androidx.viewpager.widget.ViewPager
import com.example.logindemo.fragment.ChatFragment
import com.example.logindemo.fragment.ContactsFragment
import com.example.logindemo.fragment.DiscoverFragment
import com.google.android.material.tabs.TabLayout
import com.gyf.immersionbar.ImmersionBar

class MainActivity : AppCompatActivity() {

    private lateinit var viewPager: ViewPager
    private lateinit var tabLayout: TabLayout
    private lateinit var titleTv: TextView

    override fun onCreate(savedInstanceState: Bundle?) {
        super.onCreate(savedInstanceState)
        ImmersionBar.with(this)
            .statusBarDarkFont(true)
            .statusBarColor(R.color.title)
            .navigationBarColor(R.color.white)
            .navigationBarDarkIcon(true)
            .init()
        setContentView(R.layout.activity_main)
        val fragments = listOf(
            ChatFragment(),
            ContactsFragment(),
            DiscoverFragment()
        )
        titleTv = findViewById(R.id.titleTv)
        viewPager = findViewById(R.id.viewPager)
        tabLayout = findViewById(R.id.tabLayout)

        viewPager.adapter = ViewPagerAdapter(supportFragmentManager, fragments)
        tabLayout.setupWithViewPager(viewPager)

        tabLayout.getTabAt(0)?.text = "聊天"
        tabLayout.getTabAt(1)?.text = "联系人"
        tabLayout.getTabAt(2)?.text = "发现"

        tabLayout.addOnTabSelectedListener(object : TabLayout.OnTabSelectedListener {
            override fun onTabSelected(tab: TabLayout.Tab?) {
                titleTv.text = tab?.text
            }

            override fun onTabUnselected(tab: TabLayout.Tab?) {

            }

            override fun onTabReselected(tab: TabLayout.Tab?) {

            }
        })
    }

    class ViewPagerAdapter(
        fragmentManager: androidx.fragment.app.FragmentManager,
        private val fragments: List<Fragment>
    ) : FragmentPagerAdapter(fragmentManager, BEHAVIOR_RESUME_ONLY_CURRENT_FRAGMENT) {

        override fun getItem(position: Int): Fragment {
            return fragments[position]
        }

        override fun getCount(): Int {
            return fragments.size
        }
    }
}
修改fragment
布局中增加了RecyclerView显示多条目
fragment_chat.xml
<?xml version="1.0" encoding="utf-8"?>
<androidx.constraintlayout.widget.ConstraintLayout xmlns:android="http://schemas.android.com/apk/res/android"
    android:layout_width="match_parent"
    android:layout_height="match_parent">

    <androidx.recyclerview.widget.RecyclerView
        android:id="@+id/recyclerView"
        android:layout_width="match_parent"
        android:layout_height="match_parent"/>

</androidx.constraintlayout.widget.ConstraintLayout>
fragment_contacts.xml
<?xml version="1.0" encoding="utf-8"?>
<androidx.constraintlayout.widget.ConstraintLayout xmlns:android="http://schemas.android.com/apk/res/android"
    android:layout_width="match_parent"
    android:layout_height="match_parent">

    <androidx.recyclerview.widget.RecyclerView
        android:id="@+id/recyclerView"
        android:layout_width="match_parent"
        android:layout_height="match_parent"/>

</androidx.constraintlayout.widget.ConstraintLayout>
fragment_discover.xml
<?xml version="1.0" encoding="utf-8"?>
<androidx.constraintlayout.widget.ConstraintLayout xmlns:android="http://schemas.android.com/apk/res/android"
    android:layout_width="match_parent"
    android:layout_height="match_parent">

    <androidx.recyclerview.widget.RecyclerView
        android:id="@+id/recyclerView"
        android:layout_width="match_parent"
        android:layout_height="match_parent"/>

</androidx.constraintlayout.widget.ConstraintLayout>
fragment中的内容增加如下
package com.example.logindemo.fragment

import android.os.Bundle
import android.view.LayoutInflater
import android.view.View
import android.view.ViewGroup
import androidx.fragment.app.Fragment
import androidx.recyclerview.widget.LinearLayoutManager
import androidx.recyclerview.widget.RecyclerView
import com.example.logindemo.R
import com.example.logindemo.base.BaseAdapter
import com.example.logindemo.bean.ChatBean

class ChatFragment : Fragment() {

    private lateinit var recyclerView: RecyclerView

    override fun onCreateView(
        inflater: LayoutInflater, container: ViewGroup?,
        savedInstanceState: Bundle?
    ): View? {
        val view = inflater.inflate(R.layout.fragment_chat, container, false)
        recyclerView = view.findViewById(R.id.recyclerView)
        val data = ArrayList<ChatBean>()
        data.add(ChatBean("头像0", "用户0", "聊天记录0", "4月25日"))
        data.add(ChatBean("头像1", "用户1", "聊天记录1", "4月24日"))
        data.add(ChatBean("头像2", "用户2", "聊天记录2", "4月23日"))
        data.add(ChatBean("头像3", "用户3", "聊天记录3", "4月22日"))
        data.add(ChatBean("头像4", "用户4", "聊天记录4", "4月21日"))
        data.add(ChatBean("头像5", "用户5", "聊天记录5", "4月20日"))
        data.add(ChatBean("头像6", "用户6", "聊天记录6", "4月19日"))
        data.add(ChatBean("头像7", "用户7", "聊天记录7", "4月18日"))
        data.add(ChatBean("头像8", "用户8", "聊天记录8", "4月17日"))
        data.add(ChatBean("头像9", "用户9", "聊天记录9", "4月16日"))
        recyclerView.layoutManager = LinearLayoutManager(context)
        recyclerView.adapter = BaseAdapter(data)
        return view
    }
}
package com.example.logindemo.fragment
import android.os.Bundle
import android.view.LayoutInflater
import android.view.View
import android.view.ViewGroup
import androidx.fragment.app.Fragment
import androidx.recyclerview.widget.LinearLayoutManager
import androidx.recyclerview.widget.RecyclerView
import com.example.logindemo.R
import com.example.logindemo.base.BaseAdapter
import com.example.logindemo.bean.ChatBean
class ContactsFragment : Fragment() {
private lateinit var recyclerView: RecyclerView
override fun onCreateView(
inflater: LayoutInflater, container: ViewGroup?,
savedInstanceState: Bundle?
): View? {
val view = inflater.inflate(R.layout.fragment_contacts, container, false)
recyclerView = view.findViewById(R.id.recyclerView)
val data = ArrayList<ChatBean>()
data.add(ChatBean("头像0", "用户0", "", ""))
data.add(ChatBean("头像1", "用户1", "", ""))
data.add(ChatBean("头像2", "用户2", "", ""))
data.add(ChatBean("头像3", "用户3", "", ""))
data.add(ChatBean("头像4", "用户4", "", ""))
data.add(ChatBean("头像5", "用户5", "", ""))
data.add(ChatBean("头像6", "用户6", "", ""))
data.add(ChatBean("头像7", "用户7", "", ""))
data.add(ChatBean("头像8", "用户8", "", ""))
data.add(ChatBean("头像9", "用户9", "", ""))
recyclerView.layoutManager = LinearLayoutManager(context)
recyclerView.adapter = BaseAdapter(data)
return view
}
}package com.example.logindemo.fragment
import android.os.Bundle
import android.view.LayoutInflater
import android.view.View
import android.view.ViewGroup
import androidx.fragment.app.Fragment
import androidx.recyclerview.widget.LinearLayoutManager
import androidx.recyclerview.widget.RecyclerView
import com.example.logindemo.R
import com.example.logindemo.base.BaseAdapter
import com.example.logindemo.bean.ChatBean
class DiscoverFragment : Fragment() {
private lateinit var recyclerView: RecyclerView
override fun onCreateView(
inflater: LayoutInflater, container: ViewGroup?,
savedInstanceState: Bundle?
): View? {
val view = inflater.inflate(R.layout.fragment_discover, container, false)
recyclerView = view.findViewById(R.id.recyclerView)
val data = ArrayList<ChatBean>()
data.add(ChatBean("头像0", "朋友圈", "", ""))
data.add(ChatBean("头像1", "视频号", "", ""))
data.add(ChatBean("头像2", "直播", "", ""))
data.add(ChatBean("头像2", "扫一扫", "", ""))
data.add(ChatBean("头像2", "摇一摇", "", ""))
data.add(ChatBean("头像2", "看一看", "", ""))
data.add(ChatBean("头像2", "搜一搜", "", ""))
data.add(ChatBean("头像2", "附近", "", ""))
data.add(ChatBean("头像2", "购物", "", ""))
data.add(ChatBean("头像2", "游戏", "", ""))
data.add(ChatBean("头像2", "小程序", "", ""))
recyclerView.layoutManager = LinearLayoutManager(context)
recyclerView.adapter = BaseAdapter(data)
return view
}
}条目适配器
package com.example.logindemo.base

import android.view.LayoutInflater
import android.view.View
import android.view.ViewGroup
import android.widget.TextView
import androidx.recyclerview.widget.RecyclerView
import com.example.logindemo.R
import com.example.logindemo.bean.ChatBean

class BaseAdapter(private val data: List<ChatBean>) :
    RecyclerView.Adapter<BaseAdapter.BaseHolder>() {

    override fun onCreateViewHolder(parent: ViewGroup, viewType: Int): BaseHolder {
        val view = LayoutInflater.from(parent.context).inflate(R.layout.base_item, null, false);
        return BaseHolder(view)
    }

    override fun getItemCount(): Int {
        return data.size
    }

    override fun onBindViewHolder(holder: BaseHolder, position: Int) {

        holder.headTv.visibility = if (data[position].head.isEmpty()) View.GONE else View.VISIBLE
        holder.nickTv.visibility = if (data[position].nick.isEmpty()) View.GONE else View.VISIBLE
        holder.newestTv.visibility = if (data[position].newest.isEmpty()) View.GONE else View.VISIBLE
        holder.dateTv.visibility = if (data[position].date.isEmpty()) View.GONE else View.VISIBLE

        holder.headTv.text = data[position].head
        holder.nickTv.text = data[position].nick
        holder.newestTv.text = data[position].newest
        holder.dateTv.text = data[position].date
    }

    class BaseHolder(itemView: View) : RecyclerView.ViewHolder(itemView) {
        val headTv: TextView = itemView.findViewById(R.id.headTv)
        val nickTv: TextView = itemView.findViewById(R.id.nickTv)
        val newestTv: TextView = itemView.findViewById(R.id.newestTv)
        val dateTv: TextView = itemView.findViewById(R.id.dateTv)
    }

}
数据类型
package com.example.logindemo.bean

data class ChatBean(val head: String, val nick: String, val newest: String, val date: String) {

}



![P1033 [NOIP2002 提高组] 自由落体](https://img-blog.csdnimg.cn/img_convert/cde10e8f336b6c2ad46bbf2144470e2a.png)
