Redis-cli Go代码
安装
go get github.com/redis/go-redis/v9
建立连接
import (
	"context"
	"fmt"
	"github.com/redis/go-redis/v9"
)

client := redis.NewClient(&redis.Options{
	Addr:	  "localhost:6379",
	Password: "", // no password set
	DB:		  0,  // use default DB
})
Options 配置
// Options keeps the settings to set up redis connection.
type Options struct {
	// The network type, either tcp or unix.
	// Default is tcp.
	Network string
	// host:port address.
	Addr string

	// ClientName will execute the `CLIENT SETNAME ClientName` command for each conn.
	ClientName string

	// Dialer creates new network connection and has priority over
	// Network and Addr options.
	Dialer func(ctx context.Context, network, addr string) (net.Conn, error)

	// Hook that is called when new connection is established.
	OnConnect func(ctx context.Context, cn *Conn) error

	// Use the specified Username to authenticate the current connection
	// with one of the connections defined in the ACL list when connecting
	// to a Redis 6.0 instance, or greater, that is using the Redis ACL system.
	Username string
	// Optional password. Must match the password specified in the
	// requirepass server configuration option (if connecting to a Redis 5.0 instance, or lower),
	// or the User Password when connecting to a Redis 6.0 instance, or greater,
	// that is using the Redis ACL system.
	Password string
	// CredentialsProvider allows the username and password to be updated
	// before reconnecting. It should return the current username and password.
	CredentialsProvider func() (username string, password string)

	// Database to be selected after connecting to the server.
	DB int

	// Maximum number of retries before giving up.
	// Default is 3 retries; -1 (not 0) disables retries.
	MaxRetries int
	// Minimum backoff between each retry.
	// Default is 8 milliseconds; -1 disables backoff.
	MinRetryBackoff time.Duration
	// Maximum backoff between each retry.
	// Default is 512 milliseconds; -1 disables backoff.
	MaxRetryBackoff time.Duration

	// Dial timeout for establishing new connections.
	// Default is 5 seconds.
	DialTimeout time.Duration
	// Timeout for socket reads. If reached, commands will fail
	// with a timeout instead of blocking. Supported values:
	//   - `0` - default timeout (3 seconds).
	//   - `-1` - no timeout (block indefinitely).
	//   - `-2` - disables SetReadDeadline calls completely.
	ReadTimeout time.Duration
	// Timeout for socket writes. If reached, commands will fail
	// with a timeout instead of blocking.  Supported values:
	//   - `0` - default timeout (3 seconds).
	//   - `-1` - no timeout (block indefinitely).
	//   - `-2` - disables SetWriteDeadline calls completely.
	WriteTimeout time.Duration
	// ContextTimeoutEnabled controls whether the client respects context timeouts and deadlines.
	// See https://redis.uptrace.dev/guide/go-redis-debugging.html#timeouts
	ContextTimeoutEnabled bool

	// Type of connection pool.
	// true for FIFO pool, false for LIFO pool.
	// Note that FIFO has slightly higher overhead compared to LIFO,
	// but it helps closing idle connections faster reducing the pool size.
	PoolFIFO bool
	// Maximum number of socket connections.
	// Default is 10 connections per every available CPU as reported by runtime.GOMAXPROCS.
	PoolSize int
	// Amount of time client waits for connection if all connections
	// are busy before returning an error.
	// Default is ReadTimeout + 1 second.
	PoolTimeout time.Duration
	// Minimum number of idle connections which is useful when establishing
	// new connection is slow.
	MinIdleConns int
	// Maximum number of idle connections.
	MaxIdleConns int
	// ConnMaxIdleTime is the maximum amount of time a connection may be idle.
	// Should be less than server's timeout.
	//
	// Expired connections may be closed lazily before reuse.
	// If d <= 0, connections are not closed due to a connection's idle time.
	//
	// Default is 30 minutes. -1 disables idle timeout check.
	ConnMaxIdleTime time.Duration
	// ConnMaxLifetime is the maximum amount of time a connection may be reused.
	//
	// Expired connections may be closed lazily before reuse.
	// If <= 0, connections are not closed due to a connection's age.
	//
	// Default is to not close idle connections.
	ConnMaxLifetime time.Duration

	// TLS Config to use. When set, TLS will be negotiated.
	TLSConfig *tls.Config

	// Limiter interface used to implement circuit breaker or rate limiter.
	Limiter Limiter

	// Enables read only queries on slave/follower nodes.
	readOnly bool
}
初始化连接
var Client *redis.Client
// 建立新连接时的回调
func OnConnect(ctx context.Context, cn *redis.Conn) error {
	if cn != nil {
		fmt.Println("connect ok")
	}
	return nil
}
//初始化redis
func InitRedis() {
	if Client == nil {
		fmt.Println("init client")
		Client = redis.NewClient(&redis.Options{
			Addr:      "localhost:6379",
			Password:  "", // no password set
			DB:        0,  // use default DB
			OnConnect: OnConnect,
		})
	}
}

// Set
func Set(ctx context.Context, key string, val interface{}, duration time.Duration) error {
	return Client.Set(ctx, key, val, duration).Err()
}
// Get
func Get(ctx context.Context, key string) string {
	val, err := Client.Get(ctx, key).Result()
	if err != nil {
		panic(err)
	}
	return val
}
string 测试Get Set 方法
func TestRedis(t *testing.T) {
	InitRedis()
	ctx := context.Background()
	err := Set(ctx, "zdm", "赵德满", 1*time.Hour)
	if err != nil {
		fmt.Println(err.Error())
	}
	fmt.Println(Get(ctx, "zdm"))
}

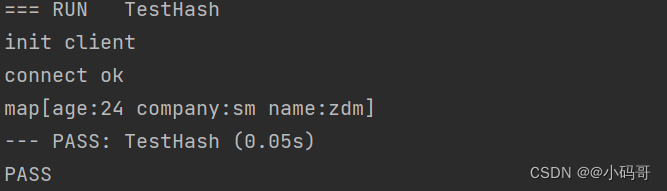
存储hash
func TestHash(t *testing.T) {
	InitRedis()
	session := map[string]string{"name":"zdm","company":"sm","age":"24"}
	ctx := context.Background()
	for k,v := range session {
		err := HSet(ctx,"user:session",k,v)
		if err != nil {
			fmt.Println(err.Error())
		}
	}
	res,err := HGetAll(ctx,"user:session")
	if err != nil {
		fmt.Println(err.Error())
	}
	fmt.Println(res)
}
连接到Redis群集
var ReCluster *redis.ClusterClient
func InitRedisCluster() {
	if ReCluster == nil {
		ReCluster = redis.NewClusterClient(&redis.ClusterOptions{
			Addrs: []string{":16379", ":16380", ":16381", ":16382", ":16383", ":16384"},

			// To route commands by latency or randomly, enable one of the following.
			//RouteByLatency: true,
			//RouteRandomly: true,
		})
	}
}
使用Redis 集群扩展
Redis使用称为Redis Cluster的部署拓扑进行水平扩展。本主题将教您如何在生产中设置、测试和操作Redis集群。您将从最终用户的角度了解Redis Cluster的可用性和一致性特征。
如果您计划运行生产Redis Cluster部署,或者想更好地了解Redis Cluster如何在内部工作,请参阅Redis Cluster规范(https://redis.io/docs/reference/cluster-spec/)。要了解Redis Enterprise如何处理缩放,请参阅Redis Enterprise的线性缩放(https://redis.com/redis-enterprise/technology/linear-scaling-redis-enterprise)。
创建和使用一个Redis 集群
包含以下几个步骤
- Create a Redis Cluster (创建一个Redis 集群)
- Interact with the cluster (与集群交互)
- Write an example app with redis-rb-cluster (编写一个带有redis-rb集群的示例应用程序)
- Reshard the cluster
- A more interesting example application
- Test the failover (测试故障切换)
- Manual failover (手动故障转移)
- Add a new node (添加一个新节点)
- Remove a node (移除一个新节点)
- Replica migration (复制副本迁移)
- Upgrade nodes in a Redis Cluster (升级redis 中集群的节点)
- 迁移到Redis群集 (迁移到redis 集群)
首先我们要熟悉创建集群的要求
Requirements to create a Redis Cluster (创建集群的要求)
To create a cluster, the first thing you need is to have a few empty Redis instances running in cluster mode.
At minimum, set the following directives in the redis.conf file:
要创建一个集群,首先需要有几个空的Redis实例在集群模式下运行。
至少在redis.conf文件中设置以下指令:
port 7000
cluster-enabled yes
cluster-config-file nodes.conf
cluster-node-timeout 5000
appendonly yes
要启用群集模式,请将启用群集的指令设置为yes。每个实例还包含存储该节点配置的文件的路径,默认情况下为nodes.conf。人类永远不会接触该文件;它只是在启动时由Redis Cluster实例生成,并在每次需要时更新。
请注意,按预期工作的最小集群必须至少包含三个主节点。对于部署,我们强烈建议使用六节点集群,其中包含三个主节点和三个副本。
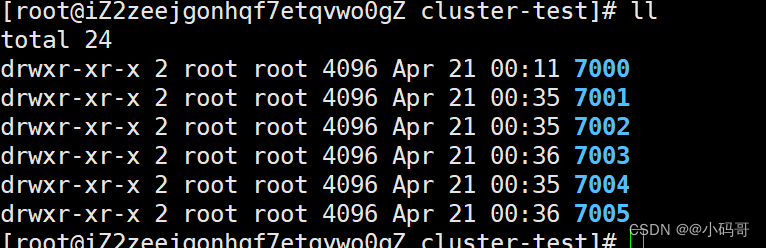
您可以通过创建以下目录来本地测试这一点,这些目录以您将在任何给定目录中运行的实例的端口号命名。
mkdir cluster-test
cd cluster-test
mkdir 7000 7001 7002 7003 7004 7005
每个文件夹下放的redis-conf 文件,port 改为对应的7001 7002…
daemonize no # 改为yes 支持后台进程启动
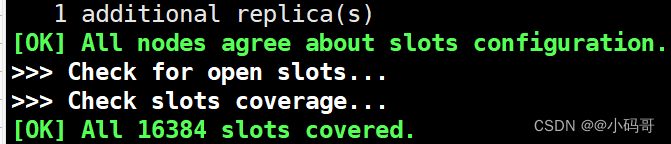
./redis-cli --cluster create 127.0.0.1:7000 127.0.0.1:7001 127.0.0.1:7002 127.0.0.1:7003 127.0.0.1:7004 127.0.0.1:7005 --cluster-replicas 1


![[架构之路-174]-《软考-系统分析师》-5-数据库系统-7-数据仓库技术与数据挖掘技术](https://img-blog.csdnimg.cn/06763829bfcd4264be4d1f0adc547eb3.png)