系列文章:这个系列已完结,如对您有帮助,求点赞收藏评论。
读者寄语:再小的帆,也能远航!
- 【k8s完整实战教程0】前言
- 【k8s完整实战教程1】源码管理-Coding
- 【k8s完整实战教程2】腾讯云搭建k8s托管集群
- 【k8s完整实战教程3】k8s集群部署kubesphere
- 【k8s完整实战教程4】使用kubesphere部署项目到k8s
- 【k8s完整实战教程5】网络服务配置(nodeport/loadbalancer/ingress)
- 【k8s完整实战教程6】完整实践-部署一个federated_download项目
kubesphere官网上有安装文档
1 集群配置
3.3版本需要开启外网访问,之前实践的时候没有这一环,因此先不设置
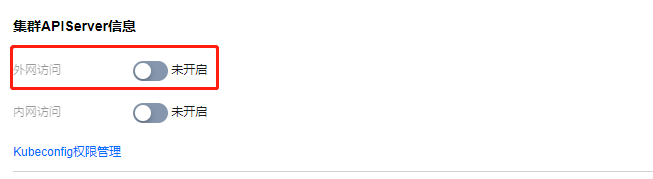
设置一下:
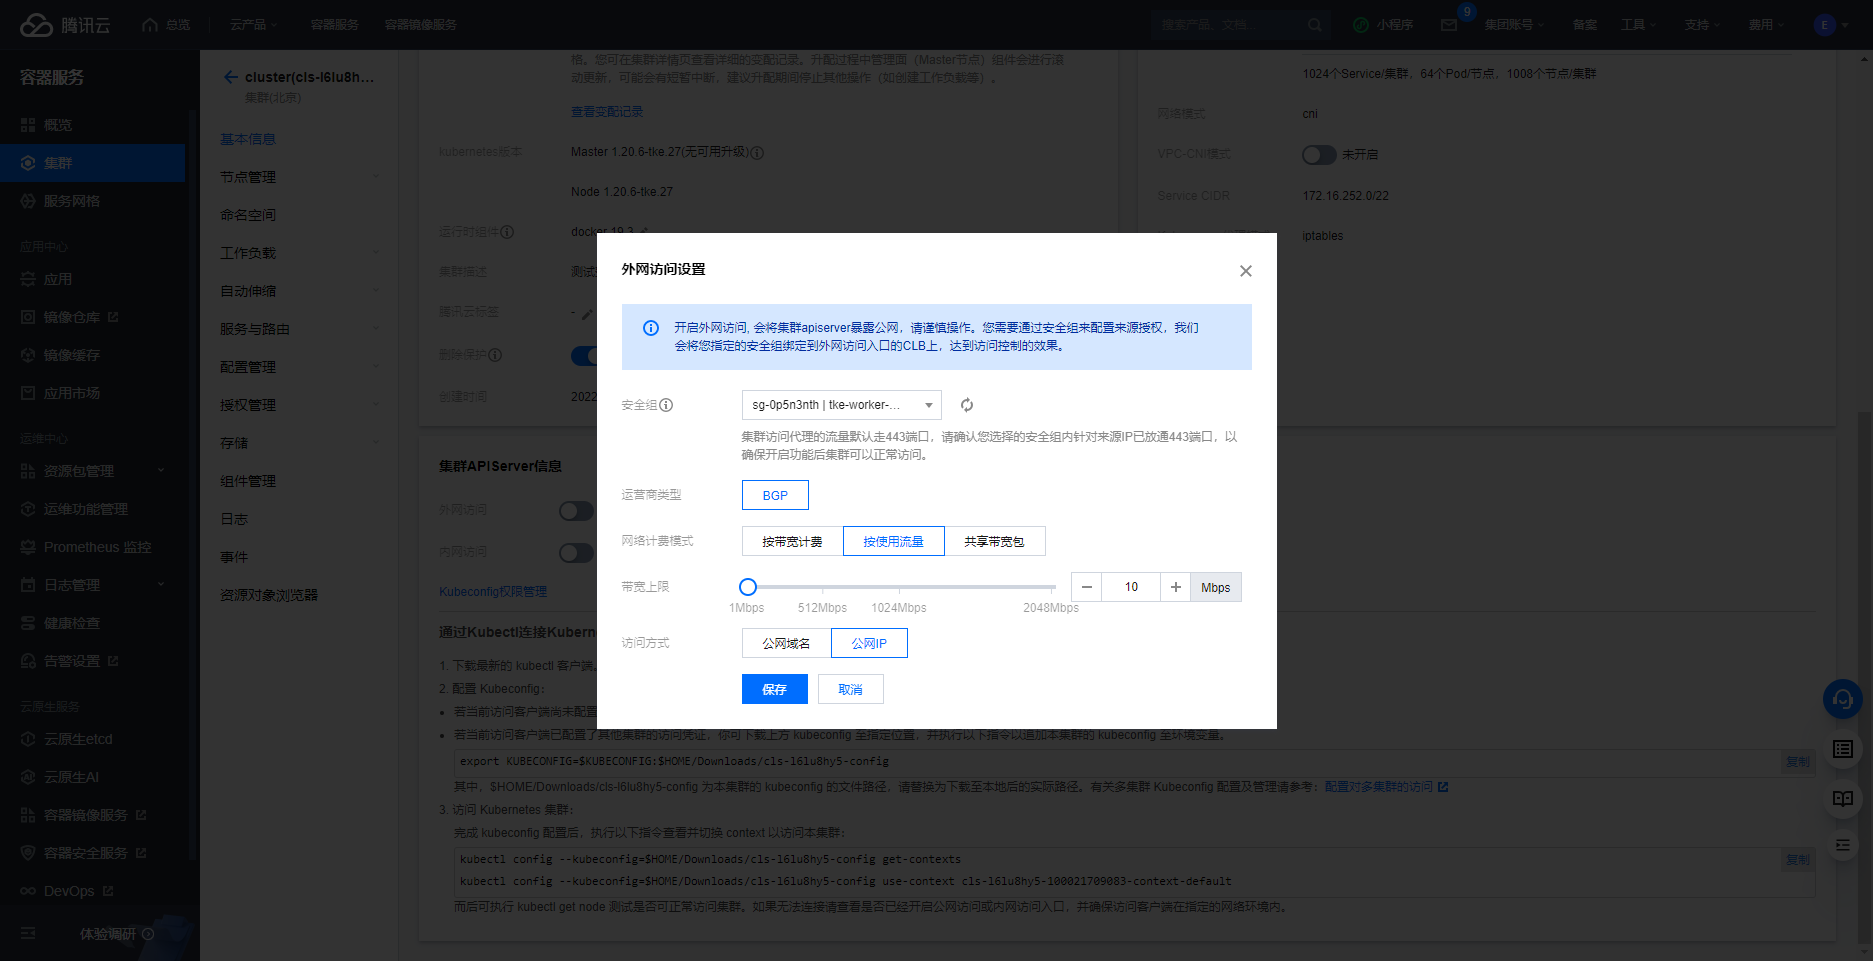
点击保存之后
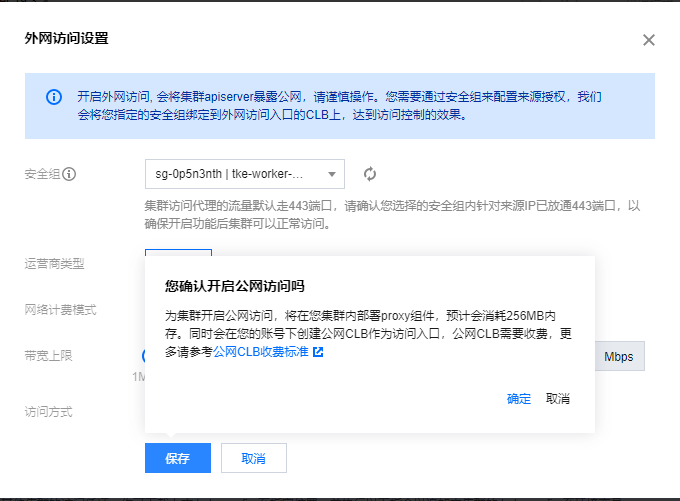
目前就开启好了
可通过 kubectl 命令行工具来验证集群连接:
ubuntu@VM-1-13-ubuntu:~$ kubectl version
Client Version: version.Info{Major:"1", Minor:"20+", GitVersion:"v1.20.6-tke.27", GitCommit:"9921bde307511509f8cbdf2391339b33a1207ba7", GitTreeState:"clean", BuildDate:"2022-10-08T04:36:47Z", GoVersion:"go1.15.10", Compiler:"gc", Platform:"linux/amd64"}
Server Version: version.Info{Major:"1", Minor:"20+", GitVersion:"v1.20.6-tke.27", GitCommit:"9921bde307511509f8cbdf2391339b33a1207ba7", GitTreeState:"clean", BuildDate:"2022-10-08T04:02:09Z", GoVersion:"go1.15.10", Compiler:"gc", Platform:"linux/amd64"}
2 cmd登录集群中的某个节点
注意,之前建立集群设置密码时,集群的用户名为 ubuntu
C:\Users\17211>ssh root@10.0.1.8
ssh: connect to host 10.0.1.8 port 22: Connection timed out

C:\Users\17211>ssh root@192.144.150.57
The authenticity of host '192.144.150.57 (192.144.150.57)' can't be established.
ECDSA key fingerprint is SHA256:3qfu7eftcXL+h9vK/O2G2NSYhjXEnSVw5t9+VZ6RKbc.
Are you sure you want to continue connecting (yes/no/[fingerprint])? yes
Warning: Permanently added '192.144.150.57' (ECDSA) to the list of known hosts.
root@192.144.150.57's password:
Permission denied, please try again.

C:\Users\17211>ssh ubuntu@192.144.150.57
ubuntu@192.144.150.57's password:
Welcome to Ubuntu 18.04.4 LTS (GNU/Linux 4.15.0-180-generic x86_64)

 * Documentation:  https://help.ubuntu.com
 * Management:     https://landscape.canonical.com
 * Support:        https://ubuntu.com/advantage

  System information as of Tue Oct 18 10:56:46 CST 2022

  System load:  0.08               Users logged in:        0
  Usage of /:   12.5% of 49.15GB   IP address for eth0:    10.0.1.8
  Memory usage: 24%                IP address for docker0: 169.254.32.1
  Swap usage:   0%                 IP address for cbr0:    172.16.0.65
  Processes:    144

 * Super-optimized for small spaces - read how we shrank the memory
   footprint of MicroK8s to make it the smallest full K8s around.

   https://ubuntu.com/blog/microk8s-memory-optimisation

 * Canonical Livepatch is available for installation.
   - Reduce system reboots and improve kernel security. Activate at:
     https://ubuntu.com/livepatch

To run a command as administrator (user "root"), use "sudo <command>".
See "man sudo_root" for details.'

ubuntu@VM-1-8-ubuntu:~$
由此可见:
- 不能通过节点的内网IP进行登录,需要使用公网IP
- 用户名为ubuntu而不是root
3 安装
可以使用github上的 ks-installer 在已有的 Kubernetes 集群上来执行 KubeSphere 部署
ubuntu@VM-1-8-ubuntu:~$ kubectl apply -f https://github.com/kubesphere/ks-installer/releases/download/v3.3.0/kubesphere-installer.yaml
customresourcedefinition.apiextensions.k8s.io/clusterconfigurations.installer.kubesphere.io created
namespace/kubesphere-system created
serviceaccount/ks-installer created
clusterrole.rbac.authorization.k8s.io/ks-installer created
clusterrolebinding.rbac.authorization.k8s.io/ks-installer created
deployment.apps/ks-installer created
安装完成
4 下载配置文件修改并应用
- 下载配置文件:
 ubuntu@VM-1-8-ubuntu:~$ wget https://github.com/kubesphere/ks-installer/releases/download/v3.3.0/cluster-configuration.yaml
--2022-10-18 11:02:28--  https://github.com/kubesphere/ks-installer/releases/download/v3.3.0/cluster-configuration.yaml
Resolving github.com (github.com)... 20.205.243.166
Connecting to github.com (github.com)|20.205.243.166|:443... connected.
HTTP request sent, awaiting response... 302 Found
Location: https://objects.githubusercontent.com/github-production-release-asset-2e65be/196956614/9cb8209d-7f4e-48d3-bf46-494d607fa991?X-Amz-Algorithm=AWS4-HMAC-SHA256&X-Amz-Credential=AKIAIWNJYAX4CSVEH53A%2F20221018%2Fus-east-1%2Fs3%2Faws4_request&X-Amz-Date=20221018T030228Z&X-Amz-Expires=300&X-Amz-Signature=7514391e069f5db43a08250e65ce4661d2337a20363fe730251c0cbbe75b5d61&X-Amz-SignedHeaders=host&actor_id=0&key_id=0&repo_id=196956614&response-content-disposition=attachment%3B%20filename%3Dcluster-configuration.yaml&response-content-type=application%2Foctet-stream [following]
--2022-10-18 11:02:29--  https://objects.githubusercontent.com/github-production-release-asset-2e65be/196956614/9cb8209d-7f4e-48d3-bf46-494d607fa991?X-Amz-Algorithm=AWS4-HMAC-SHA256&X-Amz-Credential=AKIAIWNJYAX4CSVEH53A%2F20221018%2Fus-east-1%2Fs3%2Faws4_request&X-Amz-Date=20221018T030228Z&X-Amz-Expires=300&X-Amz-Signature=7514391e069f5db43a08250e65ce4661d2337a20363fe730251c0cbbe75b5d61&X-Amz-SignedHeaders=host&actor_id=0&key_id=0&repo_id=196956614&response-content-disposition=attachment%3B%20filename%3Dcluster-configuration.yaml&response-content-type=application%2Foctet-stream
Resolving objects.githubusercontent.com (objects.githubusercontent.com)... 185.199.109.133, 185.199.110.133, 185.199.111.133, ...
Connecting to objects.githubusercontent.com (objects.githubusercontent.com)|185.199.109.133|:443... connected.
HTTP request sent, awaiting response... 200 OK
Length: 10021 (9.8K) [application/octet-stream]
Saving to: ‘cluster-configuration.yaml’

cluster-configuration.yaml    100%[=================================================>]   9.79K  --.-KB/s    in 0.003s

2022-10-18 11:02:29 (2.79 MB/s) - ‘cluster-configuration.yaml’ saved [10021/10021]
- 修改配置文件:PVC需要改为10的倍数
 ubuntu@VM-1-8-ubuntu:~$ vim cluster-configuration.yaml
--------------------------------------------------------------------
 redis:
      enabled: false
      enableHA: false
      volumeSize: 20Gi # Redis PVC size.
    openldap:
      enabled: false
      volumeSize: 20Gi   # openldap PVC size.
    minio:
      volumeSize: 20Gi # Minio PVC size.
    monitoring:
      # type: external   # Whether to specify the external prometheus stack, and need to modify the endpoint at the next line.
--------------------------------
% 这里只有jenkinsVolumeSize: 10Gi需要改
# resources: {}
    jenkinsMemoryLim: 2Gi      # Jenkins memory limit.
    jenkinsMemoryReq: 1500Mi   # Jenkins memory request.
    jenkinsVolumeSize: 10Gi     # Jenkins volume size.
    jenkinsJavaOpts_Xms: 1200m  # The following three fields are JVM parameters.
    jenkinsJavaOpts_Xmx: 1600m
    jenkinsJavaOpts_MaxRAM: 2g
最后保存即可
- 应用配置文件
 ubuntu@VM-1-8-ubuntu:~$ kubectl apply -f cluster-configuration.yaml
clusterconfiguration.installer.kubesphere.io/ks-installer created
- 查看日志消息
kubectl logs -n kubesphere-system $(kubectl get pod -n kubesphere-system -l 'app in (ks-install, ks-installer)' -o jsonpath='{.items[0].metadata.name}') -f
创建过程中有一段时间,需要等一等
5 等完成之后登录
# 访问管理页面(替换ip为你的节点ip)
http://82.157.47.240:30880
# 用户名 admin 密码 P@88w0rd
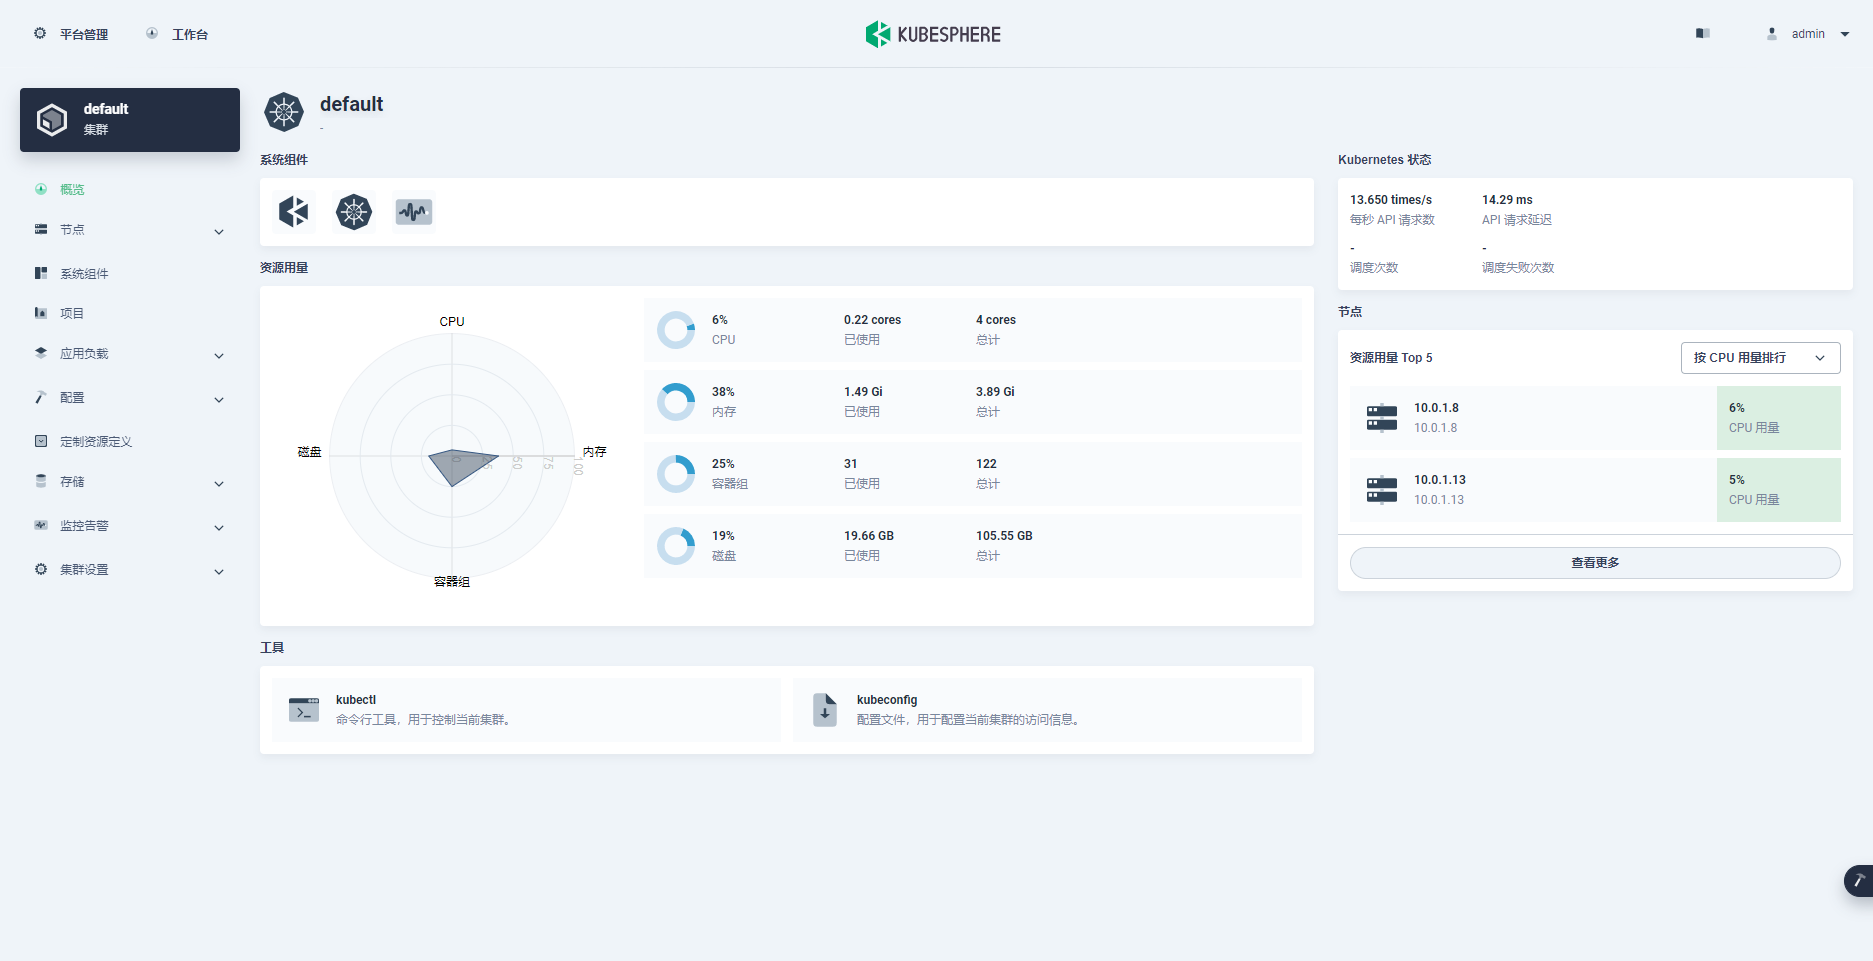
成功!
6 卸载
脚本:
#!/usr/bin/env bash

function delete_sure(){
  cat << eof
$(echo -e "\033[1;36mNote:\033[0m")
Delete the KubeSphere cluster, including the module kubesphere-system kubesphere-devops-system kubesphere-monitoring-system kubesphere-logging-system openpitrix-system.
eof

read -p "Please reconfirm that you want to delete the KubeSphere cluster.  (yes/no) " ans
while [[ "x"$ans != "xyes" && "x"$ans != "xno" ]]; do
    read -p "Please reconfirm that you want to delete the KubeSphere cluster.  (yes/no) " ans
done

if [[ "x"$ans == "xno" ]]; then
    exit
fi
}


delete_sure

# delete ks-install
kubectl delete deploy ks-installer -n kubesphere-system 2>/dev/null

# delete helm
for namespaces in kubesphere-system kubesphere-devops-system kubesphere-monitoring-system kubesphere-logging-system openpitrix-system kubesphere-monitoring-federated
do
  helm list -n $namespaces | grep -v NAME | awk '{print $1}' | sort -u | xargs -r -L1 helm uninstall -n $namespaces 2>/dev/null
done

# delete kubefed
kubectl get cc -n kubesphere-system ks-installer -o jsonpath="{.status.multicluster}" | grep enable
if [[ $? -eq 0 ]]; then
  helm uninstall -n kube-federation-system kubefed 2>/dev/null
  #kubectl delete ns kube-federation-system 2>/dev/null
fi


helm uninstall -n kube-system snapshot-controller 2>/dev/null

# delete kubesphere deployment
kubectl delete deployment -n kubesphere-system `kubectl get deployment -n kubesphere-system -o jsonpath="{.items[*].metadata.name}"` 2>/dev/null

# delete monitor statefulset
kubectl delete prometheus -n kubesphere-monitoring-system k8s 2>/dev/null
kubectl delete statefulset -n kubesphere-monitoring-system `kubectl get statefulset -n kubesphere-monitoring-system -o jsonpath="{.items[*].metadata.name}"` 2>/dev/null
# delete grafana
kubectl delete deployment -n kubesphere-monitoring-system grafana 2>/dev/null
kubectl --no-headers=true get pvc -n kubesphere-monitoring-system -o custom-columns=:metadata.namespace,:metadata.name | grep -E kubesphere-monitoring-system | xargs -n2 kubectl delete pvc -n 2>/dev/null

# delete pvc
pvcs="kubesphere-system|openpitrix-system|kubesphere-devops-system|kubesphere-logging-system"
kubectl --no-headers=true get pvc --all-namespaces -o custom-columns=:metadata.namespace,:metadata.name | grep -E $pvcs | xargs -n2 kubectl delete pvc -n 2>/dev/null


# delete rolebindings
delete_role_bindings() {
  for rolebinding in `kubectl -n $1 get rolebindings -l iam.kubesphere.io/user-ref -o jsonpath="{.items[*].metadata.name}"`
  do
    kubectl -n $1 delete rolebinding $rolebinding 2>/dev/null
  done
}

# delete roles
delete_roles() {
  kubectl -n $1 delete role admin 2>/dev/null
  kubectl -n $1 delete role operator 2>/dev/null
  kubectl -n $1 delete role viewer 2>/dev/null
  for role in `kubectl -n $1 get roles -l iam.kubesphere.io/role-template -o jsonpath="{.items[*].metadata.name}"`
  do
    kubectl -n $1 delete role $role 2>/dev/null
  done
}

# remove useless labels and finalizers
for ns in `kubectl get ns -o jsonpath="{.items[*].metadata.name}"`
do
  kubectl label ns $ns kubesphere.io/workspace-
  kubectl label ns $ns kubesphere.io/namespace-
  kubectl patch ns $ns -p '{"metadata":{"finalizers":null,"ownerReferences":null}}'
  delete_role_bindings $ns
  delete_roles $ns
done

# delete clusters
for cluster in `kubectl get clusters -o jsonpath="{.items[*].metadata.name}"`
do
  kubectl patch cluster $cluster -p '{"metadata":{"finalizers":null}}' --type=merge
done
kubectl delete clusters --all 2>/dev/null

# delete workspaces
for ws in `kubectl get workspaces -o jsonpath="{.items[*].metadata.name}"`
do
  kubectl patch workspace $ws -p '{"metadata":{"finalizers":null}}' --type=merge
done
kubectl delete workspaces --all 2>/dev/null

# delete devopsprojects
for devopsproject in `kubectl get devopsprojects -o jsonpath="{.items[*].metadata.name}"`
do
  kubectl patch devopsprojects $devopsproject -p '{"metadata":{"finalizers":null}}' --type=merge
done

for pip in `kubectl get pipeline -A -o jsonpath="{.items[*].metadata.name}"`
do
  kubectl patch pipeline $pip -n `kubectl get pipeline -A | grep $pip | awk '{print $1}'` -p '{"metadata":{"finalizers":null}}' --type=merge
done

for s2ibinaries in `kubectl get s2ibinaries -A -o jsonpath="{.items[*].metadata.name}"`
do
  kubectl patch s2ibinaries $s2ibinaries -n `kubectl get s2ibinaries -A | grep $s2ibinaries | awk '{print $1}'` -p '{"metadata":{"finalizers":null}}' --type=merge
done

for s2ibuilders in `kubectl get s2ibuilders -A -o jsonpath="{.items[*].metadata.name}"`
do
  kubectl patch s2ibuilders $s2ibuilders -n `kubectl get s2ibuilders -A | grep $s2ibuilders | awk '{print $1}'` -p '{"metadata":{"finalizers":null}}' --type=merge
done

for s2ibuildertemplates in `kubectl get s2ibuildertemplates -A -o jsonpath="{.items[*].metadata.name}"`
do
  kubectl patch s2ibuildertemplates $s2ibuildertemplates -n `kubectl get s2ibuildertemplates -A | grep $s2ibuildertemplates | awk '{print $1}'` -p '{"metadata":{"finalizers":null}}' --type=merge
done

for s2iruns in `kubectl get s2iruns -A -o jsonpath="{.items[*].metadata.name}"`
do
  kubectl patch s2iruns $s2iruns -n `kubectl get s2iruns -A | grep $s2iruns | awk '{print $1}'` -p '{"metadata":{"finalizers":null}}' --type=merge
done

kubectl delete devopsprojects --all 2>/dev/null


# delete validatingwebhookconfigurations
for webhook in ks-events-admission-validate users.iam.kubesphere.io network.kubesphere.io validating-webhook-configuration
do
  kubectl delete validatingwebhookconfigurations.admissionregistration.k8s.io $webhook 2>/dev/null
done

# delete mutatingwebhookconfigurations
for webhook in ks-events-admission-mutate logsidecar-injector-admission-mutate mutating-webhook-configuration
do
  kubectl delete mutatingwebhookconfigurations.admissionregistration.k8s.io $webhook 2>/dev/null
done

# delete users
for user in `kubectl get users -o jsonpath="{.items[*].metadata.name}"`
do
  kubectl patch user $user -p '{"metadata":{"finalizers":null}}' --type=merge
done
kubectl delete users --all 2>/dev/null


# delete helm resources
for resource_type in `echo helmcategories helmapplications helmapplicationversions helmrepos helmreleases`; do
  for resource_name in `kubectl get ${resource_type}.application.kubesphere.io -o jsonpath="{.items[*].metadata.name}"`; do
    kubectl patch ${resource_type}.application.kubesphere.io ${resource_name} -p '{"metadata":{"finalizers":null}}' --type=merge
  done
  kubectl delete ${resource_type}.application.kubesphere.io --all 2>/dev/null
done

# delete workspacetemplates
for workspacetemplate in `kubectl get workspacetemplates.tenant.kubesphere.io -o jsonpath="{.items[*].metadata.name}"`
do
  kubectl patch workspacetemplates.tenant.kubesphere.io $workspacetemplate -p '{"metadata":{"finalizers":null}}' --type=merge
done
kubectl delete workspacetemplates.tenant.kubesphere.io --all 2>/dev/null

# delete federatednamespaces in namespace kubesphere-monitoring-federated
for resource in $(kubectl get federatednamespaces.types.kubefed.io -n kubesphere-monitoring-federated -oname); do
  kubectl patch "${resource}" -p '{"metadata":{"finalizers":null}}' --type=merge -n kubesphere-monitoring-federated
done

# delete crds
for crd in `kubectl get crds -o jsonpath="{.items[*].metadata.name}"`
do
  if [[ $crd == *kubesphere.io ]]; then kubectl delete crd $crd 2>/dev/null; fi
done

# delete relevance ns
for ns in kubesphere-alerting-system kubesphere-controls-system kubesphere-devops-system kubesphere-logging-system kubesphere-monitoring-system kubesphere-monitoring-federated openpitrix-system kubesphere-system
do
  kubectl delete ns $ns 2>/dev/null
done
创建脚本:
ubuntu@VM-1-8-ubuntu:~$ vim kubesphere-delete.sh
增加权限:
ubuntu@VM-1-8-ubuntu:~$ sudo chmod u+x kubesphere-delete.sh
执行脚本:
ubuntu@VM-1-8-ubuntu:~$ ./kubesphere-delete.sh