说实话本人通过Vue页面实现前端对后端数据的渲染显示也是初学咋练,但后端实现本人却是老鸟,对于后端开发者来说如果,渲染显示的软件是浏览器,除非团队中有Vue方面的大拿,不管是PC浏览器还是移动PC浏览器,Razor页面是最好的选择; 如果是通过App或小程序进行渲染显示那么Vue是必需且唯一的选择。
Vue页面的实现不管是语言还是开发环境当前都于处于急剧迭代的阶段,即它们都还不成熟,1年前的前端项目不能被运行是常态,因此建议最好集成当前最新的开发包,这样也许前端项目的运行兼容周期会长一些,这也是本人建议如果是浏览器就选择Razor页面的主要原因之一。
由于上述因素在开发开发环境:VSCode与Hbuilder X,的选择是准则是:小孩才作选择,大人全都要;这是向现实认命和妥协,只有在两个者能够明显分出高下的时候,才是开者才能作出最终的选择。
VSCode:能够获取最新的Vue包,但上手和配置比较麻烦,特别对于App或小程序的uni-app尤其此。
Hbuilder X:所支持Vue包的最新版本是:3.28,但当前Vue的最新包最新版本是:5.x,但Hbuilder X最大的优点是上手简单,特别对于App或小程序的uni-app开发,除非特别需求,建议还是直接选择Hbuilder X。
“Blog.Admin-master”前端项目是最终用于浏览器渲染显示的,它的开发环境是“VSCode”,所以本人也会遵循上述要求对“Blog.Admin-master”前端项目进行分解实现,由于本人“VSCode”中所配置的Vue包版本比较高导致原项目不能被正常运行,所以本从前端项项目代码可能与考“Blog.Admin-master”前端项目的代码有些不同敬请谅解。
1 跨域(Cors)异常的后端解决方案
在当前Vue前端项目中对后端的访问中会异常:“has been blocked by CORS policy: No 'Access-Control-Allow-Origin' header is present on the requested resource.”,如下图所示:

1.1 异常解决方案
1.1.1 定义中间件“CorsMiddleware”
namespace WebApi.Middleware
{
/// <summary>
/// 【跨域访问中间件】
/// </summary>
/// <remarks>
/// 摘要:
/// 该管道中间件类主要为了解决在由vue/uni-app前端项目(Cors)访问当前后端项目时,浏览器或App中出现的异常:
/// 1、“has been blocked by CORS policy: Request header field content-type is not allowed by Access-Control-Allow-Headers in preflight response.”。
/// 2、“has been blocked by CORS policy: No 'Access-Control-Allow-Origin' header is present on the requested resource.”。
/// </remarks>
public class CorsMiddleware
{
#region 拷贝构造方法
/// <summary>
/// 【下1个】
/// </summary>
/// <remarks>
/// 摘要:
/// .Net(Core)框架内置管道中的下1个管道中间件实例。
/// </remarks>
private readonly RequestDelegate _next;
///<param name="next">.Net(Core)框架内置管道中的下1个管道中间件实例。</param>
/// <summary>
/// 【拷贝构造方法】
/// </summary>
/// <remarks>
/// 摘要:
/// 通过该构造方法中的参数实例,实例化.Net(Core)框架内置管道中的下1个管道中间件实例。
/// </remarks>
public CorsMiddleware(RequestDelegate next)
{
_next = next;
}
#endregion
#region 方法
///<param name="context">HTTP上下文实例。</param>
/// <summary>
/// 【调用】
/// </summary>
/// <remarks>
/// 摘要:
/// 通过该方法向.Net(Core)框架内置管道中集成当前管道中间件,解决由vue/uni-app前端项目(Cors)访问当前后端项目时,浏览器或App中出现的异常:
/// 1、“has been blocked by CORS policy: Request header field content-type is not allowed by Access-Control-Allow-Headers in preflight response.”。
/// 2、“has been blocked by CORS policy: No 'Access-Control-Allow-Origin' header is present on the requested resource.”。
/// </remarks>
public async Task Invoke(HttpContext context)
{
//解决在由Hbuilder创建的前端Xuni-app项目(Cors)访问当前后端项目时,浏览器或App中会出现异常:
//“has been blocked by CORS policy: Request header field content-type is not allowed by Access-Control-Allow-Headers in preflight response.”。
if (!context.Response.Headers.ContainsKey("Access-Control-Allow-Headers"))
{
context.Response.Headers.Add("Access-Control-Allow-Headers", "DNT,X-Mx-ReqToken,Keep-Alive,User-Agent,X-Requested-With,If-Modified-Since,Cache-Control,Content-Type,Authorization");
}
if (!context.Response.Headers.ContainsKey("Access-Control-Allow-Methods"))
{
context.Response.Headers.Add("Access-Control-Allow-Methods", "GET,POST,PUT,DELETE,PATCH,OPTIONS");
}
//解决在由Hbuilder创建的前端Xuni-app项目(Cors)访问当前后端项目时,浏览器或App中会出现异常:
//“has been blocked by CORS policy: No 'Access-Control-Allow-Origin' header is present on the requested resource.”。
if (!context.Response.Headers.ContainsKey("Access-Control-Allow-Origin"))
{
context.Response.Headers.Add("Access-Control-Allow-Origin", "*");
}
await _next(context);
}
#endregion
}
1.1.2 重构 Program类
var app = builder.Build();
//把自定义管道中间中集成到.Net(Core)框架内置管道中,解决vue/uni-app前端项目(Cors)访问当前后端项目时,浏览器或App中出现的异常:
// 1、“has been blocked by CORS policy: Request header field content-type is not allowed by Access-Control-Allow-Headers in preflight response.”。
// 2、“has been blocked by CORS policy: No 'Access-Control-Allow-Origin' header is present on the requested resource.”。
app.UseMiddleware<CorsMiddleware>();
// Configure the HTTP request pipeline.
if (app.Environment.IsDevelopment())
{
app.UseSwagger();
app.UseSwaggerUI();
}
app.UseHttpsRedirection();
1.1.3 启动程序
.net框架可以在不经过部署,直接在执行的情况下让前端项目直接访问后端项目,按F5启动程序,如下图所示:

2 博客文章的前端实现
2.1 “element-plus”模板插件的导入与配置
2.1.1 “element-plus”导入命令:
npm install element-plus
2.1.2 “element-plus”配置:
在“main.js”文件中定义如下配置:
import { createApp } from 'vue'
//把“element-plus”模板插件【导入】为全局变量:“ElementPlus”。
import ElementPlus from 'element-plus'
import 'element-plus/dist/index.css'
import App from './App.vue'
import router from './router'
import store from './store'
createApp(App)
.use(store)
.use(router)
// 使全局变量:“ElementPlus”,在所有的*.vue页面中都有效。
.use(ElementPlus)
.mount('#app')
2.2 “axios”路由组件导入命令:
npm install axios
3 “BlogsView.vue”页面与路由
3.1 定义BlogsView.vue”页面
<template>
<!--列表-->
<el-table
:data="blogList"
v-loading="listLoading"
style="width: 100%"
ref="table"
class="custom-tbl">
<el-table-column type="selection" width="50"> </el-table-column>
<el-table-column prop="id" label="ID" width="100" sortable>
</el-table-column>
<el-table-column prop="btitle" label="标题" width="" sortable>
</el-table-column>
<el-table-column prop="content" label="内容" width="400" sortable>
<template #default="scope">
<span v-html="scope.row.content"></span>
</template>
</el-table-column>
<el-table-column prop="createTime" label="创建时间" :formatter="formatCreateTime" width="250" sortable>
</el-table-column>>
</el-table>
</template>
<script>
import axios from 'axios'
export default ({
data() {
return {
//数组局部变量,用于存储从后端获取的“博客文章”实体的所有实例与当前页面进行绑定,以在页面进行渲染显示时,同时渲染显示出这些实例数据。
blogList: [],
listLoading: false,
};
},
methods:
{
//获取“博客文章”实体的所有实例。
async getBlogList() {
this.listLoading = true;
let res = await axios.get('https://localhost:7037/Blog?page=1');
this.blogList = res.data.response.data;
this.listLoading = false;
},
//格式化日期显示格式。
formatCreateTime: function (row, column) {
let data = row[column.property];
if (data == null) {
return null;
}
let dt = new Date(data);
return dt.getFullYear() + '-' + (dt.getMonth() + 1) + '-' + dt.getDate();
},
},
mounted() {
//在页面渲染显示完成前,把数据加载到页面中,以便在页面渲染显示后把数据渲染显示出来;“mounted”方法执行结束即为页面渲染显示后。
this.getBlogList();
}
});
</script>
<style scoped>
.custom-tbl /deep/ .has-gutter .el-checkbox {
display: none;
}
</style>
注意:
- 在方法定义时最好使用异步方法,同步方法会造成执行穿透,从而产生逻辑异常,常见现象是:第1个同步方法依赖于第2个同步方法的实例值,但由于第2个同步方法,还没有执行完成,第1个同步方法就会直接把默认值渲染显示在页面上。
- JavaScript代码是选项式API(Options API),这是vue2中的定义方式;vue3中提倡使用组合式api(composition API),两种定义方式在1个项目中可以混用,但在基于vue3项目中最好以组合式api(composition API)为主,如果可能最好只使用这种定义方式,由于本人水平和当前项目所以使用了选项式API(Options API)。
3.2 “BlogsView.vue”页面的路由定义
在“router\index.js”文件中定义如下配置:
{
path: '/about',
name: 'about',
component: () => import('../views/AboutView.vue')
},
{
path: '/Blog/Blogs',
name: '博客管理',
component: () => import('../views/Blog/BlogsView.vue'),
meta: {
title: '博客管理',
}
}
]
const router = createRouter({
history: createWebHashHistory(),
routes,
})
router.beforeEach(async (to) => {
// 如果路由中有标题实例,而把标题渲染显示在标签上。
if (to.meta.title) {
document.title = to.meta.title;
}
});
注意:
在当前版本的Vue中路由的名称不能与*.vue页面的名称一样,例如:Blogs就与BlogsView.vue不同。
执行前端项目如下图所示:
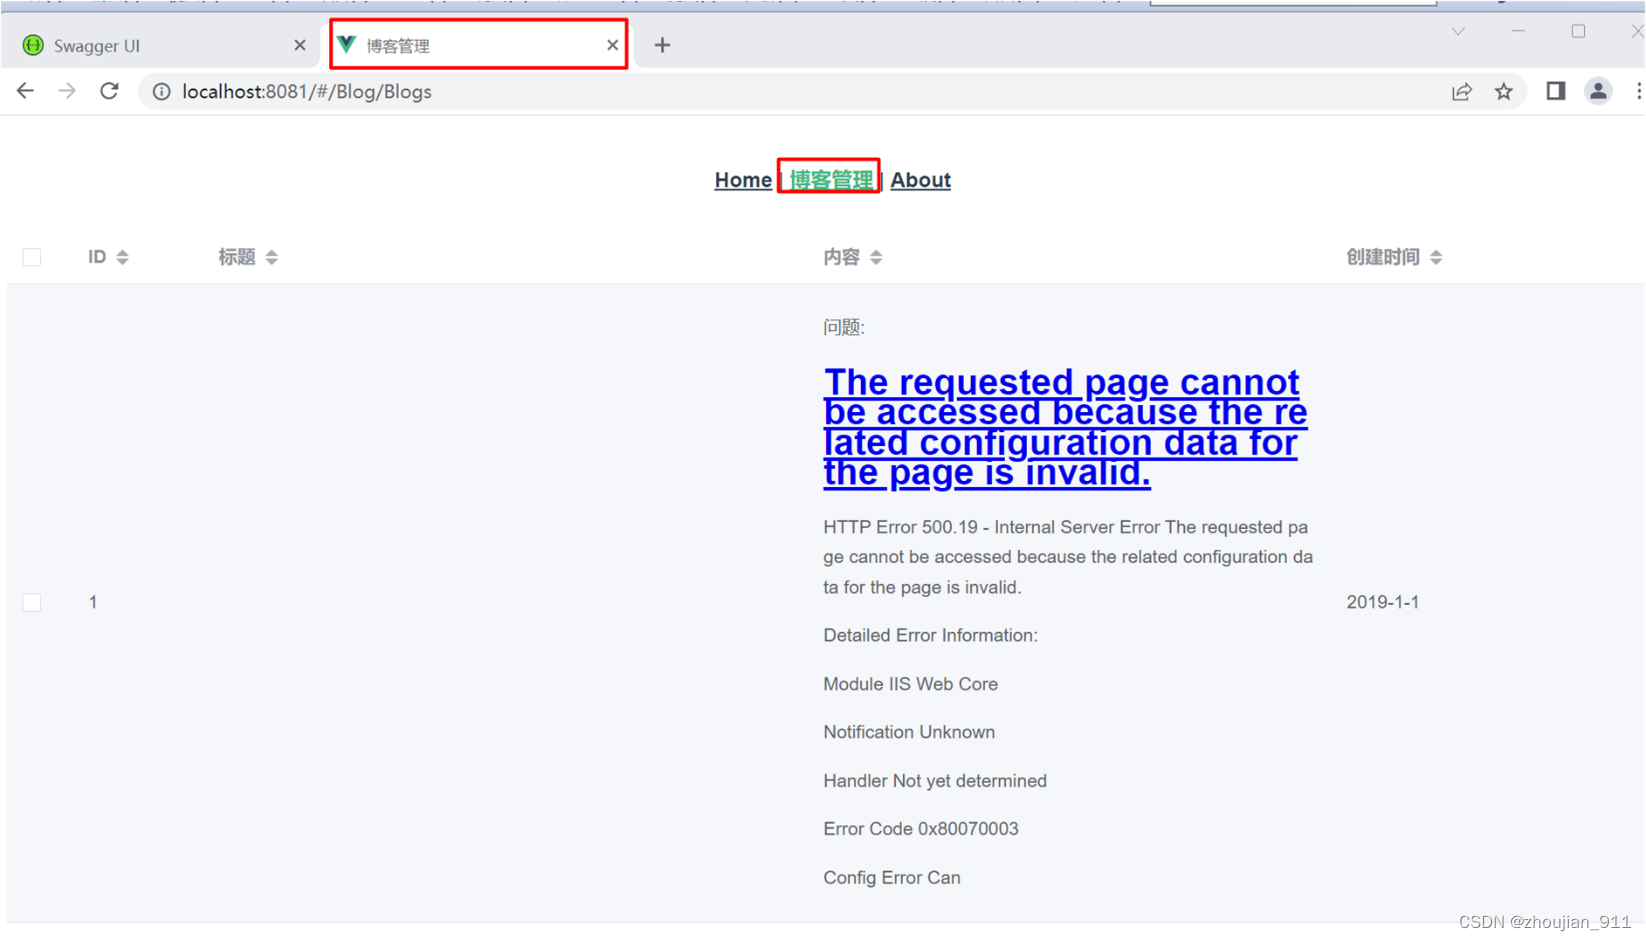
对以上功能更为具体实现和注释见:221128_001_admin(BlogsView页面绑定渲染数据)。






![[附源码]SSM计算机毕业设计线上图书销售管理系统JAVA](https://img-blog.csdnimg.cn/a4bb736b839e4179bfc9ab142785bdd6.png)

