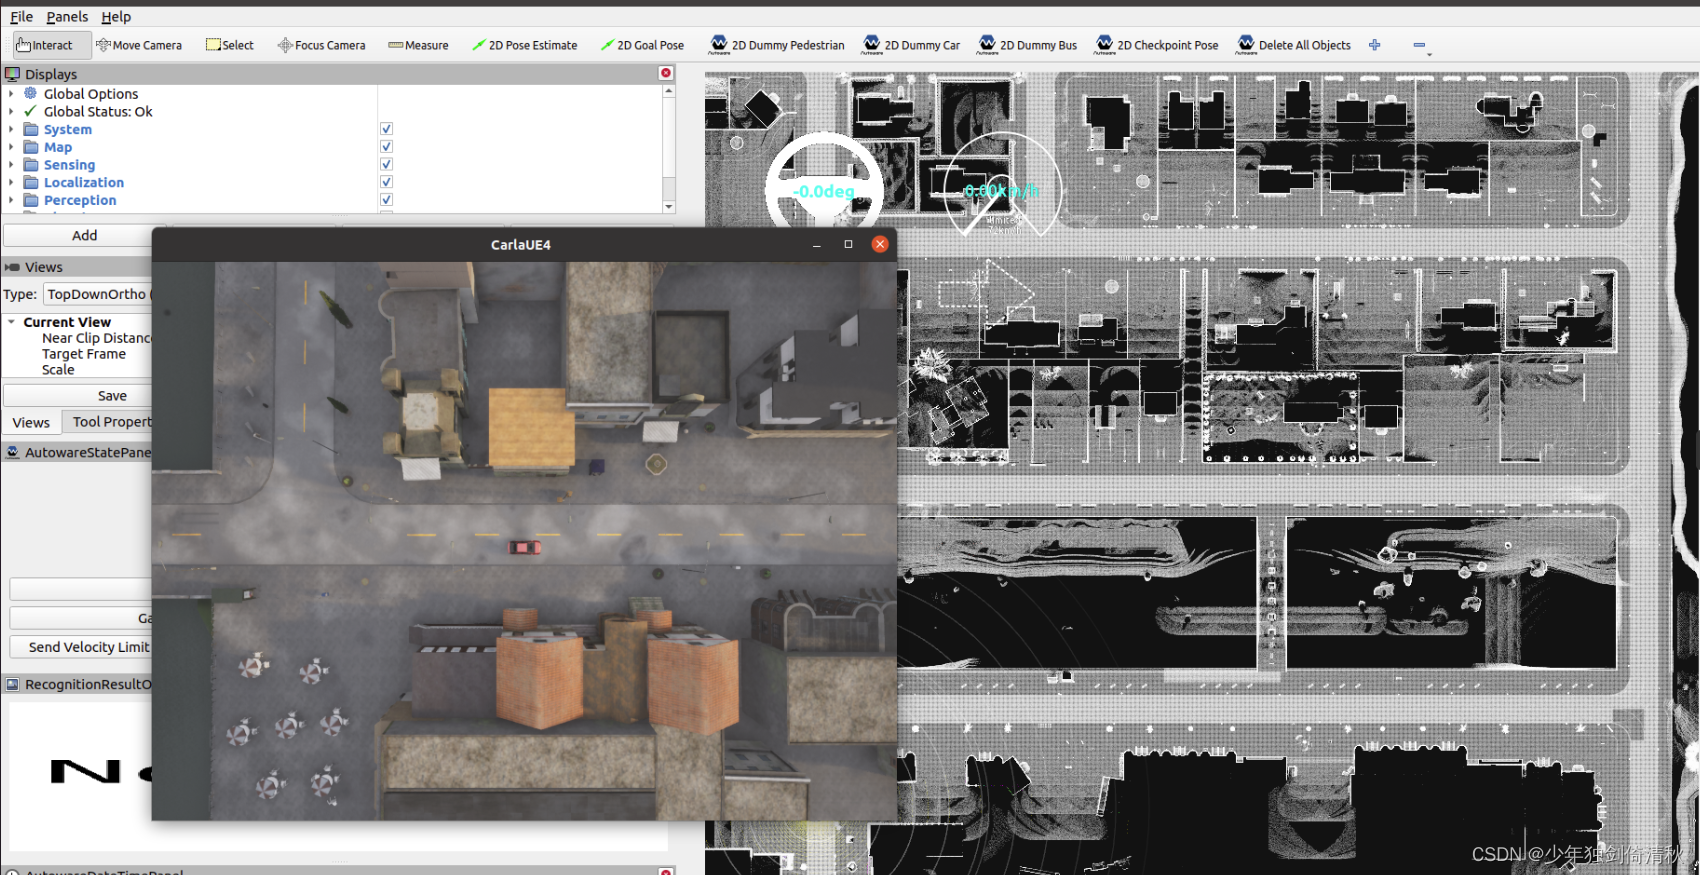
在Ubuntu20.04下安装Autoware.universe和Carla并进行联合仿真
- 一、安装Carla0.9.13
- 二、安装 UnrealEngine 4.26
- 三、安装Autoware.universe
- 四、设置 OpenPlanner
- 五、运行Carla和Autoware
一、安装Carla0.9.13
1、进入Carla 的官方 github 页面,找到0.9.13版本
https://github.com/carla-simulator/carla/releases
2、下载到home解压
cd ~/carla-0.9.13/CARLA_0.9.13
./CarlaUE4.sh -quality-level=Epic -world-port=2000 -resx=800 -resy=600
1、安装 Carla 0.9.13
pip install --user pygame numpy
pip3 install --user pygame numpy
sudo apt-key adv --keyserver keyserver.ubuntu.com --recv-keys 1AF1527DE64CB8D9
sudo add-apt-repository "deb [arch=amd64] http://dist.carla.org/carla $(lsb_release -sc) main"
sudo apt-get update
sudo apt-get install carla-simulator=0.9.13
二、安装 UnrealEngine 4.26
1、进入UE网页,按照顺序完成以下6步。
https://www.unrealengine.com/en-US/ue-on-github
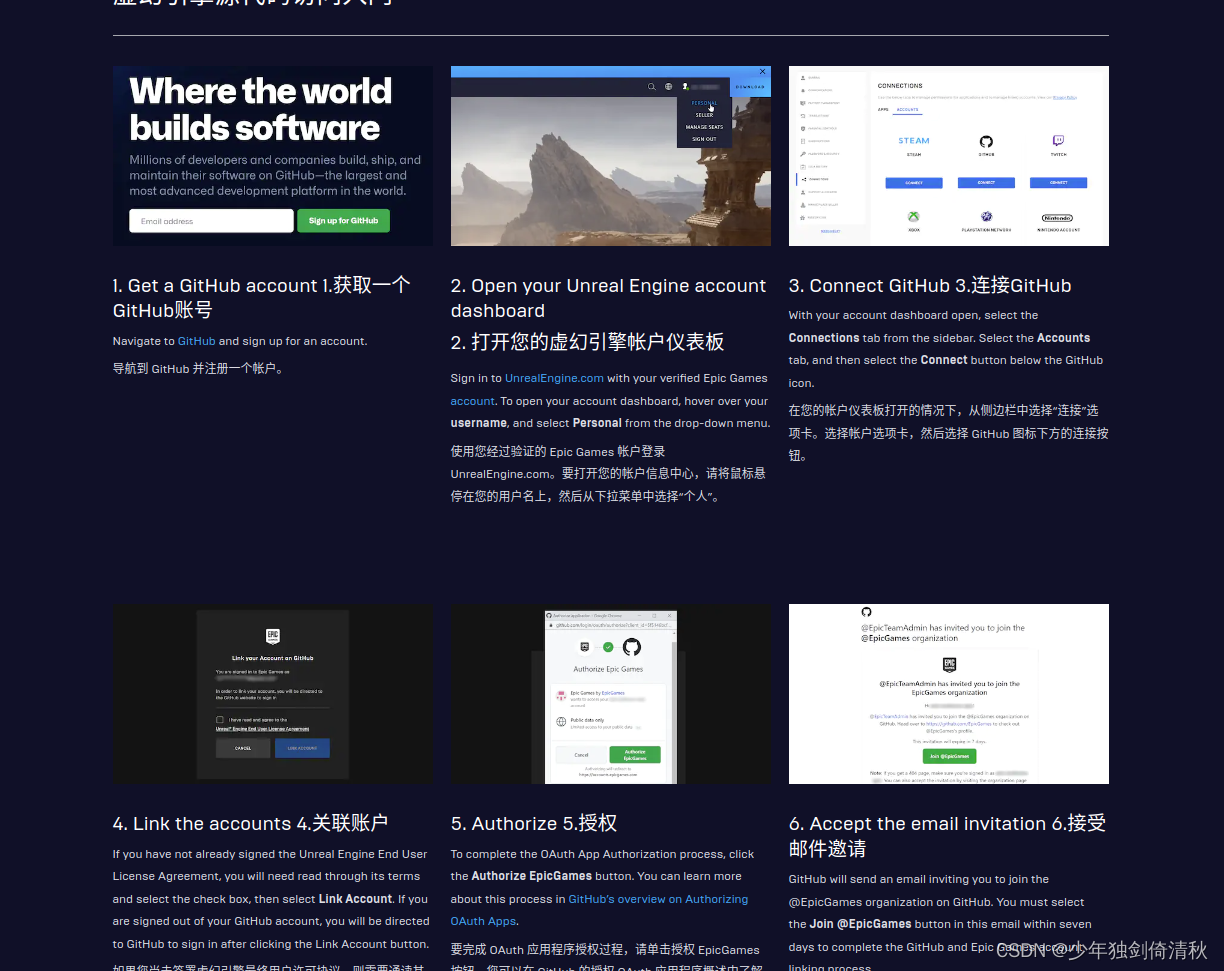
2、进入EpicGame的Github
https://github.com/EpicGames
点击UnrealEngine
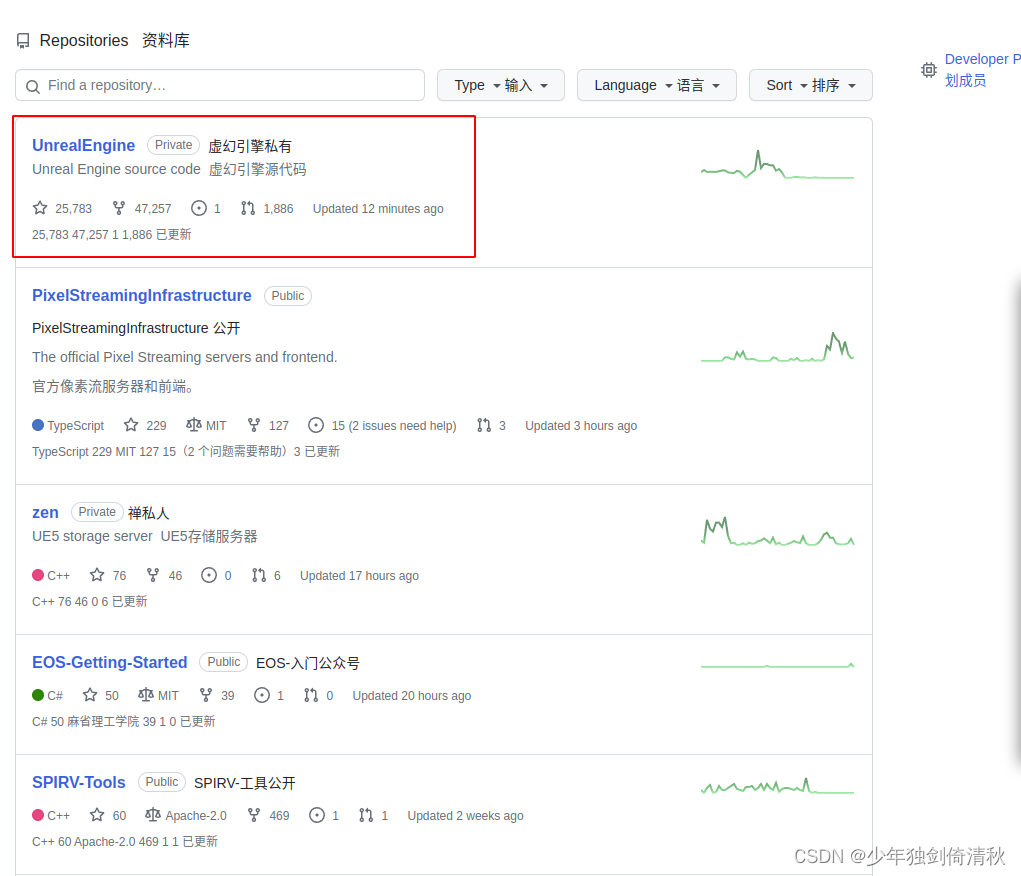
2、直接clone出来是最新版,需要设置classic token,可以参考:
https://docs.github.com/en/authentication/keeping-your-account-and-data-secure/creating-a-personal-access-token
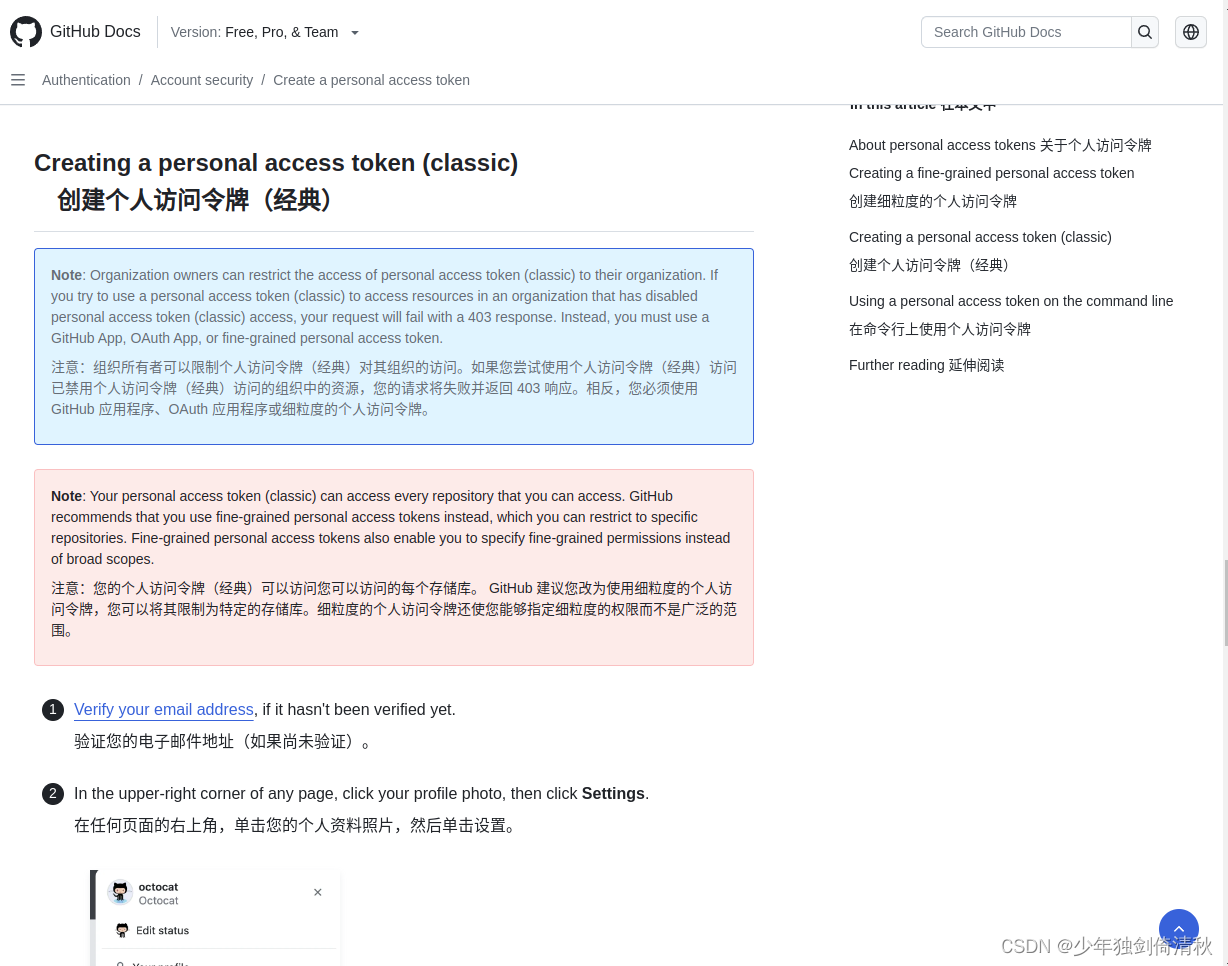
3、复制密钥后,下载UnrealEngine
git clone --depth 1 -b carla https://github.com/CarlaUnreal/UnrealEngine.git ~/UnrealEngine_4.26
输入用户名和刚才的密钥
4、编译
cd UnrealEngine_4.26/
./Setup.sh
./GenerateProjectFiles.sh
make
在make时报以下错:
ERROR: Platform Linux is not a valid platform to build. Check that the SDK is installed properly.
可以参考:
在编译UnrealEngine4.26时报错:ERROR: Platform Linux is not a valid platform to build. Check that the SDK is
5、检查是否安装成功
cd UnrealEngine_4.26/Engine/Binaries/Linux
./UE4Editor
6、添加环境变量
echo "export UE4_ROOT=~/UnrealEngine_4.26" >> ~/.bashrc
三、安装Autoware.universe
在第3步自动安装依赖时,可以将ROS2 Galactic一并安装,也可以提前自己手动安装,参考如下:
在Ubuntu20.04下安装ROS2 Galactic
1、安装git
sudo apt-get -y update
sudo apt-get -y install git
2、克隆Autoware到本地
mkdir autoware_universe
cd autoware_universe/
git clone https://github.com/autowarefoundation/autoware.git -b galactic
3、自动安装相关依赖
cd autoware
./setup-dev-env.sh
如果有以下报错:
The following packages have unmet dependencies:“, " cuda-drivers : Depends: cuda-drivers-530 (= 530.30.02-1) but it is not going to be installed”]}
解决办法:
在Ubuntu20.04下安装Autoware.universe使用命令安装依赖时报错
4、创建 src 文件夹
mkdir src
5、修改 autoware.repos 文件
sudo gedit autoware.repos
在autoware.repos 文件中,28行位置加入以下内容
universe/external/open_planner:
    type: git
    url: https://github.com/ZATiTech/open_planner.git
    version: main
6、下载代码库到本地
vcs import src < autoware.repos
7、安装 Autoware 依赖包
rosdep update --include-eol-distros
source /opt/ros/galactic/setup.bash
rosdep install -y --from-paths src --ignore-src --rosdistro $ROS_DISTRO
在安装open3d时速度慢,报错,可以参考:
安装ROS依赖时,安装open3d速度慢,报错问题
遇到 Invalid version: ‘0.23ubuntu1’ (package: distro-info) 报错问题,可以参考:
安装ROS依赖时,Invalid version: ‘0.23ubuntu1报错
8、编译工作空间
colcon build --symlink-install --cmake-args -DCMAKE_BUILD_TYPE=Release
在编译过程中卡死或者崩溃,或者其他问题,可以参考:
https://autowarefoundation.github.io/autoware-documentation/galactic/support/troubleshooting/#build-issues
四、设置 OpenPlanner
1、下载代码
cd ~/autoware_universe
mkdir op_carla
cd op_carla/
git clone https://github.com/hatem-darweesh/op_bridge.git -b ros2
git clone https://github.com/hatem-darweesh/op_agent.git -b ros2
git clone https://github.com/hatem-darweesh/scenario_runner.git
2、从google drive上下载Town01.pcd 和 Town01.osm地图。
https://drive.google.com/drive/folders/1Or0CMS08AW8XvJtzzR8TfhqdY9MMUBpS
以下网盘链接中只有Town01.pcd 和 Town01.osm地图,可供下载。
链接:https://pan.baidu.com/s/1xhUj71nMniECfQrM2MniPw
提取码:i4ll
创建 Town01 文件夹,将 Town01.pcd 和 Town01.osm 复制到Town01_map 文件夹中。
Town01.pcd重命名为pointcloud_map.pcd
Town01.osm重命名为lanelet2_map.osm
3、修改 run_exploration_mode_ros2.sh 文件
sudo gedit ~/autoware_universe/op_carla/op_bridge/op_scripts/run_exploration_mode_ros2.sh
在第8行
如果不在同一台电脑上运行仿真,需要设置运行仿真的电脑的 IP 地址。如下:
export SIMULATOR_LOCAL_HOST=“192.168.11.5”
如果在本机上运行仿真需要修改为:
export SIMULATOR_LOCAL_HOST=“localhost”
3、修改 start_ros2.sh 文件
sudo gedit ~/autoware_universe/op_carla/op_agent/start_ros2.sh
在第15行
按照实际的安装路径修改。
source /home/username/autoware_universe/autoware/install/setup.bash
在第18行
按照实际的安装路径修改launch文件路径,按照Town01的路径修改map_path。
ros2 launch /home/username/autoware_universe/autoware/src/launcher/autoware_launch/autoware_launch/launch/autoware.launch.xml map_path:=/home/username/autoware_universe/autoware/src/${map_name} vehicle_model:=sample_vehicle sensor_model:=sample_sensor_kit
4、修改 autoware.launch.xml 文件
sudo gedit ~/autoware_universe/autoware/src/launcher/autoware_launch/autoware_launch/launch/autoware.launch.xml
在第11行
添加如下:
<arg name="launch_carla_interface" default="true" description="convert carla sensor data to autoware suitable format"/>
在第17行
将launch_sensing_driver中的true改成false,可以直接复制以下替换第17行。
<arg name="launch_sensing_driver" default="false" description="launch sensing driver"/>
在第23行
将use_sim_time中的false改成true,可以直接复制以下替换第23行。
<arg name="use_sim_time" default="true" description="use_sim_time"/>
在第52行
添加如下:
  <!-- CARLA -->
    <group if="$(var launch_carla_interface)">
		<node pkg="carla_pointcloud" exec="carla_pointcloud_node" name="carla_pointcloud_interface" output="screen"/>
	</group>
5、修改 gnss.launch.xml 文件
sudo gedit ~/autoware_universe/autoware/src/sensor_kit/sample_sensor_kit_launch/sample_sensor_kit_launch/launch/gnss.launch.xml
在第4行
将coordinate_system中的1改成2,可以直接复制以下替换第4行。
<arg name="coordinate_system" default="2" description="0:UTM, 1:MGRS, 2:PLANE"/>
在第5行
添加如下:
<arg name="plane_zone" default="0"/>
5、修改 sensor_kit_calibration.yaml 文件
sudo gedit ~/autoware_universe/autoware/src/sensor_kit/sample_sensor_kit_launch/sample_sensor_kit_description/config/sensor_kit_calibration.yaml
由于修改较多,可以直接全部替换:
sensor_kit_base_link:
  camera0/camera_link:
    x: 0.7
    y: 0.0
    z: 0.0
    roll: 0.0
    pitch: 0.0
    yaw: 0.0
  camera1/camera_link:
    x: 0.0
    y: 0.0
    z: 0.0
    roll: 0.0
    pitch: 0.0
    yaw: 0.0
  camera2/camera_link:
    x: 0.0
    y: 0.0
    z: 0.0
    roll: 0.0
    pitch: 0.0
    yaw: 0.0
  camera3/camera_link:
    x: 0.0
    y: 0.0
    z: 0.0
    roll: 0.0
    pitch: 0.0
    yaw: 0.0
  camera4/camera_link:
    x: 0.0
    y: 0.0
    z: 0.0
    roll: 0.0
    pitch: 0.0
    yaw: 0.0
  camera5/camera_link:
    x: 0.0
    y: 0.0
    z: 0.0
    roll: 0.0
    pitch: 0.0
    yaw: 0.0
  traffic_light_right_camera/camera_link:
    x: 0.0
    y: 0.0
    z: 0.0
    roll: 0.0
    pitch: 0.0
    yaw: 0.0
  traffic_light_left_camera/camera_link:
    x: 0.0
    y: 0.0
    z: 0.0
    roll: 0.0
    pitch: 0.0
    yaw: 0.0
  velodyne_top_base_link:
    x: 0.0
    y: 0.0
    z: 0.8
    roll: 0.0
    pitch: 0.0
    yaw: 0.0
  velodyne_left_base_link:
    x: -0.5
    y: 0.0
    z: 0.8
    roll: 0.0
    pitch: 0.0
    yaw: 0.0
  velodyne_right_base_link:
    x: 0.5
    y: 0.0
    z: 0.8
    roll: 0.0
    pitch: 0.0
    yaw: 0.0
  gnss_link:
    x: 0.0
    y: 0.0
    z: 0.8
    roll: 0.0
    pitch: 0.0
    yaw: 0.0
  tamagawa/imu_link:
    x: 0.0
    y: 0.0
    z: 0.8
    roll: 0.0
    pitch: 0.0
    yaw: 0.0
6、修改 sensors_calibration.yaml 文件
sudo gedit ~/autoware_universe/autoware/src/sensor_kit/sample_sensor_kit_launch/sample_sensor_kit_description/config/sensors_calibration.yaml
由于修改较多,可以直接全部替换:
base_link:
  sensor_kit_base_link:
    x: 0.0
    y: 0.0
    z: 1.6
    roll: 0.0
    pitch: 0.0
    yaw: 0.0
  velodyne_rear_base_link:
    x: 0.0
    y: 0.0
    z: 0.0
    roll: 0.0
    pitch: 0.0
    yaw: 0.0
7、修改环境变量
sudo gedit ~/.bashrc
根据安装位置修改路径后,再添加到环境变量中。
export CARLA_ROOT=/opt/carla-simulator
export SCENARIO_RUNNER_ROOT=/home/username/autoware_universe/op_carla/scenario_runner
export LEADERBOARD_ROOT=/home/username/autoware_universe/op_carla/op_bridge
export TEAM_CODE_ROOT=/home/username/autoware_universe/op_carla/op_agent
export PYTHONPATH=$PYTHONPATH:${CARLA_ROOT}/PythonAPI
export PYTHONPATH=$PYTHONPATH:${CARLA_ROOT}/PythonAPI/util
export PYTHONPATH=$PYTHONPATH:${CARLA_ROOT}/PythonAPI/carla
export PYTHONPATH=$PYTHONPATH:${CARLA_ROOT}/PythonAPI/carla/agents
export PYTHONPATH=$PYTHONPATH:$CARLA_ROOT/PythonAPI/carla/dist/carla-0.9.13-py3.7-linux-x86_64.egg
五、运行Carla和Autoware
cd $CARLA_ROOT
./CarlaUE4.sh -quality-level=Epic -world-port=2000 -resx=800 -resy=600
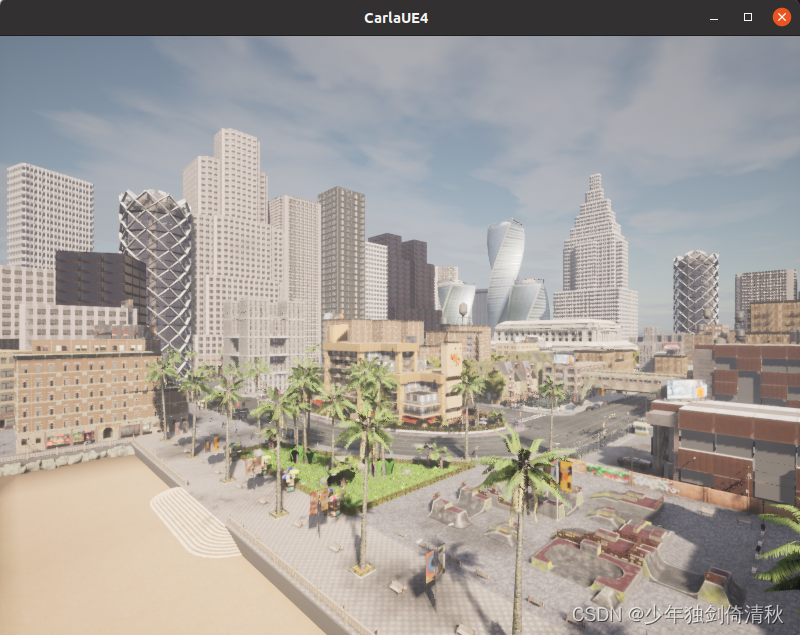
再打开一个终端:
cd ~/autoware_universe/op_carla/op_bridge/op_scripts
source ~/autoware_universe/autoware/install/setup.bash
./run_exploration_mode_ros2.sh
如果报错,需要什么依赖,安装什么依赖:
pip install py-trees
pip install networkx
pip install tabulate
sudo apt-get install ros-galactic-sensor-msgs-py
