👨💻个人简介: 深度学习图像领域工作者
🎉总结链接:
链接中主要是个人工作的总结,每个链接都是一些常用demo,代码直接复制运行即可。包括:
📌1.工作中常用深度学习脚本
📌2.torch、numpy等常用函数详解
📌3.opencv 图片、视频等操作
📌4.个人工作中的项目总结(纯干活)
链接: https://blog.csdn.net/qq_28949847/article/details/128552785
🎉视频讲解: 以上记录,通过B站等平台进行了视频讲解使用,可搜索 ‘Python图像识别’ 进行观看
B站:Python图像识别
抖音:Python图像识别
西瓜视频:Python图像识别
1. 数据下载
COCO2017数据集官方下载:
http://images.cocodataset.org/annotations/annotations_trainval2017.zip
http://images.cocodataset.org/zips/val2017.zip
http://images.cocodataset.org/zips/train2017.zip
COCO整个人体关键点数据集:
github: https://github.com/jin-s13/COCO-WholeBody里面包含下载标签的链接,谷歌网盘下载
百度网盘下载:链接:https://pan.baidu.com/s/1OFE_6kq_0ogTXlxc7rpZdg?pwd=xhiu
里面包含coco2017数据集以及coco整体关键点
2. annotations标签文件介绍:
captions_train2017.json:图片描述训练集
captions_val2017.json:图片描述测试集
coco_wholebody_train_v1.0.json:人全体关键点训练集
coco_wholebody_val_v1.0.json:人全体关键点测试集
instances_train2017.json:目标检测、分割训练集
instances_val2017.json:目标检测、分割测试集
person_keypoints_train2017.json:关键点训练集
person_keypoints_val2017.json:关键点测试集
不过上面的json文件中的标注有些会相互之间包含,比如person_keypoints_train2017.json关键点数据集中,也会有seg和box的标注信息。
3. json文件格式介绍
上面这些json文件的格式大体上都是一样的,都包含以下5个字段:
{
    "info": info,
    "licenses": [license],
    "images": [image],
    "annotations": [annotation],
    "categories": [categories]
}
info:是一个字典,包含了数据集的年份、版本、作者,以及描述等信息
licenses:是一个list,包含了数据集的发布证书信息,由于有多个证书,将它们的信息以序列表的形式进行存储,序列表中每个证书的存储形式是一样的
images:是一个list,包含了图像信息,由于有多张图像,将它们的信息以序列表的形式进行存储,序列表中每张图像信息的存储形式是一样的
这三个字段在每个json中都是一样的格式,但是annotations和categories,每个json会根据不同标注内容会不一样。
最重要的是 images 字段,它里面包含了图片的 file_name、 height、 width这三个信息,会经常用到。
images字段的内容是个列表,包含了所有的图片
上面3个字段的示例:
"info": {
        "description": "COCO-WholeBody",
        "url": "https://github.com/jin-s13/COCO-WholeBody",
        "version": "1.0",
        "year": "2020",
        "date_created": "2020/07/01"
    },
"licenses": [
	    {
	        "url": "http://creativecommons.org/licenses/by-nc-sa/2.0/",
	        "id": 1,
	        "name": "Attribution-NonCommercial-ShareAlike License"
	    }],
"images": [
        {
            "license": 3,
            "file_name": "000000391895.jpg",
            "coco_url": "http://images.cocodataset.org/train2017/000000391895.jpg",
            "height": 360,
            "width": 640,
            "date_captured": "2013-11-14 11:18:45",
            "flickr_url": "http://farm9.staticflickr.com/8186/8119368305_4e622c8349_z.jpg",
            "id": 391895
        },
        {
            "license": 4,
            "file_name": "000000522418.jpg",
            "coco_url": "http://images.cocodataset.org/train2017/000000522418.jpg",
            "height": 480,
            "width": 640,
            "date_captured": "2013-11-14 11:38:44",
            "flickr_url": "http://farm1.staticflickr.com/1/127244861_ab0c0381e7_z.jpg",
            "id": 522418
        }]
3.1 Keypoint Detection 人全体关键点 annotations和categories 介绍:
3.2 Keypoint Detection(17个关键点检测) annotations和categories 介绍:
一个图像包干若干对象,一个对象对应一个字典,一个字典注释包含对象注释的所有数据(包括id、bbox等)
”keypoints“字段的value是一个长度为3 * n 的数组,其中n是类别定义的关键点总数(例如人体姿态关键点的n为17)。每个关键点都由3个值组成(x, y, v),其中v=0表示未标记,此时x=y=0;v=1时表示标记,但不可见,不可见的原因在于被遮挡了;v=2时表示标记且可见。
annotation是个列表,里面是好多的字典,每个字典是一个标注对象,注意这个字典中包含的是图片中的一个对象的信息,不是整张图片的所有对象的信息。
形式如下:
annotation[{
	"segmentation"  : [] # 分割信息
	"keypoints"		: [x1,y1,v1,x2,y2,v2,...],  # 共 3 * 17 个数值
	"num_keypoints"	: int, 	# v=1,2的关键点的个数,即有标记的关键点个数
	"area"		:  float,  # 标注对象的面积
	"iscrowd"   : int,  #
	"image_id"  : int, #
	"bbox"  : [x1, y1, w, h],  # 标注对象的box框
},...]

categories[{
	"keypoints"	: [str], 	# 长度为17的关键点名字符串,关键点的标注顺序在这里能体现出来
	"skeleton"	: [edge], 	# 关键点的连通性,主要是通过一组关键点边缘队列表的形式表示,用于可视化.
}]
coco_wholebody_train_v1.0.json相关操作
将coco_wholebody_train_v1.0.json全身数据集中的人的box和人脸的右眼中心、左眼中心、鼻子、右嘴边、左嘴边提取出来,并保存为txt文件(数据未进行归一化,其中的左右是相对标注图片来的),用来同时训练人的box和人脸关键点,脚本如下:
from pycocotools.coco import COCO
import cv2
import os
import numpy as np
import random


def show_img(yolo_res):
    # 测试图片路径
    # if img_name != '000000004441.jpg':
    #     continue
    img_name = yolo_res[0]
    print(img_name)
    cls = yolo_res[1]
    width = yolo_res[2]
    height = yolo_res[3]
    print(width, height)
    x1 = yolo_res[4]
    y1 = yolo_res[5]
    width_box = yolo_res[6]
    height_box = yolo_res[7]
    right_eye_x = yolo_res[8]
    right_eye_y = yolo_res[9]
    right_eye_value = yolo_res[10]
    left_eye_x = yolo_res[11]
    left_eye_y = yolo_res[12]
    left_eye_value = yolo_res[13]
    nose_x  = yolo_res[14]
    nose_y = yolo_res[15]
    nose_value = yolo_res[16]
    right_mouse_x = yolo_res[17]
    right_mouse_y = yolo_res[18]
    right_mouse_value = yolo_res[19]
    left_mouse_x = yolo_res[20]
    left_mouse_y = yolo_res[21]
    left_mouse_value = yolo_res[22]
    im = cv2.imread(os.path.join(cocoRoot, img_name))
    cv2.circle(im, (int(right_eye_x), int(right_eye_y)), 1, (0, 255, 0), 2)
    cv2.circle(im, (int(left_eye_x), int(left_eye_y)), 1, (0, 255, 0), 2)
    cv2.circle(im, (int(nose_x), int(nose_y)), 1, (0, 255, 0), 2)
    cv2.circle(im, (int(right_mouse_x), int(right_mouse_y)), 1, (0, 255, 0), 2)
    cv2.circle(im, (int(left_mouse_x), int(left_mouse_y)), 1, (0, 255, 0), 2)
    print(left_mouse_value, right_mouse_value, nose_value, left_mouse_value, left_eye_value, right_eye_value)
    # 画矩形
    cv2.rectangle(im, (int(x1), int(y1)), (int(x1) + int(width_box), int(y1) + int(height_box)), (0, 255, 0), 2)

    cv2.imshow('111', im)
    cv2.waitKey(0)


'''
    形成如下格式的TXT文件, eye: 是眼的中心
    [img_name, cls, width, height, x1, y1, width_box, height_box,
        right_eye_x, right_eye_y, right_eye_value,
        left_eye_x, left_eye_y, left_eye_value,
        nose_x, nose_y, nose_value,
        right_mouse_x, right_mouse_y, right_mouse_value,
        left_mouse_x, left_mouse_y, left_mouse_value]
    数据未进行归一化处理
'''
if __name__ == '__main__':

    ann_file = r'E:\lg\coco2017\annotations\coco_wholebody_train_v1.0.json'
    # 图片路径
    cocoRoot = r'E:\lg\coco2017\train2017'
    # 生成的txt保存路径
    save_path = r'E:\lg\coco2017\annotations\box_facekpts'
    coco = COCO(ann_file)
    # 遍历所有的图片
    for imgID in coco.getImgIds():
        imgInfo = coco.loadImgs(imgID)[0]
        print(f'图像{imgID}的信息如下:\n{imgInfo}')
        img_name = imgInfo['file_name']
        imPath = os.path.join(cocoRoot, img_name)
        im = cv2.imread(imPath)
        height = imgInfo['height']
        width = imgInfo['width']
        annIds = coco.getAnnIds(imgIds=imgID)
        anns = coco.loadAnns(annIds)
        img_lst_kpts = []
        img_shapes = []
        for ann in anns:
            bbox = ann['bbox']
            face_kpts = ann['face_kpts']
            imgId = ann['image_id']
            all_lst_kpts = []
            lst_kpts = []
            for i, kpts in enumerate(face_kpts):
                lst_kpts.append(kpts)
                if len(lst_kpts) == 3:
                    all_lst_kpts.append(lst_kpts)
                    lst_kpts = []
            img_shapes.append({'bbox': bbox, 'face_kpts': all_lst_kpts})
        print('img_shapes:', img_shapes)

        if len(img_shapes) != 0:
            f_txt = open(os.path.join(save_path, os.path.splitext(img_name)[0] + '.txt'), 'w')
        # [36, 39, 42, 45, 30, 48, 54]: 索引对应right_eye left_eye nose mouth_right mouth_left
        for box_face in img_shapes:
            cls = 0
            box = box_face['bbox']
            x1 = box_face['bbox'][0]
            y1 = box_face['bbox'][1]
            width_box = box_face['bbox'][2]
            height_box = box_face['bbox'][3]
            all_lst_kpts = box_face['face_kpts']
            # 左右眼是通过左右两个眼角计算得到的
            right_eye_x = int(all_lst_kpts[36][0] + ((all_lst_kpts[39][0] - all_lst_kpts[36][0]) / 2))
            right_eye_y = int(all_lst_kpts[36][1] + ((all_lst_kpts[39][1] - all_lst_kpts[36][1]) / 2))
            right_eye_value = all_lst_kpts[36][2]
            left_eye_x = int(all_lst_kpts[42][0] + ((all_lst_kpts[45][0] - all_lst_kpts[42][0]) / 2))
            left_eye_y = int(all_lst_kpts[42][1] + ((all_lst_kpts[45][1] - all_lst_kpts[42][1]) / 2))
            left_eye_value = all_lst_kpts[42][2]
            nose_x = int(all_lst_kpts[30][0])
            nose_y = int(all_lst_kpts[30][1])
            nose_value = all_lst_kpts[30][2]
            right_mouse_x = int(all_lst_kpts[48][0])
            right_mouse_y = int(all_lst_kpts[48][1])
            right_mouse_value = all_lst_kpts[48][2]
            left_mouse_x = int(all_lst_kpts[54][0])
            left_mouse_y = int(all_lst_kpts[54][1])
            left_mouse_value = all_lst_kpts[54][2]

            yolo_res = [img_name, cls, width, height, x1, y1, width_box, height_box,
                        right_eye_x, right_eye_y, right_eye_value,
                        left_eye_x, left_eye_y, left_eye_value,
                        nose_x, nose_y, nose_value,
                        right_mouse_x, right_mouse_y, right_mouse_value,
                        left_mouse_x, left_mouse_y, left_mouse_value]
            yolo_res = [str(item) for item in yolo_res]
            # 进行可视化展示,验证上面的索引取值是否正确
            # show_img(yolo_res)
            f_txt.write(' '.join(yolo_res) + '\n')
        f_txt.close()
保存的格式为:每张图片对应一个txt文件,如下图: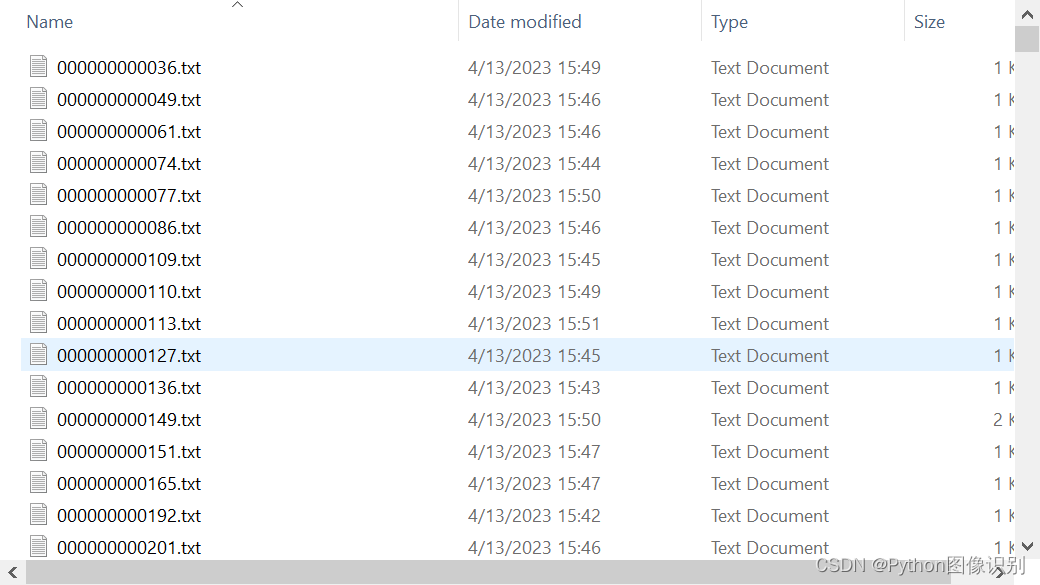
txt的内容形式为:

