由上一篇我们可以知道,我们生成了一个label_img文件夹,里面存放的是索引对应图片的filename,每个filename里面存放的是GT的40个通道的边缘GT。train里面是这样,test里面也是这样。

加载数据我们要到train文件的dataloader中:
data_loaders = prepare_data(args, ckpt_dir)
然后我们到prepare_data文件中:
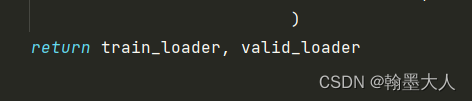
生成的是trainloader说明没找错地方。
接着我们想,想把另外一个文件夹的图片和原本的rgb,depth,label同时加载到一起,那肯定要到原本的rgb,depth,label加载数据的地方增加一个数据读取代码。数据读取在哪里呢?
首先想prepare里面就两个大类,dataset和dataloader,dataloader是将数据打包成batch的,那肯定是在dataset中了。我们找到dataset:
然后进入到dataset中:

再跳到NYUv2中。
# -*- coding: utf-8 -*-
"""
.. codeauthor:: Daniel Seichter <daniel.seichter@tu-ilmenau.de>
"""
import torch
import os
import random
import cv2
import numpy as np
import torchvision
import torchvision.transforms as transforms
from ..dataset_base import DatasetBase
from .nyuv2 import NYUv2Base
from src.preprocessing import get_preprocessor
class ToTensor:
def __call__(self, sample_edge):
label_img = sample_edge['label_img']
label_edge = []
for filename in os.listdir(label_img):
img = cv2.imread(label_img + "/" + filename, cv2.IMREAD_UNCHANGED)
label_re = torch.from_numpy(img).float()
label_edge.append(label_re)
label_data = torch.stack(label_edge)#(40,480,640)
sample_edge['label_img'] = label_data
return sample_edge
class NYUv2(NYUv2Base, DatasetBase):#继承DatasetBase和NYUv2Base会获得父类所有的属性和方法。
def __init__(self,args,data_dir=None,n_classes=40,split='train',depth_mode='refined',with_input_orig=False,phase='train'):
super(NYUv2, self).__init__()
assert split in self.SPLITS
assert n_classes in self.N_CLASSES
assert depth_mode in ['refined', 'raw']
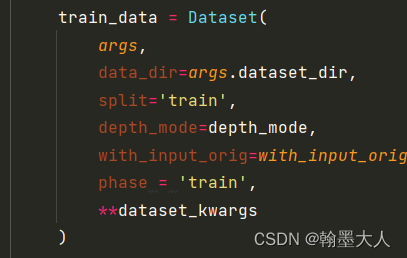
#NYUv2的属性,实例化train_data = Dataset(参数) = NYUv2(参数),通过train_data._split来调用
self._n_classes = n_classes
self._split = split #train/test
self._depth_mode = depth_mode #refine
self._with_input_orig = with_input_orig
self._cameras = ['kv1']
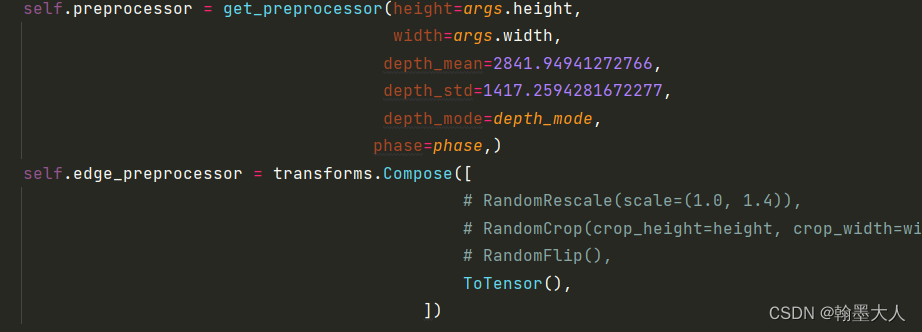
self.preprocessor = get_preprocessor(height=args.height,
width=args.width,
depth_mean=2841.94941272766,
depth_std=1417.2594281672277,
depth_mode=depth_mode,
phase=phase,)
self.edge_preprocessor = transforms.Compose([
# RandomRescale(scale=(1.0, 1.4)),
# RandomCrop(crop_height=height, crop_width=width),
# RandomFlip(),
ToTensor(),
])
if data_dir is not None:
data_dir = os.path.expanduser(data_dir)#显示出data_dir的路径,即args.dataset_dir=/home/Projects/ZQB/a/ESANet-main/datasets
assert os.path.exists(data_dir)
self._data_dir = data_dir
# load filenames,/home/Projects/ZQB/a/ESANet-main/datasets/ train.txt
fp = os.path.join(self._data_dir,self.SPLIT_FILELIST_FILENAMES[self._split])
self._filenames = np.loadtxt(fp, dtype=str)#载入/home/Projects/ZQB/a/ESANet-main/datasets/ train.txt目录,是一个列表。
else:
print(f"Loaded {self.__class__.__name__} dataset without files")
# load class names
self._class_names = getattr(self, f'CLASS_NAMES_{self._n_classes}')#获取实例化self对象的'CLASS_NAMES_40'的属性值。(在nyuv2中)
# load class colors
self._class_colors = np.array(getattr(self, f'CLASS_COLORS_{self._n_classes}'),dtype='uint8')#同上
# note that mean and std differ depending on the selected depth_mode
# however, the impact is marginal, therefore, we decided to use the
# stats for refined depth for both cases
# stats for raw: mean: 2769.0187903686697, std: 1350.4174149841133
self._depth_mean = 2841.94941272766
self._depth_std = 1417.2594281672277
#train_data = Dataset(参数) = NYUv2(参数),可以通过train_data.cameras使用调用属性的形式调用方法,不加()。
@property
def cameras(self):
return self._cameras #train_data.cameras = ['kv1']
@property
def class_names(self):
return self._class_names #train_data.class_names = ['void','wall'...]
@property
def class_names_without_void(self):
return self._class_names[1:] #train_data.class_names = ['wall'...]
@property
def class_colors(self):
return self._class_colors #train_data.class_colors = [[0, 0, 0],[0, 0, 255],[232, 88, 47]...]
@property
def class_colors_without_void(self):
return self._class_colors[1:] #train_data.class_colors = [[0, 0, 255],[232, 88, 47]...]
@property
def n_classes(self):
return self._n_classes + 1 #train_data.n_classes = 41
@property
def n_classes_without_void(self):
return self._n_classes #train_data.n_classes_without_void = 40
@property
def split(self):
return self._split #train_data.split = train
@property
def depth_mode(self):
return self._depth_mode #train_data.depth_mode = 'refined'
@property
def depth_mean(self):
return self._depth_mean #train_data.depth_mean = 2841.94941272766
@property
def depth_std(self):
return self._depth_std #train_data.depth_std = 1417.2594281672277
@property
def source_path(self):
return os.path.abspath(os.path.dirname(__file__)) #train_data.source_path = 脚本绝对路径
@property
def with_input_orig(self):
return self._with_input_orig #train_data.with_input_orig = False
def _load(self, directory, filename):
fp = os.path.join(self._data_dir,#data_dir
self.split, #train
directory, #rgb
f'{filename}.png')
im = cv2.imread(fp, cv2.IMREAD_UNCHANGED)
if im.ndim == 3:
im = cv2.cvtColor(im, cv2.COLOR_BGR2RGB)
return im
def _load_file(self, directory, filename):
img_file = os.path.join(self._data_dir,#data_dir
self.split, #train
directory, #rgb
filename)
return img_file
#载入RGB图片,参数self.RGB_DIR = rgb,self._filenames[idx] = train.txt[idx]。
#fp = /home/Projects/ZQB/a/ESANet-main/datasets/ train / rgb / 0003
def load_image(self, idx):
return self._load(self.RGB_DIR, self._filenames[idx])
#载入depth图片,参数self.depth_DIR = depth, self._filenames[idx] = train.txt[idx]。
#fp = /home/Projects/ZQB/a/ESANet-main/datasets/ train / depth / 0003
def load_depth(self, idx):
if self._depth_mode == 'raw':
return self._load(self.DEPTH_RAW_DIR, self._filenames[idx])
else:
return self._load(self.DEPTH_DIR, self._filenames[idx])
#载入label图片,参数self.LABELS_DIR_FMT.format(self._n_classes) = label40, self._filenames[idx] = train.txt[idx]。
#fp = /home/Projects/ZQB/a/ESANet-main/datasets/ train / label40 / 0003
def load_label(self, idx):
return self._load(self.LABELS_DIR_FMT.format(self._n_classes),
self._filenames[idx])
#获得整个文件的长度,train为795,test为675。
def load_label_image(self, idx):
return self._load_file(self.LABEL_IMAGE_DIR,self._filenames[idx])
#该方法未被装饰,可以不用重写。train_data = Dataset(参数) = NYUv2(参数)继承DatasetBase,则通过train_data调用__getitem__。
def __getitem__(self, idx):
seed = np.random.randint(2147483647)
sample = {'image': self.load_image(idx),#图片
'depth': self.load_depth(idx),#图片
'label': self.load_label(idx)}#图片
sample_edge = {'label_img':self.load_label_image(idx)}#文件夹
if self.split != 'train':
# needed to compute mIoU on original image size
sample['label_orig'] = sample['label'].copy() #向sample字典里面添加了sample['label_orig']
#对sample进行变换
random.seed(seed)
sample = self.preprocessor(sample)
random.seed(seed)
sample_edge = self.edge_preprocessor(sample_edge)
#经过处理之后的sample,即经过堆叠的。
return sample,sample_edge
def __len__(self):
return len(self._filenames)
我们可以看到NYUv2继承了NYUv2Base和DatasetBase两个大类,不同于往常的继承nn.module,说明我们还需要看这两个类。

先看第一个NYUv2Base:
class NYUv2Base:
SPLITS = ['train', 'test']
SPLIT_FILELIST_FILENAMES = {SPLITS[0]: 'train.txt', SPLITS[1]: 'test.txt'}
SPLIT_DIRS = {SPLITS[0]: 'train', SPLITS[1]: 'test'}
# number of classes without void
N_CLASSES = [894, 40, 13]
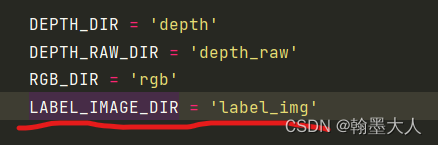
DEPTH_DIR = 'depth'
DEPTH_RAW_DIR = 'depth_raw'
RGB_DIR = 'rgb'
LABEL_IMAGE_DIR = 'label_img'
LABELS_DIR_FMT = 'labels_{:d}'
LABELS_COLORED_DIR_FMT = 'labels_{:d}_colored'
CLASS_NAMES_13 = ['void',
'bed', 'books', 'ceiling', 'chair', 'floor', 'furniture',
'objects', 'picture', 'sofa', 'table', 'tv', 'wall',
'window']
CLASS_NAMES_40 = ['void',
'wall', 'floor', 'cabinet', 'bed', 'chair', 'sofa',
'table', 'door', 'window', 'bookshelf', 'picture',
'counter', 'blinds', 'desk', 'shelves', 'curtain',
'dresser', 'pillow', 'mirror', 'floor mat', 'clothes',
'ceiling', 'books', 'refridgerator', 'television',
'paper', 'towel', 'shower curtain', 'box', 'whiteboard',
'person', 'night stand', 'toilet', 'sink', 'lamp',
'bathtub', 'bag',
'otherstructure', 'otherfurniture', 'otherprop']
这里定义了一些文件名,我们逐行看:
1:

splits列表里面包含了’train’和’test’。
SPLIT_FILELIST_FILENAMES字典里面train对应的train.txt,test对应的test.txt。
SPLIT_DIRS字典里train对应的train,test对应的test。
2:
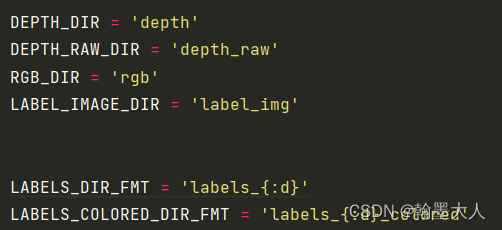
这里定义的是我们文件里面的文件名。
3:
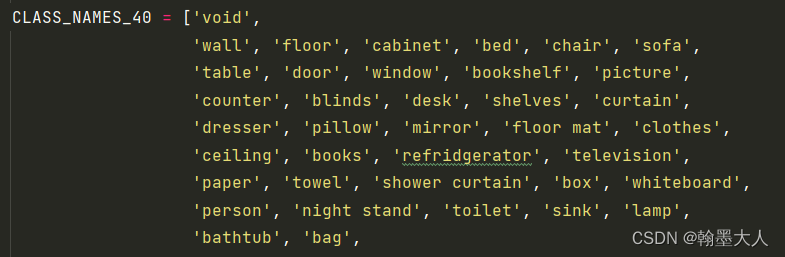
这是我们标签里面所有的类别名称,包含空。
接着我们看DatasetBase里面的代码:
# -*- coding: utf-8 -*-
"""
.. codeauthor:: Mona Koehler <mona.koehler@tu-ilmenau.de>
.. codeauthor:: Daniel Seichter <daniel.seichter@tu-ilmenau.de>
"""
import os
import pickle
import abc

import numpy as np
from torch.utils.data import Dataset

#抽象类不可直接实例化,需要继承该类并实现该类所有抽象方法(重写),未被装饰的可以不用重写。train_data = Dataset(参数) = NYUv2(参数)继承DatasetBase
class DatasetBase(abc.ABC, Dataset):
    def __init__(self):
        self._camera = None


    def filter_camera(self, camera):
        assert camera in self.cameras
        self._camera = camera
        return self

    def __enter__(self):
        return self

    def __exit__(self, *exc):
        self._camera = None

    @abc.abstractmethod
    def __len__(self):
        pass
#----------------------------------------------------------------------------------------------------------------------#
    # #该方法未被装饰,可以不用重写。train_data = Dataset(参数) = NYUv2(参数)继承DatasetBase,则通过train_data调用__getitem__。
    # def __getitem__(self, idx):
    #     sample = {'image': self.load_image(idx),#图片
    #               'depth': self.load_depth(idx),#图片
    #               'label': self.load_label(idx)}#图片
    #     sample_edge = {'label_img':self.load_label_image(idx)}#文件夹
    #
    #     if self.split != 'train':
    #         # needed to compute mIoU on original image size
    #         sample['label_orig'] = sample['label'].copy() #向sample字典里面添加了sample['label_orig']
    #
    #     #对sample进行变换
    #     sample = self.preprocessor(sample)
    #     sample_edge  = self.edge_preprocessor(sample_edge)
    #
    #     return sample,sample_edge
#----------------------------------------------------------------------------------------------------------#
    @property
    @abc.abstractmethod
    def cameras(self):
        pass

    @property
    @abc.abstractmethod
    def class_names(self):
        pass

    @property
    @abc.abstractmethod
    def class_names_without_void(self):
        pass

    @property
    @abc.abstractmethod
    def class_colors(self):
        pass

    @property
    @abc.abstractmethod
    def class_colors_without_void(self):
        pass

    @property
    @abc.abstractmethod
    def n_classes(self):
        pass

    @property
    @abc.abstractmethod
    def n_classes_without_void(self):
        pass

    @property
    @abc.abstractmethod
    def split(self):
        pass

    @property
    @abc.abstractmethod
    def depth_mode(self):
        pass

    @property
    @abc.abstractmethod
    def depth_mean(self):
        pass

    @property
    @abc.abstractmethod
    def depth_std(self):
        pass

    @property
    @abc.abstractmethod
    def source_path(self):
        pass

    @property
    @abc.abstractmethod
    def with_input_orig(self):
        pass

    @property
    def camera(self):
        return self._camera

    @abc.abstractmethod
    def load_image(self, idx):
        pass

    @abc.abstractmethod
    def load_depth(self, idx):
        pass

    @abc.abstractmethod
    def load_label(self, idx):
        pass

    @abc.abstractmethod
    def load_label_image(self, idx):
        pass

#--------------------------------------------------------------------------------------------------#
    def color_label(self, label, with_void=True):
        if with_void:
            colors = self.class_colors
        else:
            colors = self.class_colors_without_void
        cmap = np.asarray(colors, dtype='uint8')

        return cmap[label]

    @staticmethod
    def static_color_label(label, colors):
        cmap = np.asarray(colors, dtype='uint8')
        return cmap[label]

#------------------------------------------------------------------------------------------------------------#
    #计算类别权重
    def compute_class_weights(self, weight_mode='median_frequency', c=1.02):
        assert weight_mode in ['median_frequency', 'logarithmic', 'linear']

        # build filename
        class_weighting_filepath = os.path.join(
            self.source_path, f'weighting_{weight_mode}_'
                              f'1+{self.n_classes_without_void}')
        if weight_mode == 'logarithmic':
            class_weighting_filepath += f'_c={c}'

        class_weighting_filepath += f'_{self.split}.pickle'

        if os.path.exists(class_weighting_filepath):
            class_weighting = pickle.load(open(class_weighting_filepath, 'rb'))
            print(f'Using {class_weighting_filepath} as class weighting')
            return class_weighting

        print('Compute class weights')

        n_pixels_per_class = np.zeros(self.n_classes) #40个0,大小为40*1
        n_image_pixels_with_class = np.zeros(self.n_classes)#40个0,大小为40*1
        for i in range(len(self)): #self是实例对象即数据集
            label = self.load_label(i)
            h, w = label.shape
            current_dist = np.bincount(label.flatten(),
                                       minlength=self.n_classes)
            n_pixels_per_class += current_dist

            # For median frequency we need the pixel sum of the images where
            # the specific class is present. (It only matters if the class is
            # present in the image and not how many pixels it occupies.)
            class_in_image = current_dist > 0
            n_image_pixels_with_class += class_in_image * h * w

            print(f'\r{i+1}/{len(self)}', end='')
        print()

        # remove void
        n_pixels_per_class = n_pixels_per_class[1:]
        n_image_pixels_with_class = n_image_pixels_with_class[1:]

        if weight_mode == 'linear':
            class_weighting = n_pixels_per_class

        elif weight_mode == 'median_frequency':
            frequency = n_pixels_per_class / n_image_pixels_with_class
            class_weighting = np.median(frequency) / frequency

        elif weight_mode == 'logarithmic':
            probabilities = n_pixels_per_class / np.sum(n_pixels_per_class)
            class_weighting = 1 / np.log(c + probabilities)

        if np.isnan(np.sum(class_weighting)):
            print(f"n_pixels_per_class: {n_pixels_per_class}")
            print(f"n_image_pixels_with_class: {n_image_pixels_with_class}")
            print(f"class_weighting: {class_weighting}")
            raise ValueError('class weighting contains NaNs')

        with open(class_weighting_filepath, 'wb') as f:
            pickle.dump(class_weighting, f)
        print(f'Saved class weights under {class_weighting_filepath}.')
        return class_weighting
#----------------------------------------------------------------------------------------------------------#
    #计算深度的均值和方差
    def compute_depth_mean_std(self, force_recompute=False):
        # ensure that mean and std are computed on train set only
        assert self.split == 'train'

        # build filename
        depth_stats_filepath = os.path.join(
            self.source_path, f'depth_{self.depth_mode}_mean_std.pickle')

        if not force_recompute and os.path.exists(depth_stats_filepath):
            depth_stats = pickle.load(open(depth_stats_filepath, 'rb'))
            print(f'Loaded depth mean and std from {depth_stats_filepath}')
            print(depth_stats)
            return depth_stats

        print('Compute mean and std for depth images.')

        pixel_sum = np.float64(0)
        pixel_nr = np.uint64(0)
        std_sum = np.float64(0)

        print('Compute mean')
        for i in range(len(self)):
            depth = self.load_depth(i)
            if self.depth_mode == 'raw':
                depth_valid = depth[depth > 0]
            else:
                depth_valid = depth.flatten()
            pixel_sum += np.sum(depth_valid)
            pixel_nr += np.uint64(len(depth_valid))
            print(f'\r{i+1}/{len(self)}', end='')
        print()

        mean = pixel_sum / pixel_nr

        print('Compute std')
        for i in range(len(self)):
            depth = self.load_depth(i)
            if self.depth_mode == 'raw':
                depth_valid = depth[depth > 0]
            else:
                depth_valid = depth.flatten()
            std_sum += np.sum(np.square(depth_valid - mean))
            print(f'\r{i+1}/{len(self)}', end='')
        print()

        std = np.sqrt(std_sum / pixel_nr)

        depth_stats = {'mean': mean, 'std': std}
        print(depth_stats)

        with open(depth_stats_filepath, 'wb') as f:
            pickle.dump(depth_stats, f)

        return depth_stats
1:首先注意,datasetbase继承的是抽象类,抽象类是不可实例化,我们需要继承该类,并且重写所有抽象方法。这样就清晰多了,我们NYUv2继承了datasetbase,所以还需重写datasetbase内所有的抽象方法。

2:在抽象类中,我们通过@abc.abstractmethod装饰方法。这些抽象方法通过在NYUv2中重写,如果没有装饰就不需要重写。
还需要注意的是使用了@property装饰器,将方法转化为相同名称的只读属性,使方法可以向属性一样访问,将方法转换为属性,即调用方式变了,我们通过 . 可调用属性,现在调用经过@property装饰的方法也只需要用 . 就可以。
需要在NYUv2重写:
    @abc.abstractmethod
    def load_image(self, idx):
        pass

    @abc.abstractmethod
    def load_depth(self, idx):
        pass

    @abc.abstractmethod
    def load_label(self, idx):
        pass

    @abc.abstractmethod
    def load_label_image(self, idx):
        pass
重写,并且可以通过调用属性形式调用方法。
    @property
    @abc.abstractmethod
    def cameras(self):
        pass

    @property
    @abc.abstractmethod
    def class_names(self):
        pass

    @property
    @abc.abstractmethod
    def class_names_without_void(self):
        pass

    @property
    @abc.abstractmethod
    def class_colors(self):
        pass

    @property
    @abc.abstractmethod
    def class_colors_without_void(self):
        pass

    @property
    @abc.abstractmethod
    def n_classes(self):
        pass

    @property
    @abc.abstractmethod
    def n_classes_without_void(self):
        pass

    @property
    @abc.abstractmethod
    def split(self):
        pass

    @property
    @abc.abstractmethod
    def depth_mode(self):
        pass

    @property
    @abc.abstractmethod
    def depth_mean(self):
        pass

    @property
    @abc.abstractmethod
    def depth_std(self):
        pass

    @property
    @abc.abstractmethod
    def source_path(self):
        pass

    @property
    @abc.abstractmethod
    def with_input_orig(self):
        pass

    @property
    def camera(self):
        return self._camera
我们再回到NYUv2中看如何重写方法:
# -*- coding: utf-8 -*-
"""
.. codeauthor:: Daniel Seichter <daniel.seichter@tu-ilmenau.de>
"""
import torch
import os
import random
import cv2
import numpy as np
import torchvision
import torchvision.transforms as transforms
from ..dataset_base import DatasetBase
from .nyuv2 import NYUv2Base
from src.preprocessing import get_preprocessor

class ToTensor:
    def __call__(self, sample_edge):
        label_img = sample_edge['label_img']
        label_edge = []
        for filename in os.listdir(label_img):
            img = cv2.imread(label_img + "/" + filename, cv2.IMREAD_UNCHANGED)
            label_re = torch.from_numpy(img).float()
            label_edge.append(label_re)
        label_data = torch.stack(label_edge)#(40,480,640)
        sample_edge['label_img'] = label_data
        return sample_edge

class NYUv2(NYUv2Base, DatasetBase):#继承DatasetBase和NYUv2Base会获得父类所有的属性和方法。
    def __init__(self,args,data_dir=None,n_classes=40,split='train',depth_mode='refined',with_input_orig=False,phase='train'):
        super(NYUv2, self).__init__()
        assert split in self.SPLITS
        assert n_classes in self.N_CLASSES
        assert depth_mode in ['refined', 'raw']
        #NYUv2的属性,实例化train_data = Dataset(参数) = NYUv2(参数),通过train_data._split来调用
        self._n_classes = n_classes
        self._split = split #train/test
        self._depth_mode = depth_mode #refine
        self._with_input_orig = with_input_orig
        self._cameras = ['kv1']

        self.preprocessor = get_preprocessor(height=args.height,
                                             width=args.width,
                                            depth_mean=2841.94941272766,
                                            depth_std=1417.2594281672277,
                                            depth_mode=depth_mode,
                                           phase=phase,)
        self.edge_preprocessor = transforms.Compose([
                                                    # RandomRescale(scale=(1.0, 1.4)),
                                                    # RandomCrop(crop_height=height, crop_width=width),
                                                    # RandomFlip(),
                                                    ToTensor(),
                                                ])

        if data_dir is not None:
            data_dir = os.path.expanduser(data_dir)#显示出data_dir的路径,即args.dataset_dir=/home/Projects/ZQB/a/ESANet-main/datasets
            assert os.path.exists(data_dir)
            self._data_dir = data_dir

            # load filenames,/home/Projects/ZQB/a/ESANet-main/datasets/ train.txt
            fp = os.path.join(self._data_dir,self.SPLIT_FILELIST_FILENAMES[self._split])
            self._filenames = np.loadtxt(fp, dtype=str)#载入/home/Projects/ZQB/a/ESANet-main/datasets/ train.txt目录,是一个列表。
        else:
            print(f"Loaded {self.__class__.__name__} dataset without files")

        # load class names
        self._class_names = getattr(self, f'CLASS_NAMES_{self._n_classes}')#获取实例化self对象的'CLASS_NAMES_40'的属性值。(在nyuv2中)

        # load class colors
        self._class_colors = np.array(getattr(self, f'CLASS_COLORS_{self._n_classes}'),dtype='uint8')#同上

        # note that mean and std differ depending on the selected depth_mode
        # however, the impact is marginal, therefore, we decided to use the
        # stats for refined depth for both cases
        # stats for raw: mean: 2769.0187903686697, std: 1350.4174149841133
        self._depth_mean = 2841.94941272766
        self._depth_std = 1417.2594281672277

    #train_data = Dataset(参数) = NYUv2(参数),可以通过train_data.cameras使用调用属性的形式调用方法,不加()。
    @property
    def cameras(self):
        return self._cameras #train_data.cameras = ['kv1']

    @property
    def class_names(self):
        return self._class_names #train_data.class_names = ['void','wall'...]

    @property
    def class_names_without_void(self):
        return self._class_names[1:] #train_data.class_names = ['wall'...]

    @property
    def class_colors(self):
        return self._class_colors #train_data.class_colors = [[0, 0, 0],[0, 0, 255],[232, 88, 47]...]

    @property
    def class_colors_without_void(self):
        return self._class_colors[1:] #train_data.class_colors = [[0, 0, 255],[232, 88, 47]...]

    @property
    def n_classes(self):
        return self._n_classes + 1 #train_data.n_classes = 41

    @property
    def n_classes_without_void(self):
        return self._n_classes #train_data.n_classes_without_void = 40

    @property
    def split(self):
        return self._split #train_data.split = train

    @property
    def depth_mode(self):
        return self._depth_mode #train_data.depth_mode = 'refined'

    @property
    def depth_mean(self):
        return self._depth_mean #train_data.depth_mean = 2841.94941272766

    @property
    def depth_std(self):
        return self._depth_std #train_data.depth_std = 1417.2594281672277

    @property
    def source_path(self):
        return os.path.abspath(os.path.dirname(__file__)) #train_data.source_path = 脚本绝对路径

    @property
    def with_input_orig(self):
        return self._with_input_orig #train_data.with_input_orig = False

    def _load(self, directory, filename):
        fp = os.path.join(self._data_dir,#data_dir
                          self.split,    #train
                          directory,     #rgb
                          f'{filename}.png')
        im = cv2.imread(fp, cv2.IMREAD_UNCHANGED)
        if im.ndim == 3:
            im = cv2.cvtColor(im, cv2.COLOR_BGR2RGB)

        return im

    def _load_file(self, directory, filename):
        img_file = os.path.join(self._data_dir,#data_dir
                          self.split,    #train
                          directory,     #rgb
                          filename)
        return  img_file

    #载入RGB图片,参数self.RGB_DIR = rgb,self._filenames[idx] = train.txt[idx]。
    #fp = /home/Projects/ZQB/a/ESANet-main/datasets/ train / rgb / 0003
    def load_image(self, idx):
        return self._load(self.RGB_DIR, self._filenames[idx])

    #载入depth图片,参数self.depth_DIR = depth, self._filenames[idx] = train.txt[idx]。
    #fp = /home/Projects/ZQB/a/ESANet-main/datasets/ train / depth / 0003
    def load_depth(self, idx):
        if self._depth_mode == 'raw':
            return self._load(self.DEPTH_RAW_DIR, self._filenames[idx])
        else:
            return self._load(self.DEPTH_DIR, self._filenames[idx])

    #载入label图片,参数self.LABELS_DIR_FMT.format(self._n_classes) = label40, self._filenames[idx] = train.txt[idx]。
    #fp = /home/Projects/ZQB/a/ESANet-main/datasets/ train / label40 / 0003
    def load_label(self, idx):
        return self._load(self.LABELS_DIR_FMT.format(self._n_classes),
                          self._filenames[idx])
    #获得整个文件的长度,train为795,test为675。

    def load_label_image(self, idx):
        return self._load_file(self.LABEL_IMAGE_DIR,self._filenames[idx])


    #该方法未被装饰,可以不用重写。train_data = Dataset(参数) = NYUv2(参数)继承DatasetBase,则通过train_data调用__getitem__。
    def __getitem__(self, idx):

        seed = np.random.randint(2147483647)
        sample = {'image': self.load_image(idx),#图片
                  'depth': self.load_depth(idx),#图片
                  'label': self.load_label(idx)}#图片
        sample_edge = {'label_img':self.load_label_image(idx)}#文件夹

        if self.split != 'train':
            # needed to compute mIoU on original image size
            sample['label_orig'] = sample['label'].copy() #向sample字典里面添加了sample['label_orig']

        #对sample进行变换
        random.seed(seed)
        sample = self.preprocessor(sample)
        random.seed(seed)
        sample_edge  = self.edge_preprocessor(sample_edge)
        #经过处理之后的sample,即经过堆叠的。
        return sample,sample_edge


    def __len__(self):
        return len(self._filenames)
1:首先定义一些属性:
        self._n_classes = n_classes#40
        self._split = split #train/test
        self._depth_mode = depth_mode #refine
        self._with_input_orig = with_input_orig
        self._cameras = ['kv1']
2:假设我们现在位于train阶段,接着我们加载train.txt文件,通过np.loadtxt载入txt文件的每一行,即文件的名字,比如0003,。。。。。。
        if data_dir is not None:
            data_dir = os.path.expanduser(data_dir)#显示出data_dir的路径,即args.dataset_dir=/home/Projects/ZQB/a/ESANet-main/datasets
            assert os.path.exists(data_dir)
            self._data_dir = data_dir

            # load filenames,/home/Projects/ZQB/a/ESANet-main/datasets/ train.txt
            fp = os.path.join(self._data_dir,self.SPLIT_FILELIST_FILENAMES[self._split])
            self._filenames = np.loadtxt(fp, dtype=str)#载入/home/Projects/ZQB/a/ESANet-main/datasets/ train.txt目录,是一个列表。
        else:
            print(f"Loaded {self.__class__.__name__} dataset without files")
3:然后通过getattr获得CLASS_NAMES_40对应的值,即40个类别的名字。同理获得每个类别对应的颜色,用数组保存。
self._class_names = getattr(self, f'CLASS_NAMES_{self._n_classes}')#获取实例化self对象的'CLASS_NAMES_40'的属性值。(在nyuv2中)

        # load class colors
self._class_colors = np.array(getattr(self, f'CLASS_COLORS_{self._n_classes}'),dtype='uint8')#同上
4:接着就是我们重写的一些方法,加上@property使其可以通过.进行调用。返回的值我们已经提前定义好了。
    @property
    def cameras(self):
        return self._cameras #train_data.cameras = ['kv1']

    @property
    def class_names(self):
        return self._class_names #train_data.class_names = ['void','wall'...]

    @property
    def class_names_without_void(self):
        return self._class_names[1:] #train_data.class_names = ['wall'...]

    @property
    def class_colors(self):
        return self._class_colors #train_data.class_colors = [[0, 0, 0],[0, 0, 255],[232, 88, 47]...]

    @property
    def class_colors_without_void(self):
        return self._class_colors[1:] #train_data.class_colors = [[0, 0, 255],[232, 88, 47]...]

    @property
    def n_classes(self):
        return self._n_classes + 1 #train_data.n_classes = 41

    @property
    def n_classes_without_void(self):
        return self._n_classes #train_data.n_classes_without_void = 40

    @property
    def split(self):
        return self._split #train_data.split = train

    @property
    def depth_mode(self):
        return self._depth_mode #train_data.depth_mode = 'refined'

    @property
    def depth_mean(self):
        return self._depth_mean #train_data.depth_mean = 2841.94941272766

    @property
    def depth_std(self):
        return self._depth_std #train_data.depth_std = 1417.2594281672277

    @property
    def source_path(self):
        return os.path.abspath(os.path.dirname(__file__)) #train_data.source_path = 脚本绝对路径

    @property
    def with_input_orig(self):
        return self._with_input_orig #train_data.with_input_orig = False
5:接着就是最重要的数据加载过程:
    def _load(self, directory, filename):
        fp = os.path.join(self._data_dir,#data_dir
                          self.split,    #train
                          directory,     #rgb
                          f'{filename}.png')
        im = cv2.imread(fp, cv2.IMREAD_UNCHANGED)
        if im.ndim == 3:
            im = cv2.cvtColor(im, cv2.COLOR_BGR2RGB)

        return im
首先通过os.path.join进入到data_dir(提前给定)的train文件夹下的directory文件夹。然后找到filename对应的png。然后我们通过cv2读入图片。如果输入通道是3,即rgb图像,因为CV2读入图片是BGR形式,所以需要转换为RGB格式。这是加载RGB,depth,label的读取方式。
那label_img怎么读取呢?filename对应的label_img里面的是文件夹,文件夹里面存放的才是图片。
6:加载label_img:根据共用的filename我们可以加载对应的文件夹,现在先不忙读取里面的图片。img_file是一个文件夹。
    def _load_file(self, directory, filename):
        img_file = os.path.join(self._data_dir,#data_dir
                          self.split,    #train
                          directory,     #rgb
                          filename)
        return  img_file
7:定义读取的方法有了,那我们就开始读取图片了。具体的意思看注释。
    def load_image(self, idx):
        return self._load(self.RGB_DIR, self._filenames[idx])

    #载入depth图片,参数self.depth_DIR = depth, self._filenames[idx] = train.txt[idx]。
    #fp = /home/Projects/ZQB/a/ESANet-main/datasets/ train / depth / 0003
    def load_depth(self, idx):
        if self._depth_mode == 'raw':
            return self._load(self.DEPTH_RAW_DIR, self._filenames[idx])
        else:
            return self._load(self.DEPTH_DIR, self._filenames[idx])

    #载入label图片,参数self.LABELS_DIR_FMT.format(self._n_classes) = label40, self._filenames[idx] = train.txt[idx]。
    #fp = /home/Projects/ZQB/a/ESANet-main/datasets/ train / label40 / 0003
    def load_label(self, idx):
        return self._load(self.LABELS_DIR_FMT.format(self._n_classes),
                          self._filenames[idx])
8:我们添加读取label_img的读取方式,
    def load_label_image(self, idx):
        return self._load_file(self.LABEL_IMAGE_DIR,self._filenames[idx])
其中:像RGB_DIR一样添加LABEL_IMAGE_DIR。注意调用load_label_image函数返回的仍然是文件夹。
9:接着就是dataset中比较重要的两个函数__getitem__和__len__。在__getitem__中通过索引加载数据,并对数据进行处理,在__len__中返回要训练的图片个数。由于__getitem__本来是在抽象类里面的,但是__getitem__没有被装饰,所以不需要重写,我就把他放在了NYUv2中。
在__getitem__我们有两个字典,一个字典存放的RGB,depth,label,另一个字典存放的label_img。我们调用之前定义的load_image等方式,根据索引,假设idx是0003,则sample存放的是’image’及对应读入的图片,并不是tensor,其他两个同理。sample_edge 存放的是label_img对应的0003文件夹。接着我们对sample和sample_edge进行处理。
#该方法未被装饰,可以不用重写。train_data = Dataset(参数) = NYUv2(参数)继承DatasetBase,则通过train_data调用__getitem__。
    def __getitem__(self, idx):

        seed = np.random.randint(2147483647)
        sample = {'image': self.load_image(idx),#图片
                  'depth': self.load_depth(idx),#图片
                  'label': self.load_label(idx)}#图片
        sample_edge = {'label_img':self.load_label_image(idx)}#文件夹

        if self.split != 'train':
            # needed to compute mIoU on original image size
            sample['label_orig'] = sample['label'].copy() #向sample字典里面添加了sample['label_orig']

        #对sample进行变换
        random.seed(seed)
        sample = self.preprocessor(sample)
        random.seed(seed)
        sample_edge  = self.edge_preprocessor(sample_edge)
        #经过处理之后的sample,即经过堆叠的。
        return sample,sample_edge


    def __len__(self):
        return len(self._filenames)
10:对sample我们调用另一个py中的函数,对于label_img我们自己重写一个函数,读入文件夹下的图片,并将其堆叠在一起。
看第一个,使用transform将一系列操作composed到一起,具体的操作看各自需求,sample是一个字典,要对字典键对应的值进行处理,就需要把他取出来。
def get_preprocessor(depth_mean,
                     depth_std,
                     depth_mode='refined',
                     height=None,
                     width=None,
                     phase='train',
                     train_random_rescale=(1.0, 1.4)):
    assert phase in ['train', 'test']

    if phase == 'train':
        transform_list = [
            RandomRescale(train_random_rescale),
            RandomCrop(crop_height=height, crop_width=width),
            RandomHSV((0.9, 1.1),
                      (0.9, 1.1),
                      (25, 25)),
            RandomFlip(),
            ToTensor(),
            Normalize(depth_mean=depth_mean,
                      depth_std=depth_std,
                      depth_mode=depth_mode),
            # MultiScaleLabel(downsampling_rates=[16, 8, 4])
        ]

    else:
        if height is None and width is None:
            transform_list = []
        else:
            transform_list = [Rescale(height=height, width=width)]
        transform_list.extend([
            ToTensor(),
            Normalize(depth_mean=depth_mean,
                      depth_std=depth_std,
                      depth_mode=depth_mode)
        ])
    transform = transforms.Compose(transform_list)#串联多个操作
    return transform
随即找一个操作,先取出数值,经过变换后再塞回去,替换原来的数值。经过Process之后,返回的是一个新的sample,里面是经过处理后的rgb,depth,label。
class RandomFlip:
    def __call__(self, sample):
        image, depth, label = sample['image'], sample['depth'], sample['label']
        if np.random.rand() > 0.5:
            image = np.fliplr(image).copy()
            depth = np.fliplr(depth).copy()
            label = np.fliplr(label).copy()

        sample['image'] = image
        sample['depth'] = depth
        sample['label'] = label

        return sample
对于label_img处理就需要自己写,我们不做过多变幻,只将他转换为tensor,如果要做也是可以的。
首先去除文件夹,然后新建一个空列表,通过遍历label_img 文件夹下的name,即0.png,1.png…,我们通过cv2读取文件夹下的filename即读取图片,将每一个通道转换为tensor并储存在空列表中,遍历完之后,空列表有四十个tensor,分别对应每个通道,通过stack函数将列表堆叠在一起,即变成了(40,480,640)大小。作为新的数据替换掉原来label_img键对应的路径值,即我们最后要的效果。同时返回sample_edge。这样整个dataset处理完毕。
class ToTensor:
    def __call__(self, sample_edge):
        label_img = sample_edge['label_img']
        label_edge = []
        for filename in os.listdir(label_img):
            img = cv2.imread(label_img + "/" + filename, cv2.IMREAD_UNCHANGED)
            label_re = torch.from_numpy(img).float()
            label_edge.append(label_re)
        label_data = torch.stack(label_edge)#(40,480,640)
        sample_edge['label_img'] = label_data
        return sample_edge
这样sample里面有三个list对应的rgb,depth,label存储的值,sample_edge里面有一个list对应的label_img存储的值。经过dataloader加载生成train_loader和val_loader。
11:在数据加载过程中通过enumerate遍历train_loader。

对字典进行取值:

最后计算边界损失:自己定义。
CASENet有自己的边界损失,Gate-SCNN也采用CASENet的数据处理方式。也有自己的损失。