认证授权过程
在认证和授权的过程中涉及的三方包括:
1、服务提供方,用户使用服务提供方来存储受保护的资源,如照片,视频,联系人列表。
2、用户,存放在服务提供方的受保护的资源的拥有者。
3、客户端,要访问服务提供方资源的第三方应用,通常是网站,如提供照片打印服务的网站。在认证过程之前,客户端要向服务提供者申请客户端标识。
使用OAuth进行认证和授权的过程如下所示:
用户想操作存放在服务提供方的资源。
用户登录客户端向服务提供方请求一个临时令牌。
服务提供方验证客户端的身份后,授予一个临时令牌。
客户端获得临时令牌后,将用户引导至服务提供方的授权页面请求用户授权。在这个过程中将临时令牌和客户端的回调连接发送给服务提供方。
用户在服务提供方的网页上输入用户名和密码,然后授权该客户端访问所请求的资源。
授权成功后,服务提供方引导用户返回客户端的网页。
客户端根据临时令牌从服务提供方那里获取访问令牌。
服务提供方根据临时令牌和用户的授权情况授予客户端访问令牌。
客户端使用获取的访问令牌访问存放在服务提供方上的受保护的资源。
一、服务端搭建
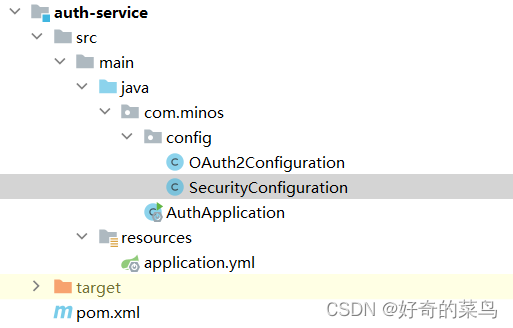
项目结构
1、依赖
  <dependency>
            <groupId>org.springframework.boot</groupId>
            <artifactId>spring-boot-starter-web</artifactId>
        </dependency>

        <dependency>
            <groupId>org.springframework.boot</groupId>
            <artifactId>spring-boot-starter-security</artifactId>
        </dependency>

        <!--  OAuth2.0依赖,不再内置了,所以得我们自己指定一下版本  -->
        <dependency>
            <groupId>org.springframework.cloud</groupId>
            <artifactId>spring-cloud-starter-oauth2</artifactId>
            <version>2.2.5.RELEASE</version>
        </dependency>
2、配置文件
package com.minos.config;

import org.springframework.context.annotation.Configuration;
import org.springframework.security.authentication.AuthenticationManager;
import org.springframework.security.core.userdetails.UserDetailsService;
import org.springframework.security.crypto.bcrypt.BCryptPasswordEncoder;
import org.springframework.security.oauth2.config.annotation.configurers.ClientDetailsServiceConfigurer;
import org.springframework.security.oauth2.config.annotation.web.configuration.AuthorizationServerConfigurerAdapter;
import org.springframework.security.oauth2.config.annotation.web.configuration.EnableAuthorizationServer;
import org.springframework.security.oauth2.config.annotation.web.configurers.AuthorizationServerEndpointsConfigurer;
import org.springframework.security.oauth2.config.annotation.web.configurers.AuthorizationServerSecurityConfigurer;

import javax.annotation.Resource;

@EnableAuthorizationServer   //开启验证服务器
@Configuration
public class OAuth2Configuration extends AuthorizationServerConfigurerAdapter {

    @Resource
    private AuthenticationManager manager;
    @Resource
    UserDetailsService service;


    private final BCryptPasswordEncoder encoder = new BCryptPasswordEncoder();

    /**
     * 这个方法是对客户端进行配置,一个验证服务器可以预设很多个客户端,
     * 之后这些指定的客户端就可以按照下面指定的方式进行验证
     * @param clients 客户端配置工具
     */
    @Override
    public void configure(ClientDetailsServiceConfigurer clients) throws Exception {
        clients
                .inMemory()   //这里我们直接硬编码创建,当然也可以像Security那样自定义或是使用JDBC从数据库读取
                .withClient("web")   //客户端名称,随便起就行
                .secret(encoder.encode("654321"))      //只与客户端分享的secret,随便写,但是注意要加密
                .autoApprove(false)    //自动审批,这里关闭,要的就是一会体验那种感觉
                .scopes("book", "user", "borrow")     //授权范围,这里我们使用全部all
                .redirectUris("http://localhost:8201/login")   //可以写多个,当有多个时需要在验证请求中指定使用哪个地址进行回调
                .authorizedGrantTypes("client_credentials", "password", "implicit", "authorization_code", "refresh_token");
        //授权模式,一共支持5种,除了之前我们介绍的四种之外,还有一个刷新Token的模式
        //这里我们直接把五种都写上,方便一会实验,当然各位也可以单独只写一种一个一个进行测试
        //现在我们指定的客户端就支持这五种类型的授权方式了
    }

    @Override
    public void configure(AuthorizationServerSecurityConfigurer security) {
        security
                .passwordEncoder(encoder)    //编码器设定为BCryptPasswordEncoder
                .allowFormAuthenticationForClients()  //允许客户端使用表单验证,一会我们POST请求中会携带表单信息
                .checkTokenAccess("permitAll()");     //允许所有的Token查询请求
    }

    @Override
    public void configure(AuthorizationServerEndpointsConfigurer endpoints) {
        endpoints
                .authenticationManager(manager);
        //由于SpringSecurity新版本的一些底层改动,这里需要配置一下authenticationManager,才能正常使用password模式
        endpoints
                .userDetailsService(service);
    }
}
package com.minos.config;
import org.springframework.context.annotation.Bean;
import org.springframework.context.annotation.Configuration;
import org.springframework.security.authentication.AuthenticationManager;
import org.springframework.security.config.annotation.authentication.builders.AuthenticationManagerBuilder;
import org.springframework.security.config.annotation.web.builders.HttpSecurity;
import org.springframework.security.config.annotation.web.configuration.WebSecurityConfigurerAdapter;
import org.springframework.security.core.userdetails.UserDetailsService;
import org.springframework.security.crypto.bcrypt.BCryptPasswordEncoder;
@Configuration
public class SecurityConfiguration extends WebSecurityConfigurerAdapter {
@Override
protected void configure(HttpSecurity http) throws Exception {
http
.authorizeRequests()
.anyRequest().authenticated() //
.and()
.formLogin().permitAll(); //使用表单登录
}
@Override
protected void configure(AuthenticationManagerBuilder auth) throws Exception {
BCryptPasswordEncoder encoder = new BCryptPasswordEncoder();
auth
.inMemoryAuthentication() //直接创建一个用户,懒得搞数据库了
.passwordEncoder(encoder)
.withUser("test").password(encoder.encode("123456")).roles("USER");
}
@Bean //这里需要将AuthenticationManager注册为Bean,在OAuth配置中使用
@Override
public AuthenticationManager authenticationManagerBean() throws Exception {
return super.authenticationManagerBean();
}
@Bean
@Override
public UserDetailsService userDetailsServiceBean() throws Exception {
return super.userDetailsServiceBean();
}
}
import org.springframework.boot.SpringApplication;
import org.springframework.boot.autoconfigure.SpringBootApplication;

@SpringBootApplication
public class AuthApplication {
    public static void main(String[] args) {
        SpringApplication.run(AuthApplication.class,args);
    }
}
3、配置属性
server:
  port: 8500
  servlet:
    #为了防止一会在服务之间跳转导致Cookie打架(因为所有服务地址都是localhost,都会存JSESSIONID)
    #这里修改一下context-path,这样保存的Cookie会使用指定的路径,就不会和其他服务打架了
    #但是注意之后的请求都得在最前面加上这个路径
    context-path: /sso
二、服务端测试
1、客户端模式
http://localhost:8500/sso/oauth/token
grant_type:client_credentials
client_id:web
client_secret:654321
验证token
http://localhost:8500/sso/oauth/check_token?token=7cd6c753-bd1f-4a41-aa60-372dc43f2a70 
2、密码模式
http://localhost:8500/sso/oauth/token
grant_type:password
username:test
password:123456
填写请求参数
 设置校验账号密码
3、隐式授权模式
浏览器调用
http://localhost:8500/sso/oauth/authorize?client_id=web&response_type=token服务器根据规则携带token重定向至http://localhost:8201/login
http://localhost:8201/login#access_token=2d81d2ff-898f-4138-bc0b-a46c2c15a13c&token_type=bearer&expires_in=42373&scope=book%20borrow%20user4、授权码模式
http://localhost:8500/sso/oauth/authorize?client_id=web&response_type=code浏览器页面登录

勾选权限

返回code
http://localhost:8201/login?code=4om04n根据返回code获取token
http://localhost:8500/sso/oauth/token
grant_type:authorization_code
client_id:web
client_secret:654321
code:4om04n
5、刷新token
http://localhost:8500/sso/oauth/token
grant_type:refresh_token
client_id:web
client_secret:654321
refresh_token:b1eda2a0-d1bd-4bd3-9c48-67115e159bf2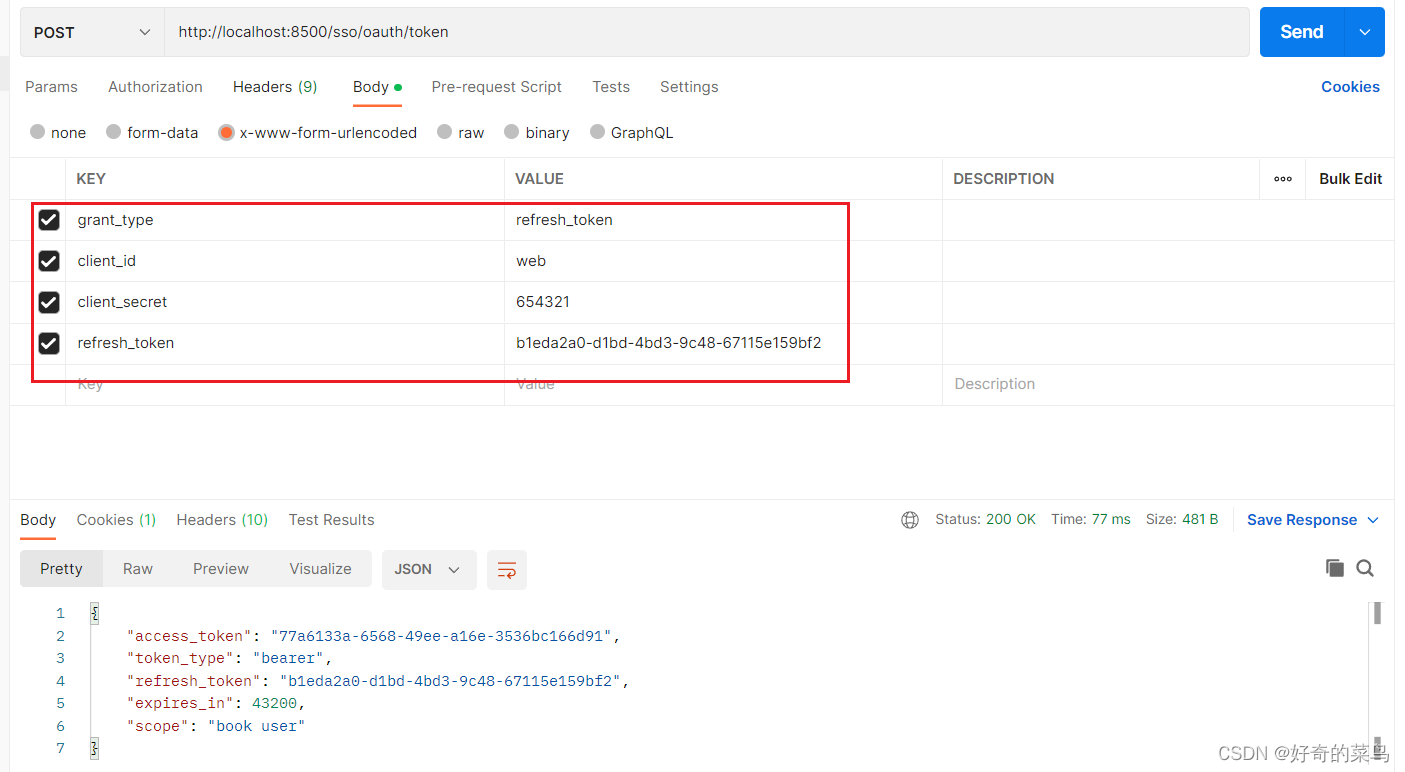
三、基于@EnableOAuth2Sso实现自动登录
1、导入依赖
<dependency>
    <groupId>org.springframework.boot</groupId>
    <artifactId>spring-boot-starter-security</artifactId>
</dependency>

<dependency>
    <groupId>org.springframework.cloud</groupId>
    <artifactId>spring-cloud-starter-oauth2</artifactId>
    <version>2.2.5.RELEASE</version>
</dependency>
2、启动类添加开启注解
@EnableOAuth2Sso3、配置文件增加配置
security:
  oauth2:
    client:
      #不多说了
      client-id: web
      client-secret: 654321
      #Token获取地址
      access-token-uri: http://localhost:8500/sso/oauth/token
      #验证页面地址
      user-authorization-uri: http://localhost:8500/sso/oauth/authorize
    resource:
      #Token信息获取和校验地址
      token-info-uri: http://localhost:8500/sso/oauth/check_token
四、基于@EnableResourceServer实现资源服务器
1、导入依赖
<dependency>
    <groupId>org.springframework.boot</groupId>
    <artifactId>spring-boot-starter-security</artifactId>
</dependency>

<dependency>
    <groupId>org.springframework.cloud</groupId>
    <artifactId>spring-cloud-starter-oauth2</artifactId>
    <version>2.2.5.RELEASE</version>
</dependency>
2、启动类添加开启注解
@EnableResourceServer3、配置文件增加配置
security:
  oauth2:
    client:
      #不多说了
      client-id: web
      client-secret: 654321
      #Token获取地址
      access-token-uri: http://localhost:8500/sso/oauth/token
      #验证页面地址
      user-authorization-uri: http://localhost:8500/sso/oauth/authorize
    resource:
      #Token信息获取和校验地址
      token-info-uri: http://localhost:8500/sso/oauth/check_token
4、权限范围校验
@Configuration
public class ResourceConfiguration extends ResourceServerConfigurerAdapter { //继承此类进行高度自定义

    @Override
    public void configure(HttpSecurity http) throws Exception {  //这里也有HttpSecurity对象,方便我们配置SpringSecurity
        http
                .authorizeRequests()
                .anyRequest().access("#oauth2.hasScope('lbwnb')");  //添加自定义规则
      					//Token必须要有我们自定义scope授权才可以访问此资源
    }
}
5、RestTemplate 远程调用携带token
@Configuration
public class WebConfiguration {

    @Resource
    OAuth2ClientContext context;

    @Bean
    public OAuth2RestTemplate restTemplate(){
        return new OAuth2RestTemplate(new ClientCredentialsResourceDetails(), context);
    }
}
使用OAuth2RestTemplate进行调用,自动携带token
  @Resource
    OAuth2RestTemplate template;
6、Feign调用携带token
OpenFeign使用参考。
https://blog.csdn.net/qq_29752857/article/details/129221077feign:
oauth2:
#开启Oauth支持,这样就会在请求头中携带Token了
enabled: true
#同时开启负载均衡支持
load-balanced: true