freemarker提供很多指令用于解析各种类型的数据模型
参考地址:http://freemarker.foofun.cn/ref_directives.html
一.测试
搭建Freemarker的运行环境并进行测试.
1.添加Freemarker与SpringBoot的整合包
XML
<!-- Spring Boot 对结果视图 Freemarker 集成 -->
<dependency>
    <groupId>org.springframework.boot</groupId>
    <artifactId>spring-boot-starter-freemarker</artifactId>
</dependency>
2.yml配置文件如下,也可以集中管理到nacos,这里就先不管理
YAML
spring:
  freemarker:
    enabled: true
    cache: false   #关闭模板缓存,方便测试
    settings:
      template_update_delay: 0
    suffix: .ftl   #页面模板后缀名
    charset: UTF-8
    template-loader-path: classpath:/templates/   #页面模板位置(默认为 classpath:/templates/)
    resources:
      add-mappings: false   #关闭项目中的静态资源映射(static、resources文件夹下的资源)
3.在resources下创建templates目录,添加test.ftl模板文件
HTML
<!DOCTYPE html>
<html>
<head>
    <meta charset="utf-8">
    <title>Hello World!</title>
</head>
<body>
Hello ${name}!
</body>
</html>
4.编写controller方法,准备模型数据
@Controller
public class FreemarkerController {

    @GetMapping("/testfreemarker")
    public ModelAndView test(){
        ModelAndView modelAndView = new ModelAndView();
        //设置模型数据
        modelAndView.addObject("name","小明");
        //设置模板名称
        modelAndView.setViewName("test");
        return modelAndView;
    }


}
启动内容管理接口工程,访问http://localhost:63040/content/testfreemarker,这个地址按自己配置的测试,我的是我自己的测试路径。

屏幕输出:Hello 小明!
二.部署
这里部署nginx来访问这些静态资源,对于SpringBoot服务的动态资源由Nginx去代理请求
本机测试的话需要修改本机hosts文件,添加地址和域名
window10操作系统hosts文件在C:\Windows\System32\drivers\etc下
Centos7操作系统的hosts文件在/etc目录下。
nginx目录中找到conf目录,配置目录下的nginx.conf文件,去配置静态页面的路径
1.添加渲染文件-记住这个后缀
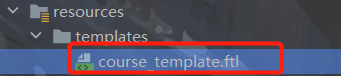
@Controller
public class CoursePublishController {

    @GetMapping("/coursepreview/{courseId}")
    public ModelAndView preview(@PathVariable("courseId") Long courseId){
        ModelAndView modelAndView = new ModelAndView();
        modelAndView.addObject("model",null);
        modelAndView.setViewName("course_template");
        return modelAndView;
    }

}
预览接口虽然可以正常访问,但是页面没有样式
这些静态资源全在门户下,我们需要由Nginx反向代理访问课程预览接口,通过门户的URL去访问课程预览。
已经实现了基础的入门测试,先end。后续再更新

![洛谷P1125 [NOIP2008 提高组] 笨小猴 C语言/C++](https://img-blog.csdnimg.cn/0fc91118d10c4050b0bffdf097c854e2.png)