创建父子工程,可以通过父工程来引入jar,定义统一的版本号等。更方便对整个项目的jar包实现统一化管理,让项目的层次更加清晰。
一、创建父工程
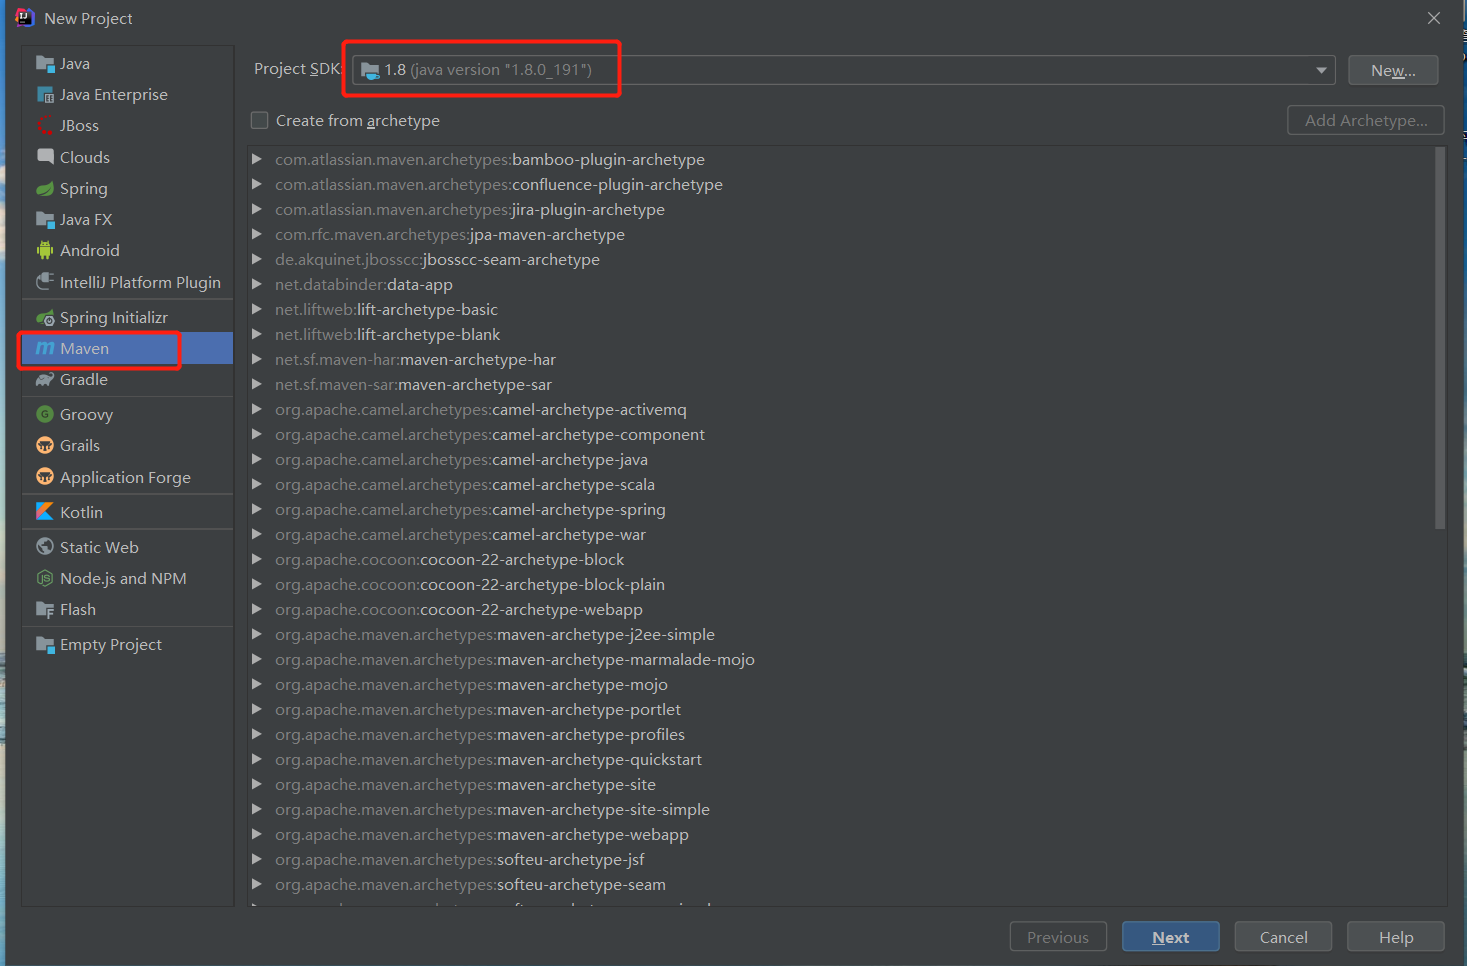
第一步:file–>new–>project–>maven
默认使用jdk1.8,不引入任何jar包,直接创建空项目,直接点击Next
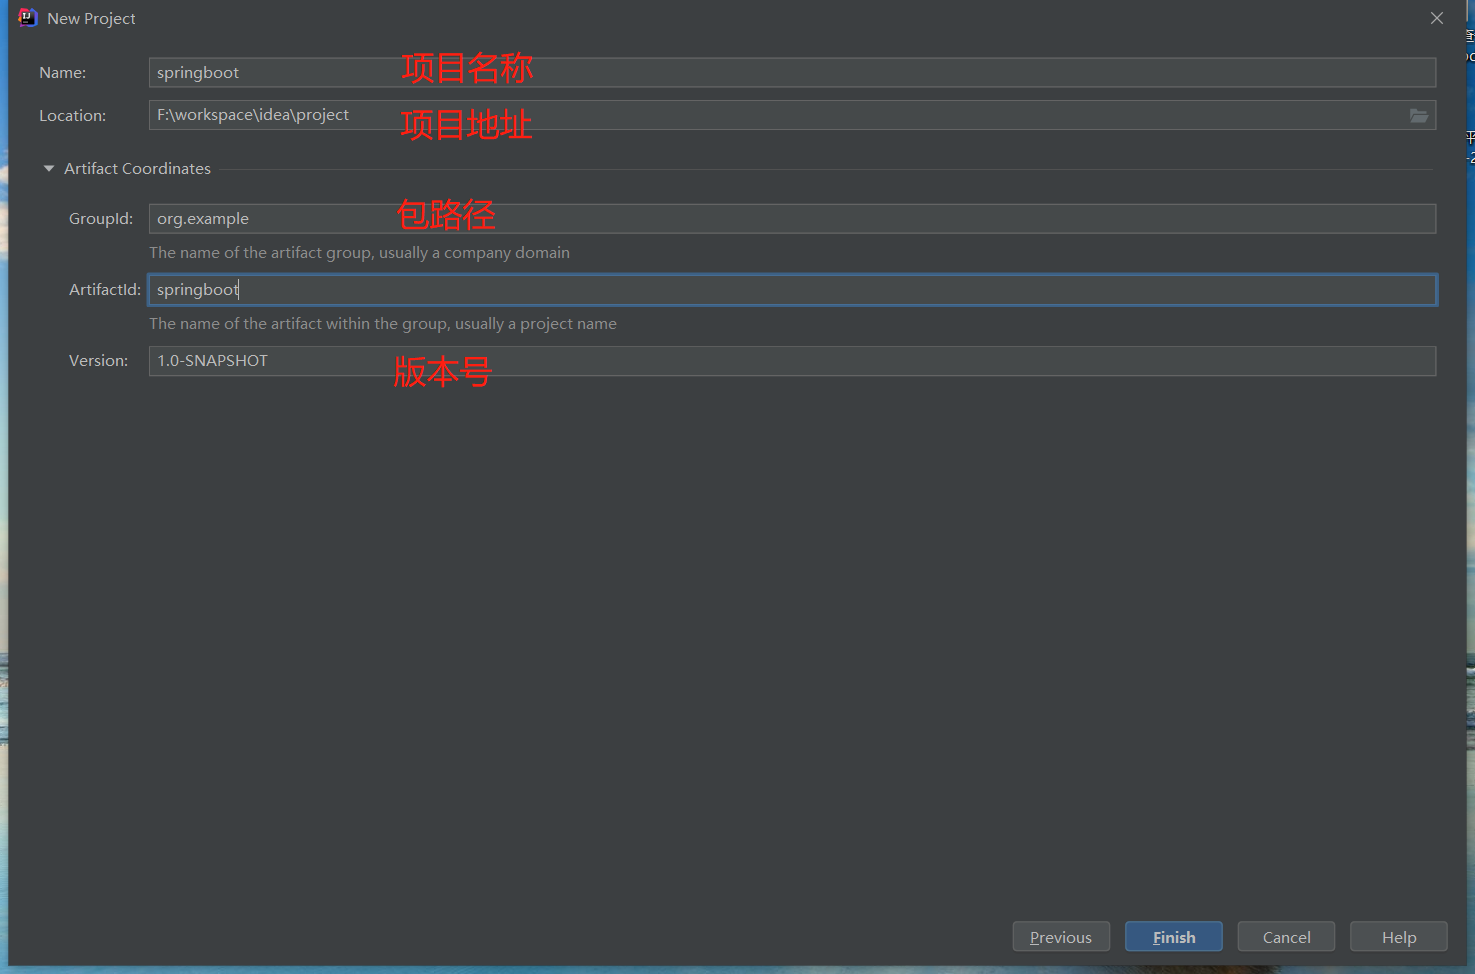
第二步:修改默认项目名称、项目路径、包。然后Finish
第三步:到这里父工程就建好了,在pom.xml设置,项目类型打包方式有pom,war,jar三种。因为是父工程我们设置为pom。
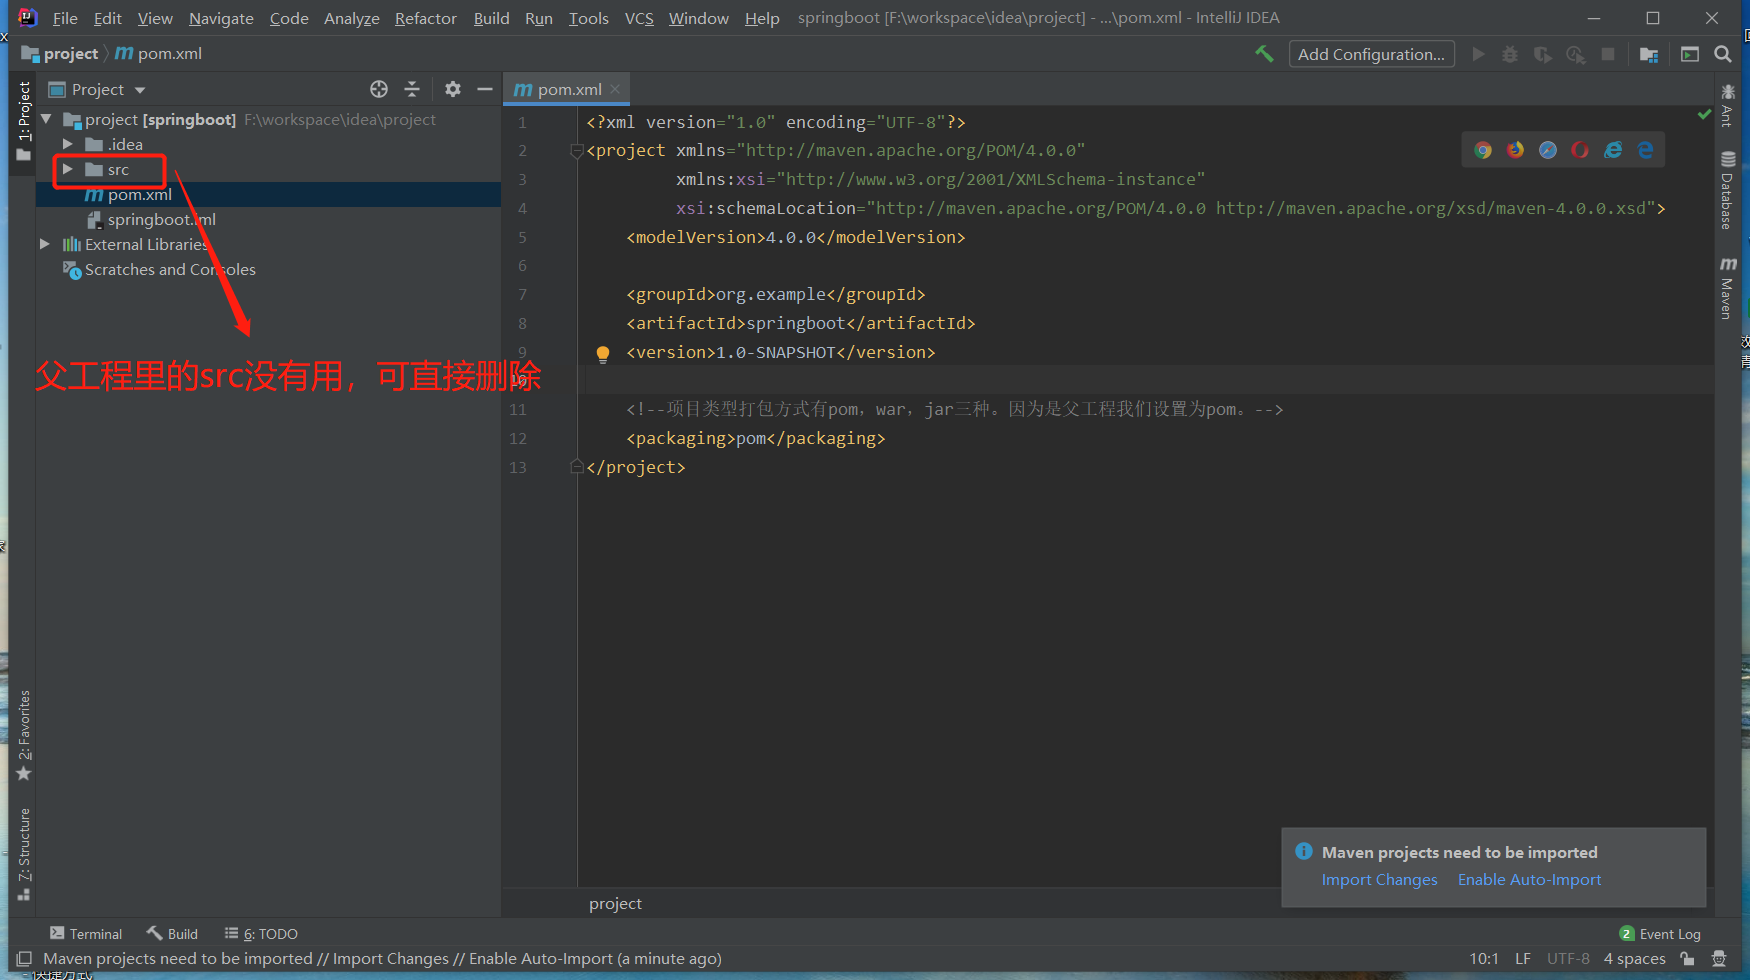
第四步:配置pom.xml
我们使用properties来进行版本号的统一管理,使用dependencyManagement来管理依赖
二、创建子工程
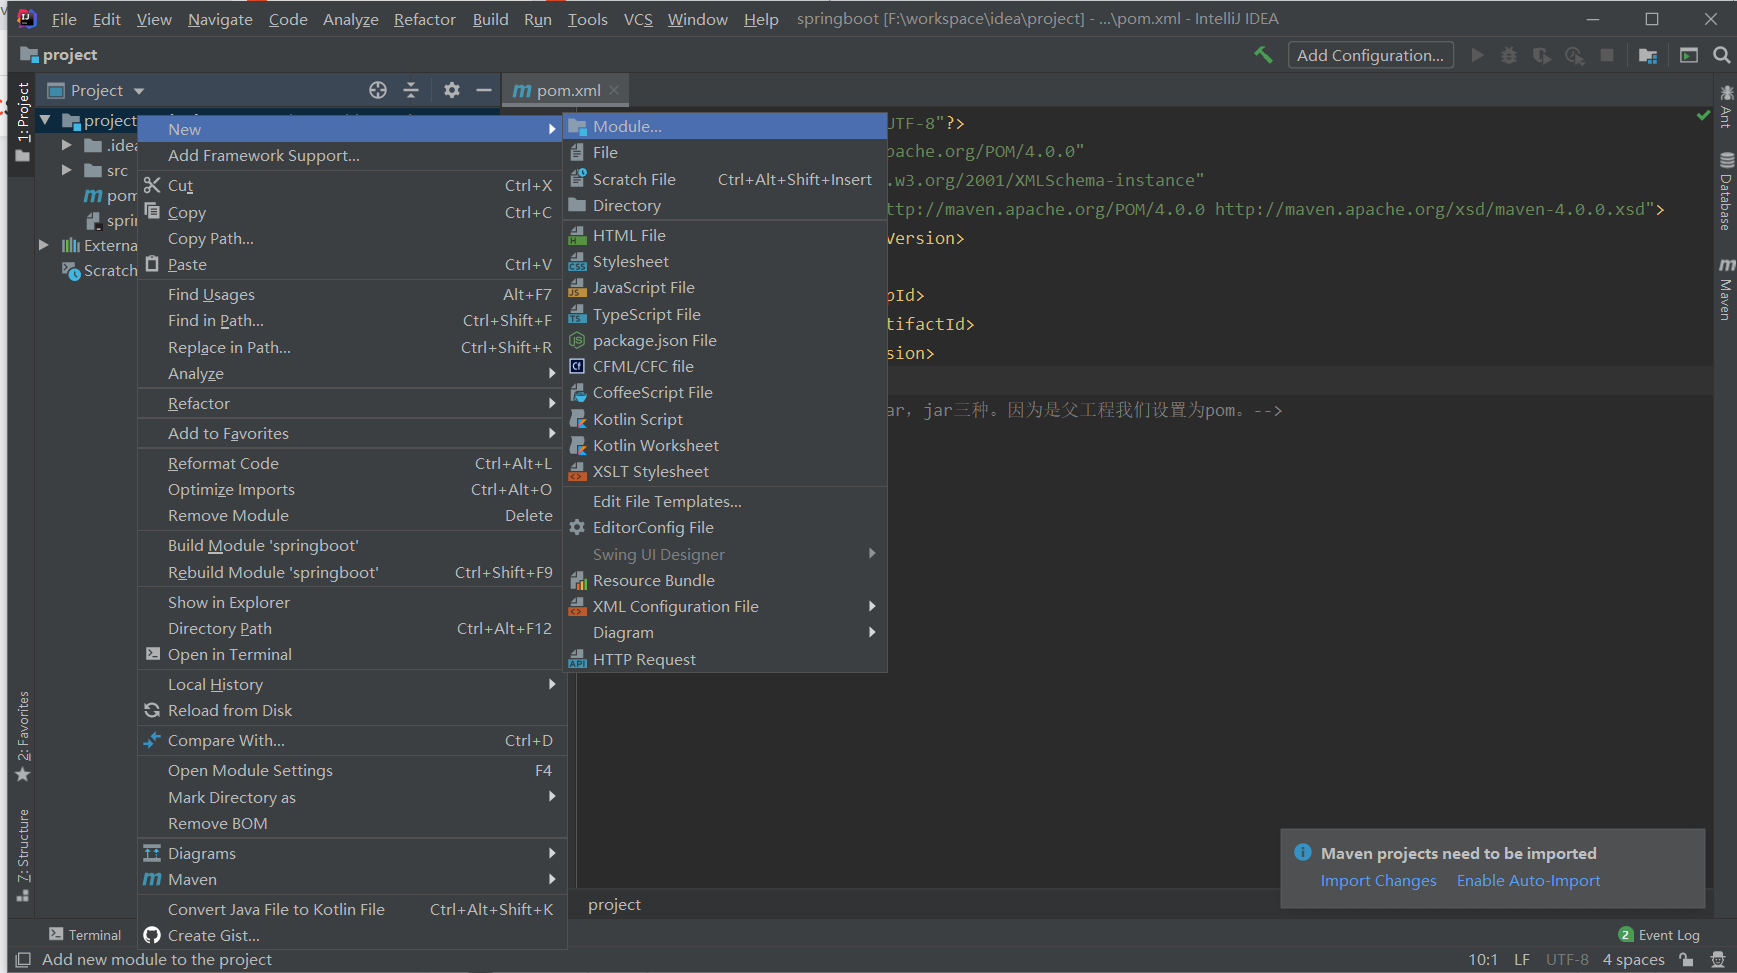
第一步:创建module子工程:在项目根目录右键—>new—>Module
1、使用spring-initializr来创建子工程,可以选择需要的依赖,无需手动导入
2、使用maven直接创建,需要手动导入jar
这里是为了展示父子工程的依赖的关系,我们使用maven选项创建。
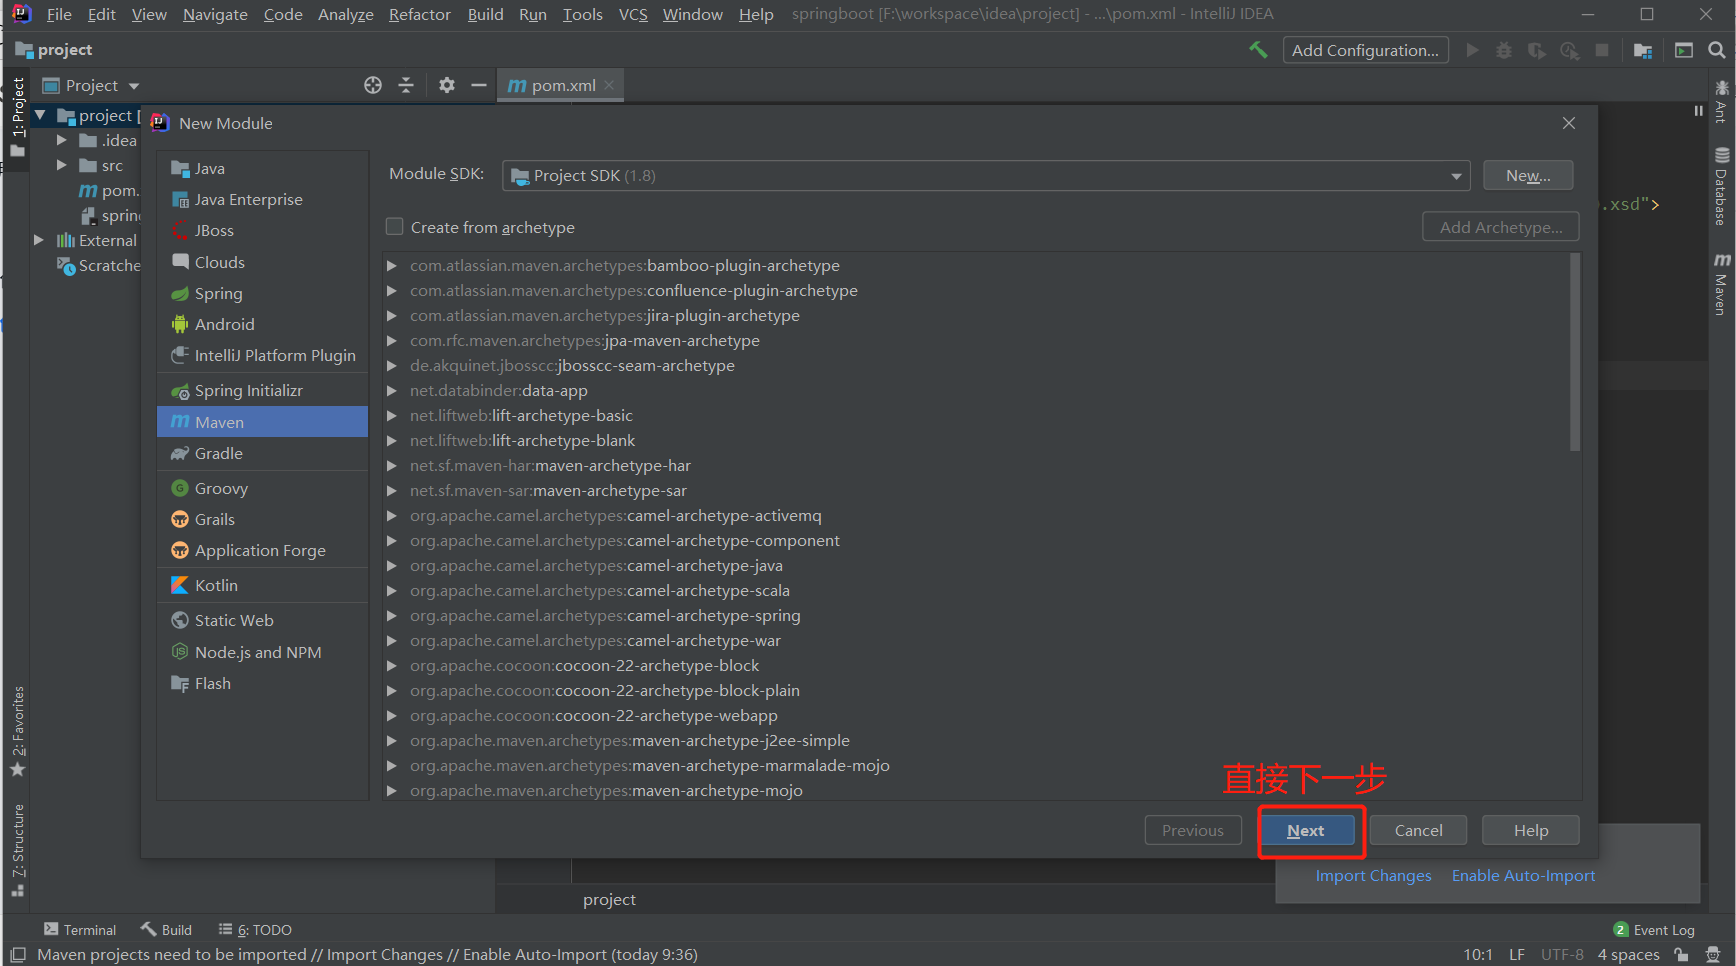
第二步:声明artifactid
这里我们是不需要来声明groupid的,因为是子工程,所以这个值是固定的,我们可以自定义artifactid
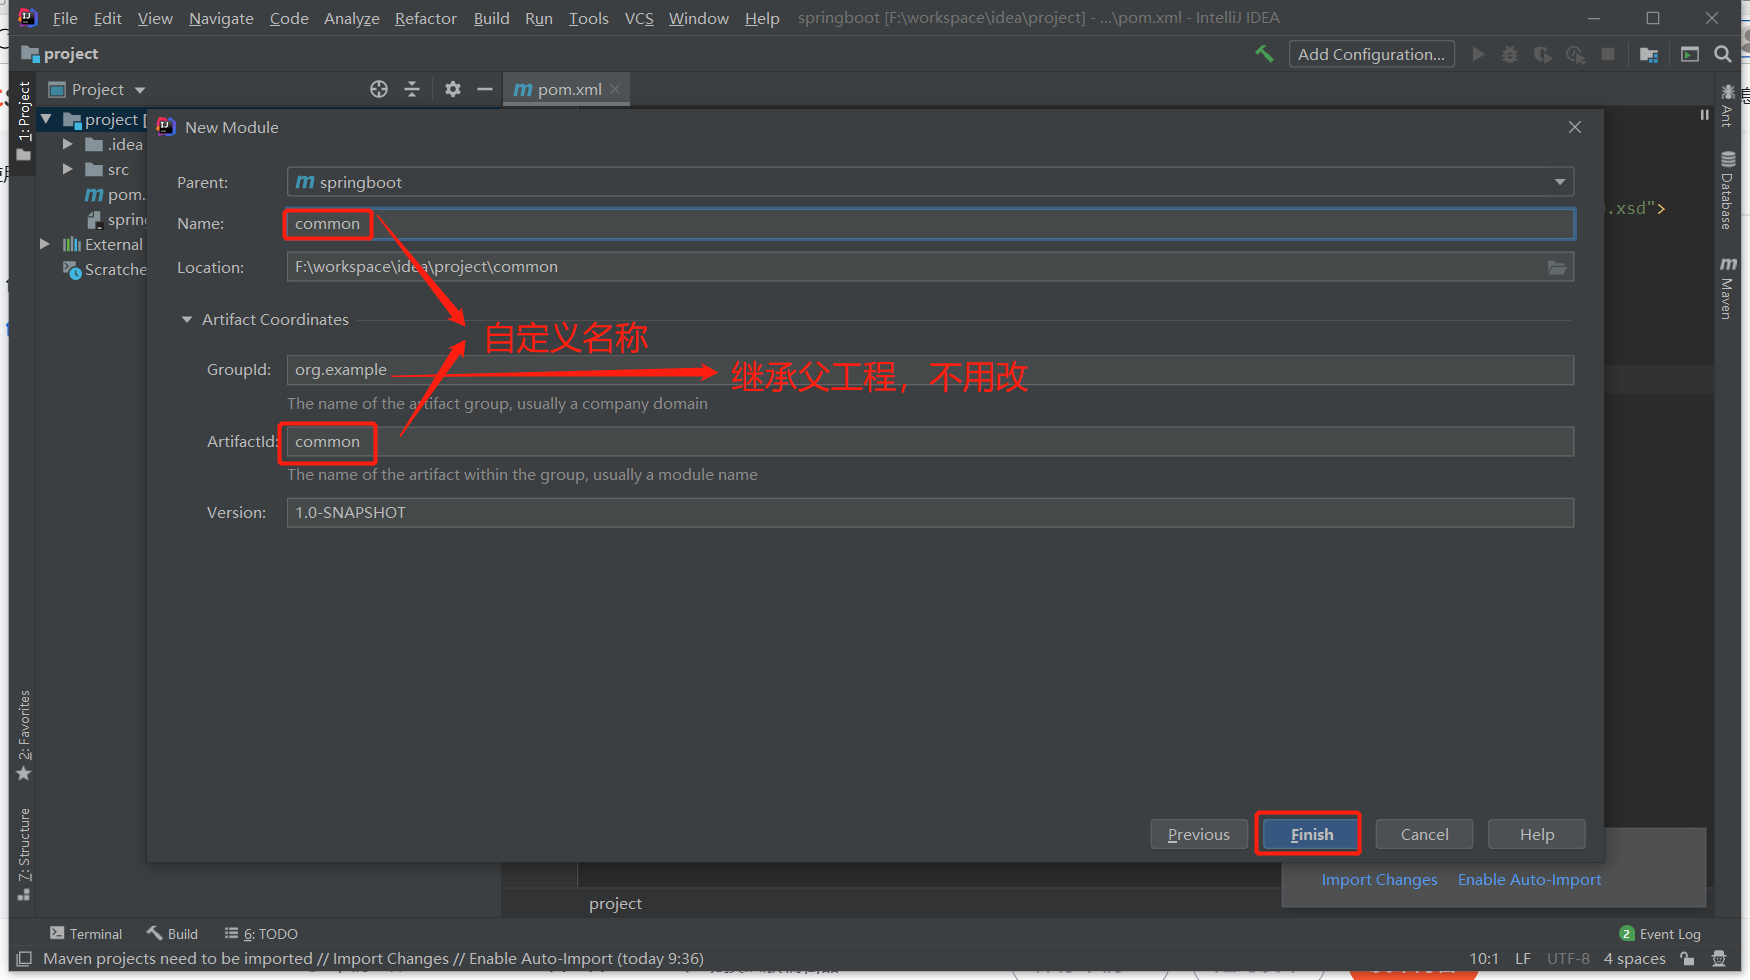
第三步:依次创建api、framework、system模块
三、引入依赖、统一jar版本
<properties>
    <project.build.sourceEncoding>UTF-8</project.build.sourceEncoding>
    <project.reporting.outputEncoding>UTF-8</project.reporting.outputEncoding>
    <java.version>1.8</java.version>
    <maven-jar-plugin.version>3.1.1</maven-jar-plugin.version>
    <druid.version>1.2.15</druid.version>
    <bitwalker.version>1.21</bitwalker.version>
    <swagger.version>3.0.0</swagger.version>
    <kaptcha.version>2.3.3</kaptcha.version>
    <pagehelper.boot.version>1.4.6</pagehelper.boot.version>
    <fastjson.version>2.0.23</fastjson.version>
    <oshi.version>6.4.0</oshi.version>
    <commons.io.version>2.11.0</commons.io.version>
    <commons.fileupload.version>1.4</commons.fileupload.version>
    <commons.collections.version>3.2.2</commons.collections.version>
    <poi.version>4.1.2</poi.version>
    <velocity.version>2.3</velocity.version>
    <jwt.version>0.9.1</jwt.version>
</properties>

<!-- 依赖声明 -->
<dependencyManagement>
    <dependencies>
        <!-- SpringBoot的依赖配置-->
        <dependency>
            <groupId>org.springframework.boot</groupId>
            <artifactId>spring-boot-dependencies</artifactId>
            <version>2.5.14</version>
            <type>pom</type>
            <scope>import</scope>
        </dependency>

        <!-- 阿里数据库连接池 -->
        <dependency>
            <groupId>com.alibaba</groupId>
            <artifactId>druid-spring-boot-starter</artifactId>
            <version>${druid.version}</version>
        </dependency>

        <!-- 解析客户端操作系统、浏览器等 -->
        <dependency>
            <groupId>eu.bitwalker</groupId>
            <artifactId>UserAgentUtils</artifactId>
            <version>${bitwalker.version}</version>
        </dependency>

        <!-- pagehelper 分页插件 -->
        <dependency>
            <groupId>com.github.pagehelper</groupId>
            <artifactId>pagehelper-spring-boot-starter</artifactId>
            <version>${pagehelper.boot.version}</version>
        </dependency>

        <!-- 获取系统信息 -->
        <dependency>
            <groupId>com.github.oshi</groupId>
            <artifactId>oshi-core</artifactId>
            <version>${oshi.version}</version>
        </dependency>

        <!-- Swagger3依赖 -->
        <dependency>
            <groupId>io.springfox</groupId>
            <artifactId>springfox-boot-starter</artifactId>
            <version>${swagger.version}</version>
            <exclusions>
                <exclusion>
                    <groupId>io.swagger</groupId>
                    <artifactId>swagger-models</artifactId>
                </exclusion>
            </exclusions>
        </dependency>

        <!-- io常用工具类 -->
        <dependency>
            <groupId>commons-io</groupId>
            <artifactId>commons-io</artifactId>
            <version>${commons.io.version}</version>
        </dependency>

        <!-- 文件上传工具类 -->
        <dependency>
            <groupId>commons-fileupload</groupId>
            <artifactId>commons-fileupload</artifactId>
            <version>${commons.fileupload.version}</version>
        </dependency>

        <!-- excel工具 -->
        <dependency>
            <groupId>org.apache.poi</groupId>
            <artifactId>poi-ooxml</artifactId>
            <version>${poi.version}</version>
        </dependency>

        <!-- velocity代码生成使用模板 -->
        <dependency>
            <groupId>org.apache.velocity</groupId>
            <artifactId>velocity-engine-core</artifactId>
            <version>${velocity.version}</version>
        </dependency>

        <!-- collections工具类 -->
        <dependency>
            <groupId>commons-collections</groupId>
            <artifactId>commons-collections</artifactId>
            <version>${commons.collections.version}</version>
        </dependency>

        <!-- 阿里JSON解析器 -->
        <dependency>
            <groupId>com.alibaba.fastjson2</groupId>
            <artifactId>fastjson2</artifactId>
            <version>${fastjson.version}</version>
        </dependency>

        <!-- Token生成与解析-->
        <dependency>
            <groupId>io.jsonwebtoken</groupId>
            <artifactId>jjwt</artifactId>
            <version>${jwt.version}</version>
        </dependency>

        <!-- 验证码 -->
        <dependency>
            <groupId>pro.fessional</groupId>
            <artifactId>kaptcha</artifactId>
            <version>${kaptcha.version}</version>
        </dependency>
    </dependencies>
</dependencyManagement>
四、关联父子模块
点击maven,在父工程下install初始化一下,这时父子工程才能关联。
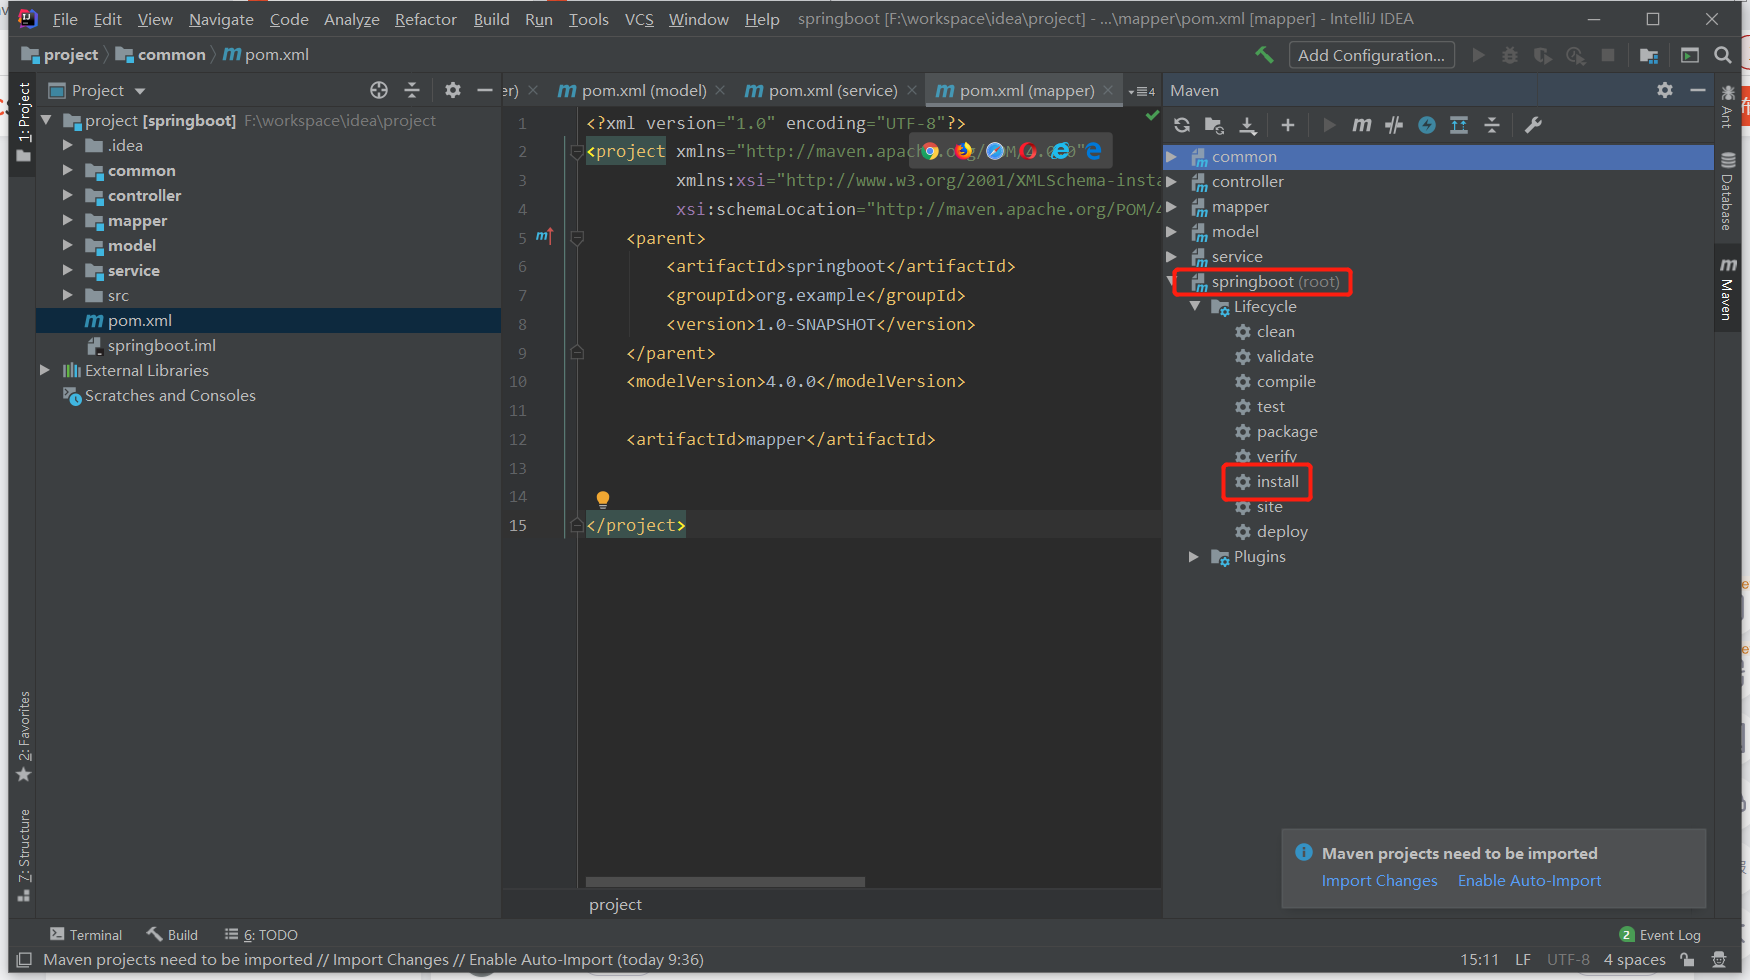
注意点:
1.父工程的pom.xml文件的打包方式应该为pom
2.想要子工程的依赖指向父工程的话,父工程的依赖应该使用dependencyManagement来管理。


