目录
- 前言
- 一、Linux 安装
- 1、下载安装包
- ⑴、选择需要的安装包
- ⑵、下载解压到安装目录
- 2、查看解压后目录结构
- 3、启动 Elasticsearch
- ⑴、正常启动流程
- ⑵、启动过程遇到的问题
- ①、启动报错
- ②、创建运行 Elasticsearch 的用户,启动成功,但无法访问
- ③、停止Elasticsearch,修改配置文件重新启动
- ④、JDK 问题
- 二、Windows 安装
- 1、下载安装包
- 2、启动 Elasticsearch
- ⑴、正常启动流程
- ⑵、启动过程遇到的问题
- ①、同Linux 默认开启安全认证,启动后无法直接访问
前言
上一篇简单了解了一下 Elasticsearch 的发展史,特性和使用场景,为了方便接下来的数据测试,本篇内容先开始安装 Elasticsearch。
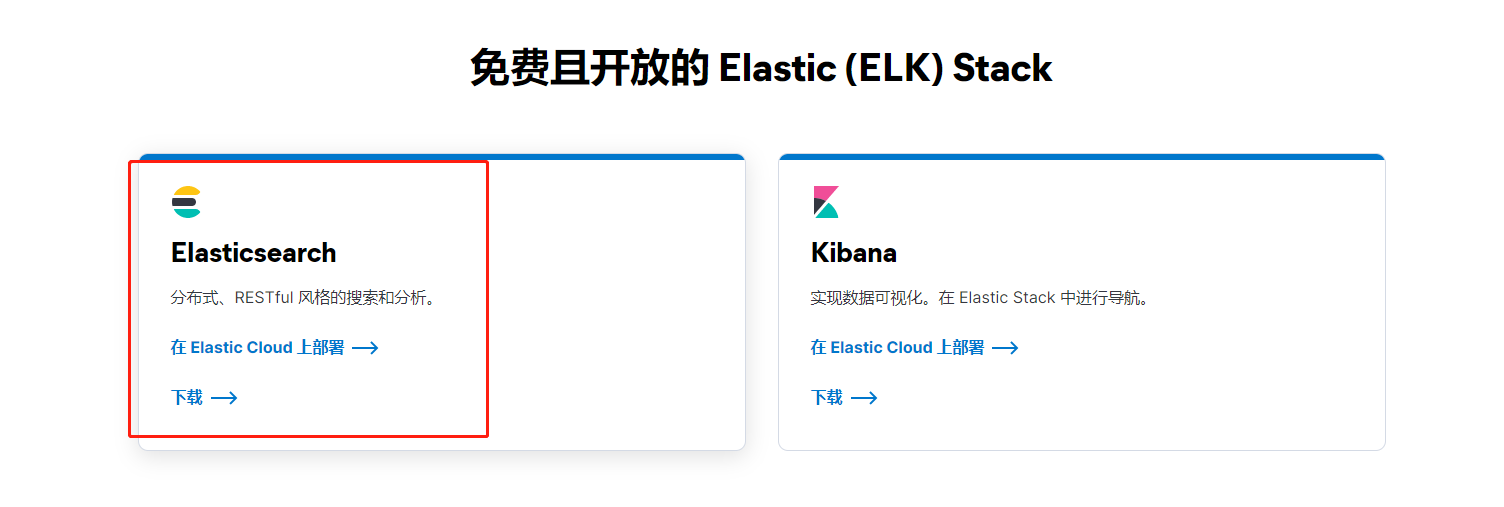
官网下载
一、Linux 安装
1、下载安装包
⑴、选择需要的安装包
进入 官网 选择自己需要版本,我这里选择 Linux x86_64:

登录服务器查看系 Linux 内核版本:
a[root@VM-0-12-centos ~]# arch
x86_64
[root@VM-0-12-centos ~]# uname -a
Linux VM-0-12-centos 3.10.0-1160.71.1.el7.x86_64 #1 SMP Tue Jun 28 15:37:28 UTC 2022 x86_64 x86_64 x86_64 GNU/Linux
⑵、下载解压到安装目录
进入 /usr/local/ 目录,这个目录是我的安装目录,根据自己的习惯选择,下载安装包并解压:
[root@VM-0-12-centos ~]# cd /usr/local/
[root@VM-0-12-centos local]# wget https://artifacts.elastic.co/downloads/elasticsearch/elasticsearch-8.6.1-linux-x86_64.tar.gz
--2023-02-14 09:45:52--  https://artifacts.elastic.co/downloads/elasticsearch/elasticsearch-8.6.1-linux-x86_64.tar.gz
Resolving artifacts.elastic.co (artifacts.elastic.co)... 34.120.127.130, 2600:1901:0:1d7::
Connecting to artifacts.elastic.co (artifacts.elastic.co)|34.120.127.130|:443... connected.
HTTP request sent, awaiting response... 200 OK
Length: 581763080 (555M) [application/x-gzip]
Saving to: ‘elasticsearch-8.6.1-linux-x86_64.tar.gz’

100%[=====================================================================>] 581,763,080 12.2MB/s   in 46s

2023-02-14 09:46:38 (12.2 MB/s) - ‘elasticsearch-8.6.1-linux-x86_64.tar.gz’ saved [581763080/581763080]

[root@VM-0-12-centos local]# tar -zvxf elasticsearch-8.6.1-linux-x86_64.tar.gz
[root@VM-0-12-centos local]# rm -f elasticsearch-8.6.1-linux-x86_64.tar.gz
[root@VM-0-12-centos local]# ll -a
total 80
drwxr-xr-x. 20 root  root  4096 Feb 14 14:11 .
drwxr-xr-x. 13 root  root  4096 Aug  8  2018 ..
drwxr-xr-x.  2 root  root  4096 Dec 21 16:33 bin
drwxr-xr-x   9 root  root  4096 Jan 25 05:47 elasticsearch-8.6.1
drwxr-xr-x.  2 root  root  4096 Apr 11  2018 etc
drwxr-xr-x   6 root  root  4096 Dec 21 16:21 freetype
drwxr-xr-x.  2 root  root  4096 Apr 11  2018 games
drwxr-xr-x.  3 root  root  4096 Dec 21 16:23 include
drwxr-xr-x.  4 root  root  4096 Dec 21 16:23 lib
drwxr-xr-x.  2 root  root  4096 Apr 11  2018 lib64
drwxr-xr-x.  2 root  root  4096 Apr 11  2018 libexec
drwxr-xr-x   3 root  root  4096 Dec 21 16:20 man
drwxr-xr-x  10 mysql mysql 4096 Dec 21 16:22 mysql
drwxr-xr-x  11 root  root  4096 Dec 22 10:40 mysql-master-slave
drwxr-xr-x  11 root  root  4096 Dec 21 16:37 nginx
drwxr-xr-x  10 root  root  4096 Dec 21 16:33 php
drwxr-xr-x  17 root  root  4096 Dec 21 16:07 qcloud
drwxr-xr-x.  2 root  root  4096 Apr 11  2018 sbin
drwxr-xr-x.  8 root  root  4096 Dec 21 16:20 share
drwxr-xr-x.  2 root  root  4096 Apr 11  2018 src
[root@VM-0-12-centos local]#
2、查看解压后目录结构
[root@VM-0-12-centos local]# cd elasticsearch-8.6.1/
[root@VM-0-12-centos elasticsearch-8.6.1]# ll -X
total 2224
drwxr-xr-x  2 root root    4096 Jan 25 05:47 bin
drwxr-xr-x  3 root root    4096 Feb 14 14:06 config
drwxr-xr-x  8 root root    4096 Jan 25 05:47 jdk
drwxr-xr-x  5 root root    4096 Jan 25 05:47 lib
drwxr-xr-x  2 root root    4096 Jan 25 05:43 logs
drwxr-xr-x 69 root root    4096 Jan 25 05:47 modules
drwxr-xr-x  2 root root    4096 Jan 25 05:43 plugins
-rw-r--r--  1 root root    8106 Jan 25 05:34 README.asciidoc
-rw-r--r--  1 root root    3860 Jan 25 05:34 LICENSE.txt
-rw-r--r--  1 root root 2235851 Jan 25 05:43 NOTICE.txt
以下为 Elasticsearch 目录及主要配置文件介绍:
| 目录|文件 | 描述 |
|---|---|
bin/ | 二进制脚本包含启动节点的elasticsearch |
| |-- elasticsearch | elasticsearch的启动命令,Linux下加”-d”参数以服务的形式后台运行。 |
| |-- … | |
config/ | 配置文件目录(elasticsearch、log、jvm、role、user) |
| |-- elasticsearch.yml | 配置文件中可进行端口、是否允许外部访问、端口等的设置。 |
| |-- jvm.options | jvm 配置文件 |
| |-- log4j2.properties | 日志配置文件 |
| |-- … | |
data/ | 在节点上申请的每个index/shard的数据文件的位置,可容纳多个位置 |
jdk/ | jdk包(7.0版本以后自带jdk环境,如果已经配置了jdk,会优先使用外部 jdk 环境) |
lib/ | 引用的相关类库的存放目录,elasticsearch.jar本身也放于该目录 |
logs/ | 日志文件位置 |
modules/ | 功能模块的存放目录,如aggs、reindex、geoip、xpack、eval。。。 |
plugins/ | 插件文件位置。每个插件将包含在一个子目录中 |
| README.asciidoc | readme文档 |
| LICENSE.txt | 证书 |
| NOTICE.txt | 通知 |
注意事项:
- es依赖jdk环境,现在7.0以后的es压缩包中自带有jdk。
- 若已提前安装了jdk环境,则es启动时,会优先找linux中的jdk。若此时jdk的版本不一致,就会造成jdk不能正常运行。
- 所以,若Linux服务本来没有配置jdk,则会直接使用es目录下默认的jdk,反而不会报错。
3、启动 Elasticsearch
⑴、正常启动流程
- 1、创建用户
elastic,专门用于管理 Elasticsearch。[root@VM-0-12-centos elasticsearch-8.6.1]# useradd elastic [root@VM-0-12-centos elasticsearch-8.6.1]# chown -R elastic:elastic /usr/local/elasticsearch-8.6.1/ - 2、修改配置文件
elasticsearch.yml,这里为了验证是否安装成功,关闭安全认证:xpack.security.enabled和xpack.security.http.ssl: enabled都改为false,否则无法直接通过浏览器访问 9200端口,后正式应用的时候在启用。# Enable security features xpack.security.enabled: false # Enable encryption for HTTP API client connections, such as Kibana, Logstash, and Agents xpack.security.http.ssl: enabled: false keystore.path: certs/http.p12 - 3、切换到
elastic用户,后台启动 Elasticsearch,浏览器访问 9200端口:http://你的IP:9200/;Linux 记得在安全组配置9200端口允许访问。[root@VM-0-12-centos elasticsearch-8.6.1]# su elastic [elastic@VM-0-12-centos elasticsearch-8.6.1]$ ./bin/elasticsearch -d
⑵、启动过程遇到的问题
①、启动报错
运行 bin/ 目录下的 elasticsearch 脚本,启动 elasticsearch:
[root@VM-0-12-centos elasticsearch-8.6.1]# ./bin/elasticsearch
[2023-02-14T17:44:22,531][ERROR][o.e.b.Elasticsearch ] [VM-0-12-centos] fatal exception while booting Elasticsearchjava.lang.RuntimeException: can not run elasticsearch as root
at org.elasticsearch.server@8.6.1/org.elasticsearch.bootstrap.Elasticsearch.initializeNatives(Elasticsearch.java:260)
at org.elasticsearch.server@8.6.1/org.elasticsearch.bootstrap.Elasticsearch.initPhase2(Elasticsearch.java:166)
at org.elasticsearch.server@8.6.1/org.elasticsearch.bootstrap.Elasticsearch.main(Elasticsearch.java:66)
See logs for more details.
ERROR: Elasticsearch did not exit normally - check the logs at /usr/local/elasticsearch-8.6.1/logs/elasticsearch.log
ERROR: Elasticsearch exited unexpectedly
[root@VM-0-12-centos elasticsearch-8.6.1]#
报错了,提示 can not run elasticsearch as root,不能使用root用户启动会报错。
②、创建运行 Elasticsearch 的用户,启动成功,但无法访问
[root@VM-0-12-centos elasticsearch-8.6.1]# useradd elastic
[root@VM-0-12-centos elasticsearch-8.6.1]# chown -R elastic:elastic /usr/local/elasticsearch-8.6.1/
[root@VM-0-12-centos elasticsearch-8.6.1]# su elastic
[elastic@VM-0-12-centos elasticsearch-8.6.1]$ ./bin/elasticsearch
启动成功,这时候我们试着访问你的 9200端口 :http://你的IP:9200/ ,失败。

并且启动台那边也报错了 http client did not trust this server's certificate,如下:
[2023-02-14T18:04:06,931][WARN ][o.e.x.s.t.n.SecurityNetty4HttpServerTransport] [VM-0-12-centos] received plaintext http traffic on an https channel, closing connection Netty4HttpChannel{localAddress=/172.17.0.12:9200, remoteAddress=/218.81.82.139:2348}
[2023-02-14T18:06:25,213][WARN ][o.e.x.s.t.n.SecurityNetty4HttpServerTransport] [VM-0-12-centos] http client did not trust this server's certificate, closing connection Netty4HttpChannel{localAddress=/172.17.0.12:9200, remoteAddress=/218.81.82.139:2349}
[2023-02-14T18:06:25,214][WARN ][o.e.x.s.t.n.SecurityNetty4HttpServerTransport] [VM-0-12-centos] http client did not trust this server's certificate, closing connection Netty4HttpChannel{localAddress=/172.17.0.12:9200, remoteAddress=/218.81.82.139:2350}
原因是因为 Elasticsearch 默认开启了安全认证,虽然启动台启动成功,但访问 9200 端口失败。
解决办法:找到config/目录下面的elasticsearch.yml配置文件,把安全认证开关从原先的true都改成false,实现免密登录访问即可,修改这两处都为false后,重新启动:
③、停止Elasticsearch,修改配置文件重新启动
新开一个SSH连接,停止Elasticsearch:
[root@VM-0-12-centos ~]# ps -ef | grep elastic
root     26132 24103  0 18:23 pts/4    00:00:00 su elastic
elastic  26133 26132  0 18:23 pts/4    00:00:00 bash
elastic  26178 26133  2 18:23 pts/4    00:00:02 /usr/local/elasticsearch-8.6.1/jdk/bin/java -Xms4m -Xmx64m -XX:+UseSerialGC -Dcli.name=server -Dcli.script=./bin/elasticsearch -Dcli.libs=lib/tools/server-cli -Des.path.home=/usr/local/elasticsearch-8.6.1 -Des.path.conf=/usr/local/elasticsearch-8.6.1/config -Des.distribution.type=tar -cp /usr/local/elasticsearch-8.6.1/lib/ *:/usr/local/elasticsearch-8.6.1/lib/cli-launcher/ * org.elasticsearch.launcher.CliToolLauncher
elastic  26246 26178 31 18:23 pts/4    00:00:31 /usr/local/elasticsearch-8.6.1/jdk/bin/java -Des.networkaddress.cache.ttl=60 -Des.networkaddress.cache.negative.ttl=10 -Djava.security.manager=allow -XX:+AlwaysPreTouch -Xss1m -Djava.awt.headless=true -Dfile.encoding=UTF-8 -Djna.nosys=true -XX:-OmitStackTraceInFastThrow -Dio.netty.noUnsafe=true -Dio.netty.noKeySetOptimization=true -Dio.netty.recycler.maxCapacityPerThread=0 -Dlog4j.shutdownHookEnabled=false -Dlog4j2.disable.jmx=true -Dlog4j2.formatMsgNoLookups=true -Djava.locale.providers=SPI,COMPAT --add-opens=java.base/java.io=ALL-UNNAMED -XX:+UseG1GC -Djava.io.tmpdir=/tmp/elasticsearch-2471405775610397709 -XX:+HeapDumpOnOutOfMemoryError -XX:+ExitOnOutOfMemoryError -XX:HeapDumpPath=data -XX:ErrorFile=logs/hs_err_pid%p.log -Xlog:gc*,gc+age=trace,safepoint:file=logs/gc.log:utctime,pid,tags:filecount=32,filesize=64m -Xms999m -Xmx999m -XX:MaxDirectMemorySize=524288000 -XX:G1HeapRegionSize=4m -XX:InitiatingHeapOccupancyPercent=30 -XX:G1ReservePercent=15 -Des.distribution.type=tar --module-path /usr/local/elasticsearch-8.6.1/lib --add-modules=jdk.net -m org.elasticsearch.server/org.elasticsearch.bootstrap.Elasticsearch
elastic  26275 26246  0 18:23 pts/4    00:00:00 /usr/local/elasticsearch-8.6.1/modules/x-pack-ml/platform/linux-x86_64/bin/controller
root     26681 26605  0 18:24 pts/5    00:00:00 grep --color=auto elastic
[root@VM-0-12-centos ~]# kill -9 26133
[root@VM-0-12-centos ~]# kill -9 26178
修改配置文件 elasticsearch.yml,把这两处改为 false:
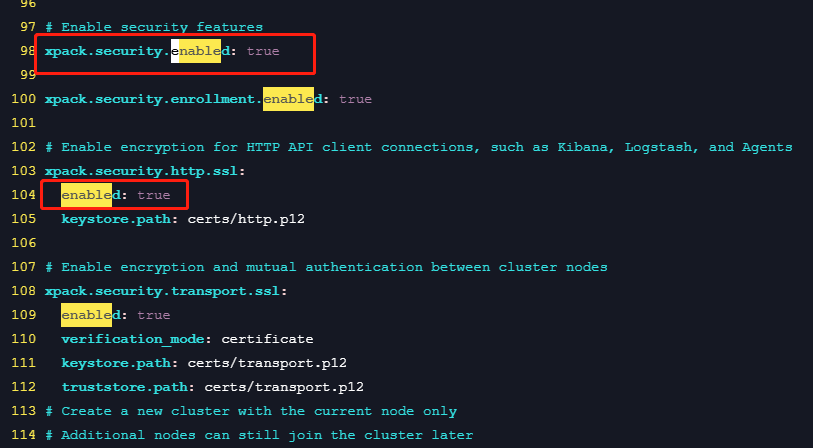
# Enable security features
xpack.security.enabled: false

xpack.security.enrollment.enabled: true

# Enable encryption for HTTP API client connections, such as Kibana, Logstash, and Agents
xpack.security.http.ssl:
  enabled: false
  keystore.path: certs/http.p12
重新启动 Elasticsearch,访问 9200 端口成功。

或者curl 访问:
[root@VM-0-12-centos ~]# curl localhost:9200/
{
  "name" : "VM-0-12-centos",
  "cluster_name" : "elasticsearch",
  "cluster_uuid" : "3e6bNn6dS_G7bEfl7YhXcA",
  "version" : {
    "number" : "8.6.1",
    "build_flavor" : "default",
    "build_type" : "tar",
    "build_hash" : "180c9830da956993e59e2cd70eb32b5e383ea42c",
    "build_date" : "2023-01-24T21:35:11.506992272Z",
    "build_snapshot" : false,
    "lucene_version" : "9.4.2",
    "minimum_wire_compatibility_version" : "7.17.0",
    "minimum_index_compatibility_version" : "7.0.0"
  },
  "tagline" : "You Know, for Search"
}
[root@VM-0-12-centos ~]#
④、JDK 问题
这里安装了一下 JDK,但是 Elasticsearch8.6 仍会自动选择自己内置的JDK。如果其他版本优先选择系统环境变量中的JDK可以参考这篇博客 Elasticsearch JDK选择。
[elastic@VM-0-12-centos elasticsearch-8.6.1]$ ps -ef | grep elastic
root     20695 17356  0 13:40 pts/3    00:00:00 su elastic
elastic  20697 20695  0 13:40 pts/3    00:00:00 bash
elastic  21252     1 93 13:41 pts/3    00:00:30 /usr/local/elasticsearch-8.6.1/jdk/bin/java -Des.networkaddress.cache.ttl=60 -Des.networkaddress.cache.negative.ttl=10 -Djava.security.manager=allow -XX:+AlwaysPreTouch -Xss1m -Djava.awt.headless=true -Dfile.encoding=UTF-8 -Djna.nosys=true -XX:-OmitStackTraceInFastThrow -Dio.netty.noUnsafe=true -Dio.netty.noKeySetOptimization=true -Dio.netty.recycler.maxCapacityPerThread=0 -Dlog4j.shutdownHookEnabled=false -Dlog4j2.disable.jmx=true -Dlog4j2.formatMsgNoLookups=true -Djava.locale.providers=SPI,COMPAT --add-opens=java.base/java.io=ALL-UNNAMED -XX:+UseG1GC -Djava.io.tmpdir=/tmp/elasticsearch-16881426132015000451 -XX:+HeapDumpOnOutOfMemoryError -XX:+ExitOnOutOfMemoryError -XX:HeapDumpPath=data -XX:ErrorFile=logs/hs_err_pid%p.log -Xlog:gc*,gc+age=trace,safepoint:file=logs/gc.log:utctime,pid,tags:filecount=32,filesize=64m -Xms999m -Xmx999m -XX:MaxDirectMemorySize=524288000 -XX:G1HeapRegionSize=4m -XX:InitiatingHeapOccupancyPercent=30 -XX:G1ReservePercent=15 -Des.distribution.type=tar --module-path /usr/local/elasticsearch-8.6.1/lib --add-modules=jdk.net -m org.elasticsearch.server/org.elasticsearch.bootstrap.Elasticsearch
elastic  21280 21252  0 13:41 pts/3    00:00:00 /usr/local/elasticsearch-8.6.1/modules/x-pack-ml/platform/linux-x86_64/bin/controller
elastic  21434 20697  0 13:42 pts/3    00:00:00 ps -ef
elastic  21435 20697  0 13:42 pts/3    00:00:00 grep --color=auto elastic
[elastic@VM-0-12-centos elasticsearch-8.6.1]$ java -version
java version "17.0.6" 2023-01-17 LTS
Java(TM) SE Runtime Environment (build 17.0.6+9-LTS-190)
Java HotSpot(TM) 64-Bit Server VM (build 17.0.6+9-LTS-190, mixed mode, sharing)
[elastic@VM-0-12-centos elasticsearch-8.6.1]$
二、Windows 安装
1、下载安装包

下载后解压:

2、启动 Elasticsearch
⑴、正常启动流程
由于 Elasticsearch 默认开启安全认证所以无法直接通过端口访问成功,先修改 config 目录下的配置文件elasticsearch.yml,把这两处改为 false。:

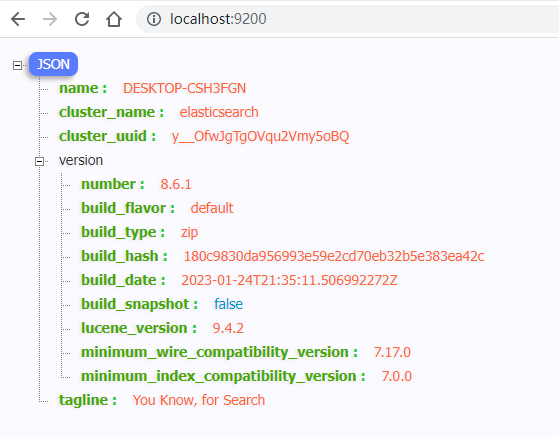
进入 bin 目录下,双击 elasticsearch.bat 文件启动 ES,访问 http://localhost:9200/:
⑵、启动过程遇到的问题
①、同Linux 默认开启安全认证,启动后无法直接访问
和Linux 一样启动后无法访问,进入logs/ 查看 elasticsearch.log 日志文件信息看到提示 received plaintext http traffic on an https channel,所以找到原因了:同上,默认开启了安全认证,不允许直接访问。

解决办法:修改配置文件 elasticsearch.yml,把这两处改为 false。

再次启动,访问9200端口成功:

