create React App 脚手架工具创建项目
1.下载插件

2.打开终端
npx create-react-app my-app //my-app是自己创建的项目名
创建完成后cd my-app,到该项目的盘符执行npm start,就可以运行起来了
组件通讯
父传子
在父亲组件中引用子组件
在render()中使用子组件
在子组件中直接使用This.props.xxx
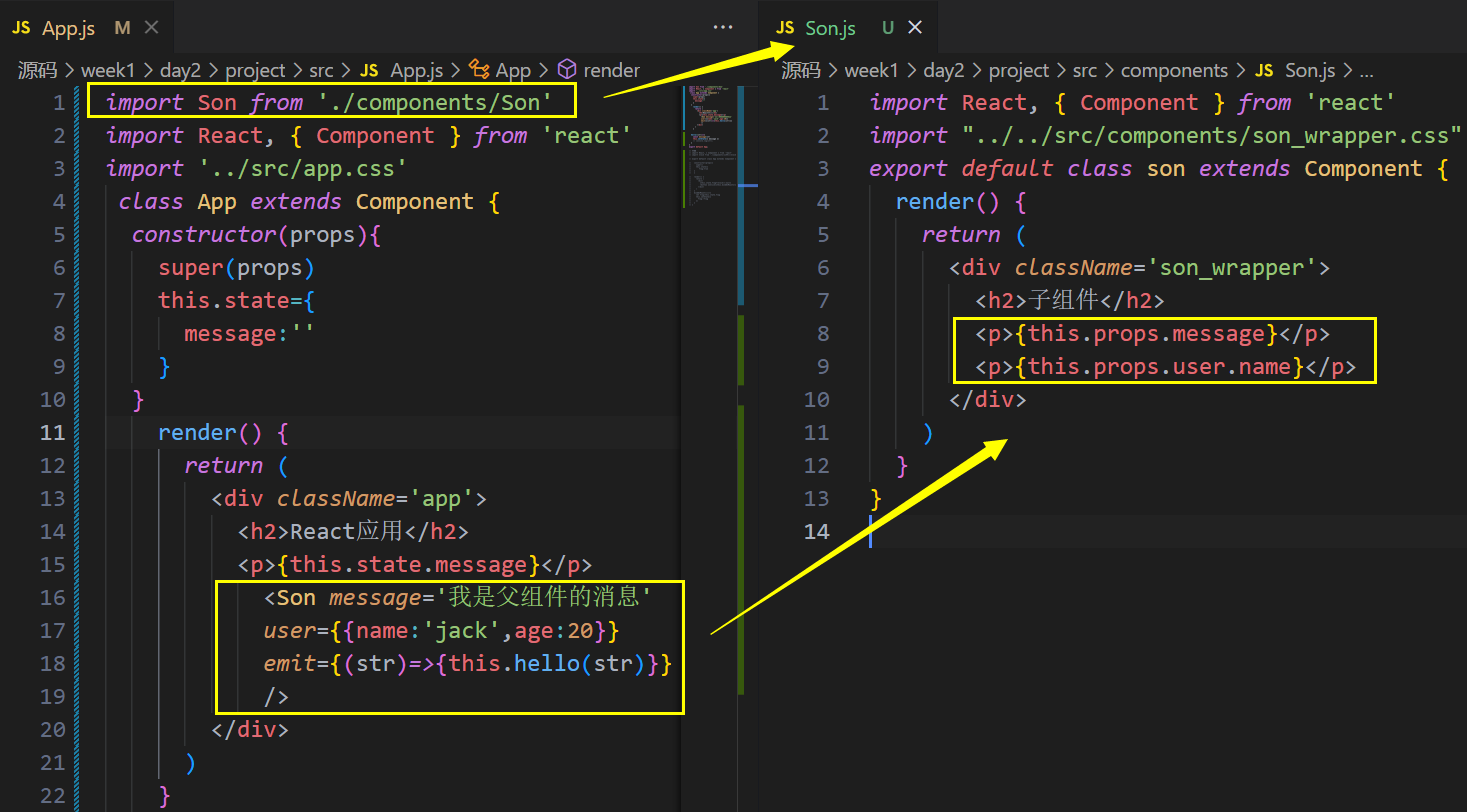
props
1. 值是只读的,不能修改
2. 任意类型数据 数值、字符串、数组、对象、函数、JSX(vue插槽slot) ...
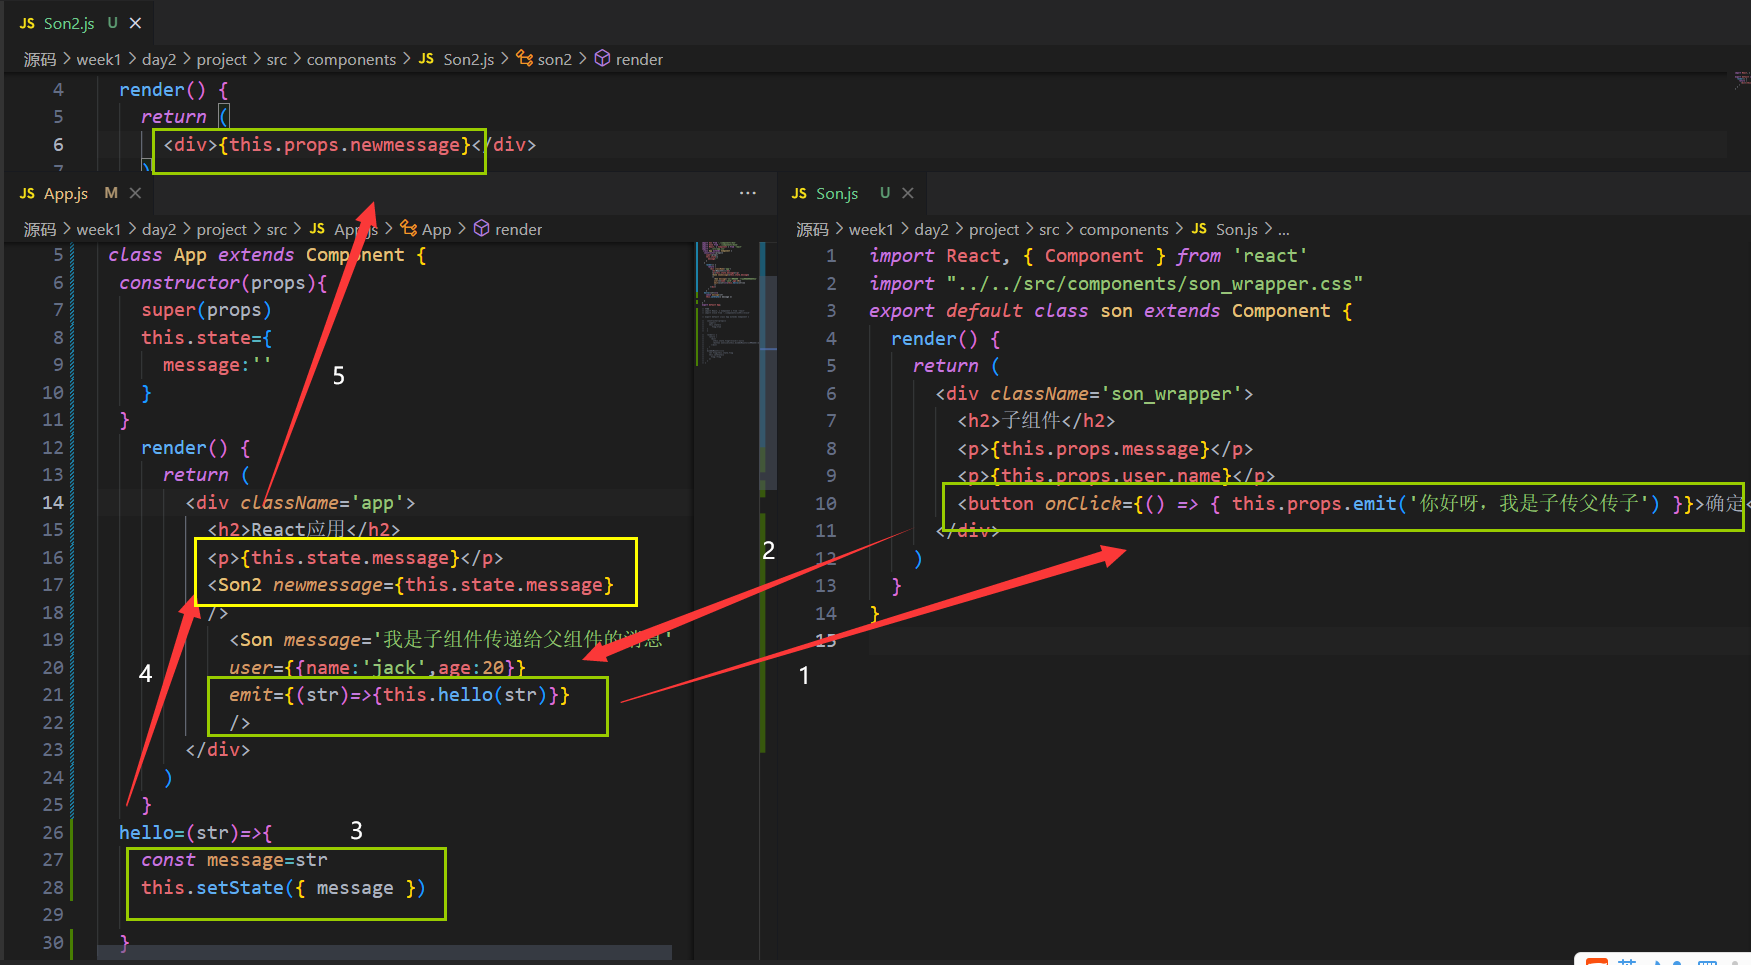
子传父
在父亲组件中引用子组件
在render()中使用子组件
在子组件中直接使用This.props.自定义属性,并将内容传到父组件中,用Str来接收,执行hello方法。

兄弟组件:
兄弟通信的精髓在于,子组件1传递给父亲组件,父亲组件再把值传递给子组件2
跨组件通信
实现方式:
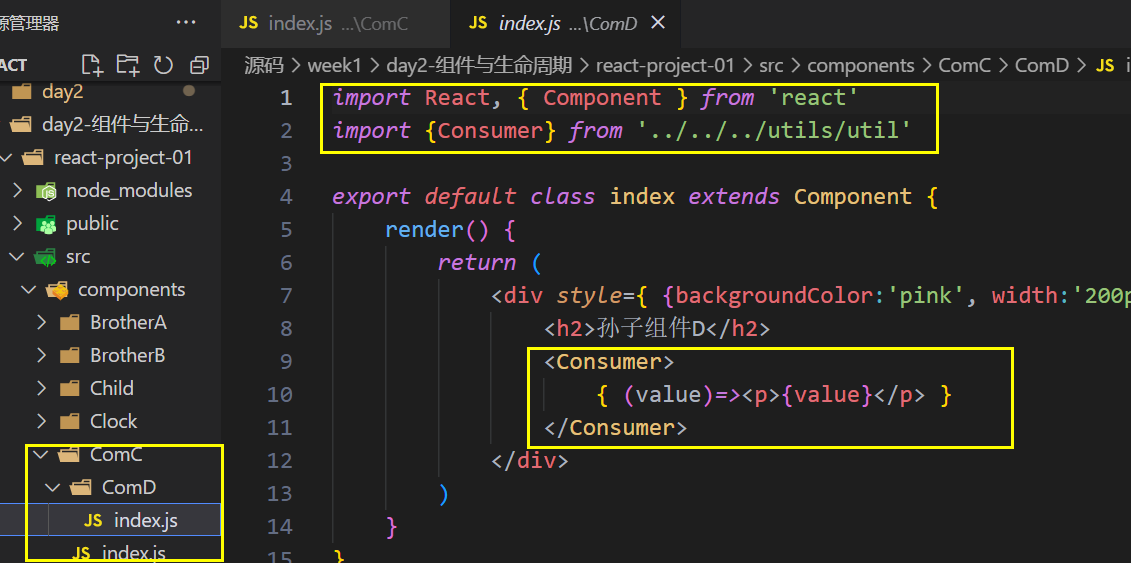
1. 创建Context对象,导出Provider和Consumer对象(我写在utils里面,进行的引入)
2. 使用Provider包裹根组件提供数据,在APP中
3. 需要用到数据的组件使用Consumer包裹获取数据

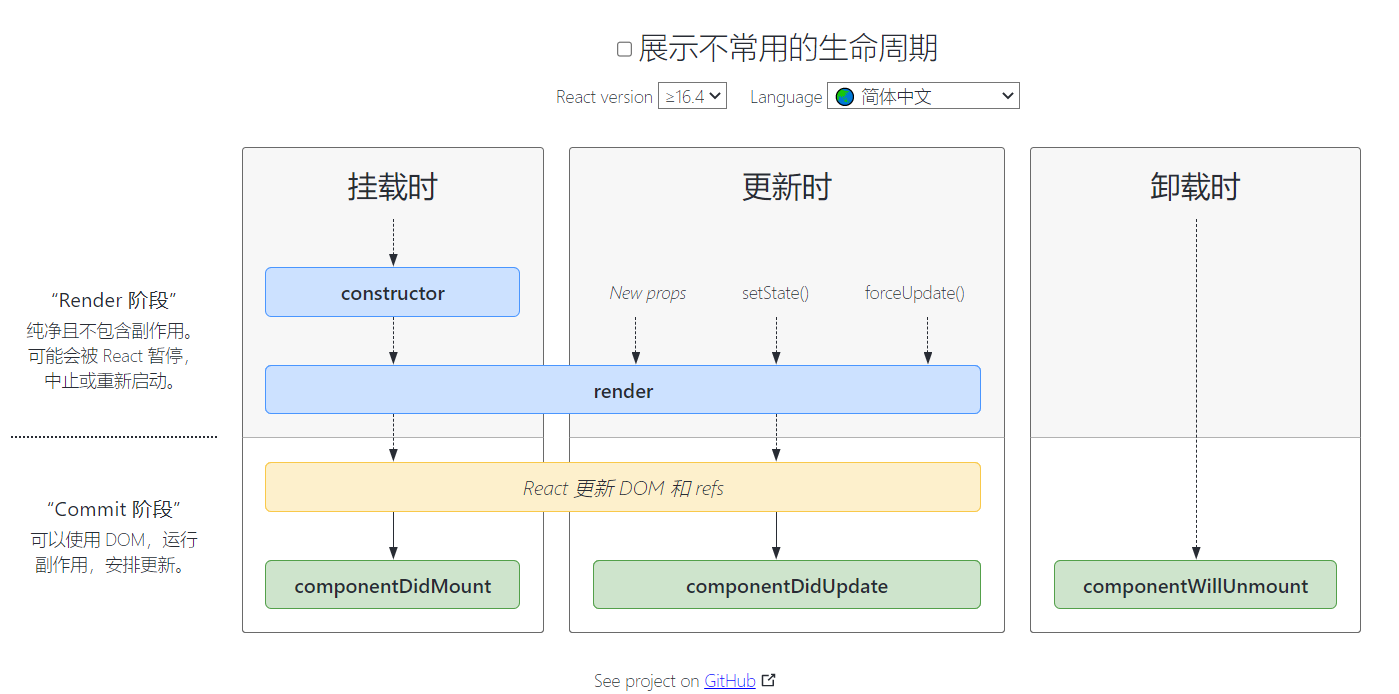
React生命周期:
https://projects.wojtekmaj.pl/react-lifecycle-methods-diagram/
案例:
import React, { Component } from 'react'

export default class Clock extends Component {
    constructor(props){
        super()
        this.state={
            date: new Date(),
            message:'生命周期'
        }
    }
    render() {
        return (
         <React.Fragment>
            <h1>{this.state.message}</h1>
            <h2>时钟组件,动态更新时间</h2>
            <h3>当前时间 {this.state.date.toLocaleTimeString()}</h3>
         </React.Fragment>
        )
      }
    componentDidMount(){
        this.timer()
        console.log('componentDidMount 组件挂载时>>>');
    }

    componentDidUpdate(){
        console.log('componentDidUpdate 组件更新时>>>');
    }

    componentWillUnmount(){
        console.log('componentWillUnmount 组件卸载时');
        clearInterval(this.timerID)
    }

    timer(){
        this.timerID=setInterval(()=>{
            this.setState({
                date:new Date()
            })
        },1000)
    }

}
APP.js
// import React, { Component } from 'react'
// import Clock from './components/定时器/Clock'

// export default class App extends Component {

//   constructor(props){
//     super()
//     this.state={
//        flag:true
//   }
//   }

//   render() {
//     return (
//       <div>
//         {this.state.flag?<Clock/>:null}
//         <button onClick={this.bindUnMount}>关闭组件</button>
//       </div>
//     )
//   }
//   bindUnMount=()=>{
//     let flag=this.state.flag
//     this.setState({
//       flag:!flag
//     })
//   }
// }
