前言
为学习IOS知识并加深理解,故通过IOS漏洞靶场来直接体现IOS环境中的常见漏洞。
环境准备
iPhone X ios 13.4.1 已越狱
MacOS Big Sur 11.0 Bate 虚拟机
DVIA-v2 IOS 漏洞靶场app
grapefruit、objection
#pip3 install frida、pip3 install frida-tools、sudo npm install -g igf
注:工具和客户端的frida版本都是16.0.1
part1-Local Data Storage
任务:寻找存储在本地的敏感信息
Plist
PLIST 文件是一个特殊的文本文件,其中包含属性列表格式的数据。macOS、iOS 和 iPadOS 应用程序使用该文件以具有XML结构的键值格式存储设置和其他数据。
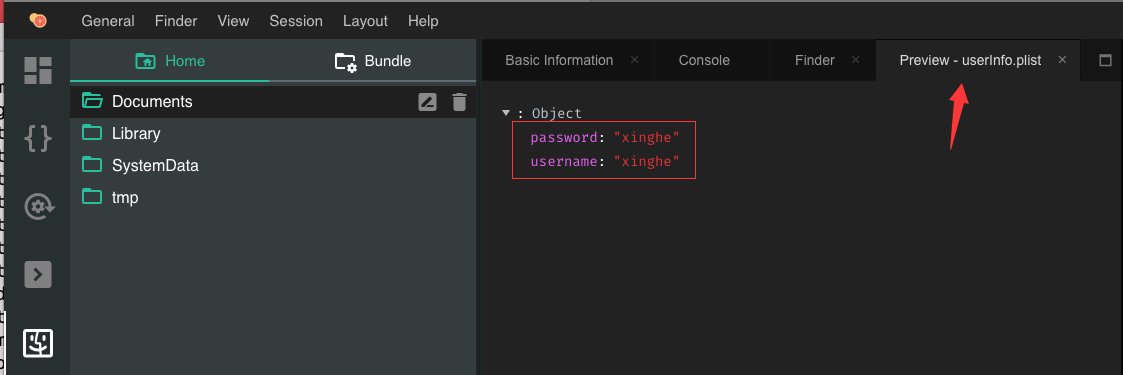
输入账号密码,数据会被保存到plist文件中

objection -g DVIA-v2 explore
env
使用objection定位app使用的目录,env 列出app当前环境(使用的目录),查看Documents目录下是否有plist文件

默认情况下, 每个沙盒含有1个应用程序包和三个文件夹: Documents, Library和tmp. 因为沙盒机制, 应用只能在这几个目录读写文件.
MyApp.app
应用程序包, 这里面存放的是应用程序文件, 包括资源文件和可执行文件.
Documents
应用程序在运行时生成的一些需要长久保存的数据(比如: 个人设置等信息), 通过iTunes, iCloud备份时,会备份这个目录下的数据, 此目录下保存相对重要的数据.
Library/Caches
从网络上下载的文件或数据(如: 音乐缓存, 图片缓存等) , 此目录下的数据某些情况下会自动删除, 需要程序员手动清除该目录下的数据. ITunes, iCloud备份时不会备份此目录下的数据.一般用于存储体积不大, 不需要备份的非重要资源数据.
tmp
保存应用运行时产生的一些临时数据,应用程序退出,系统磁盘空间不够,手机重启时,都会自动清除该目录的数据。无需程序员手动清除该目录中的数据.iTunes、iCloud备份时,不会备份次目录。
发现明文存储的账号密码

使用grapefruit查看
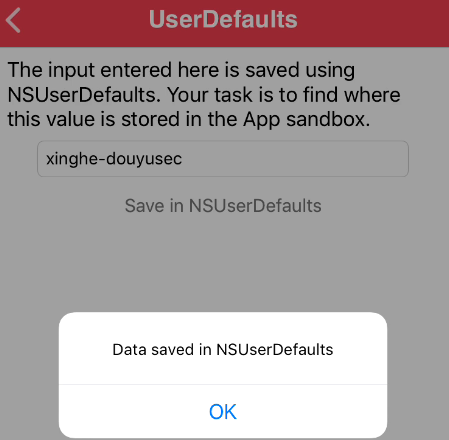
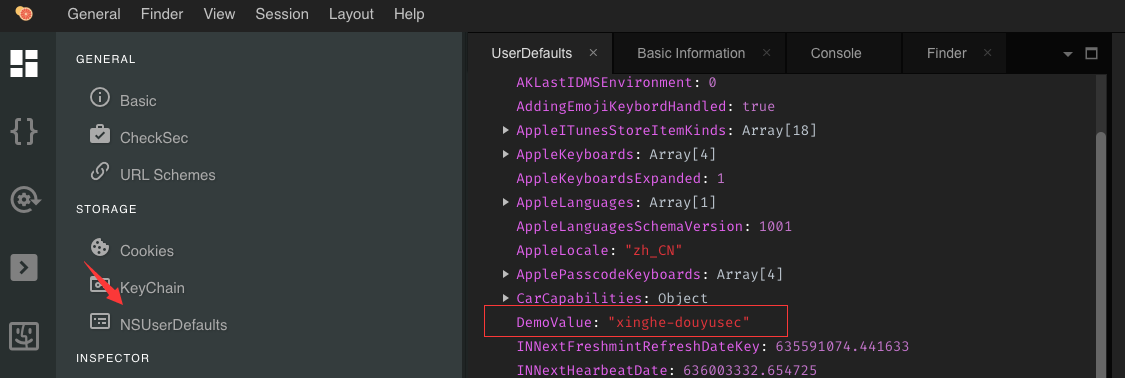
NSUserDefaults
NSUserDefaults 是一个单例,它可以用于数据的永久存储,适合存储轻量级的本地数据。
NSUserDefaults 存储的位置为应用的 /Library/Preferences/目录下
cd /var/mobile/Containers/Data/Application/733E2124-8A28-4F84-A7/Preferences
ios plist cat com.highaltitudehacks.DVIAswiftv2.plist

使用grapefruit查看
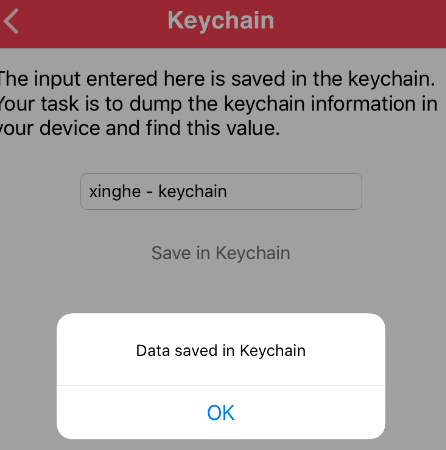
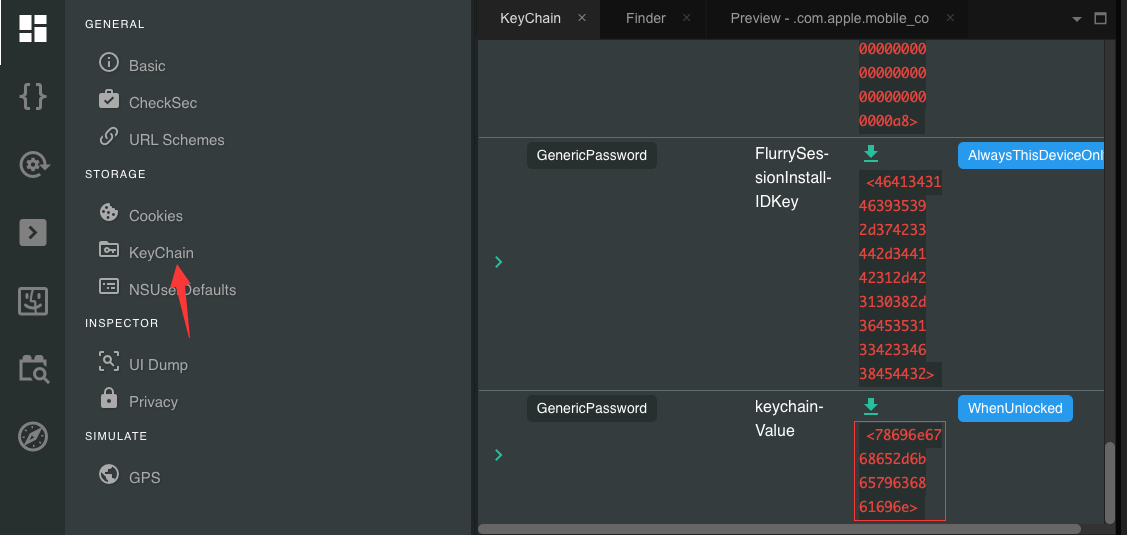
Keychain
Keychain Services 是 macOS 和 iOS 都提供一种安全的存储敏感信息的工具,比如,网络密码:用户访问服务器或者网站,通用密码:用来保存应用程序或者数据库密码.与此同时,用于认证的证书密钥和身份信息,也可以存储在Keychain中,Keychain Services 的安全机制保证了存储这些敏感信息不会被窃取。简单说来,Keychain 就是一个安全容器。
ios keychain dump

使用grapefruit查看,十六进制解密

Core Data
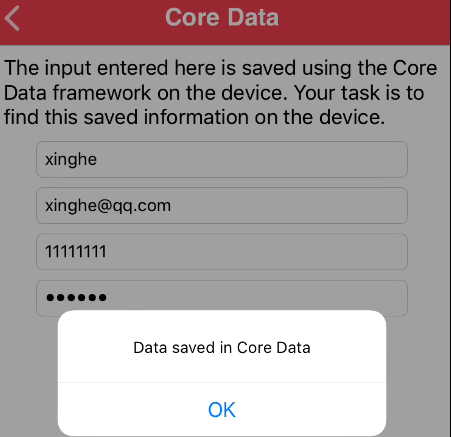
Core Data是苹果官方提供的管理数据层对象的框架,它提供了对象—关系映射(ORM)的功能,即能够将Objective-C对象转化成数据,保存在SQLite数据库文件中,也能够将保存在数据库中的数据还原成Objective-C对象。在此数据操作期间,不需要编写任何SQL语句。Core Data针对对象生命周期,以及持久化的对象图管理(object graph management)中的一些常见问题提供了解决方案。CoreData的主要任务是负责数据更改的管理、序列化到磁盘、最小化内存占用以及查询数据。CoreData通常能有效减少50%~70%模型层的代码量。
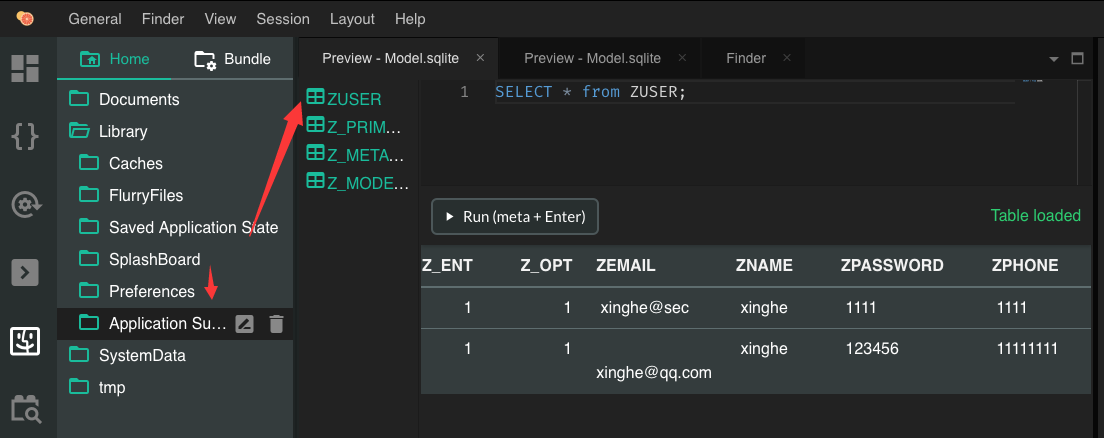
cd /var/mobile/Containers/Data/Application/9C3F7322-BB5B-4727-922C-51F238A4893F/Library/Application\ Support/
cp Model.sqlite ../
scp -P 1234 root@127.0.0.1:/var/mobile/Containers/Data/Application/9C3F7322-BB5B-4727-922C-51F238A4893F/Library/Model.sqlite .
sqlite3 Model.sqlite
.tables
select * from ZUSER;

这里有个坑,到应用下复制sql文件到Mac上查看内容的时候是空的,而使用grapefruit工具查看的时候是有数据的

Webkit Caching
使用UrWebView加载网页的应用程序通常使用缓存来加快响应时间。在某些情况下,它们可以缓存包含机密信息的响应。您的任务是找到存储请求和响应的位置–应用程序沙箱。提示:在数据库中使用cf_url缓存数据端口的表。
在app目录中只发现了数据库文件,里面没有发现一些有用的东西。可能是开放式命题,在app内打开的链接会生成缓存存储在数据库中,如果缓存中包含敏感信息,则会造成信息泄露。

Realm
需要特定工具打开,先留着
Couchbase Lite
CouchBase是一款开源的,分布式的nosql数据库,主要用于分布式缓存和数据存储领域。能够通过manage cache提供快速的亚毫米级别的k-v存储操作,并且提供快速的查询和其功能强大的能够指定SQL-like查询的查询引擎。
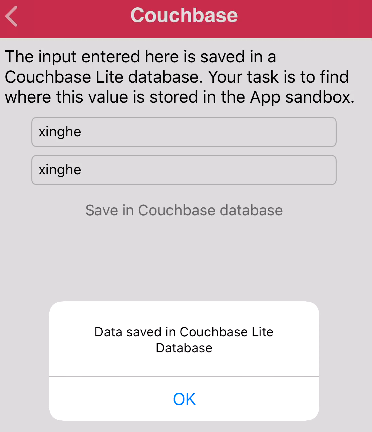
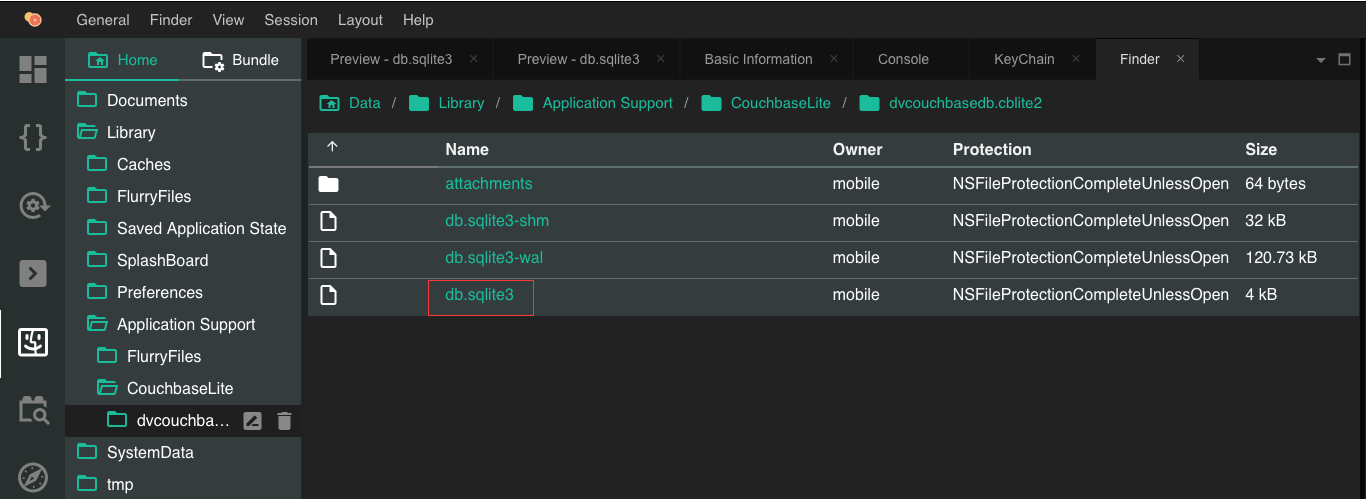
但是这边不知道为什么写不进去,没有内容
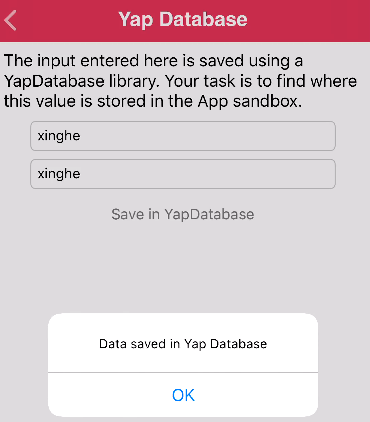
YapDatabase
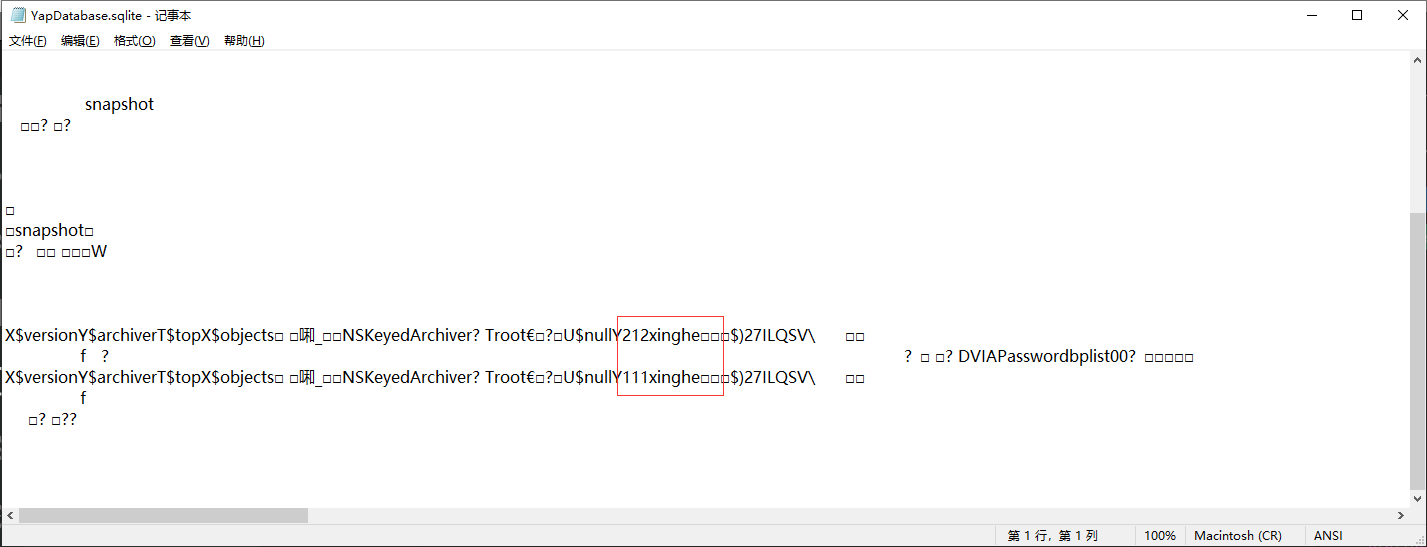
YapDatabase是以 键值对 的形式储存数据的,和NSUserDefault很像。但是Yap是数据库。
Yap里有 Collection,key。key对应value(可以储存任意对象)。而Collection可以理解为命名空间。

part2-Jaibreak Detection
任务:绕过越狱检测
Test 1
frida-trace -U -i "*jail*" DVIA-v2
使用frida查看相关的越狱函数,点击Test 1事件,触发 _T07DVIA_v232JailbreakDetectionViewControllerC20jailbreakTest1TappedyypF() 方法,IDA反汇编查看相应代码,调用了几个函数,但是没什么内容,猜测应该是某个函数的返回值决定是否越狱


重新查看汇编代码,LDR指令中一般会在寄存器中存贮一些数据,可以通过配合BL指令来查看跳转函数
__text:0000000100192C10 SUB             SP, SP, #0x60
__text:0000000100192C14 STP             X20, X19, [SP,#0x50+var_10]
__text:0000000100192C18 STP             X29, X30, [SP,#0x50+var_s0]
__text:0000000100192C1C ADD             X29, SP, #0x50
__text:0000000100192C20 STUR            X0, [X29,#var_18]
__text:0000000100192C24 STUR            X20, [X29,#var_20]
__text:0000000100192C28 STR             X20, [SP,#0x50+var_28]
__text:0000000100192C2C STR             X0, [SP,#0x50+var_30]
__text:0000000100192C30 BL              __T07DVIA_v213DVIAUtilitiesCMa
__text:0000000100192C34 ADRP            X20, #_swift_isaMask_ptr@PAGE
__text:0000000100192C38 LDR             X20, [X20,#_swift_isaMask_ptr@PAGEOFF]
__text:0000000100192C3C LDR             X30, [X0,#0x58]
__text:0000000100192C40 LDR             X8, [SP,#0x50+var_28]
__text:0000000100192C44 LDR             X9, [X8]
__text:0000000100192C48 LDR             X20, [X20]
__text:0000000100192C4C AND             X9, X9, X20
__text:0000000100192C50 LDR             X9, [X9,#0x80]
__text:0000000100192C54 MOV             X20, X8
__text:0000000100192C58 STR             X0, [SP,#0x50+var_38]
__text:0000000100192C5C STR             X30, [SP,#0x50+var_40]
__text:0000000100192C60 BLR             X9
__text:0000000100192C64 LDR             X8, [SP,#0x50+var_28]    #将[SP,#0x50+var_28]的值保存在寄存器x8中,值为0x1,对应true
__text:0000000100192C68 STR             W0, [SP,#0x50+var_44]
__text:0000000100192C6C MOV             X0, X8
__text:0000000100192C70 BL              _objc_retain
__text:0000000100192C74 LDR             X8, [SP,#0x50+var_28]
__text:0000000100192C78 LDR             X9, [SP,#0x50+var_40]
__text:0000000100192C7C LDR             W10, [SP,#0x50+var_44]
__text:0000000100192C80 AND             W11, W10, #1
__text:0000000100192C84 STR             X0, [SP,#0x50+var_50]
__text:0000000100192C88 MOV             X0, X11
__text:0000000100192C8C MOV             X1, X8
__text:0000000100192C90 LDR             X20, [SP,#0x50+var_38]   #修改这个值也能绕过
__text:0000000100192C94 BLR             X9
__text:0000000100192C98 LDR             X0, [SP,#0x50+var_30]
__text:0000000100192C9C BL              ___swift_destroy_boxed_opaque_existential_0
__text:0000000100192CA0 LDP             X29, X30, [SP,#0x50+var_s0]
__text:0000000100192CA4 LDP             X20, X19, [SP,#0x50+var_10]
__text:0000000100192CA8 ADD             SP, SP, #0x6
hook 脚本
var targetModule = 'DVIA-v2';
var addr = ptr(0x192c64); #ptr(0x192c90);
var moduleBase = Module.getBaseAddress(targetModule);
var targetAddress = moduleBase.add(addr);
   Interceptor.attach(targetAddress, {
        onEnter: function(args) {
                    console.log('At the address ' + addr + ' the value is currently ' + this.context.x0);
        },
    });


var targetModule = 'DVIA-v2';
var addr = ptr(0x192c64); #ptr(0x192c90);
var moduleBase = Module.getBaseAddress(targetModule);
var targetAddress = moduleBase.add(addr);
   Interceptor.attach(targetAddress, {
        onEnter: function(args) {
                if(this.context.x0 == 0x01){     #替换返回值
                    this.context.x0=0x00
                    console.log("Bypass Test1");
            }
        },
    });
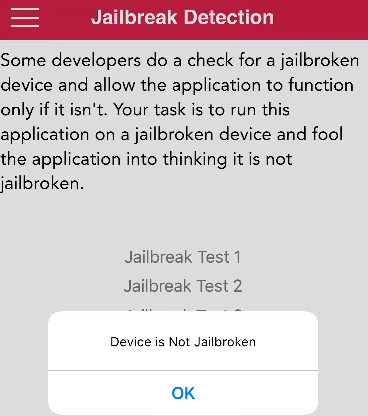
替换返回值之后成功绕过越狱检测
frida -U -l jailbreak.js DVIA-v2


Test 2
第二关用objection来测试比较方便
objection -g DVIA-v2 explore  #启动调试

ios hooking search classes jailbreak  #寻找越狱的相关类
ios hooking list class_methods JailbreakDetection   #列出类中的相关方法
ios hooking list class_methods DVIA_v2.JailbreakDetectionViewController   #列出类中的相关方法

方法名称前的加号(+)和减号(-)表示方法的返回值。加号(+)表示这是一个返回BOOL类型的类方法。减号(-)表示这是一个实例方法。
只有一个返回BOOL值的类,即+ isJailbreak方法,极大是越狱的判定方法,可以通过改变布尔方法的返回值来越狱。
ios hooking watch method "+[JailbreakDetection isJailbroken]" --dump-args --dump-return   #hook该方法
ios hooking set return_value "+[JailbreakDetection isJailbroken]" false        #修改返回值为false

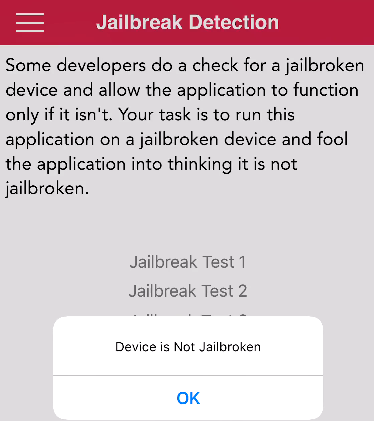
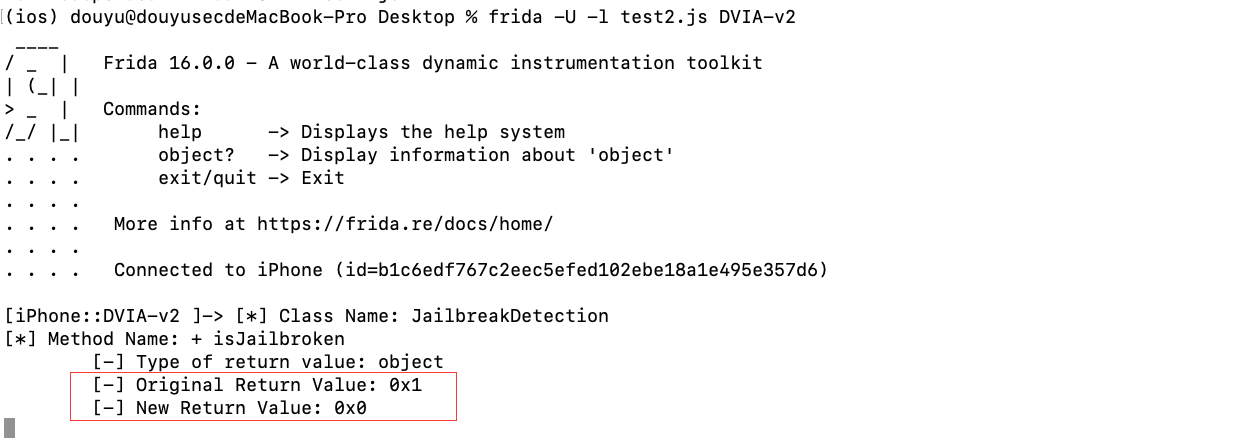
也可以通过frida hook返回值,脚本如下
var className = "JailbreakDetection";
var funcName = "+ isJailbroken";
var hook = eval('ObjC.classes.' + className + '["' + funcName + '"]');
var newretval = ptr("0x0");

Interceptor.attach(hook.implementation, {
    onLeave: function(retval) { console.log("[*] Class Name: " + className);
    console.log("[*] Method Name: " + funcName);
    console.log("\t[-] Type of return value: " + typeof retval);
    console.log("\t[-] Original Return Value: " + retval);
    retval.replace(newretval)
    console.log("\t[-] New Return Value: " + newretval) } });
Test 3
第三关调用了两个函数,重点看第二个方法中的代码

代码主要是检测越狱后的特征,比如安装软件、系统功能等,最终会写到一个jailbreak.txt文件中。
v2 = _T0S2SBp21_builtinStringLiteral_Bw17utf8CodeUnitCountBi1_7isASCIItcfC("/Applications/Cydia.app", 23LL, 1LL);
v4 = v3;
v5 = _T0SS10FoundationE19_bridgeToObjectiveCSo8NSStringCyF(v2);
swift_unknownRelease(v4);
v6 = (unsigned __int64)objc_msgSend(v1, "fileExistsAtPath:", v5);
v2 = _T0S2SBp21_builtinStringLiteral_Bw17utf8CodeUnitCountBi1_7isASCIItcfC("/Applications/Cydia.app", 23LL, 1LL);
v4 = v3;
v5 = _T0SS10FoundationE19_bridgeToObjectiveCSo8NSStringCyF(v2);
swift_unknownRelease(v4);
v6 = (unsigned __int64)objc_msgSend(v1, "fileExistsAtPath:", v5);
v23 = _T0S2SBp21_builtinStringLiteral_Bw17utf8CodeUnitCountBi1_7isASCIItcfC("/usr/sbin/sshd", 14LL, 1LL);
v25 = v24;
v26 = _T0SS10FoundationE19_bridgeToObjectiveCSo8NSStringCyF(v23);
swift_unknownRelease(v25);
v27 = (unsigned __int64)objc_msgSend(v22, "fileExistsAtPath:", v26);
v30 = _T0S2SBp21_builtinStringLiteral_Bw17utf8CodeUnitCountBi1_7isASCIItcfC("/etc/apt", 8LL, 1LL);
v32 = v31;
v33 = _T0SS10FoundationE19_bridgeToObjectiveCSo8NSStringCyF(v30);
swift_unknownRelease(v32);
v34 = (unsigned __int64)objc_msgSend(v29, "fileExistsAtPath:", v33);
v43 = _T0S2SBp21_builtinStringLiteral_Bw17utf8CodeUnitCountBi1_7isASCIItcfC("/private/jailbreak.txt", 22LL, 1LL);
v45 = v44;
v46 = _T0SS10FoundationE19_bridgeToObjectiveCSo8NSStringCyF(v43);
swift_unknownRelease(v45);
v104 = 0uLL;
v47 = (unsigned __int64)objc_msgSend(v42, "removeItemAtPath:error:", v46, &v104);
但是代码中有一个if逻辑决定是否越狱
  if ( v51 & 1 )
    v116 = 1;
  if ( v116 & 1 )
  {
    _T0So17UIAlertControllerCMa(v52);
    v53 = _T0S2SBp21_builtinStringLiteral_Bw17utf8CodeUnitCountBi1_7isASCIItcfC(&unk_100391E4C, 0LL, 1LL);
    v55 = v54;
    v57 = v56;
    v58 = _T0S2SBp21_builtinStringLiteral_Bw17utf8CodeUnitCountBi1_7isASCIItcfC(
            "Device is Jailbroken, the application will now exit",
            51LL,
            1LL);
    _T0So13UIAlertActionCMa();
  }
  else
  {
    _T0So17UIAlertControllerCMa(v52);
    v66 = _T0S2SBp21_builtinStringLiteral_Bw17utf8CodeUnitCountBi1_7isASCIItcfC(&unk_100391E4C, 0LL, 1LL);
    v68 = v67;
    v70 = v69;
    v71 = _T0S2SBp21_builtinStringLiteral_Bw17utf8CodeUnitCountBi1_7isASCIItcfC("Device is Not Jailbroken", 24LL, 1LL);

  }
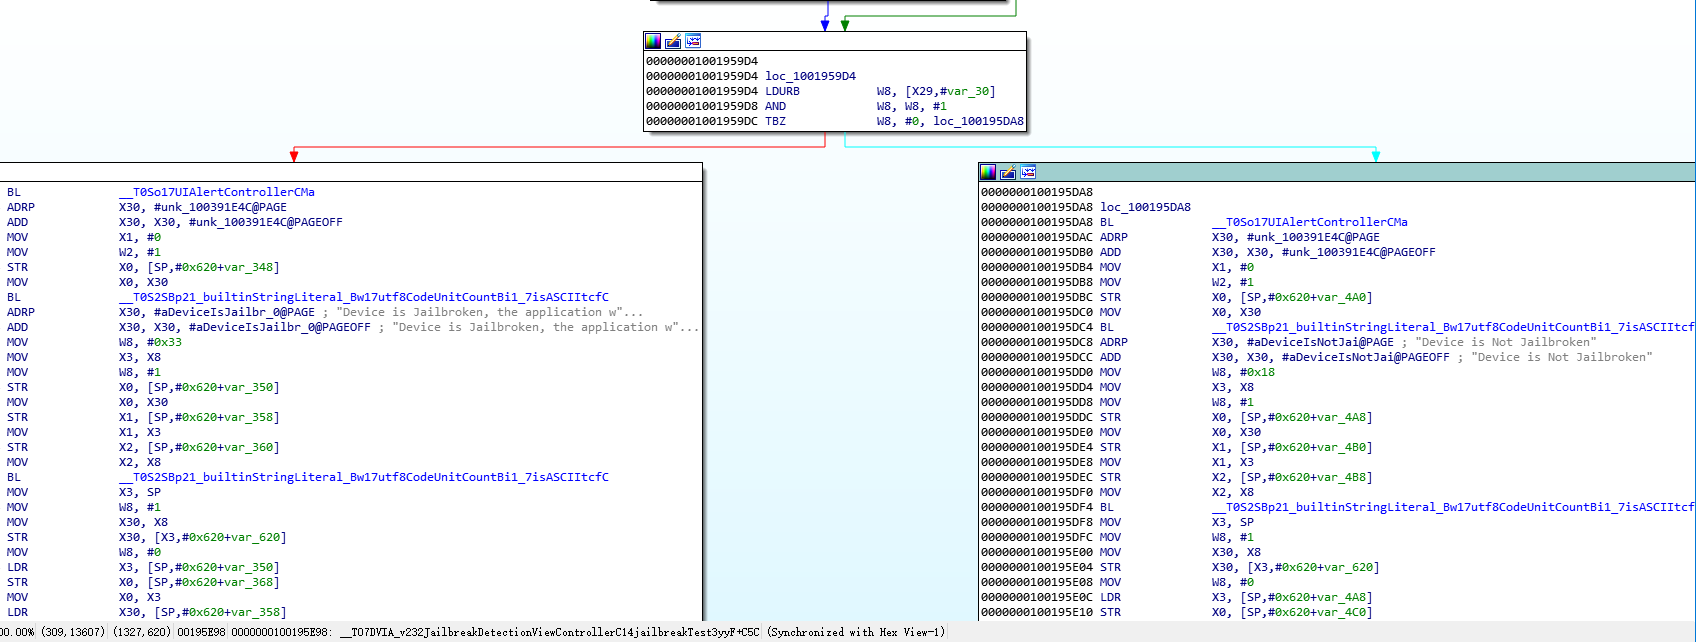
__text:00000001001959D4 loc_1001959D4
__text:00000001001959D4 LDURB           W8, [X29,#var_30]
__text:00000001001959D8 AND             W8, W8, #1
__text:00000001001959DC TBZ             W8, #0, loc_10
在and指令中,它对寄存器 8 和值 0x1 执行 AND 操作。该tbz指令定义为Test bit and branch if zero。因此该tbz指令正在测试寄存器 8 是 0x0 还是 0x1。如果它是 0x0,那么它将跳转。这意味着可以让寄存器 8 的值为 0x0,那么它将跳转到成功函数。
查看目前寄存器中存的值,是0x1,对应的是检测到越狱的分支,修改为0x0则绕过越狱检测
var targetModule = 'DVIA-v2';
var addr = ptr(0x1959dc);
var moduleBase = Module.getBaseAddress(targetModule);
var targetAddress = moduleBase.add(addr);
   Interceptor.attach(targetAddress, {
        onEnter: function(args) {
                    console.log('At the address ' + addr + ' the value is currently ' + this.context.x8);
        },
    });


var targetModule = 'DVIA-v2';
var addr = ptr(0x1959dc);
var moduleBase = Module.getBaseAddress(targetModule);
var targetAddress = moduleBase.add(addr);
   Interceptor.attach(targetAddress, {
        onEnter: function(args) {
                if(this.context.x8 == 0x01){
                    this.context.x8=0x00
                    console.log("Bypass Test3");
            }
        },
    });

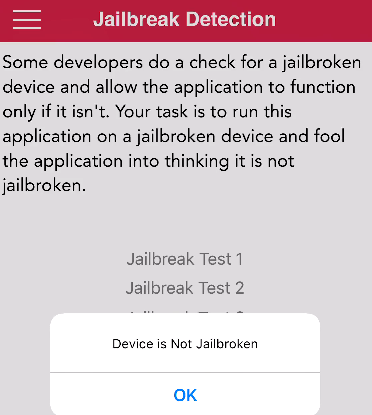
修改值之后

Test 4
操作同3
var targetModule = 'DVIA-v2';
var addr = ptr(0x1936E4);
var moduleBase = Module.getBaseAddress(targetModule);
var targetAddress = moduleBase.add(addr);
   Interceptor.attach(targetAddress, {
        onEnter: function(args) {
                    console.log('At the address ' + addr + ' the value is currently ' + this.context.x8);
        },
    });


var targetModule = 'DVIA-v2';
var addr = ptr(0x1936E4);
var moduleBase = Module.getBaseAddress(targetModule);
var targetAddress = moduleBase.add(addr);
   Interceptor.attach(targetAddress, {
        onEnter: function(args) {
                if(this.context.x8 == 0x01){
                    this.context.x8=0x00
                    console.log("Bypass Test4");
            }
        },
    });19702C
Test 5
同3
var targetModule = 'DVIA-v2';
var addr = ptr(0x19702C);
var moduleBase = Module.getBaseAddress(targetModule);
var targetAddress = moduleBase.add(addr);
   Interceptor.attach(targetAddress, {
        onEnter: function(args) {
                    console.log('At the address ' + addr + ' the value is currently ' + this.context.x8);
        },
    });


var targetModule = 'DVIA-v2';
var addr = ptr(0x19702C);
var moduleBase = Module.getBaseAddress(targetModule);
var targetAddress = moduleBase.add(addr);
   Interceptor.attach(targetAddress, {
        onEnter: function(args) {
                if(this.context.x8 == 0x01){
                    this.context.x8=0x00
                    console.log("Bypass Test5");
            }
        },
    });
part3-Runtime Manipulation
任务:绕过登录限制和修改url
Login Method 1
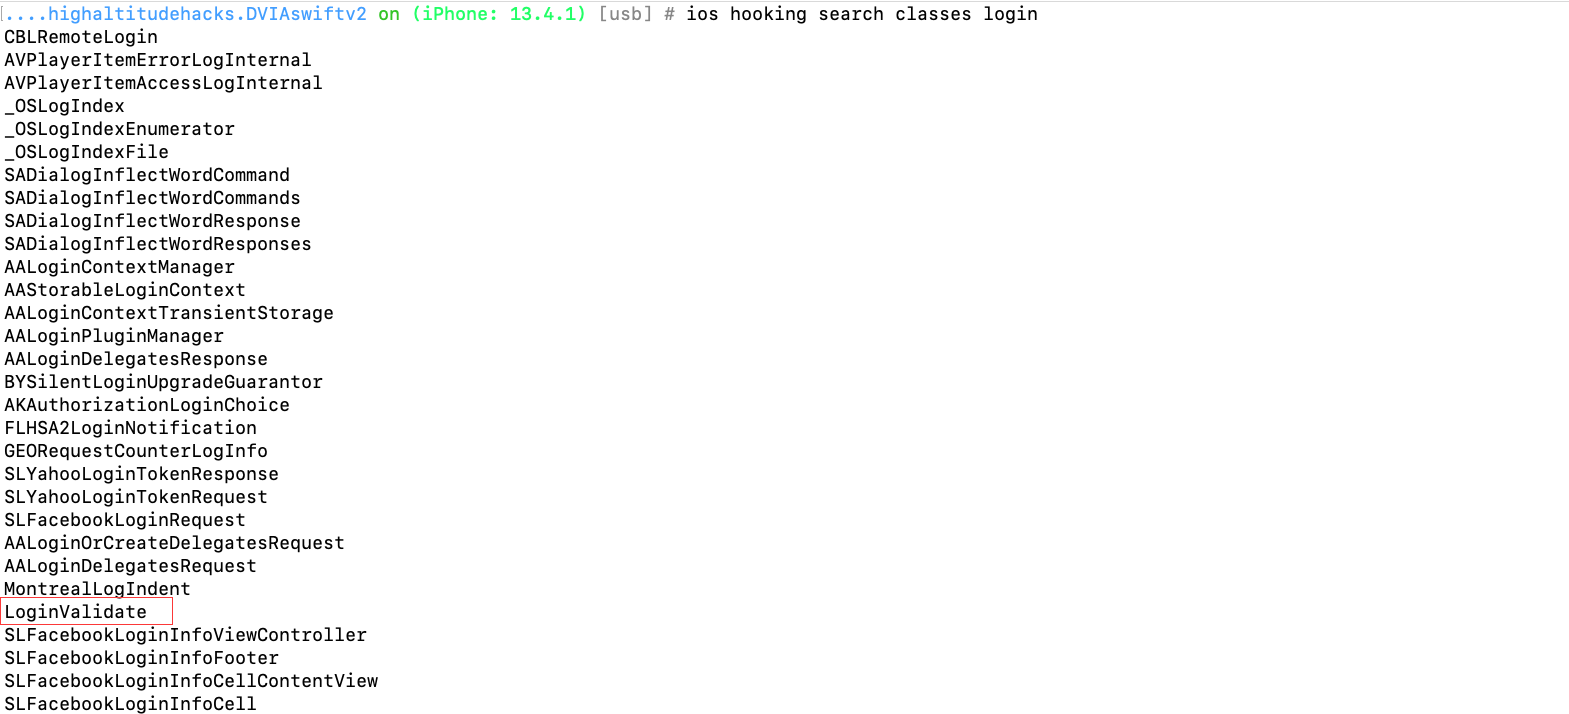
起初是想像越狱绕过一样hook TBZ指令的值来绕过登录,但是发现修改了也不行,所以改用objection
ios hooking search classes login
ios hooking list class_methods LoginValidate
ios hooking watch class LoginValidate
ios hooking watch method "+[LoginValidate isLoginValidated]" --dump-args --dump-return
ios hooking set return_value "+[LoginValidate isLoginValidated]" true


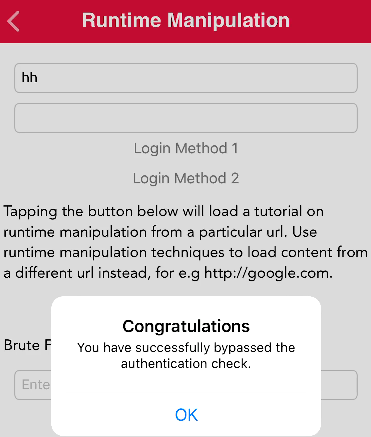
Login Method 2
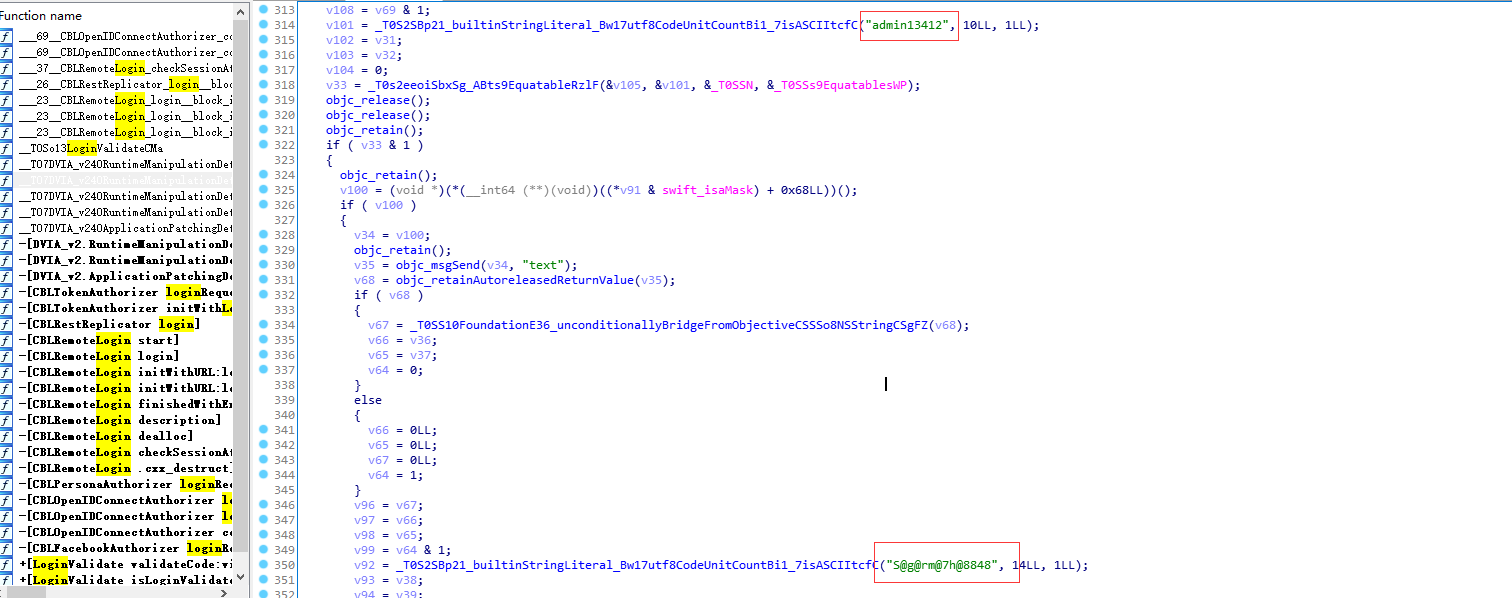
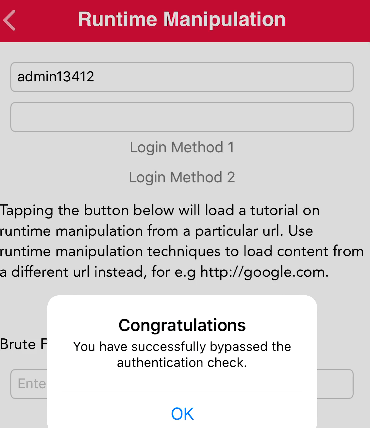
定位登录方式2的方法,在代码中找到账号密码,登录成功

Read tutorial
还未弄清,暂留
Validate code
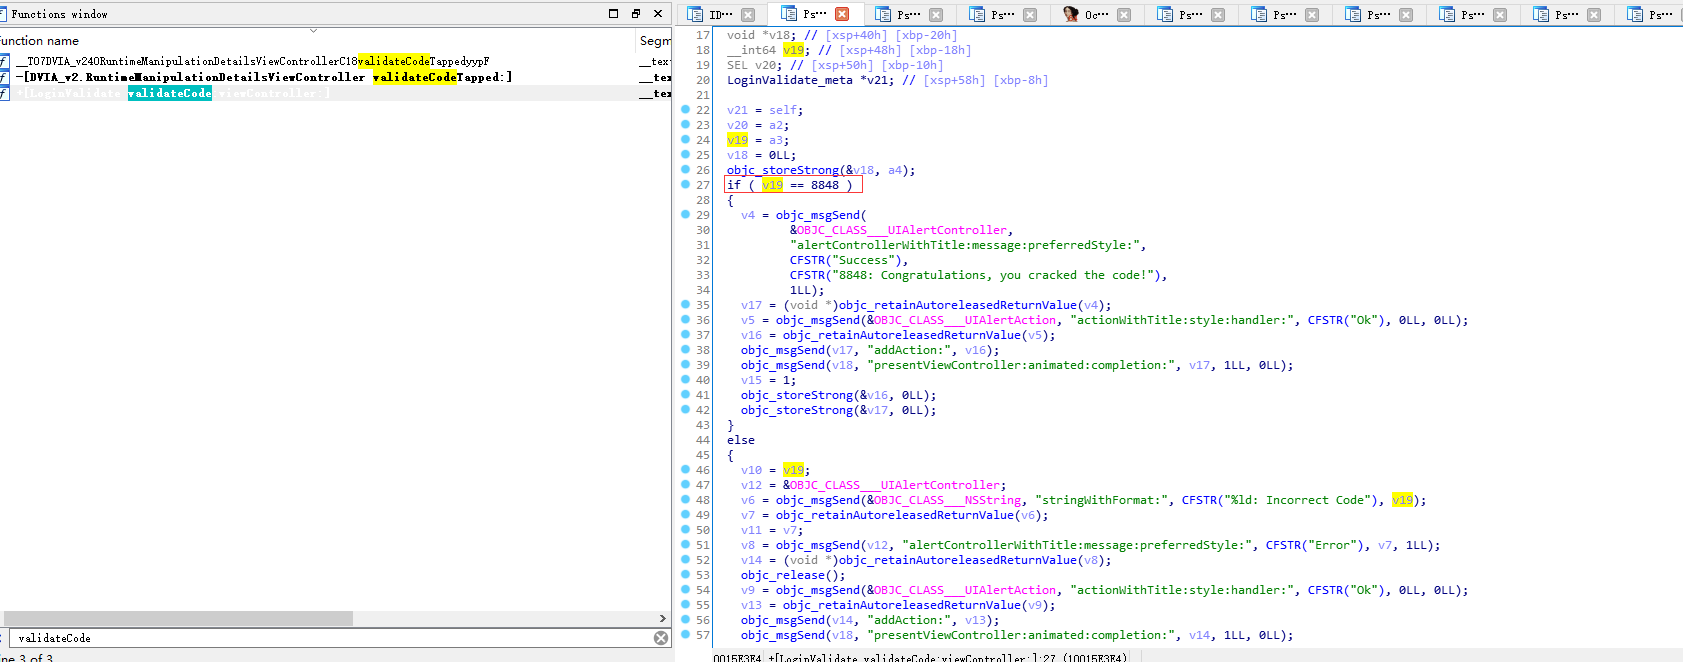
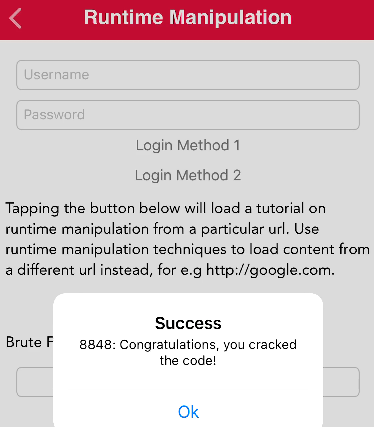
在登录验证类中就包含该方法,验证码写死了,值为8848

part4-Side Channel DataLeakage
Device Logs
提交信息就崩溃,暂留
App Screenshot
暂不清楚意义,暂留
Pasteboard
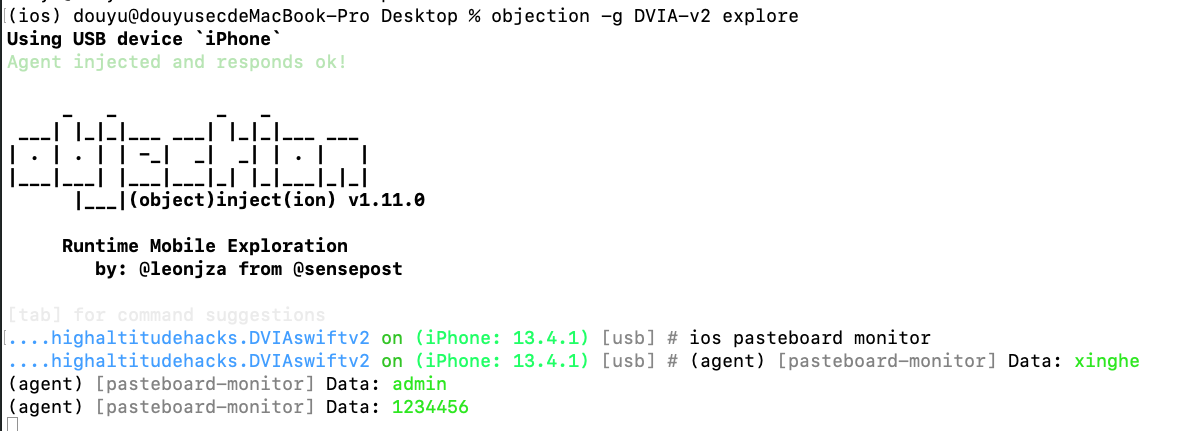
读取剪贴板的信息,但是另一个应用访问权限还不太清楚
ios pasteboard monitor
Cookies
ios cookies get

part5-Broken Cryptography
这一关环节使用 RNEncryptor 对数据进行加密存贮,使用的是AES加密,可以根据key和密文等信息解密出数据,但是试了一番发现自己对swift语言不太会,没办法编写对应解密工具,所以就先放一放。此题wp见:https://resources.infosecinstitute.com/topic/ios-part-29-insecure-broken-cryptography/
Challenge 1
Challenge 2
part6-Webview Issues
任务:向app注入一些代码以完成需求
MSG “Hello Word”
正常提交数据
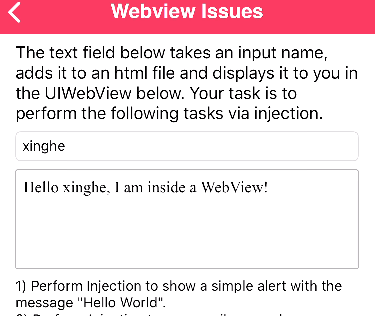
向app注入代码,成功弹出数据
<script>alert(/Hello Word/)</script>
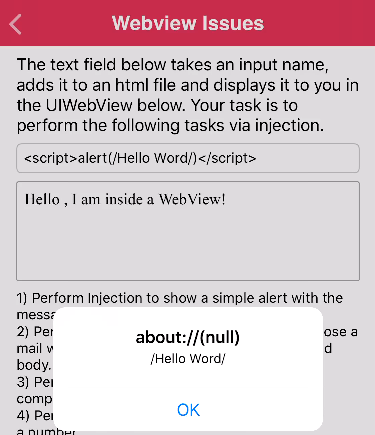
其他要求是通过注入代码达到开启其他app的效果,但是没找到相关资料没能复现成功
part7-Network Layer Security
任务:绕过证书检测
SslPinning
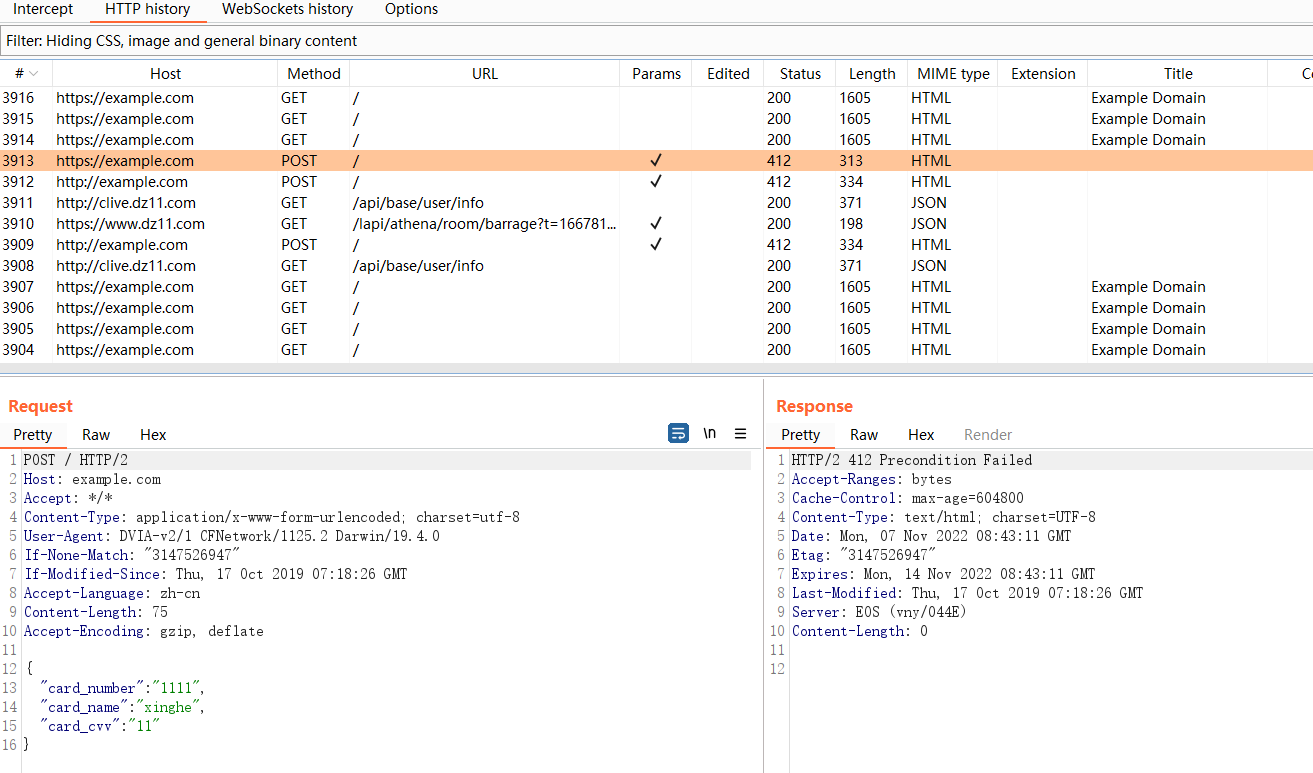
使用objection hook即可,和安卓端的思路一样
objection --gadget DVIA-v2 explore
ios sslpinning disable
手机配置burp的代理后发送请求,即可截获信息
[外链图片转存失败,源站可能有防盗链机制,建议将图片保存下来直接上传(img-6AEi5uDa-1669259570834)(C:/Users/xinghe/AppData/Roaming/Typora/typora-user-images/image-20221107164149486.png)]

part8-Application Patching
任务:绕过一些特定的检测
Login Method 1
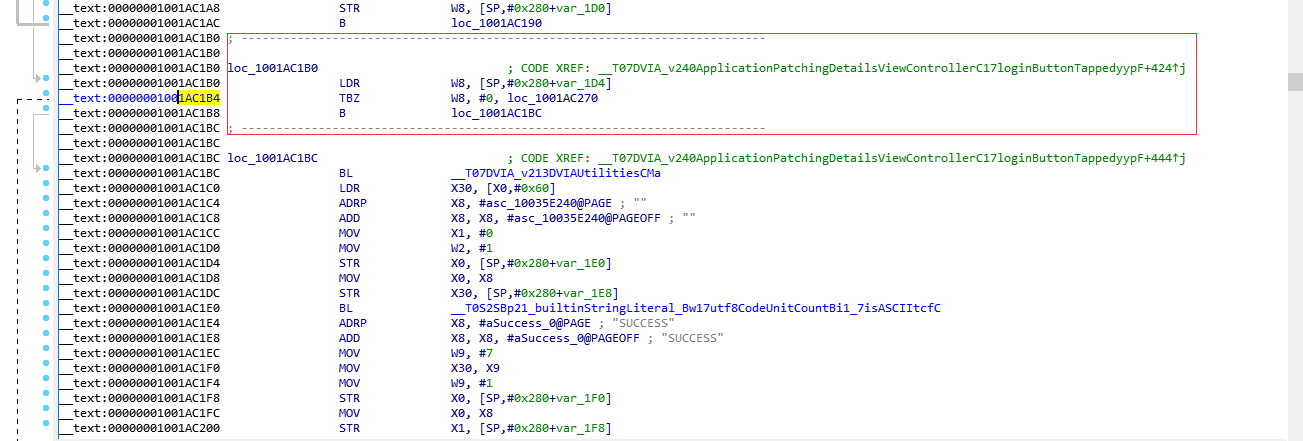
在ida中查看方法也能看到账号密码,但是任务要求我们要用hook的方式通关。定位到检测登录的代码,关键处理逻辑跟前面一样也是if判断,直接hook结果
frida-trace -U -i "*ApplicationPatching*" DVIA-v2 #定位触发函数

hook代码
var targetModule = 'DVIA-v2';
var addr = ptr(0x1AC1B4);
var moduleBase = Module.getBaseAddress(targetModule);
var targetAddress = moduleBase.add(addr);
   Interceptor.attach(targetAddress, {
        onEnter: function(args) {
                if(this.context.x8 == 0x00){
                    this.context.x8=0x01
                    console.log("Bypass OK");
            }
        },
    });
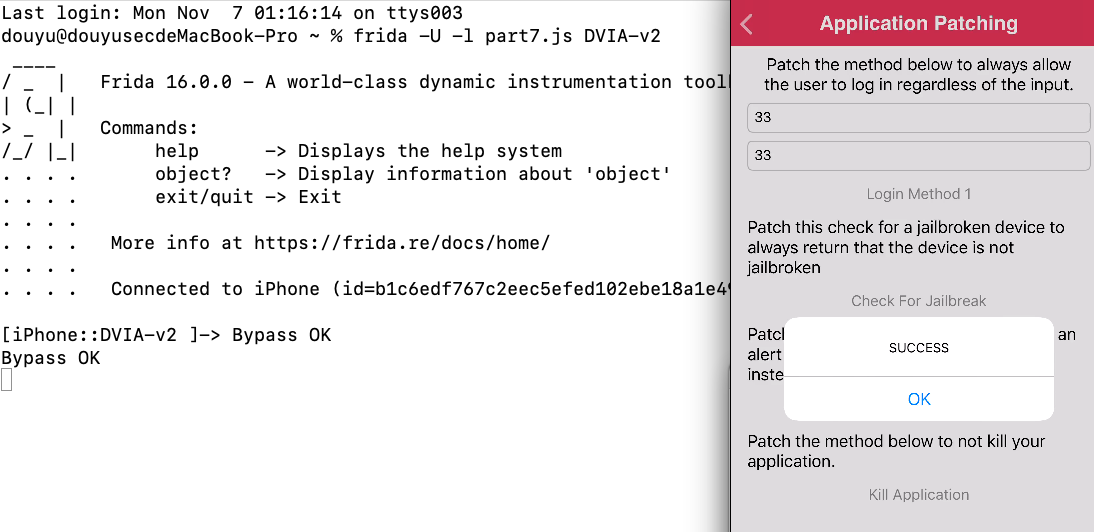
剩下的关卡也是和前面一样hook,就不做演示
总结
在练习这个DVIA-v2靶场的时候可借鉴的学习资料太少,IOS独有的漏洞还不太了解。因为swift和object-c语言自己平时也没接触,不熟悉app的开发语法,信息在app之前的传输、保存、读取等操作。但有些漏洞其实和安卓的大差不差,移动安全主要偏向于隐私保护,不能让其他未授权的app轻易读取敏感数据文件。后面的学习中可能会偏向于IOS的app开发,了解基础语法和权限申请、数据传递等知识。

