文章目录
- 一、滑动菜单
- 1. 添加依赖
- 2. 侧滑菜单内容
- 2.1 headerLayout样式
- 2.2 menu样式
- 3. 主界面添加
- 4. 关联actionbar与滑动菜单
- 二、悬浮按钮
- FloatingActionButton
- 三、可交互提示
- Snackbar
- 四、能协调子视图的布局
- CoordinatorLayout
- 五、卡片式布局
- CardView
一、滑动菜单
DrawerLayout是一个特殊的布局容器,用于在屏幕的边缘创建一个可以滑动的菜单。它可以在屏幕的左边或右边滑出,并覆盖其内容。它通常用来实现抽屉式导航菜单。
NavigationView是DrawerLayout内的一个视图,提供了侧滑菜单的实现。它用于显示应用的导航菜单,通常包含一个菜单列表或多个菜单项。
1. 添加依赖
implementation("com.google.android.material:material:1.9.0")
2. 侧滑菜单内容
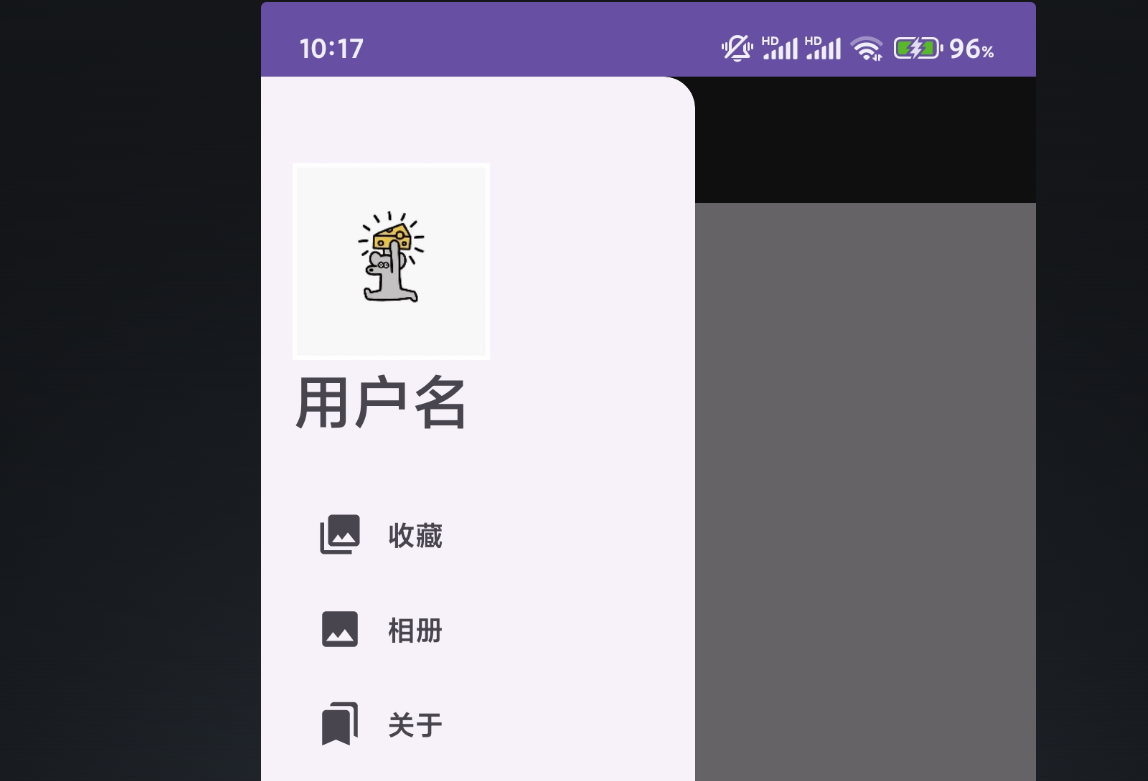
主要包含headerLayout和menu两部分
2.1 headerLayout样式
定义了侧滑菜单的头部布局,包括用户头像和用户名:
<?xml version="1.0" encoding="utf-8"?>
<LinearLayout xmlns:android="http://schemas.android.com/apk/res/android"
    android:layout_width="match_parent"
    android:layout_height="200dp"
    android:gravity="bottom"
    android:orientation="vertical"
    android:padding="16dp">

    <ImageView
        android:layout_width="100dp"
        android:layout_height="100dp"
        android:layout_marginTop="8dp"
        android:src="@drawable/userphoto1" />

    <TextView
        android:layout_width="wrap_content"
        android:layout_height="wrap_content"
        android:text="用户名"
        android:textSize="30sp" />
</LinearLayout>
2.2 menu样式
和正常构建菜单方法一致
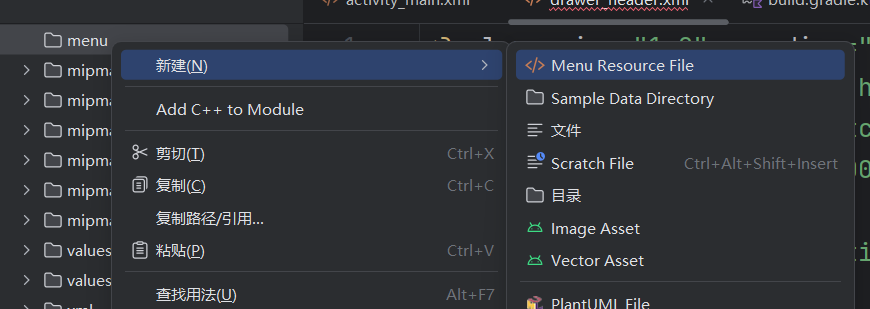
方法:
- 在
res中新建菜单文件夹
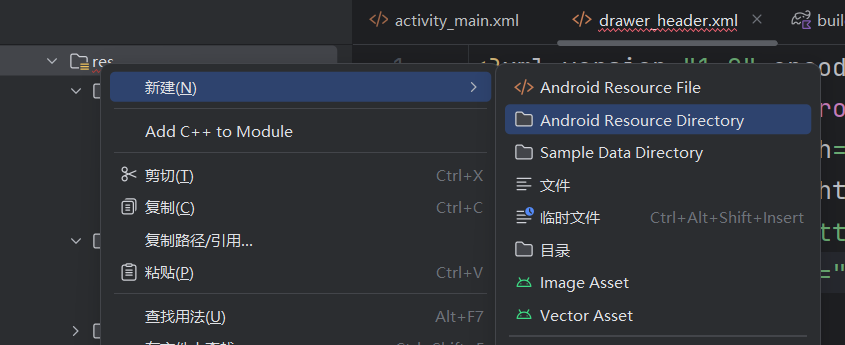
选择menu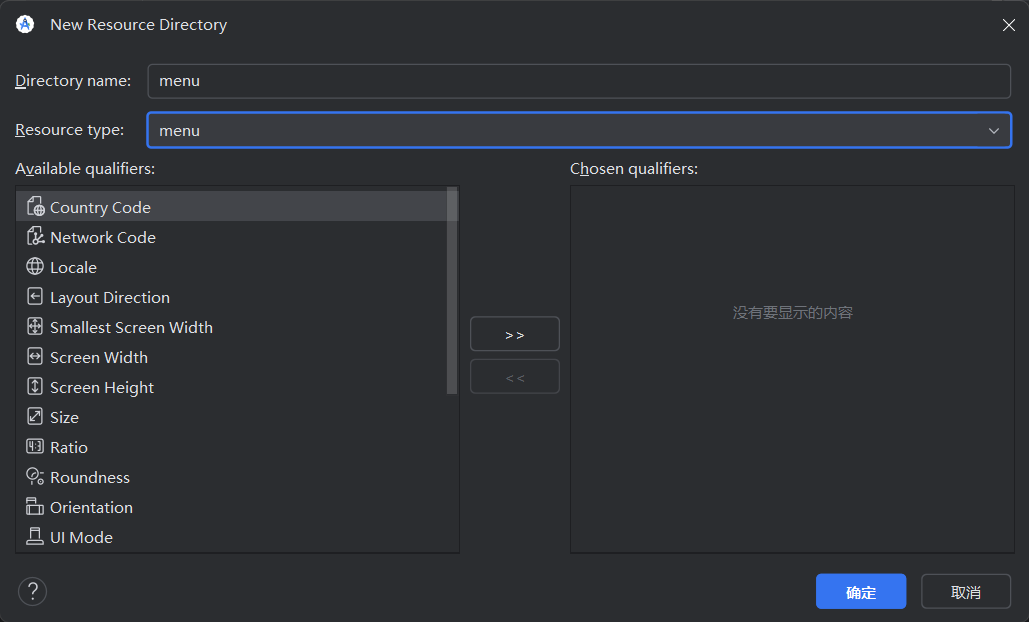
- 在新建的该文件夹中新建菜单文件
-
具体菜单内容
定义了侧滑菜单的内容,包含多个菜单项:
<?xml version="1.0" encoding="utf-8"?>
<menu xmlns:android="http://schemas.android.com/apk/res/android"
    xmlns:tools="http://schemas.android.com/tools"
    tools:showIn="nav_view">
    <group android:checkableBehavior="single">
        <item
            android:id="@+id/nav_collect"
            android:icon="@drawable/baseline_collections_24"
            android:title="收藏" />
        <item
            android:id="@+id/nav_photo"
            android:icon="@drawable/baseline_insert_photo_24"
            android:title="相册" />
        <item
            android:id="@+id/nav_about"
            android:icon="@drawable/baseline_bookmarks_24"
            android:title="关于"/>
    </group>
</menu>
3. 主界面添加
<?xml version="1.0" encoding="utf-8"?>
<androidx.drawerlayout.widget.DrawerLayout xmlns:android="http://schemas.android.com/apk/res/android"
    xmlns:app="http://schemas.android.com/apk/res-auto"
    xmlns:tools="http://schemas.android.com/tools"
    android:id="@+id/drawer_layout"
    android:layout_width="match_parent"
    android:layout_height="match_parent">

    <androidx.coordinatorlayout.widget.CoordinatorLayout
        android:layout_width="match_parent"
        android:layout_height="match_parent">

        <com.google.android.material.appbar.AppBarLayout
            android:layout_width="match_parent"
            android:layout_height="wrap_content">

            <androidx.appcompat.widget.Toolbar
                android:id="@+id/toolbar"
                android:layout_width="match_parent"
                android:layout_height="?attr/actionBarSize"
                android:background="#252525"
                app:navigationIcon="@drawable/baseline_subject_24"
                app:title="抽屉菜单"
                app:titleTextColor="@color/white" />
        </com.google.android.material.appbar.AppBarLayout>

        <TextView
            android:layout_width="wrap_content"
            android:layout_height="wrap_content"
            android:layout_gravity="center"
            android:text="主页"
            android:textSize="30dp" />

    </androidx.coordinatorlayout.widget.CoordinatorLayout>

    <com.google.android.material.navigation.NavigationView
        android:id="@+id/nav_view"
        android:layout_width="220dp"
        android:layout_height="match_parent"
        android:layout_gravity="start"
        android:fitsSystemWindows="true"
        app:headerLayout="@layout/drawer_header"
        app:menu="@menu/nav_menu" />

</androidx.drawerlayout.widget.DrawerLayout>
这个布局文件是一个包含侧滑菜单(Drawer)的Android布局。以下是对各个部分的解析:
DrawerLayout:- 根布局是一个
DrawerLayout,它是一个常用于实现抽屉导航的布局容器。这个容器允许用户从屏幕的一侧滑出一个菜单。
- 根布局是一个
CoordinatorLayout:DrawerLayout的第一个子布局是CoordinatorLayout。它通常用于协调多个子视图之间的交互,特别是当涉及到AppBarLayout和FloatingActionButton这样的子视图时。
AppBarLayout:CoordinatorLayout的第一个子视图是AppBarLayout,这是专门为Material Design应用程序的顶部栏(例如Toolbar)而设计的布局。Toolbar:AppBarLayout内包含一个Toolbar,用于显示应用的顶部操作栏。Toolbar具有一个导航图标(左上角的汉堡图标,通常用于打开抽屉菜单)和一个标题。
NavigationView:DrawerLayout的第二个子视图是NavigationView,这是一个常用于实现抽屉菜单内容的视图。NavigationView还引用了一个头部布局文件(drawer_header)和一个菜单文件(nav_menu),用于定义侧滑菜单的内容和项。
4. 关联actionbar与滑动菜单
public class MainActivity extends AppCompatActivity {

    @Override
    protected void onCreate(Bundle savedInstanceState) {
        super.onCreate(savedInstanceState);
        setContentView(R.layout.activity_main);

        // 1. 获取 Toolbar、NavigationView 和 DrawerLayout 的引用
        Toolbar toolbar = findViewById(R.id.toolbar);
        NavigationView navigationView = findViewById(R.id.nav_view);
        DrawerLayout drawerLayout = findViewById(R.id.drawer_layout);

        // 2. 创建 ActionBarDrawerToggle 对象
        // 这个对象用于同步 DrawerLayout 和 Toolbar 的状态
        ActionBarDrawerToggle toggle = new ActionBarDrawerToggle(
            this, // 当前 Activity
            drawerLayout, // DrawerLayout 对象
            toolbar, // Toolbar 对象
            R.string.open, // Drawer 打开的描述
            R.string.close // Drawer 关闭的描述
        );//需要在values的string中添加

        // 3. 同步状态
        toggle.syncState();

        // 4. 为 DrawerLayout 添加 DrawerListener
        // 这个监听器用于处理 Drawer 的打开和关闭事件
        drawerLayout.addDrawerListener(toggle);

        // 5. 设置 NavigationView 的菜单项点击事件监听器
        navigationView.setNavigationItemSelectedListener(new NavigationView.OnNavigationItemSelectedListener() {
            @Override
            public boolean onNavigationItemSelected(@NonNull MenuItem item) {
                // 当点击菜单项时,关闭 Drawer
                drawerLayout.closeDrawer(GravityCompat.START);
                // 显示点击了哪个菜单项的 Toast 提示
                Toast.makeText(MainActivity.this, "您点击了 " + item.getTitle(), Toast.LENGTH_SHORT).show();
                return true;
            }
        });
    }
}
二、悬浮按钮
FloatingActionButton
app:elevation 属性用于设置控件的阴影效果,即控件与其父布局的相对高度。通过调整 elevation 的值,可以改变控件的阴影强度,从而增强其视觉层次感。
app:backgroundTint 属性用于设置 FloatingActionButton 或其他 Material Components 控件的背景色
  <com.google.android.material.floatingactionbutton.FloatingActionButton
            android:id="@+id/fab"
            android:layout_width="wrap_content"
            android:layout_height="wrap_content"
            android:layout_gravity="bottom|end"
            android:layout_margin="30dp"
            android:elevation="8dp"
            android:src="@drawable/baseline_check_24"
            app:backgroundTint="#008000" />
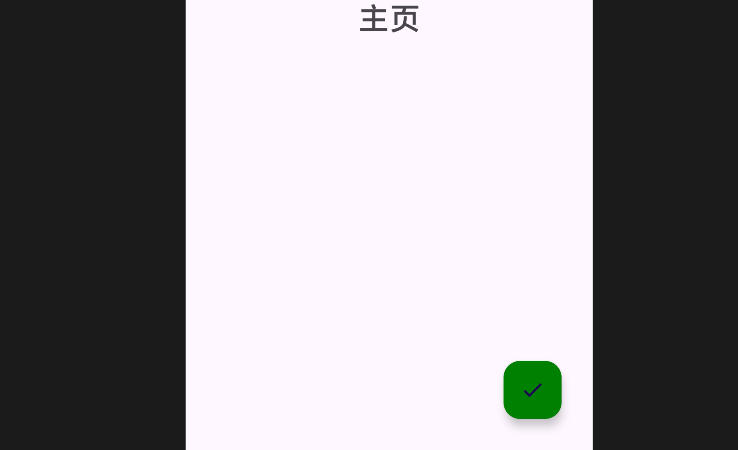
可添加点击事件
protected void onCreate(Bundle savedInstanceState) {
        super.onCreate(savedInstanceState);
        setContentView(R.layout.activity_main);

        FloatingActionButton fab = findViewById(R.id.fab);
        fab.setOnClickListener(new View.OnClickListener() {
            @Override
            public void onClick(View v) {
                Toast.makeText(MainActivity.this, "点击了悬浮按钮", Toast.LENGTH_SHORT).show();
            }
        });
    }
三、可交互提示
Toast,AlertDialog都属于可交互提示
Snackbar
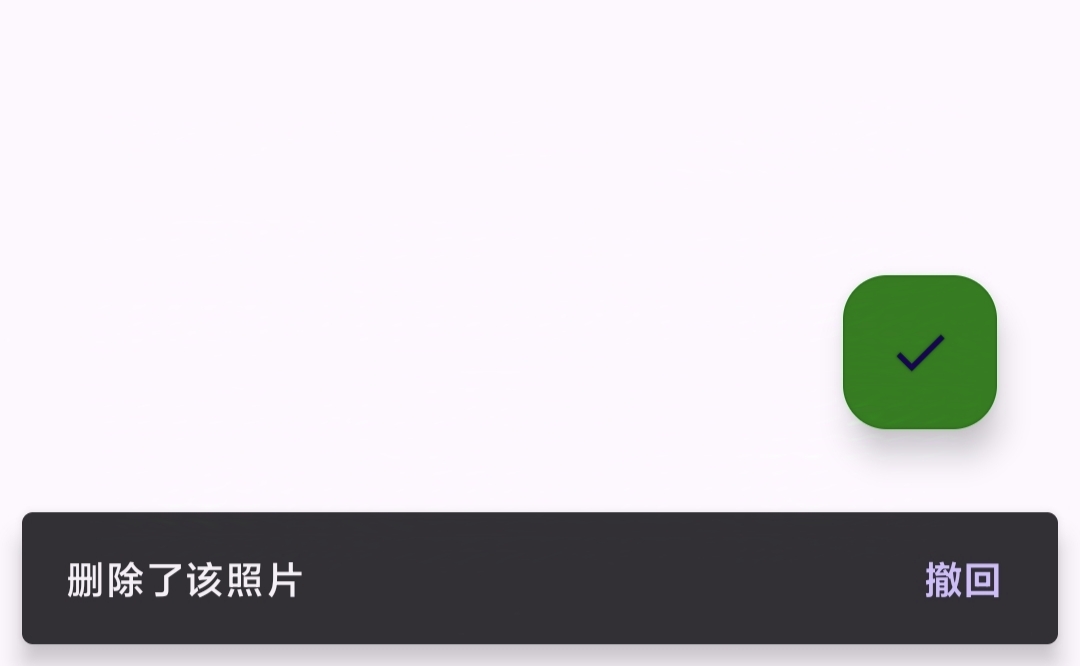
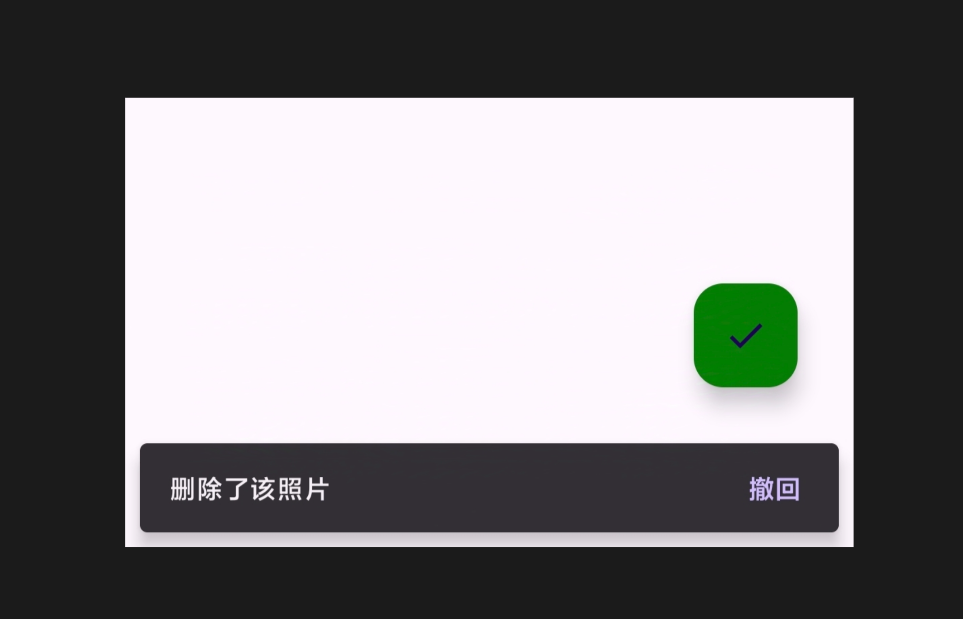
在刚才的悬浮按钮做修改,点击按钮后提示照片删除
fab.setOnClickListener(new View.OnClickListener() {
            @Override
            public void onClick(View v) {
                Snackbar.make(v, "删除了该照片", Snackbar.LENGTH_LONG).setAction("撤回", new View.OnClickListener() {
                    @Override
                    public void onClick(View v) {
                        Toast.makeText(MainActivity.this, "照片已恢复", Toast.LENGTH_SHORT).show();
                    }
                }).show();
            }
        });
Snackbar.make()方法创建了一个Snackbar对象,调用该对象的setAction方法,设置一个可点击的动作按钮
。
make
public static Snackbar make(@NonNull View view, @NonNull CharSequence text, @IntDef({ LENGTH_SHORT, LENGTH_LONG }) int duration)
- view:
Snackbar将依附的视图。通常是一个View,例如CoordinatorLayout或RelativeLayout。Snackbar会在这个视图上显示。 - text: 要显示在
Snackbar上的文本内容。 - duration:
Snackbar显示的持续时间,可以是Snackbar.LENGTH_SHORT(短时间)或Snackbar.LENGTH_LONG(长时间)。
setAction
public Snackbar setAction(CharSequence text, View.OnClickListener listener)
- text: 要显示在
Snackbar上的文本内容。 - listener: 点击按钮时要调用的
OnClickListener。
四、能协调子视图的布局
CoordinatorLayout
CoordinatorLayout 是 Android 提供的一个高级布局容器,它扩展了 FrameLayout 的功能,并提供了与其子视图(如 AppBarLayout、FloatingActionButton、Snackbar 等)之间的协调和交互的能力。CoordinatorLayout 的主要作用
-
实现复杂的交互效果,比如滚动联动、浮动操作按钮的显示/隐藏等。
-
支持 Material Design 动画和过渡:它与
FloatingActionButton等视图搭配,可以实现平滑的动画和过渡效果。
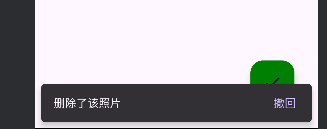
比如这里使用了CoordinatorLayout,浮动按钮会自动向上协调
未使用:
使用:
<androidx.coordinatorlayout.widget.CoordinatorLayout
        android:layout_width="match_parent"
        android:layout_height="match_parent">
</androidx.coordinatorlayout.widget.CoordinatorLayout>
五、卡片式布局
CardView
CardView是 Android 中一个常用的控件,用于在界面上显示卡片样式的布局。它提供了一个带阴影和圆角效果的容器,使得内容更加美观。CardView可以包含任何布局,并且通常与RecyclerView一起使用,以显示一系列卡片式的项。
在你的布局文件中定义 CardView
<androidx.cardview.widget.CardView
    xmlns:android="http://schemas.android.com/apk/res/android"
    android:layout_width="match_parent"
    android:layout_height="wrap_content"
    android:layout_margin="16dp"
    app:cardCornerRadius="8dp"
    app:cardElevation="4dp">

    <!-- CardView 内部的布局,可以是任何布局 -->
    <LinearLayout
        android:layout_width="match_parent"
        android:layout_height="wrap_content"
        android:orientation="vertical"
        android:padding="16dp">

        <TextView
            android:layout_width="wrap_content"
            android:layout_height="wrap_content"
            android:text="Card Title"
            android:textSize="18sp"
            android:textColor="@android:color/black"/>

        <TextView
            android:layout_width="wrap_content"
            android:layout_height="wrap_content"
            android:text="This is a simple description of the card."
            android:textSize="14sp"
            android:textColor="@android:color/darker_gray"/>

    </LinearLayout>

</androidx.cardview.widget.CardView>
app:cardCornerRadius: 设置卡片的圆角半径。app:cardElevation: 设置卡片的阴影高度。
在 Java 代码中对 CardView 进行操作,例如更改背景颜色、调整圆角等:
CardView cardView = findViewById(R.id.cardView);
cardView.setCardBackgroundColor(Color.RED); // 设置卡片背景颜色
cardView.setRadius(12f); // 设置圆角半径
cardView.setCardElevation(6f); // 设置阴影高度
参考:
- 《第一行代码》
感谢您的阅读
如有错误烦请指正


