目录
一、大概架构
二、编写pom.xml
1、yolo-study模块(root):
2、CameraDetection模块
三、编写yml配置文件
四、编写controller
五,可能会出现的问题
1、修改VM启动参数:
2、修改启动类
六、测试
七,工具模块代码
ODConfig:
Detection:
ODResult:
ImageUtil:
Letterbox:
八、添加告警判断示例
前言:关于这篇文章我也是学习了Gitee上一位大佬的开源代码,然后对代码加上自己的一些理解和修修补补,当作自己的一个学习笔记吧,最后:欢迎支持原版~~
那位大佬源代码的Gitee地址为:yolo-onnx-java: 基于Java开发的全能视觉智能识别项目 java 调用 yolo onnx 模型 AI 视频 识别 支持 yolov5 yolov8 yolov7 yolov9 yolov10,包含 预处理 和 后处理 。java 目标检测 目标识别,可集成 rtsp rtmp (gitee.com)
对于这次案例我也是通过接口的方式来实现的,不是demo的形式,我觉得这样子才符合实际应用
在文章的最后附上我的代码地址
一、大概架构
这个是代码的大概架构,其中红色方框需要去大佬的git仓库自行下载。

解释一下里面两个文件:
1、opencv_videoio_ffmpeg.dll:
类型:动态链接库(Dynamic Link Library,DLL)。
用途:这是OpenCV库中的一个特定组件,专门用于支持视频输入输出的功能。它基于FFmpeg库,实现了对多种视频格式(如AVI、MP4、MOV等)的读取和写入操作。在使用OpenCV进行视频处理时,如果系统自带的解码器无法处理某些视频格式,OpenCV会尝试加载此DLL以提供额外的编解码支持。
2、yolo7-tiny.onnx:
这个是yolo7的模型权重文件,这个也可以自行去yolo7的git仓库自行下载
下面这个是工具模块,里面的文件也可以去大佬的仓库自行下载,在文章的最后我也会给出代码

二、编写pom.xml
1、yolo-study模块(root):
<?xml version="1.0" encoding="UTF-8"?>
<project xmlns="http://maven.apache.org/POM/4.0.0"
         xmlns:xsi="http://www.w3.org/2001/XMLSchema-instance"
         xsi:schemaLocation="http://maven.apache.org/POM/4.0.0 http://maven.apache.org/xsd/maven-4.0.0.xsd">
    <modelVersion>4.0.0</modelVersion>

    <groupId>com.bluefoxyu</groupId>
    <artifactId>yolo-study</artifactId>
    <version>1.0-SNAPSHOT</version>
    <packaging>pom</packaging>
    <modules>
        <module>predict-test</module>
        <module>CameraDetection</module>
        <module>yolo-common</module>
    </modules>

    <properties>
        <maven.compiler.source>17</maven.compiler.source>
        <maven.compiler.target>17</maven.compiler.target>
        <project.build.sourceEncoding>UTF-8</project.build.sourceEncoding>
    </properties>

    <dependencies>
        <dependency>
            <groupId>com.microsoft.onnxruntime</groupId>
            <artifactId>onnxruntime</artifactId>
            <version>1.16.1</version>
        </dependency>
        <dependency>
            <groupId>org.openpnp</groupId>
            <artifactId>opencv</artifactId>
            <version>4.7.0-0</version>
        </dependency>
    </dependencies>

</project>
2、CameraDetection模块
<?xml version="1.0" encoding="UTF-8"?>
<project xmlns="http://maven.apache.org/POM/4.0.0"
         xmlns:xsi="http://www.w3.org/2001/XMLSchema-instance"
         xsi:schemaLocation="http://maven.apache.org/POM/4.0.0 http://maven.apache.org/xsd/maven-4.0.0.xsd">
    <modelVersion>4.0.0</modelVersion>
    <parent>
        <groupId>com.bluefoxyu</groupId>
        <artifactId>yolo-study</artifactId>
        <version>1.0-SNAPSHOT</version>
    </parent>

    <artifactId>CameraDetection</artifactId>

    <properties>
        <maven.compiler.source>17</maven.compiler.source>
        <maven.compiler.target>17</maven.compiler.target>
        <project.build.sourceEncoding>UTF-8</project.build.sourceEncoding>
    </properties>

    <dependencies>
        <dependency>
            <groupId>com.bluefoxyu</groupId>
            <artifactId>yolo-common</artifactId>
            <version>1.0-SNAPSHOT</version>
        </dependency>
        <!-- https://mvnrepository.com/artifact/org.springframework.boot/spring-boot-starter-web -->
        <dependency>
            <groupId>org.springframework.boot</groupId>
            <artifactId>spring-boot-starter-web</artifactId>
            <version>3.2.4</version>
        </dependency>
    </dependencies>

</project>
三、编写yml配置文件
server:
  port: 8080

spring:
  profiles:
    active: dev
四、编写controller
/**
 * 摄像头识别,这是yolov7的视频识别例子,v5和v8的根据下面的思路,将其他文件中的代码复制过来即可
 * 视频帧率15最佳,20也可以,不建议30,分辨率640最佳,720也可以。不建议1080,码率不要超过2048,1024最佳。可在摄像头自带的管理页面中设备,主码流和子码流
 */
@RestController
@RequestMapping("/camera")
public class CameraDetectionController {

    // 用于停止检测
    //volatile关键字保证了多线程环境下的可见性,确保所有线程看到这个变量的值是一致的,即当一个线程修改了 volatile 变量的值,这个新值对于其他线程来说是立即可见的
    private static volatile boolean stopRequested = false;
    private static volatile boolean startRequested = false;

    //摄像头检测
    @PostMapping("/detect")
    public String CameraDetection() throws OrtException {
        //System.load(ClassLoader.getSystemResource("lib/opencv_videoio_ffmpeg470_64.dll").getPath());
        nu.pattern.OpenCV.loadLocally();

        //linux和苹果系统需要注释这一行,如果仅打开摄像头预览,这一行没有用,可以删除,如果rtmp或者rtsp等等这一样有用,也可以用pom依赖代替
        String OS = System.getProperty("os.name").toLowerCase();
        if (OS.contains("win")) {
            System.load(ClassLoader.getSystemResource("lib/opencv_videoio_ffmpeg470_64.dll").getPath());
        }
        //yolov7的ONNX模型文件路径
        String model_path = "./CameraDetection/src/main/resources/model/yolov7-tiny.onnx";

        // 用于识别的标签,labels 数组包含了模型可以识别的目标类别
        String[] labels = {
                "person", "bicycle", "car", "motorcycle", "airplane", "bus", "train",
                "truck", "boat", "traffic light", "fire hydrant", "stop sign", "parking meter",
                "bench", "bird", "cat", "dog", "horse", "sheep", "cow", "elephant", "bear",
                "zebra", "giraffe", "backpack", "umbrella", "handbag", "tie", "suitcase",
                "frisbee", "skis", "snowboard", "sports ball", "kite", "baseball bat",
                "baseball glove", "skateboard", "surfboard", "tennis racket", "bottle",
                "wine glass", "cup", "fork", "knife", "spoon", "bowl", "banana", "apple",
                "sandwich", "orange", "broccoli", "carrot", "hot dog", "pizza", "donut",
                "cake", "chair", "couch", "potted plant", "bed", "dining table", "toilet",
                "tv", "laptop", "mouse", "remote", "keyboard", "cell phone", "microwave",
                "oven", "toaster", "sink", "refrigerator", "book", "clock", "vase", "scissors",
                "teddy bear", "hair drier", "toothbrush"};

        // 加载ONNX模型
        OrtEnvironment environment = OrtEnvironment.getEnvironment();
        OrtSession.SessionOptions sessionOptions = new OrtSession.SessionOptions();

        // 使用gpu,需要本机按钻过cuda,并修改pom.xml,不安装也能运行本程序
        // sessionOptions.addCUDA(0);
        // 实际项目中,视频识别必须开启GPU,并且要防止队列堆积

        OrtSession session = environment.createSession(model_path, sessionOptions);
        // 输出基本信息
        session.getInputInfo().keySet().forEach(x -> {
            try {
                System.out.println("input name = " + x);
                System.out.println(session.getInputInfo().get(x).getInfo().toString());
            } catch (OrtException e) {
                throw new RuntimeException(e);
            }
        });

        // 加载标签及颜色
        ODConfig odConfig = new ODConfig();
        VideoCapture video = new VideoCapture();

        // 也可以设置为rtmp或者rtsp视频流:video.open("rtmp://192.168.1.100/live/test"), 海康,大华,乐橙,宇视,录像机等等
        // video.open("rtsp://192.168.1.100/live/test")
        // 也可以静态视频文件:video.open("video/car3.mp4");  flv 等
        // 不持支h265视频编码,如果无法播放或者程序卡住,请修改视频编码格式
        video.open(0);  //获取电脑上第0个摄像头
        //video.open("images/car2.mp4"); //不开启gpu比较卡

        //可以把识别后的视频在通过rtmp转发到其他流媒体服务器,就可以远程预览视频后视频,需要使用ffmpeg将连续图片合成flv 等等,很简单。
        if (!video.isOpened()) {
            System.err.println("打开视频流失败,未检测到监控,请先用vlc软件测试链接是否可以播放!,下面试用默认测试视频进行预览效果!");
            video.open("video/car3.mp4");
        }

        // 在这里先定义下框的粗细、字的大小、字的类型、字的颜色(按比例设置大小粗细比较好一些)
        int minDwDh = Math.min((int)video.get(Videoio.CAP_PROP_FRAME_WIDTH), (int)video.get(Videoio.CAP_PROP_FRAME_HEIGHT));
        int thickness = minDwDh / ODConfig.lineThicknessRatio;
        double fontSize = minDwDh / ODConfig.fontSizeRatio;
        int fontFace = Imgproc.FONT_HERSHEY_SIMPLEX;

        Mat img = new Mat();

        // 跳帧检测,一般设置为3,毫秒内视频画面变化是不大的,快了无意义,反而浪费性能
        int detect_skip = 4;

        // 跳帧计数
        int detect_skip_index = 1;

        // 最新一帧也就是上一帧推理结果
        float[][] outputData   = null;

        //当前最新一帧。上一帧也可以暂存一下
        Mat image;

        Letterbox letterbox = new Letterbox();
        OnnxTensor tensor;

        // 使用多线程和GPU可以提升帧率,线上项目必须多线程!!!,一个线程拉流,将图像存到[定长]队列或数组或者集合,一个线程模型推理,中间通过变量或者队列交换数据,代码示例仅仅使用单线程
        while (video.read(img)) {
            if ((detect_skip_index % detect_skip == 0) || outputData == null){
                // 缓存上一帧图像
                image = img.clone();
                image = letterbox.letterbox(image);
                Imgproc.cvtColor(image, image, Imgproc.COLOR_BGR2RGB);

                image.convertTo(image, CvType.CV_32FC1, 1. / 255);
                float[] whc = new float[3 * 640 * 640];
                image.get(0, 0, whc);
                float[] chw = ImageUtil.whc2cwh(whc);

                detect_skip_index = 1;

                FloatBuffer inputBuffer = FloatBuffer.wrap(chw);
                tensor = OnnxTensor.createTensor(environment, inputBuffer, new long[]{1, 3, 640, 640});

                HashMap<String, OnnxTensor> stringOnnxTensorHashMap = new HashMap<>();
                stringOnnxTensorHashMap.put(session.getInputInfo().keySet().iterator().next(), tensor);

                // 运行推理
                // 模型推理本质是多维矩阵运算,而GPU是专门用于矩阵运算,占用率低,如果使用cpu也可以运行,可能占用率100%属于正常现象,不必纠结。
                OrtSession.Result output = session.run(stringOnnxTensorHashMap);

                // 得到结果,缓存结果
                try{
                    outputData = (float[][]) output.get(0).getValue();
                }catch (OrtException e){}
            }else{
                detect_skip_index = detect_skip_index + 1;
            }
            // 画框和文字
            for(float[] x : outputData){

                ODResult odResult = new ODResult(x);
                // 业务逻辑写在这里,注释下面代码,增加自己的代码,根据返回识别到的目标类型,编写告警逻辑。等等
                // 实际项目中建议不要在视频画面上画框和文字,只告警,或者在告警图片上画框。画框和文字对视频帧率影响非常大
                // 画框
                Point topLeft = new Point((odResult.getX0() - letterbox.getDw()) / letterbox.getRatio(), (odResult.getY0() - letterbox.getDh()) / letterbox.getRatio());
                Point bottomRight = new Point((odResult.getX1() - letterbox.getDw()) / letterbox.getRatio(), (odResult.getY1() - letterbox.getDh()) / letterbox.getRatio());
                Scalar color = new Scalar(odConfig.getOtherColor(odResult.getClsId()));

                Imgproc.rectangle(img, topLeft, bottomRight, color, thickness);
                // 框上写文字
                String boxName = labels[odResult.getClsId()];
                Point boxNameLoc = new Point((odResult.getX0() - letterbox.getDw()) / letterbox.getRatio(), (odResult.getY0() - letterbox.getDh()) / letterbox.getRatio() - 3);

                // 也可以二次往视频画面上叠加其他文字或者数据,比如物联网设备数据等等
                Imgproc.putText(img, boxName, boxNameLoc, fontFace, 0.7, color, thickness);
                // System.out.println(odResult+"   "+ boxName);

            }

            // 保存告警图像到同级目录
            // Imgcodecs.imwrite(ODConfig.savePicPath, img);
            //服务器部署:由于服务器没有桌面,所以无法弹出画面预览,主要注释一下代码
            HighGui.imshow("result", img);

            startRequested=true;

            if (stopRequested) {
                break;
            }

            // 多次按任意按键关闭弹窗画面,结束程序
            // 需要使用键盘的键入,不能使用鼠标手动关闭
            if(HighGui.waitKey(1) != -1){
                break;
            }

        }

        HighGui.destroyAllWindows();
        video.release();
        stopRequested = false;  // 重置状态以便下一次调用
        startRequested=false;   // 重置状态以便下一次调用
        //System.exit(0);

        System.out.println("该次检测成功~~");

        return "摄像头检测成功";
    }

    @PostMapping("/stop")
    public String stopDetection() {
        if (!startRequested){
            return "没有正在进行的检测";
        }
        stopRequested = true;
        System.out.println("执行停止检测");
        return "请求停止检测成功";
    }

}
在代码中我写了两个接口,一个用于开启检测,一个用于停止检测。在代码的逻辑里面我加入stopRequested,startRequested这两个参数用于判断是否开启检测和作为停止检测的手段,也保留了原作者的多次点击键盘就停止检测的方法。
五,可能会出现的问题
可能会报这样子的错误:java.awt.HeadlessException: null
解决办法有两种:
1、修改VM启动参数:
java.awt.HeadlessException: null

2、修改启动类
@SpringBootApplication
public class CameraDetectionApplication {
    public static void main(String[] args) {
        SpringApplicationBuilder builder = new SpringApplicationBuilder(CameraDetectionApplication.class);
        builder.headless(false).run(args);
        /*SpringApplication.run(CameraDetectionApplication.class, args);*/
    }
}
参考:
项目总结:部署springboot项目报java.awt.HeadlessException: null_springapplicationbuilder.headless-CSDN博客
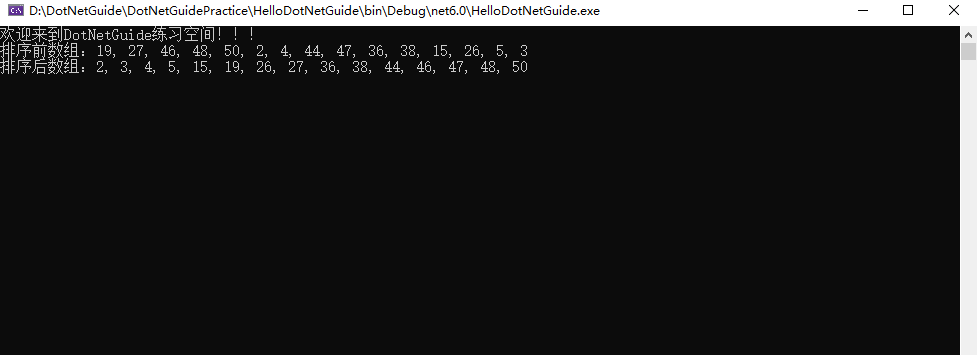
六、测试
测试开启检测接口:
http://localhost:8080/camera/detect测试停止检测接口:
http://localhost:8080/camera/stop效果如下:


七,工具模块代码
先看看大概架构:

ODConfig:
package com.bluefoxyu.config;

import java.util.*;

public final class ODConfig {


    public static final Integer lineThicknessRatio = 333;
    public static final Double fontSizeRatio = 1080.0;

    private static final List<String> default_names = new ArrayList<>(Arrays.asList(
            "person", "bicycle", "car", "motorcycle", "airplane", "bus", "train",
            "truck", "boat", "traffic light", "fire hydrant", "stop sign", "parking meter",
            "bench", "bird", "cat", "dog", "horse", "sheep", "cow", "elephant", "bear",
            "zebra", "giraffe", "backpack", "umbrella", "handbag", "tie", "suitcase",
            "frisbee", "skis", "snowboard", "sports ball", "kite", "baseball bat",
            "baseball glove", "skateboard", "surfboard", "tennis racket", "bottle",
            "wine glass", "cup", "fork", "knife", "spoon", "bowl", "banana", "apple",
            "sandwich", "orange", "broccoli", "carrot", "hot dog", "pizza", "donut",
            "cake", "chair", "couch", "potted plant", "bed", "dining table", "toilet",
            "tv", "laptop", "mouse", "remote", "keyboard", "cell phone", "microwave",
            "oven", "toaster", "sink", "refrigerator", "book", "clock", "vase", "scissors",
            "teddy bear", "hair drier", "toothbrush"));


    private static final List<String> names = new ArrayList<>(Arrays.asList(
            "no_helmet", "helmet"));

    private final Map<String, double[]> colors;

    public ODConfig() {
        this.colors = new HashMap<>();
        default_names.forEach(name->{
            Random random = new Random();
            double[] color = {random.nextDouble()*256, random.nextDouble()*256, random.nextDouble()*256};
            colors.put(name, color);
        });
    }

    public String getName(int clsId) {
        return names.get(clsId);
    }

    public double[] getColor(int clsId) {
        return colors.get(getName(clsId));
    }

    public double[] getNameColor(String Name){
        return colors.get(Name);
    }

    public double[] getOtherColor(int clsId) {
        return colors.get(default_names.get(clsId));
    }
}
Detection:
package com.bluefoxyu.domain;

public class Detection {

    public String label;

    private Integer clsId;

    public float[] bbox;

    public float confidence;


    public Detection(String label, Integer clsId, float[] bbox, float confidence){
        this.clsId = clsId;
        this.label = label;
        this.bbox = bbox;
        this.confidence = confidence;
    }

    public Detection(){

    }

    public Integer getClsId() {
        return clsId;
    }

    public void setClsId(Integer clsId) {
        this.clsId = clsId;
    }

    public String getLabel() {
        return label;
    }

    public void setLabel(String label) {
        this.label = label;
    }

    public float[] getBbox() {
        return bbox;
    }

    public void setBbox(float[] bbox) {
    }


    @Override
    public String toString() {
        return "  label="+label +
                " \t clsId="+clsId +
                " \t x0="+bbox[0] +
                " \t y0="+bbox[1] +
                " \t x1="+bbox[2] +
                " \t y1="+bbox[3] +
                " \t score="+confidence;
    }
}
ODResult:
package com.bluefoxyu.domain;

import java.text.DecimalFormat;


public class ODResult {
    private final Integer batchId;
    private final Float x0;
    private final Float y0;
    private final Float x1;
    private final Float y1;
    private final Integer clsId;
    private final Float score;

    public ODResult(float[] x) {
        this.batchId = (int) x[0];
        this.x0 = x[1];
        this.y0 = x[2];
        this.x1 = x[3];
        this.y1 = x[4];
        this.clsId = (int) x[5];
        this.score = x[6];
    }

    public Integer getBatchId() {
        return batchId;
    }

    public Float getX0() {
        return x0;
    }

    public Float getY0() {
        return y0;
    }

    public Float getX1() {
        return x1;
    }

    public Float getY1() {
        return y1;
    }

    public Integer getClsId() {
        return clsId;
    }

    public Float setX0(Float x0) {
        return this.x0;
    }

    public Float setY0(Float y0) {
        return this.y0;
    }

    public Float setX1(Float x1) {
        return this.x1;
    }

    public Float setY1(Float y1) {
        return this.y1;
    }


    public String getScore() {
        DecimalFormat df = new DecimalFormat("0.00");
        return df.format(this.score);
    }

    @Override
    public String toString() {
        return " batchId=" + batchId +
                " \t x0=" + x0 +
                " \t y0=" + y0 +
                " \t x1=" + x1 +
                " \t y1=" + y1 +
                " \t clsId=" + clsId +
                " \t score=" + getScore();
    }
}
ImageUtil:
package com.bluefoxyu.utils;

import com.bluefoxyu.domain.Detection;
import org.opencv.core.*;
import org.opencv.imgproc.Imgproc;

import java.util.List;


public class ImageUtil {

    public static Mat resizeWithPadding(Mat src, int width, int height) {

        Mat dst = new Mat();
        int oldW = src.width();
        int oldH = src.height();

        double r = Math.min((double) width / oldW, (double) height / oldH);

        int newUnpadW = (int) Math.round(oldW * r);
        int newUnpadH = (int) Math.round(oldH * r);

        int dw = (width - newUnpadW) / 2;
        int dh = (height - newUnpadH) / 2;

        int top = (int) Math.round(dh - 0.1);
        int bottom = (int) Math.round(dh + 0.1);
        int left = (int) Math.round(dw - 0.1);
        int right = (int) Math.round(dw + 0.1);

        Imgproc.resize(src, dst, new Size(newUnpadW, newUnpadH));
        Core.copyMakeBorder(dst, dst, top, bottom, left, right, Core.BORDER_CONSTANT);

        return dst;

    }

    public static void resizeWithPadding(Mat src, Mat dst, int width, int height) {

        int oldW = src.width();
        int oldH = src.height();

        double r = Math.min((double) width / oldW, (double) height / oldH);

        int newUnpadW = (int) Math.round(oldW * r);
        int newUnpadH = (int) Math.round(oldH * r);

        int dw = (width - newUnpadW) / 2;
        int dh = (height - newUnpadH) / 2;

        int top = (int) Math.round(dh - 0.1);
        int bottom = (int) Math.round(dh + 0.1);
        int left = (int) Math.round(dw - 0.1);
        int right = (int) Math.round(dw + 0.1);

        Imgproc.resize(src, dst, new Size(newUnpadW, newUnpadH));
        Core.copyMakeBorder(dst, dst, top, bottom, left, right, Core.BORDER_CONSTANT);

    }

    public static void whc2cwh(float[] src, float[] dst, int start) {
        int j = start;
        for (int ch = 0; ch < 3; ++ch) {
            for (int i = ch; i < src.length; i += 3) {
                dst[j] = src[i];
                j++;
            }
        }
    }


    public void xywh2xyxy(float[] bbox) {
        float x = bbox[0];
        float y = bbox[1];
        float w = bbox[2];
        float h = bbox[3];

        bbox[0] = x - w * 0.5f;
        bbox[1] = y - h * 0.5f;
        bbox[2] = x + w * 0.5f;
        bbox[3] = y + h * 0.5f;
    }

    public void scaleCoords(float[] bbox, float orgW, float orgH, float padW, float padH, float gain) {
        // xmin, ymin, xmax, ymax -> (xmin_org, ymin_org, xmax_org, ymax_org)
        bbox[0] = Math.max(0, Math.min(orgW - 1, (bbox[0] - padW) / gain));
        bbox[1] = Math.max(0, Math.min(orgH - 1, (bbox[1] - padH) / gain));
        bbox[2] = Math.max(0, Math.min(orgW - 1, (bbox[2] - padW) / gain));
        bbox[3] = Math.max(0, Math.min(orgH - 1, (bbox[3] - padH) / gain));
    }

    public static float[] whc2cwh(float[] src) {
        float[] chw = new float[src.length];
        int j = 0;
        for (int ch = 0; ch < 3; ++ch) {
            for (int i = ch; i < src.length; i += 3) {
                chw[j] = src[i];
                j++;
            }
        }
        return chw;
    }

    public static byte[] whc2cwh(byte[] src) {
        byte[] chw = new byte[src.length];
        int j = 0;
        for (int ch = 0; ch < 3; ++ch) {
            for (int i = ch; i < src.length; i += 3) {
                chw[j] = src[i];
                j++;
            }
        }
        return chw;
    }

    public static void drawPredictions(Mat img, List<Detection> detectionList) {
        // debugging image
        for (Detection detection : detectionList) {

            float[] bbox = detection.getBbox();
            Scalar color = new Scalar(249, 218, 60);
            Imgproc.rectangle(img,
                    new Point(bbox[0], bbox[1]),
                    new Point(bbox[2], bbox[3]),
                    color,
                    2
            );
            Imgproc.putText(
                    img,
                    detection.getLabel(),
                    new Point(bbox[0] - 1, bbox[1] - 5),
                    Imgproc.FONT_HERSHEY_SIMPLEX,
                    .5, color,
                    1);
        }
    }

}
Letterbox:
package com.bluefoxyu.utils;

import org.opencv.core.Core;
import org.opencv.core.Mat;
import org.opencv.core.Size;
import org.opencv.imgproc.Imgproc;

public class Letterbox {

    private Size newShape ;
    private final double[] color = new double[]{114,114,114};
    private final Boolean auto = false;
    private final Boolean scaleUp = true;
    private Integer stride = 32;

    private double ratio;
    private double dw;
    private double dh;

    public Letterbox(int w, int h) {
        this.newShape = new Size(w, h);
    }

    public Letterbox() {
        this.newShape = new Size(640, 640);
    }

    public double getRatio() {
        return ratio;
    }


    public double getDw() {
        return dw;
    }

    public Integer getWidth() {
        return (int) this.newShape.width;
    }

    public Integer getHeight() {
        return (int) this.newShape.height;
    }

    public double getDh() {
        return dh;
    }

    public void setNewShape(Size newShape) {
        this.newShape = newShape;
    }

    public void setStride(Integer stride) {
        this.stride = stride;
    }

    public Mat letterbox(Mat im) { // 调整图像大小和填充图像,使满足步长约束,并记录参数

        int[] shape = {im.rows(), im.cols()}; // 当前形状 [height, width]
        // Scale ratio (new / old)
        double r = Math.min(this.newShape.height / shape[0], this.newShape.width / shape[1]);
        if (!this.scaleUp) { // 仅缩小,不扩大(一且为了mAP)
            r = Math.min(r, 1.0);
        }
        // Compute padding
        Size newUnpad = new Size(Math.round(shape[1] * r), Math.round(shape[0] * r));
        double dw = this.newShape.width - newUnpad.width, dh = this.newShape.height - newUnpad.height; // wh 填充
        if (this.auto) { // 最小矩形
            dw = dw % this.stride;
            dh = dh % this.stride;
        }
        dw /= 2; // 填充的时候两边都填充一半,使图像居于中心
        dh /= 2;
        if (shape[1] != newUnpad.width || shape[0] != newUnpad.height) { // resize
            Imgproc.resize(im, im, newUnpad, 0, 0, Imgproc.INTER_LINEAR);
        }
        int top = (int) Math.round(dh - 0.1), bottom = (int) Math.round(dh + 0.1);
        int left = (int) Math.round(dw - 0.1), right = (int) Math.round(dw + 0.1);
        // 将图像填充为正方形
        Core.copyMakeBorder(im, im, top, bottom, left, right, Core.BORDER_CONSTANT, new org.opencv.core.Scalar(this.color));
        this.ratio = r;
        this.dh = dh;
        this.dw = dw;
        return im;
    }
}
八、添加告警判断示例
对于新的案例我重新创建了一个模块,将里面的video文件挪到common模块看起来优雅一点

工具类其他的和上面的一样都不变~~
controller:
/**
 * 摄像头识别,告警判断示例
 */

@RestController
@RequestMapping("/camera-detection-warn")
public class CameraDetectionWarnController {

    // 用于停止检测
    //volatile关键字保证了多线程环境下的可见性,确保所有线程看到这个变量的值是一致的,即当一个线程修改了 volatile 变量的值,这个新值对于其他线程来说是立即可见的
    private static volatile boolean stopRequested = false;
    private static volatile boolean startRequested = false;

    // 标准的对象去重或者判断是否为同一个对象避免重复告警应该使用目标跟踪,但是这里使用数量来简易判断,不是标准用法
    static Map<String,Integer> last = new ConcurrentHashMap<>();
    static Map<String,Integer> current = new ConcurrentHashMap<>();

    static Map<String,Integer> count = new ConcurrentHashMap<>();

    @PostMapping("/detect")
    public String CameraDetectionWarn()throws OrtException{
        //System.load(ClassLoader.getSystemResource("lib/opencv_videoio_ffmpeg470_64.dll").getPath());
        nu.pattern.OpenCV.loadLocally();

        //linux和苹果系统需要注释这一行,如果仅打开摄像头预览,这一行没有用,可以删除,如果rtmp或者rtsp等等这一样有用,也可以用pom依赖代替
        String OS = System.getProperty("os.name").toLowerCase();
        if (OS.contains("win")) {
            System.load(ClassLoader.getSystemResource("lib/opencv_videoio_ffmpeg470_64.dll").getPath());
        }
        String model_path = "./CameraDetectionWarn/src/main/resources/model/yolov7-tiny.onnx";

        String[] labels = {
                "person", "bicycle", "car", "motorcycle", "airplane", "bus", "train",
                "truck", "boat", "traffic light", "fire hydrant", "stop sign", "parking meter",
                "bench", "bird", "cat", "dog", "horse", "sheep", "cow", "elephant", "bear",
                "zebra", "giraffe", "backpack", "umbrella", "handbag", "tie", "suitcase",
                "frisbee", "skis", "snowboard", "sports ball", "kite", "baseball bat",
                "baseball glove", "skateboard", "surfboard", "tennis racket", "bottle",
                "wine glass", "cup", "fork", "knife", "spoon", "bowl", "banana", "apple",
                "sandwich", "orange", "broccoli", "carrot", "hot dog", "pizza", "donut",
                "cake", "chair", "couch", "potted plant", "bed", "dining table", "toilet",
                "tv", "laptop", "mouse", "remote", "keyboard", "cell phone", "microwave",
                "oven", "toaster", "sink", "refrigerator", "book", "clock", "vase", "scissors",
                "teddy bear", "hair drier", "toothbrush"};

        // 加载ONNX模型
        OrtEnvironment environment = OrtEnvironment.getEnvironment();
        OrtSession.SessionOptions sessionOptions = new OrtSession.SessionOptions();

        // 使用gpu,需要本机按钻过cuda,并修改pom.xml,不安装也能运行本程序
        // sessionOptions.addCUDA(0);
        // 实际项目中,视频识别必须开启GPU,并且要防止队列堆积

        OrtSession session = environment.createSession(model_path, sessionOptions);
        // 输出基本信息
        session.getInputInfo().keySet().forEach(x -> {
            try {
                System.out.println("input name = " + x);
                System.out.println(session.getInputInfo().get(x).getInfo().toString());
            } catch (OrtException e) {
                throw new RuntimeException(e);
            }
        });

        // 加载标签及颜色
        ODConfig odConfig = new ODConfig();
        VideoCapture video = new VideoCapture();

        // 也可以设置为rtmp或者rtsp视频流:video.open("rtmp://192.168.1.100/live/test"), 海康,大华,乐橙,宇视,录像机等等
        // video.open("rtsp://192.168.1.100/live/test")
        // 也可以静态视频文件:video.open("video/car3.mp4");  flv 等
        // 不持支h265视频编码,如果无法播放或者程序卡住,请修改视频编码格式
        video.open(0);  //获取电脑上第0个摄像头
        //video.open("images/car2.mp4"); //不开启gpu比较卡

        //可以把识别后的视频在通过rtmp转发到其他流媒体服务器,就可以远程预览视频后视频,需要使用ffmpeg将连续图片合成flv 等等,很简单。
        if (!video.isOpened()) {
            System.err.println("打开视频流失败,未检测到监控,请先用vlc软件测试链接是否可以播放!,下面试用默认测试视频进行预览效果!");
            video.open("./yolo-common/src/main/java/com/bluefoxyu/video/car3.mp4");
        }

        // 在这里先定义下框的粗细、字的大小、字的类型、字的颜色(按比例设置大小粗细比较好一些)
        int minDwDh = Math.min((int)video.get(Videoio.CAP_PROP_FRAME_WIDTH), (int)video.get(Videoio.CAP_PROP_FRAME_HEIGHT));
        int thickness = minDwDh / ODConfig.lineThicknessRatio;
        double fontSize = minDwDh / ODConfig.fontSizeRatio;
        int fontFace = Imgproc.FONT_HERSHEY_SIMPLEX;

        Mat img = new Mat();

        // 跳帧检测,一般设置为3,毫秒内视频画面变化是不大的,快了无意义,反而浪费性能
        int detect_skip = 4;

        // 跳帧计数
        int detect_skip_index = 1;

        // 最新一帧也就是上一帧推理结果
        float[][] outputData   = null;

        //当前最新一帧。上一帧也可以暂存一下
        Mat image;

        Letterbox letterbox = new Letterbox();
        OnnxTensor tensor;
        // 使用多线程和GPU可以提升帧率,线上项目必须多线程!!!,一个线程拉流,将图像存到[定长]队列或数组或者集合,一个线程模型推理,中间通过变量或者队列交换数据,代码示例仅仅使用单线程
        while (video.read(img)) {
            if ((detect_skip_index % detect_skip == 0) || outputData == null){
                image = img.clone();
                image = letterbox.letterbox(image);
                Imgproc.cvtColor(image, image, Imgproc.COLOR_BGR2RGB);

                image.convertTo(image, CvType.CV_32FC1, 1. / 255);
                float[] whc = new float[3 * 640 * 640];
                image.get(0, 0, whc);
                float[] chw = ImageUtil.whc2cwh(whc);

                detect_skip_index = 1;

                FloatBuffer inputBuffer = FloatBuffer.wrap(chw);
                tensor = OnnxTensor.createTensor(environment, inputBuffer, new long[]{1, 3, 640, 640});

                HashMap<String, OnnxTensor> stringOnnxTensorHashMap = new HashMap<>();
                stringOnnxTensorHashMap.put(session.getInputInfo().keySet().iterator().next(), tensor);

                // 运行推理
                // 模型推理本质是多维矩阵运算,而GPU是专门用于矩阵运算,占用率低,如果使用cpu也可以运行,可能占用率100%属于正常现象,不必纠结。
                OrtSession.Result output = session.run(stringOnnxTensorHashMap);

                // 得到结果,缓存结果
                outputData = (float[][]) output.get(0).getValue();
            }else{
                detect_skip_index = detect_skip_index + 1;
            }

            current.clear();
            for(float[] x : outputData){

                ODResult odResult = new ODResult(x);
                String boxName = labels[odResult.getClsId()];
                // 业务逻辑写在这里,注释下面代码,增加自己的代码,根据返回识别到的目标类型,编写告警逻辑。等等
                if(current.containsKey(boxName)){
                    current.put(boxName,current.get(boxName)+1);
                }else{
                    current.put(boxName,1);
                }

                // 画框
                Point topLeft = new Point((odResult.getX0() - letterbox.getDw()) / letterbox.getRatio(), (odResult.getY0() - letterbox.getDh()) / letterbox.getRatio());
                Point bottomRight = new Point((odResult.getX1() - letterbox.getDw()) / letterbox.getRatio(), (odResult.getY1() - letterbox.getDh()) / letterbox.getRatio());
                Scalar color = new Scalar(odConfig.getOtherColor(odResult.getClsId()));

                Imgproc.rectangle(img, topLeft, bottomRight, color, thickness);
                // 框上写文字

                Point boxNameLoc = new Point((odResult.getX0() - letterbox.getDw()) / letterbox.getRatio(), (odResult.getY0() - letterbox.getDh()) / letterbox.getRatio() - 3);

                // 也可以二次往视频画面上叠加其他文字或者数据,比如物联网设备数据等等
                Imgproc.putText(img, boxName, boxNameLoc, fontFace, 0.7, color, thickness);
                // System.out.println(odResult+"   "+ boxName);

            }

            // 可以自己记录连续帧出现的次数来判断,来避免模型不不准导致的突然误报
            // 判断连续几帧都出现或者都消失,才告警。这样才比较稳定,自己写吧
            StringBuilder info = new StringBuilder();

            for (Map.Entry<String, Integer> entry : last.entrySet()) {
                if(!current.containsKey(entry.getKey())){
                    System.err.println(entry.getValue() +"个 "+entry.getKey()+" 离开了");
                    count.remove(entry.getKey());
                }
            }

            for (Map.Entry<String, Integer> entry : current.entrySet()) {

                int lastCount = last.get(entry.getKey()) == null?0:entry.getValue();
                int currentCount = entry.getValue();
                if((lastCount < currentCount) ){
                    System.err.println(+(currentCount - lastCount)+"个 "+entry.getKey()+" 出现了");
                }
/*              info.append(" ");
                info.append(entry.getKey());
                info.append(" : ");
                info.append(currentCount);*/
            }
            last.clear();
            last.putAll(current);
/*          Point boxNameLoc = new Point(20, 20);
            Scalar color = new Scalar(odConfig.getOtherColor(0));
            Imgproc.putText(img, info.toString(), boxNameLoc, fontFace, 0.6, color, thickness);*/
            //服务器部署:由于服务器没有桌面,所以无法弹出画面预览,主要注释一下代码
            HighGui.imshow("result", img);

            startRequested=true;

            if (stopRequested) {
                break;
            }

            // 多次按任意按键关闭弹窗画面,结束程序
            if(HighGui.waitKey(1) != -1){
                break;
            }
        }

        HighGui.destroyAllWindows();
        video.release();
        stopRequested = false;  // 重置状态以便下一次调用
        startRequested=false;   // 重置状态以便下一次调用
        //System.exit(0);
        System.out.println("该次检测成功~~");

        return "摄像头检测成功";
    }

    class Identify{
        int count;
        int number;
    }

    @PostMapping("/stop")
    public String stopDetection() {
        if (!startRequested){
            return "没有正在进行的检测";
        }
        stopRequested = true;
        System.out.println("执行停止检测");
        return "请求停止检测成功";
    }


}
关键代码:

Github地址:GitHub - bluefoxyu/yolo-study: 学习yolo+java案例第一次提交
由于在第一次写的时候不知道为什么没有保存好都要发布了内容突然消失,导致第一次写的时候很精细的步骤和过程没有保存,后续由于太晚了就寥寥草草演示完了!


![[大模型]配置文件-Langchain-Chatchat-V0.3 (1)](https://img-blog.csdnimg.cn/img_convert/bc85927cd3d6366de616c7fa9a5a21a5.png)