目录
- 路由
- 使用步骤
- 案例效果
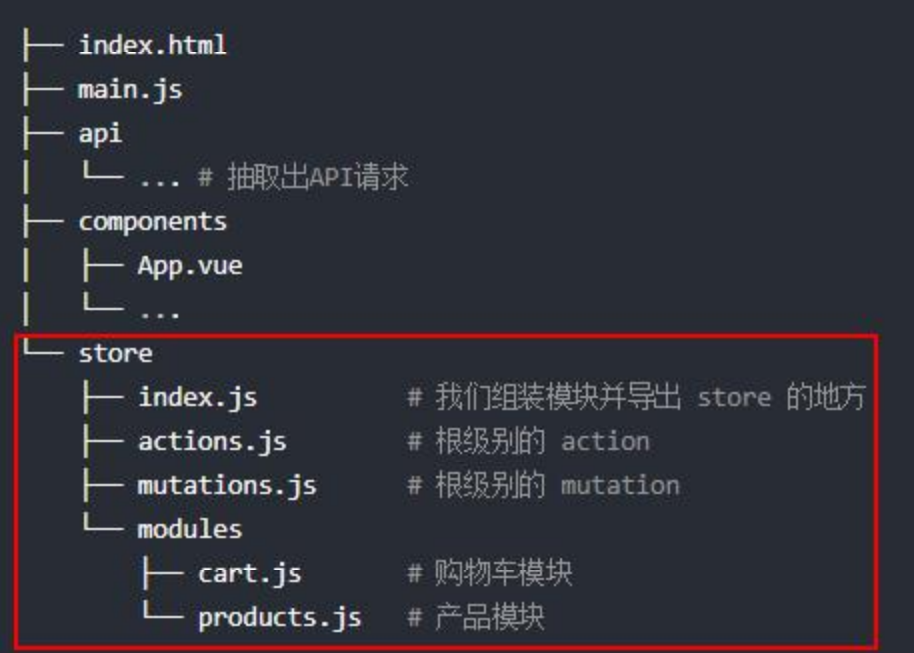
- 案例目录结构
- App.vue
- About.vue
- Home.vue
- index.js
- main.js
- index.html
本博客参考尚硅谷官方课程,详细请参考
- 【尚硅谷bilibili官方】
本博客以vue2作为学习目标(请勿混淆v2与v3的代码规范,否则可能出现报错),详细教程请参考
- 【 v2.x 官方文档】
路由
一个路由就是一组映射关系
前端中,key就是路径、value就是组件
使用步骤
- 安装
npm i vue-router@3- 配置App.vue
根据html文件配置App.vue中的template标签。将html中的a标签变为route-link标签,将组件待展示区域使用route-view标签占位- 创建组件文件
为每一个路由创建一个vue组件。创建About.vue和Home.vue单文件组件- 创建文件src/router/index.js
引入上一步创建的组件,引入VueRouter并实例化为一个对象,在该实例对象中配置routes配置项- 配置main.js
引入router、VueRouter,调用use()函数使用VueRouter插件,在Vue实例对象中配置router配置项
案例效果

案例目录结构
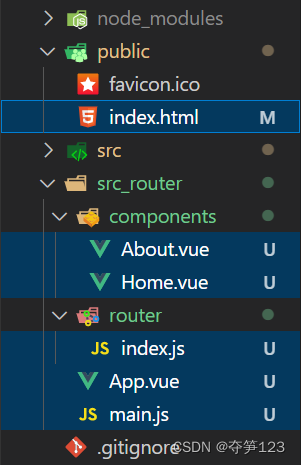
App.vue
由于SPA页面中导航栏的html代码有很多雷同之处,所以此处将大段的html代码写在了App.vue当中
<template>
  <div>
    <div class="row">
      <div class="col-xs-8">
        <div class="page-header">vue路由标题</div>
      </div>
    </div>
    <div class="row">
      <!--导航栏-->
      <div class="col-xs-2">
        <div class="list-group">
          <router-link
            href=""
            class="list-group-item"
            active-class="active"
            to="Home"
            >home</router-link
          >
          <router-link
            href=""
            class="list-group-item"
            active-class="active"
            to="About"
            >about</router-link
          >
        </div>
      </div>
      <!--内容部分-->
      <div class="col-xs-6">
        <div class="panel">
          <div class="panel-body">
            <router-view></router-view>
          </div>
        </div>
      </div>
    </div>
  </div>
</template>

<script>
export default {
  name: "App",
};
</script>
About.vue
<template>
  <h2>about页面</h2>
</template>

<script>
export default {
  name: "About",
};
</script>

<style></style>
Home.vue
<template>
  <h2>home页面</h2>
</template>

<script>
export default {
  name: "Home",
};
</script>
index.js
import VueRouter from "vue-router";

//引入组件
import About from "../components/About.vue";
import Home from "../components/Home.vue";

export default new VueRouter({
  routes: [
    {
      path: "/about",
      component: About,
    },
    {
      path: "/home",
      component: Home,
    },
  ],
});
main.js
import Vue from "vue";
import App from "./App.vue";
import router from "./router";
import VueRouter from "vue-router";
Vue.config.productionTip = false;

Vue.use(VueRouter);

new Vue({
  render: (h) => h(App),
  router: router,
}).$mount("#app");
index.html
<!DOCTYPE html>
<html lang="">
  <head>
    <meta charset="utf-8" />
    <meta http-equiv="X-UA-Compatible" content="IE=edge" />
    <meta name="viewport" content="width=device-width,initial-scale=1.0" />
    <title>vue-router实验</title>
    <!-- <script src="https://cdn.bootcdn.net/ajax/libs/twitter-bootstrap/3.4.1/js/bootstrap.min.js"></script> -->
    <link
      href="https://cdn.bootcdn.net/ajax/libs/twitter-bootstrap/3.4.1/css/bootstrap.min.css"
      rel="stylesheet"
    />
  </head>
  <body>
    <div id="app"></div>
    <!-- built files will be auto injected -->
  </body>
</html>
注意vue.config.js的配置,比如其中的pages配置项可以设置项目入口文件、lintOnSave配置项可以解决一些关于eslint的错误

